key GMC YUKON 2021 Service Manual
[x] Cancel search | Manufacturer: GMC, Model Year: 2021, Model line: YUKON, Model: GMC YUKON 2021Pages: 433, PDF Size: 6.54 MB
Page 132 of 433
GMC Yukon/Yukon XL/Denali Owner Manual (GMNA-Localizing-U.S./
Canada/Mexico-13690468) - 2021 - crc - 8/14/20
Instruments and Controls 129
Auto Door Lock
When this feature is turned on, all doors
will automatically lock when the vehicle is
shifted out of P (Park) or when the vehicle
starts moving.
Select Off or On.
Auto Door Unlock
This setting allows selection of which doors
will automatically unlock when the vehicle is
shifted into P (Park).
Touch Off, All Doors, or Driver Door.
Delayed Door Lock
When on, this feature will delay the locking
of the doors. To override the delay, press
the power door lock switch on the door.
Touch Off or On.
Remote Lock, Unlock, and Start
Touch and the following may display:
.Remote Unlock Light Feedback
.Remote Lock Feedback
.Remote Door Unlock
.Remote Start Auto Cool Seats
.Remote Start Auto Heat Seats
.Remote Window Operation
.Passive Door Unlock
.Passive Door Lock
.Remote Left in Vehicle Alert
.Remote Removed from Vehicle Alert
Remote Unlock Light Feedback
When on, the exterior lamps will flash when
unlocking the vehicle with the Remote Key.
Touch Off or Flash Lights.
Remote Lock Feedback
This allows selection of what type of
feedback is given when locking the vehicle
with the Remote Key.
Touch Off, Lights and Horn, Lights Only,
or Horn Only.
Remote Door Unlock
This allows selection of which doors will
unlock when pressing
Kon the
Remote Key.
Touch All Doors or Driver Door.
Remote Start Auto Cool Seats
If equipped and turned on, this feature will
turn on the ventilated seats when using
remote start on warm days. See Heated and
Ventilated Front Seats 044 and
Remote Vehicle Start 014. Touch Off or On.
Remote Start Auto Heat Seats
If equipped and turned on, this feature will
turn on the heated seats when using remote
start on cold days. See
Heated and
Ventilated Front Seats 044 and
Remote Vehicle Start 014.
If equipped with Auto Heated Steering
Wheel, this feature will turn on when the
Remote Start Auto Heated Seats turn on.
Touch Off or On.
Remote Window Operation
If equipped, this feature enables remote
operation of the windows with the Remote
Key. See Remote Keyless Entry (RKE) System
Operation 08.
Touch Off or On.
Passive Door Unlock
This allows the selection of what doors will
unlock when using the button on the driver
door to unlock the vehicle.
Touch Off, All Doors or Driver Door Only.
Page 133 of 433
GMC Yukon/Yukon XL/Denali Owner Manual (GMNA-Localizing-U.S./
Canada/Mexico-13690468) - 2021 - crc - 8/14/20
130 Instruments and Controls
Passive Door Lock
This allows passive locking to be turned on
or off and selects feedback. SeeRemote
Keyless Entry (RKE) System Operation 08.
Touch Off, On with Horn Chirp, or On.
Remote Left in Vehicle Alert
This feature sounds an alert when the
Remote Key is left in the vehicle.
Touch Off or On.
Remote Removed from Vehicle Alert
This feature beeps the horn 3 times when
exiting a running vehicle with the
Remote Key.
Touch Off or On.
Ride Height
Touch and the following may display:
.Automatic Entry/Egress
Automatic Entry/Egress
This feature specifies if the vehicle will
automatically lower to make it easier to
enter or exit the vehicle.
Touch Off or On.
Running Boards
Touch and the following may display:
.Automatic Running Boards
.Deploy Running Boards
Automatic Running Boards
This feature specifies the position and use of
the running boards. See Power Assist Steps
0 25.
Touch Off or On.
Deploy Running Boards
This feature moves the running boards to a
deployed position so they can be used with
the doors closed.
Touch Off or Deploy.
Seating Position
Touch and the following may display:
.Seat Entry Memory
.Seat Exit Memory
Seat Entry Memory
This feature automatically recalls the
previously stored 1 or 2 button positions
when the ignition is changed from off to on
or ACC/ACCESSORY. See Memory Seats041.
Touch Off or On. Seat Exit Memory
This feature automatically recalls the
previously stored exit button position when
the ignition is changed from on or ACC/
ACCESSORY to off and the driver door is
open. See
Memory Seats 041.
Touch Off or On.
Suspension
Touch and the following may display:
.Service Mode
.Alignment Mode
Service Mode
This feature disables the air suspension
system and is used to prevent unintended
raising or lowering of the suspension..
Touch Off or On.
Alignment Mode
This feature will optimize the vehicle height
to provide the most accurate wheel
alignment.
Touch Off or On.
Teen Driver
See “Teen Driver” underSettings 0187.
Page 134 of 433
GMC Yukon/Yukon XL/Denali Owner Manual (GMNA-Localizing-U.S./
Canada/Mexico-13690468) - 2021 - crc - 8/14/20
Instruments and Controls 131
Valet Mode
This will lock the infotainment system and
steering wheel controls. It may also limit
access to vehicle storage locations,
if equipped.
To enable valet mode:1. Enter a four-digit code on the keypad.
2. Select Enter to go to the confirmation screen.
3. Re-enter the four-digit code.
Touch Lock or Unlock to lock or unlock the
system. Touch Back to go back to the
previous menu.
Universal Remote System
See Radio Frequency Statement 0407.
Universal Remote System
Programming
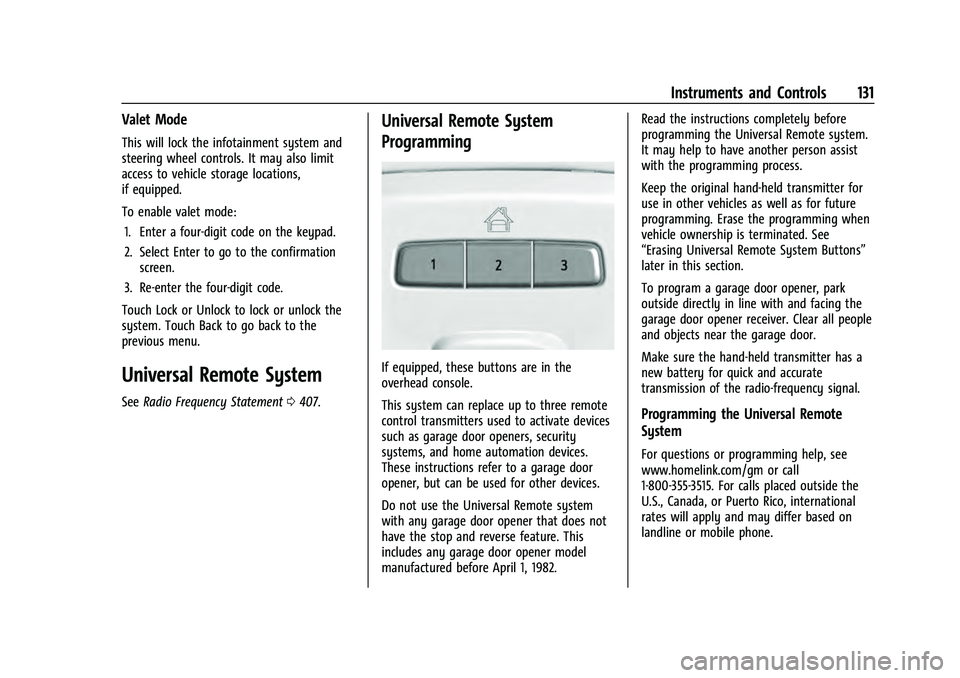
If equipped, these buttons are in the
overhead console.
This system can replace up to three remote
control transmitters used to activate devices
such as garage door openers, security
systems, and home automation devices.
These instructions refer to a garage door
opener, but can be used for other devices.
Do not use the Universal Remote system
with any garage door opener that does not
have the stop and reverse feature. This
includes any garage door opener model
manufactured before April 1, 1982. Read the instructions completely before
programming the Universal Remote system.
It may help to have another person assist
with the programming process.
Keep the original hand-held transmitter for
use in other vehicles as well as for future
programming. Erase the programming when
vehicle ownership is terminated. See
“Erasing Universal Remote System Buttons”
later in this section.
To program a garage door opener, park
outside directly in line with and facing the
garage door opener receiver. Clear all people
and objects near the garage door.
Make sure the hand-held transmitter has a
new battery for quick and accurate
transmission of the radio-frequency signal.
Programming the Universal Remote
System
For questions or programming help, see
www.homelink.com/gm or call
1-800-355-3515. For calls placed outside the
U.S., Canada, or Puerto Rico, international
rates will apply and may differ based on
landline or mobile phone.
Page 142 of 433
GMC Yukon/Yukon XL/Denali Owner Manual (GMNA-Localizing-U.S./
Canada/Mexico-13690468) - 2021 - crc - 8/14/20
Lighting 139
Interior Lighting
Instrument Panel Illumination
Control
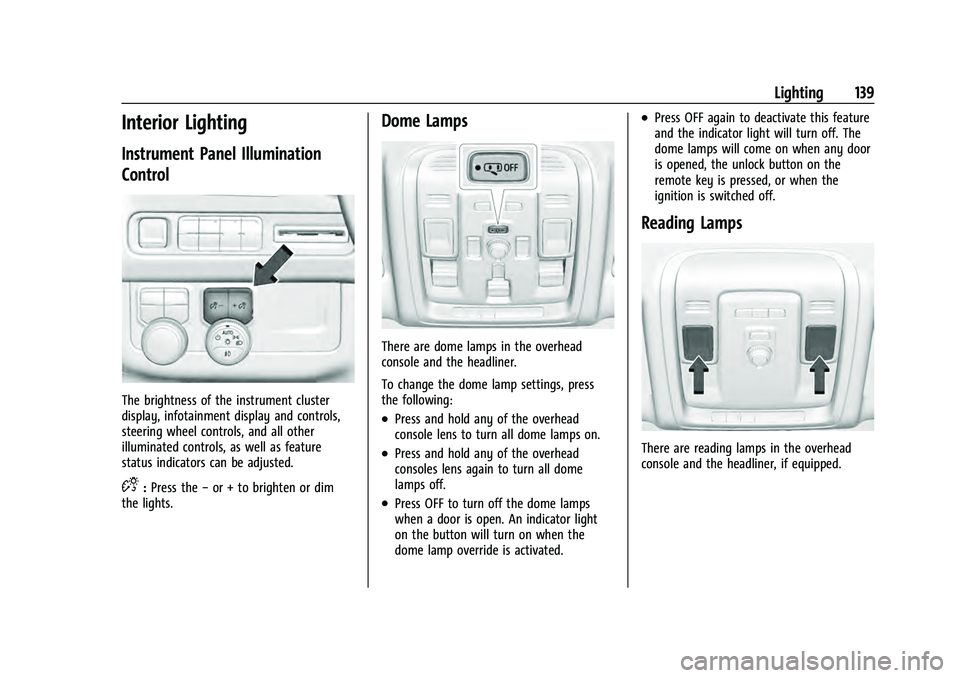
The brightness of the instrument cluster
display, infotainment display and controls,
steering wheel controls, and all other
illuminated controls, as well as feature
status indicators can be adjusted.
D:Press the −or + to brighten or dim
the lights.
Dome Lamps
There are dome lamps in the overhead
console and the headliner.
To change the dome lamp settings, press
the following:
.Press and hold any of the overhead
console lens to turn all dome lamps on.
.Press and hold any of the overhead
consoles lens again to turn all dome
lamps off.
.Press OFF to turn off the dome lamps
when a door is open. An indicator light
on the button will turn on when the
dome lamp override is activated.
.Press OFF again to deactivate this feature
and the indicator light will turn off. The
dome lamps will come on when any door
is opened, the unlock button on the
remote key is pressed, or when the
ignition is switched off.
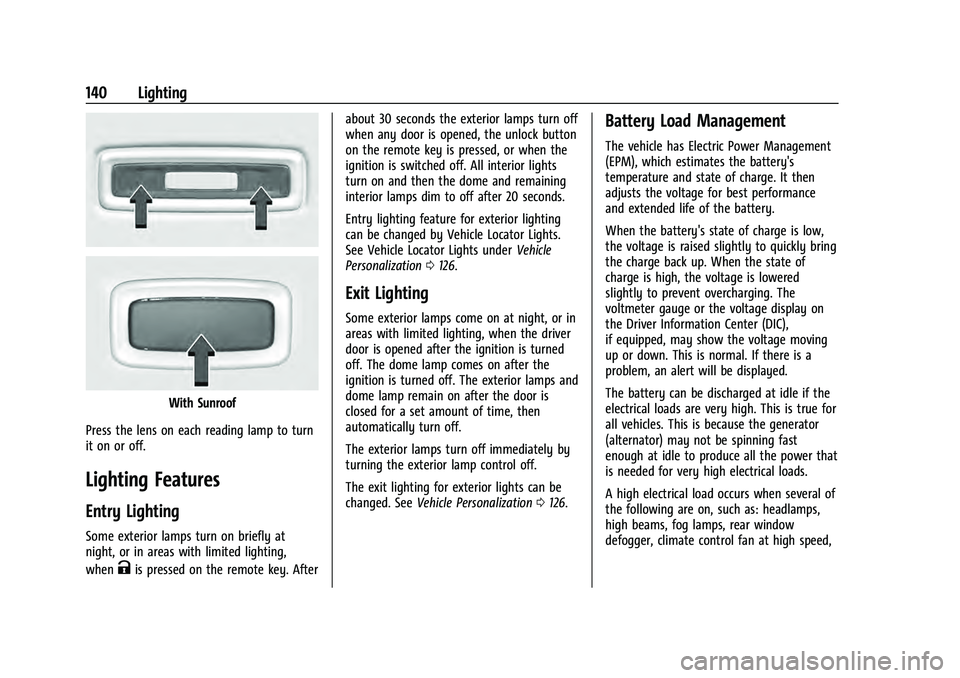
Reading Lamps
There are reading lamps in the overhead
console and the headliner, if equipped.
Page 143 of 433
GMC Yukon/Yukon XL/Denali Owner Manual (GMNA-Localizing-U.S./
Canada/Mexico-13690468) - 2021 - crc - 8/14/20
140 Lighting
With Sunroof
Press the lens on each reading lamp to turn
it on or off.
Lighting Features
Entry Lighting
Some exterior lamps turn on briefly at
night, or in areas with limited lighting,
when
Kis pressed on the remote key. After about 30 seconds the exterior lamps turn off
when any door is opened, the unlock button
on the remote key is pressed, or when the
ignition is switched off. All interior lights
turn on and then the dome and remaining
interior lamps dim to off after 20 seconds.
Entry lighting feature for exterior lighting
can be changed by Vehicle Locator Lights.
See Vehicle Locator Lights under
Vehicle
Personalization 0126.
Exit Lighting
Some exterior lamps come on at night, or in
areas with limited lighting, when the driver
door is opened after the ignition is turned
off. The dome lamp comes on after the
ignition is turned off. The exterior lamps and
dome lamp remain on after the door is
closed for a set amount of time, then
automatically turn off.
The exterior lamps turn off immediately by
turning the exterior lamp control off.
The exit lighting for exterior lights can be
changed. See Vehicle Personalization 0126.
Battery Load Management
The vehicle has Electric Power Management
(EPM), which estimates the battery's
temperature and state of charge. It then
adjusts the voltage for best performance
and extended life of the battery.
When the battery's state of charge is low,
the voltage is raised slightly to quickly bring
the charge back up. When the state of
charge is high, the voltage is lowered
slightly to prevent overcharging. The
voltmeter gauge or the voltage display on
the Driver Information Center (DIC),
if equipped, may show the voltage moving
up or down. This is normal. If there is a
problem, an alert will be displayed.
The battery can be discharged at idle if the
electrical loads are very high. This is true for
all vehicles. This is because the generator
(alternator) may not be spinning fast
enough at idle to produce all the power that
is needed for very high electrical loads.
A high electrical load occurs when several of
the following are on, such as: headlamps,
high beams, fog lamps, rear window
defogger, climate control fan at high speed,
Page 151 of 433
GMC Yukon/Yukon XL/Denali Owner Manual (GMNA-Localizing-U.S./
Canada/Mexico-13690468) - 2021 - crc - 8/14/20
148 Infotainment System
Software Updates
Over-the-Air Software Updates
If equipped, see“Updates”underSettings
0 187 for details on software updates.
Radio
AM-FM Radio
Playing the Radio
From the Home Page, touch the Audio icon
to display the active audio source page.
Choose from the three most recently used
sources listed at the left side of the display
or touch the More option to display a list of
available sources. Examples of available
sources may include AM, FM, SXM (if
equipped), USB, AUX (if equipped), and
Bluetooth.
Infotainment System Sound Menu
From any of the audio source main pages,
touch Sound to display the following:
Equalizer : Touch to adjust Bass, Midrange,
Treble, and Surround (if equipped) using the
options on the infotainment display. Fade/Balance :
Touch to adjust by using the
controls on the infotainment display or by
tapping/dragging the crosshair.
Sound Mode (If Equipped)
.Bose Surround Sound systems may have
four sound modes:
‐ Normal: Adjusts the audio to provide
the best sound for all seating positions.
‐ Driver: Adjusts the audio to provide the
best sound for the driver.
‐ Rear: Adjusts the audio to provide the
best sound for the rear seat occupants.
‐ Centerpoint: Adjusts the audio to
create a surround listening experience
for all seating positions.
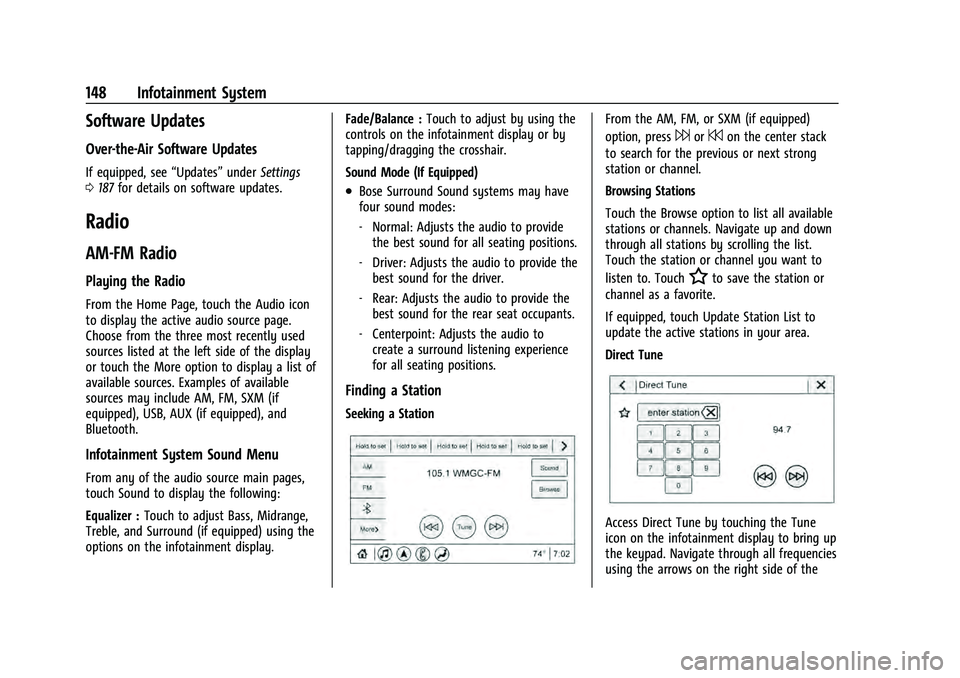
Finding a Station
Seeking a Station
From the AM, FM, or SXM (if equipped)
option, press
6or7on the center stack
to search for the previous or next strong
station or channel.
Browsing Stations
Touch the Browse option to list all available
stations or channels. Navigate up and down
through all stations by scrolling the list.
Touch the station or channel you want to
listen to. Touch
Hto save the station or
channel as a favorite.
If equipped, touch Update Station List to
update the active stations in your area.
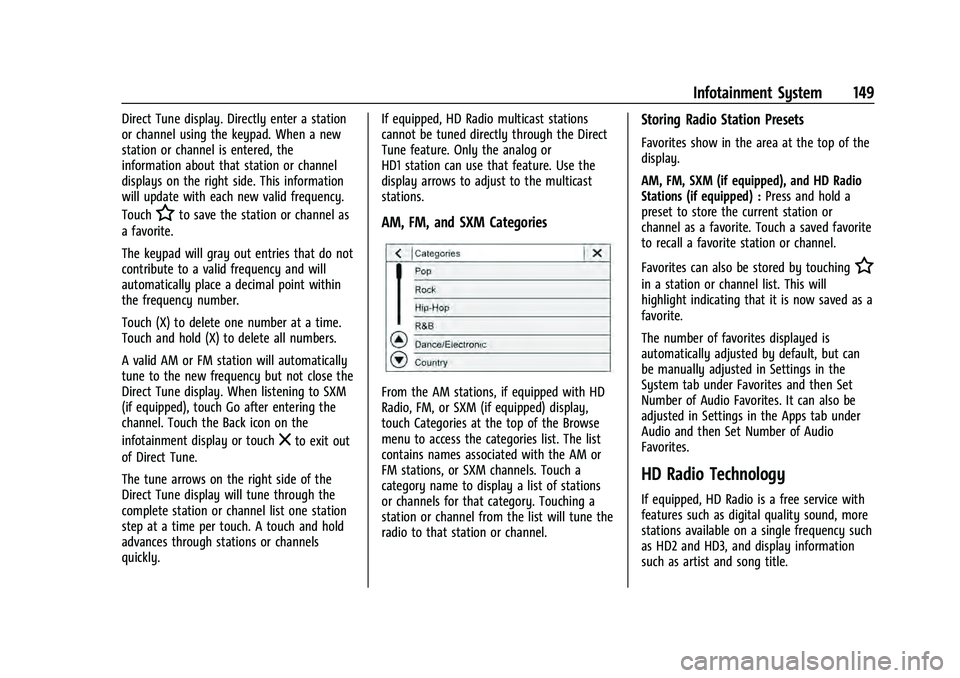
Direct Tune
Access Direct Tune by touching the Tune
icon on the infotainment display to bring up
the keypad. Navigate through all frequencies
using the arrows on the right side of the
Page 152 of 433
GMC Yukon/Yukon XL/Denali Owner Manual (GMNA-Localizing-U.S./
Canada/Mexico-13690468) - 2021 - crc - 8/14/20
Infotainment System 149
Direct Tune display. Directly enter a station
or channel using the keypad. When a new
station or channel is entered, the
information about that station or channel
displays on the right side. This information
will update with each new valid frequency.
Touch
Hto save the station or channel as
a favorite.
The keypad will gray out entries that do not
contribute to a valid frequency and will
automatically place a decimal point within
the frequency number.
Touch (X) to delete one number at a time.
Touch and hold (X) to delete all numbers.
A valid AM or FM station will automatically
tune to the new frequency but not close the
Direct Tune display. When listening to SXM
(if equipped), touch Go after entering the
channel. Touch the Back icon on the
infotainment display or touch
zto exit out
of Direct Tune.
The tune arrows on the right side of the
Direct Tune display will tune through the
complete station or channel list one station
step at a time per touch. A touch and hold
advances through stations or channels
quickly. If equipped, HD Radio multicast stations
cannot be tuned directly through the Direct
Tune feature. Only the analog or
HD1 station can use that feature. Use the
display arrows to adjust to the multicast
stations.
AM, FM, and SXM Categories
From the AM stations, if equipped with HD
Radio, FM, or SXM (if equipped) display,
touch Categories at the top of the Browse
menu to access the categories list. The list
contains names associated with the AM or
FM stations, or SXM channels. Touch a
category name to display a list of stations
or channels for that category. Touching a
station or channel from the list will tune the
radio to that station or channel.
Storing Radio Station Presets
Favorites show in the area at the top of the
display.
AM, FM, SXM (if equipped), and HD Radio
Stations (if equipped) :
Press and hold a
preset to store the current station or
channel as a favorite. Touch a saved favorite
to recall a favorite station or channel.
Favorites can also be stored by touching
H
in a station or channel list. This will
highlight indicating that it is now saved as a
favorite.
The number of favorites displayed is
automatically adjusted by default, but can
be manually adjusted in Settings in the
System tab under Favorites and then Set
Number of Audio Favorites. It can also be
adjusted in Settings in the Apps tab under
Audio and then Set Number of Audio
Favorites.
HD Radio Technology
If equipped, HD Radio is a free service with
features such as digital quality sound, more
stations available on a single frequency such
as HD2 and HD3, and display information
such as artist and song title.
Page 164 of 433
GMC Yukon/Yukon XL/Denali Owner Manual (GMNA-Localizing-U.S./
Canada/Mexico-13690468) - 2021 - crc - 8/14/20
Infotainment System 161
To turn Video Voice Over on or off, touch
*, touch the toggle and then press OK to
confirm. Video Voice Over will remain active
over ignition cycles until it is turned off.
Bluetooth Headphone Setup
The RSI system will support Bluetooth
headphones. Up to 9 Bluetooth headphones
can be paired to each REAR SCREEN. This
screen provides a list of all Bluetooth
headphones that have been paired to the
RSI system, as well as control over their use
and settings. New Bluetooth headphones
can be connected or the Bluetooth
headphone settings can be changed in this
screen.
To pair Bluetooth headphones to one of the
rear screens:
1. Select Bluetooth Headphone Setup or touch
Xfrom the desired Rear Screen
Home Page.
2. Select Add New Headphones.
3. Make sure your Bluetooth headphones are in pairing mode. Once recognized by
the system, your Bluetooth headphones
will be displayed on the list of Available
Headphones. 4. Select your Bluetooth headphones from
the list. Touch OK once the Pairing
Successful pop-up displays. The
headphones may need to be unpaired
from your phone before pairing to
the RSI.
5. An option will be given to create a custom name for this pair of headphones
–touch Yes if you want to create a
unique name for these headphones in
this vehicle. Type the headphone’s name
using virtual keyboard on the screen. The
new name is assigned when
touching SAVE.
Paired headphones can be selected from the
list of currently connected headphones. The
selected headphone’s icon turns to green.
The name of the Bluetooth headphone can
be edited by touchingy.
To delete a connected Bluetooth headphone,
Touch
Yand then touch Yes.
Screen Brightness
Select Screen Brightness. Move the bar left
or right to adjust the display brightness.
Each screen may be uniquely adjusted. Remember Screen Power Status
The system remembers the last power state
(screen ON or OFF) of each rear screen
independently. After the vehicle ignition
power is turned ON, each rear screen power
ON, or remain OFF, based on it's last known
state prior to the previous ignition cycle.
Select On or Off.
Video Auto Play
Enabling Video Auto Play will cause the next
available video to automatically begin
playing when the previous video has ended.
Disabling Video Auto Play will cause the
video playback to pause until another video
is selected for playback. Select On or Off.
Clear All Miracast Data
The system stores the Miracast data of the
devices which have been connected to the
RSI system. The data can be deleted from
this feature.
Select Clear All Miracast Data. A pop-up
message is displayed when the data is
successfully deleted.
Page 176 of 433
GMC Yukon/Yukon XL/Denali Owner Manual (GMNA-Localizing-U.S./
Canada/Mexico-13690468) - 2021 - crc - 8/14/20
Infotainment System 173
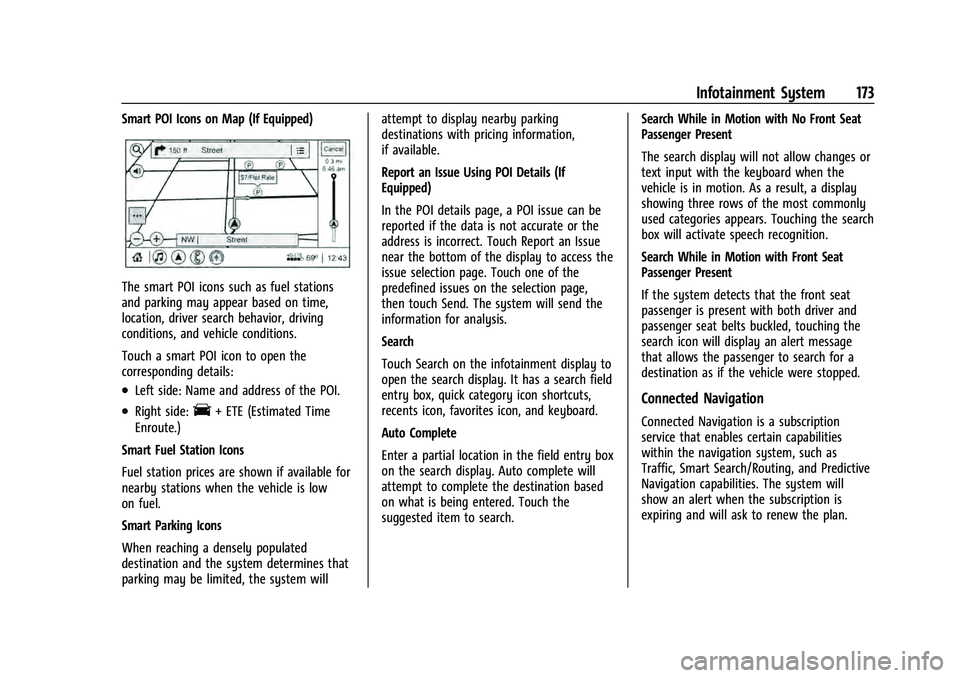
Smart POI Icons on Map (If Equipped)
The smart POI icons such as fuel stations
and parking may appear based on time,
location, driver search behavior, driving
conditions, and vehicle conditions.
Touch a smart POI icon to open the
corresponding details:
.Left side: Name and address of the POI.
.Right side:E+ ETE (Estimated Time
Enroute.)
Smart Fuel Station Icons
Fuel station prices are shown if available for
nearby stations when the vehicle is low
on fuel.
Smart Parking Icons
When reaching a densely populated
destination and the system determines that
parking may be limited, the system will attempt to display nearby parking
destinations with pricing information,
if available.
Report an Issue Using POI Details (If
Equipped)
In the POI details page, a POI issue can be
reported if the data is not accurate or the
address is incorrect. Touch Report an Issue
near the bottom of the display to access the
issue selection page. Touch one of the
predefined issues on the selection page,
then touch Send. The system will send the
information for analysis.
Search
Touch Search on the infotainment display to
open the search display. It has a search field
entry box, quick category icon shortcuts,
recents icon, favorites icon, and keyboard.
Auto Complete
Enter a partial location in the field entry box
on the search display. Auto complete will
attempt to complete the destination based
on what is being entered. Touch the
suggested item to search.
Search While in Motion with No Front Seat
Passenger Present
The search display will not allow changes or
text input with the keyboard when the
vehicle is in motion. As a result, a display
showing three rows of the most commonly
used categories appears. Touching the search
box will activate speech recognition.
Search While in Motion with Front Seat
Passenger Present
If the system detects that the front seat
passenger is present with both driver and
passenger seat belts buckled, touching the
search icon will display an alert message
that allows the passenger to search for a
destination as if the vehicle were stopped.Connected Navigation
Connected Navigation is a subscription
service that enables certain capabilities
within the navigation system, such as
Traffic, Smart Search/Routing, and Predictive
Navigation capabilities. The system will
show an alert when the subscription is
expiring and will ask to renew the plan.
Page 181 of 433
GMC Yukon/Yukon XL/Denali Owner Manual (GMNA-Localizing-U.S./
Canada/Mexico-13690468) - 2021 - crc - 8/14/20
178 Infotainment System
Helpful Hints for Speaking Commands
Voice recognition can understand commands
that are naturally stated in sentence form or
direct commands that state the application
and the task.
For best results:
.Listen for the prompt before saying a
command or reply.
.Speak the command naturally, not too
fast, not too slow.
.Use direct commands without a lot of
extra words. For example,“Call
at work,” “Play” followed by the artist or
song name, or “Tune”followed by the
radio station number.
.Navigation destinations can be made in a
single command using keywords. A few
examples are: “I want directions to an
address,” “I need to find a place of
interest or (POI),” or“Find contact.”
The system responds by requesting more
details. For other POIs, say the name of a
category like “Restaurants,” “Shopping
Malls,” or“Hospitals.”
.Navigating to a destination outside of the
current country takes more than one
command. The first command is to tell
the system where the navigation will take place, such as an Address, Intersection,
POI, or Contact. If Address or Intersection
is selected, the second command is to
say,
“Change Country.” Once the system
responds, say the country before saying
the rest of the address and/or
intersection.
If POI is asked for, say “Change Location,”
then “Change Country.”
Direct commands might be more clearly
understood by the system. An example of a
direct command would be “Call
Examples of these direct commands are
displayed on most of the screens while a
voice session is active. If “Phone”or“Phone
Commands,” is spoken, the system
understands that a phone call is requested
and will respond with questions until
enough details are gathered to make a call.
If a cell phone number has been saved with
a name and a place, the direct command
should include both, for example “Call
Using Voice Recognition for List Options
When a list is displayed, a voice prompt will
ask to confirm or select an option from
that list. When a display contains a list, there may be
options that are available but not displayed.
The list on a voice recognition screen
functions the same as a list on other
displays. Scrolling or flinging can be used to
help display other entries from the list.
Manually scrolling or paging the list on a
display during a voice recognition session
suspends the current voice recognition event
and plays the prompt
“Please select
manually or touch the Back icon on the
infotainment display to try again.”
If manual selection takes more than
15 seconds, the session terminates and
prompts that it has timed out. The display
returns to the display where voice
recognition was initiated.
The Back Command
Say “Back” or touch the Back icon on the
infotainment display to go to the
previous menu.
If in voice recognition, and “Back”is spoken
all the way back to the starting display, and
then “Back” is spoken one more time, the
voice recognition session will cancel.