brakes GMC YUKON DENALI 2010 Owners Manual
[x] Cancel search | Manufacturer: GMC, Model Year: 2010, Model line: YUKON DENALI, Model: GMC YUKON DENALI 2010Pages: 560, PDF Size: 4.32 MB
Page 158 of 560
When temperatures are very cold, the Hydra-Matic®
Automatic Transmission's gear shifting may be delayed
providing more stable shifts until the engine warms up.
Shifts may be more noticeable with a cold transmission.
This difference in shifting is normal.
M (Manual Mode) :This position lets drivers select
the range of gears appropriate for current driving
conditions. See Range Selection Mode later in this
section.
Notice: Spinning the tires or holding the vehicle in
one place on a hill using only the accelerator pedal
may damage the transmission. The repair will not be
covered by the vehicle warranty. If you are stuck,
do not spin the tires. When stopping on a hill, use
the brakes to hold the vehicle in place.
The vehicle has a shift stabilization feature that
adjusts the transmission shifting to the current driving
conditions in order to reduce rapid upshifts and
downshifts. This shift stabilization feature is designed to
determine, before making an upshift, if the engine will
be able to maintain vehicle speed by analyzing things
such as throttle position, vehicle load, and hill grade. If the shift stabilization feature determines that a current
vehicle speed cannot be maintained, the transmission
does not upshift and instead holds the current gear.
In some cases, this may appear to be a delayed shift,
however the transmission is operating normally.
The vehicle's transmission uses adaptive shift controls.
Adaptive shift controls continually compares key shift
parameters to pre‐programmed ideal shift conditions
stored in the transmissions computer. The transmission
constantly makes adjustments to improve vehicle
performance according to the way the vehicle is being
used, such as with a heavy load. During this adaptive
shift controls process, some shifts may feel different as
the transmission determines the best settings for a
particular shift.
3-32
Page 172 of 560
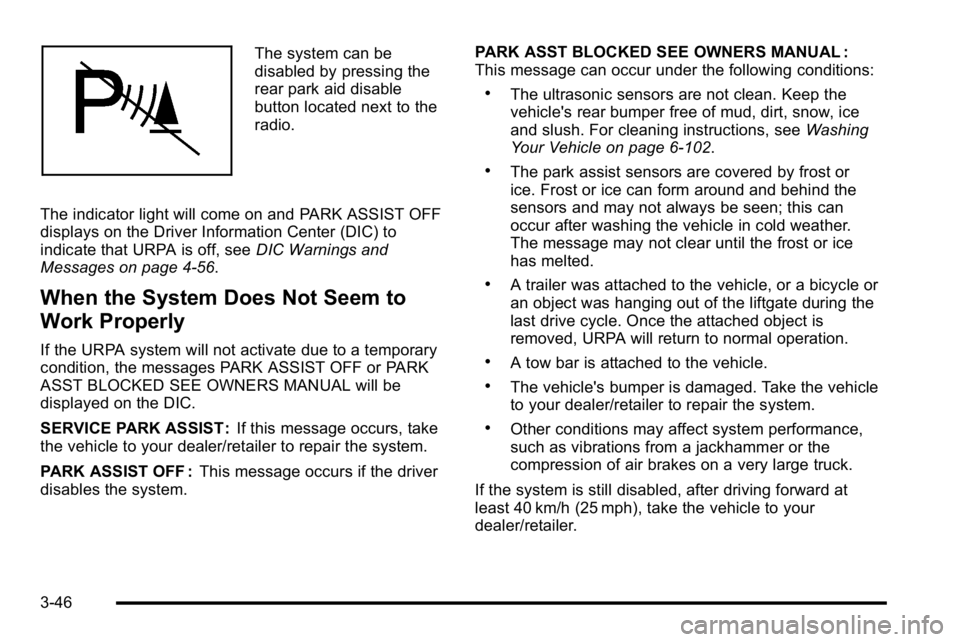
The system can be
disabled by pressing the
rear park aid disable
button located next to the
radio.
The indicator light will come on and PARK ASSIST OFF
displays on the Driver Information Center (DIC) to
indicate that URPA is off, see DIC Warnings and
Messages on page 4‑56.
When the System Does Not Seem to
Work Properly
If the URPA system will not activate due to a temporary
condition, the messages PARK ASSIST OFF or PARK
ASST BLOCKED SEE OWNERS MANUAL will be
displayed on the DIC.
SERVICE PARK ASSIST : If this message occurs, take
the vehicle to your dealer/retailer to repair the system.
PARK ASSIST OFF : This message occurs if the driver
disables the system. PARK ASST BLOCKED SEE OWNERS MANUAL :
This message can occur under the following conditions:
.The ultrasonic sensors are not clean. Keep the
vehicle's rear bumper free of mud, dirt, snow, ice
and slush. For cleaning instructions, see
Washing
Your Vehicle on page 6‑102.
.The park assist sensors are covered by frost or
ice. Frost or ice can form around and behind the
sensors and may not always be seen; this can
occur after washing the vehicle in cold weather.
The message may not clear until the frost or ice
has melted.
.A trailer was attached to the vehicle, or a bicycle or
an object was hanging out of the liftgate during the
last drive cycle. Once the attached object is
removed, URPA will return to normal operation.
.A tow bar is attached to the vehicle.
.The vehicle's bumper is damaged. Take the vehicle
to your dealer/retailer to repair the system.
.Other conditions may affect system performance,
such as vibrations from a jackhammer or the
compression of air brakes on a very large truck.
If the system is still disabled, after driving forward at
least 40 km/h (25 mph), take the vehicle to your
dealer/retailer.
3-46
Page 202 of 560
The rear window wiper/washer will not operate if the
liftgate or liftglass is open or ajar. If the liftgate or
liftglass is opened while the rear wiper is on, the wiper
will return to the parked position and stop.
Cruise Control
{WARNING:
Cruise control can be dangerous where you
cannot drive safely at a steady speed. So, do not
use the cruise control on winding roads or in
heavy traffic.
Cruise control can be dangerous on slippery
roads. On such roads, fast changes in tire traction
can cause excessive wheel slip, and you could
lose control. Do not use cruise control on slippery
roads.With cruise control, a speed of about 40 km/h (25 mph)
or more can be maintained without keeping your foot on
the accelerator. Cruise control does not work at speeds
below about 40 km/h (25 mph).
When the brakes are applied, the cruise control
turns off.
For vehicles with an Allison
®or Hydra‐Matic 6‐speed
automatic transmission, see “Grade Braking and Cruise
Grade Braking (Allison Transmission) under Tow/Haul
Mode
on page 3‑34for an explanation of how cruise
control interacts with the Range Selection Mode,
tow/haul and grade braking systems.
For vehicles with the StabiliTrak
®system, if it begins to
limit wheel spin while the cruise control is being used,
the cruise control will automatically disengage. See
StabiliTrak
®Systemon page 5‑6. When road
conditions allow the cruise control to be safely used
again, it can be turned back on.
4-8
Page 204 of 560
Resuming a Set Speed
If the cruise control is set at a desired speed and then
the brakes are applied, this shuts off the cruise control.
But it does not need to be reset.
Once the vehicle speed is about 40 km/h (25 mph) or
more, press the +RES button on the steering wheel.
The vehicle goes back to the previous set speed and
stays there.
Increasing Speed While Using Cruise
Control
To increase the cruise speed while using cruise control:
.Press and hold the +RES button on the steering
wheel until the desired speed is reached, then
release it.
.To increase vehicle speed in small increments,
press the +RES button. Each time this is done,
the vehicle goes about 1.6 km/h (1 mph) faster.
Reducing Speed While Using Cruise
Control
To reduce your speed while using cruise control:
.Press and hold the SET–button on the steering
wheel until the desired lower speed is reached,
then release it.
.To slow down in very small amounts, press the
SET– button on the steering wheel briefly.
Each time this is done, the vehicle goes about
1.6 km/h (1 mph) slower.
Passing Another Vehicle While Using
Cruise Control
Use the accelerator pedal to increase your speed.
When you take your foot off the pedal, the vehicle slows
down to the previous set cruise speed.
Using Cruise Control on Hills
How well the cruise control works on hills depends upon
the vehicle speed, load, and the steepness of the hills.
When going up steep hills, you might have to step on
the accelerator pedal to maintain the vehicle's speed.
4-10
Page 205 of 560
When going downhill, you might have to brake or shift
to a lower gear to keep the vehicle's speed down. When
the brakes are applied the cruise control is disengaged.
Ending Cruise Control
There are three ways to end cruise control:
.Step lightly on the brake pedal.
.Press the[button on the steering wheel.
.Press theIbutton on the steering wheel.
Erasing Speed Memory
The cruise control set speed memory is erased when
the cruise control or the ignition is turned off.
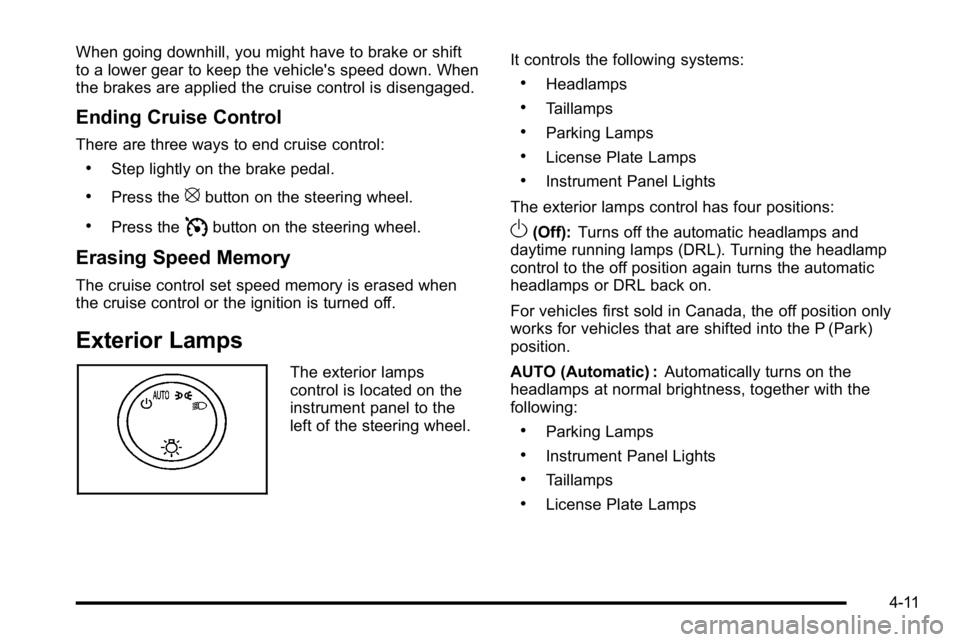
Exterior Lamps
The exterior lamps
control is located on the
instrument panel to the
left of the steering wheel.It controls the following systems:
.Headlamps
.Taillamps
.Parking Lamps
.License Plate Lamps
.Instrument Panel Lights
The exterior lamps control has four positions:
O(Off): Turns off the automatic headlamps and
daytime running lamps (DRL). Turning the headlamp
control to the off position again turns the automatic
headlamps or DRL back on.
For vehicles first sold in Canada, the off position only
works for vehicles that are shifted into the P (Park)
position.
AUTO (Automatic) : Automatically turns on the
headlamps at normal brightness, together with the
following:
.Parking Lamps
.Instrument Panel Lights
.Taillamps
.License Plate Lamps
4-11
Page 226 of 560
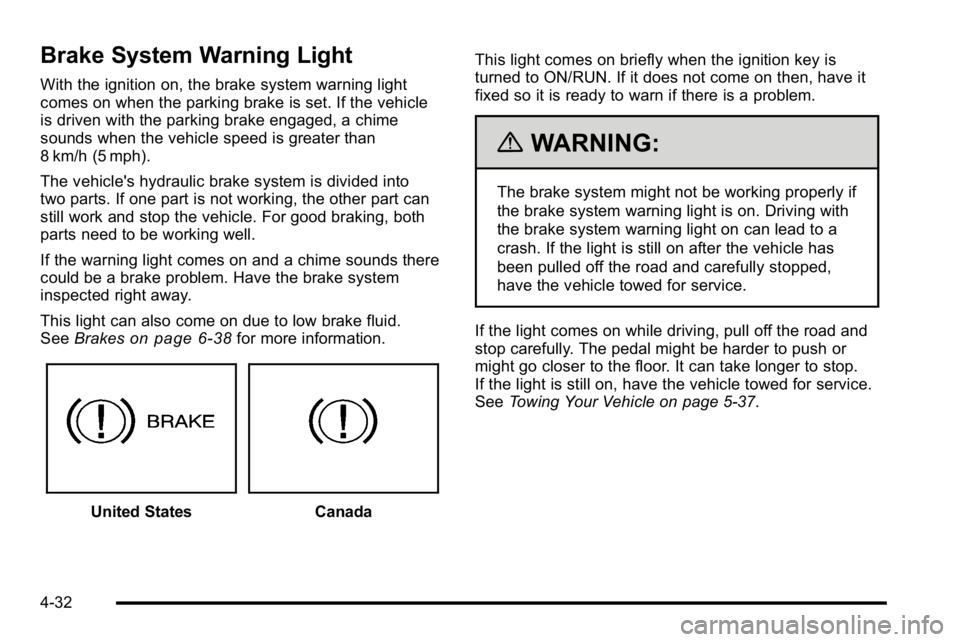
Brake System Warning Light
With the ignition on, the brake system warning light
comes on when the parking brake is set. If the vehicle
is driven with the parking brake engaged, a chime
sounds when the vehicle speed is greater than
8 km/h (5 mph).
The vehicle's hydraulic brake system is divided into
two parts. If one part is not working, the other part can
still work and stop the vehicle. For good braking, both
parts need to be working well.
If the warning light comes on and a chime sounds there
could be a brake problem. Have the brake system
inspected right away.
This light can also come on due to low brake fluid.
SeeBrakes
on page 6‑38for more information.
United StatesCanada This light comes on briefly when the ignition key is
turned to ON/RUN. If it does not come on then, have it
fixed so it is ready to warn if there is a problem.
{WARNING:
The brake system might not be working properly if
the brake system warning light is on. Driving with
the brake system warning light on can lead to a
crash. If the light is still on after the vehicle has
been pulled off the road and carefully stopped,
have the vehicle towed for service.
If the light comes on while driving, pull off the road and
stop carefully. The pedal might be harder to push or
might go closer to the floor. It can take longer to stop.
If the light is still on, have the vehicle towed for service.
See Towing Your Vehicle on page 5‑37.
4-32
Page 227 of 560
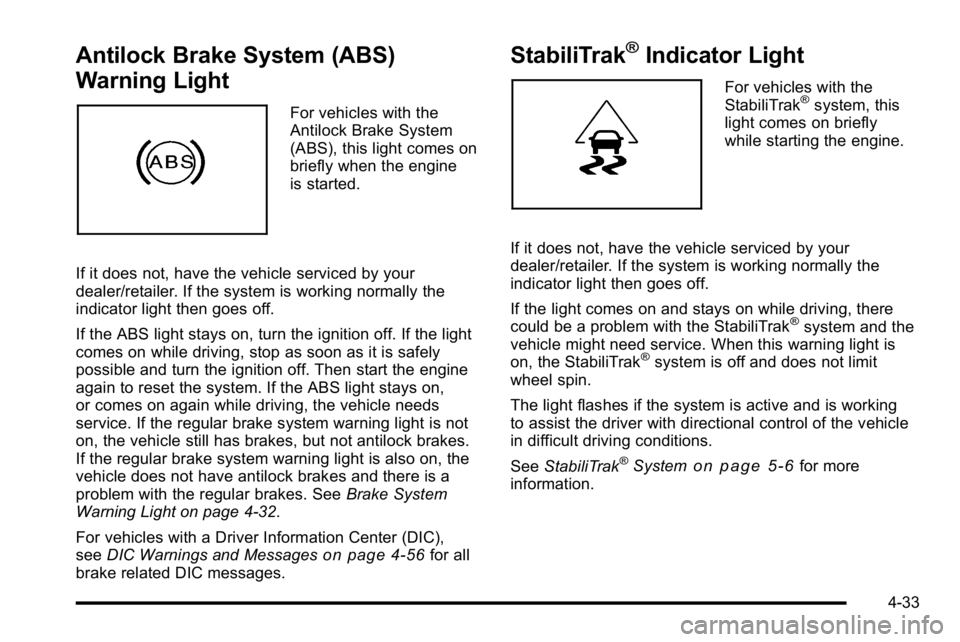
Antilock Brake System (ABS)
Warning Light
For vehicles with the
Antilock Brake System
(ABS), this light comes on
briefly when the engine
is started.
If it does not, have the vehicle serviced by your
dealer/retailer. If the system is working normally the
indicator light then goes off.
If the ABS light stays on, turn the ignition off. If the light
comes on while driving, stop as soon as it is safely
possible and turn the ignition off. Then start the engine
again to reset the system. If the ABS light stays on,
or comes on again while driving, the vehicle needs
service. If the regular brake system warning light is not
on, the vehicle still has brakes, but not antilock brakes.
If the regular brake system warning light is also on, the
vehicle does not have antilock brakes and there is a
problem with the regular brakes. See Brake System
Warning Light on page 4‑32.
For vehicles with a Driver Information Center (DIC),
see DIC Warnings and Messages
on page 4‑56for all
brake related DIC messages.
StabiliTrak®Indicator Light
For vehicles with the
StabiliTrak®system, this
light comes on briefly
while starting the engine.
If it does not, have the vehicle serviced by your
dealer/retailer. If the system is working normally the
indicator light then goes off.
If the light comes on and stays on while driving, there
could be a problem with the StabiliTrak
®system and the
vehicle might need service. When this warning light is
on, the StabiliTrak
®system is off and does not limit
wheel spin.
The light flashes if the system is active and is working
to assist the driver with directional control of the vehicle
in difficult driving conditions.
See StabiliTrak
®Systemon page 5‑6for more
information.
4-33
Page 242 of 560
Trailer Gain and Output
On vehicles with the Integrated Trailer Brake Control
(ITBC) system, the trailer brake display appears in the
DIC. Press the vehicle information button until TRAILER
GAIN and OUTPUT display.
TRAILER GAIN shows the trailer gain setting.
This setting can be adjusted from 0.0 to 10.0 with either
a trailer connected or disconnected. To adjust this
setting, see“Integrated Trailer Brake Control System”
under Towing a Trailer
on page 5‑42for more
information.
OUTPUT shows the power output to the trailer anytime
a trailer with electric brakes is connected. Output is
displayed in 0 to 10 bars. Dashes may appear in the
OUTPUT display. See “Integrated Trailer Brake Control
System” underTowing a Trailer
on page 5‑42for more
information.
Engine Hours
Press the vehicle information button until ENGINE
HOURS displays. This display shows the total number
of hours the engine has run.
Relearn Remote Key
This display allows you to match Remote Keyless Entry
(RKE) transmitters to your vehicle. This procedure will
erase all previously learned transmitters. Therefore,
they must be relearned as additional transmitters.
To match an RKE transmitter to your vehicle:
1. Press the vehicle information button until PRESS
VTO RELEARN REMOTE KEY displays.
2. Press the set/reset button until REMOTE KEY LEARNING ACTIVE is displayed.
3. Press and hold the lock and unlock buttons on the first transmitter at the same time for about
15 seconds.
On vehicles with memory recall seats, the first
transmitter learned will match driver 1 and the
second will match driver 2.
A chime will sound indicating that the transmitter
is matched.
4. To match additional transmitters at this time, repeat Step 3.
Each vehicle can have a maximum of eight
transmitters matched to it.
5. To exit the programming mode, you must cycle the key to LOCK/OFF.
4-48
Page 245 of 560
3. Continue to press and hold the trip odometer resetstem to scroll through all of the available
languages.
The available languages are ENGLISH (default),
FRANCAIS (French), ESPANOL (Spanish), and
NO CHANGE.
4. Once the desired language is displayed, release the trip odometer reset stem to set your choice.
Trip Odometer
Press the trip odometer reset stem until TRIP displays.
This display shows the current distance traveled in
either miles (mi) or kilometers (km) since the last reset
for the trip odometer.
The trip odometer can be reset to zero by pressing and
holding the trip odometer reset stem while the trip
odometer is displayed.
The trip odometer has a feature called the retro-active
reset. This can be used to set the trip odometer to the
number of miles (kilometers) driven since the ignition
was last turned on. This can be used if the trip
odometer is not reset at the beginning of the trip.
To use the retro-active reset feature, press and hold
the trip odometer reset stem for at least four seconds.
The trip odometer will display the number of miles (mi)
or kilometers (km) driven since the ignition was last
turned on and the vehicle was moving. Once the vehicle
begins moving, the trip odometer will accumulate mileage. For example, if the vehicle was driven
5 miles (8 km) before it is started again, and then the
retro-active reset feature is activated, the display will
show 5 miles (8 km). As the vehicle begins moving,
the display will then increase to 5.1 miles (8.2 km),
5.2 miles (8.4 km), etc.
Transmission Temperature
Press the trip odometer reset stem until TRANS TEMP
displays. This display shows the temperature of the
automatic transmission fluid in either degrees
Fahrenheit (°F) or degrees Celsius (°C).
Trailer Gain and Output
On vehicles with the Integrated Trailer Brake Control
(ITBC) system, the trailer brake display appears in the
DIC. Press the trip odometer reset stem until TRAILER
GAIN and OUTPUT display.
TRAILER GAIN shows the trailer gain setting. This
setting can be adjusted from 0.0 to 10.0 with either a
trailer connected or disconnected. To adjust this setting,
see
“Integrated Trailer Brake Control System” under
Towing a Trailer
on page 5‑42for more information.
OUTPUT shows the power output to the trailer anytime
a trailer with electric brakes is connected. Output is
displayed in 0 to 10 bars. Dashes may appear in the
OUTPUT display. See “Integrated Trailer Brake Control
System” underTowing a Trailer
on page 5‑42for more
information.
4-51
Page 251 of 560
CHECK TRAILER WIRING
On vehicles with the Integrated Trailer Brake Control
(ITBC) system, this message may display and a chime
may sound when one of the following conditions exists:
.A trailer with electric brakes becomes
disconnected from the vehicle.
‐If the disconnect occurs while the vehicle is
stopped, this message clears itself after a
short time.
‐ If the disconnect occurs while the vehicle is
moving, this message stays on until the ignition
is turned off.
.There is a short in the wiring to the electric trailer
brakes.
When this message displays, power is no longer
available to the trailer brakes.
As soon as it is safe to do so, carefully pull your vehicle
over to the side of the road and turn the ignition off.
Check the wiring connection to the trailer and turn
the ignition back on. This message clears if the trailer
is reconnected. This message also clears if you
acknowledge it. If this message still displays, either
your vehicle or the trailer needs service. See your
dealer/retailer.
See “Integrated Trailer Brake Control System” under
Towing a Trailer
on page 5‑42for more information.
DRIVER DOOR OPEN
This message displays and a chime sounds if the driver
door is not fully closed and the vehicle is shifted out of
P (Park). Stop and turn off the vehicle, check the door
for obstructions, and close the door again. Check to see
if the message still appears on the DIC.
ENGINE HOT A/C (Air Conditioning)
TURNED OFF
This message displays when the engine coolant
becomes hotter than the normal operating temperature.
See Engine Coolant Temperature Gage
on page 4‑34.
To avoid added strain on a hot engine, the air
conditioning compressor automatically turns off.
When the coolant temperature returns to normal,
the air conditioning compressor turns back on.
You can continue to drive your vehicle.
If this message continues to appear, have the system
repaired by your dealer/retailer as soon as possible to
avoid damage to the engine.
ENGINE OIL HOT IDLE ENGINE
This message displays when the engine oil becomes
hotter than the normal operating temperature. Stop and
allow the vehicle to idle until it cools down. See Engine
Coolant Temperature Gage
on page 4‑34.
4-57