seat adjustment GMC YUKON DENALI 2010 Owners Manual
[x] Cancel search | Manufacturer: GMC, Model Year: 2010, Model line: YUKON DENALI, Model: GMC YUKON DENALI 2010Pages: 560, PDF Size: 4.32 MB
Page 7 of 560
Section 1 In Brief
Instrument Panel. . . . . . . . . . . . . . . . . . . . . . . . . . . . . . . . . . . 1-2
Initial Drive Information . . . . . . . . . . . . . . . . . . . . . . . . . . . 1-4
Remote Keyless Entry (RKE) System . . . . . . . . . . . 1-4
Remote Vehicle Start . . . . . . . . . . . . . . . . . . . . . . . . . . . 1-4
Door Locks . . . . . . . . . . . . . . . . . . . . . . . . . . . . . . . . . . . . . 1-5
Liftgate . . . . . . . . . . . . . . . . . . . . . . . . . . . . . . . . . . . . . . . . . . 1-6
Windows . . . . . . . . . . . . . . . . . . . . . . . . . . . . . . . . . . . . . . . . 1-7
Seat Adjustment . . . . . . . . . . . . . . . . . . . . . . . . . . . . . . . . 1-7
Second Row Seats . . . . . . . . . . . . . . . . . . . . . . . . . . . . . 1-9
Third Row Seats . . . . . . . . . . . . . . . . . . . . . . . . . . . . . . . . 1-9
Heated Seats . . . . . . . . . . . . . . . . . . . . . . . . . . . . . . . . . . . 1-9
Head Restraint Adjustment . . . . . . . . . . . . . . . . . . . . 1-10
Safety Belt . . . . . . . . . . . . . . . . . . . . . . . . . . . . . . . . . . . . . 1-10
Sensing System for Passenger Airbag . . . . . . . . . 1-11
Mirror Adjustment . . . . . . . . . . . . . . . . . . . . . . . . . . . . . . 1-11
Steering Wheel Adjustment . . . . . . . . . . . . . . . . . . . . 1-12
Interior Lighting . . . . . . . . . . . . . . . . . . . . . . . . . . . . . . . . 1-12
Exterior Lighting . . . . . . . . . . . . . . . . . . . . . . . . . . . . . . . 1-13
Windshield Wiper/Washer . . . . . . . . . . . . . . . . . . . . . . 1-14
Climate Controls . . . . . . . . . . . . . . . . . . . . . . . . . . . . . . . 1-14
Transmission . . . . . . . . . . . . . . . . . . . . . . . . . . . . . . . . . . 1-15 Vehicle Features
. . . . . . . . . . . . . . . . . . . . . . . . . . . . . . . . . . 1-16
Radio(s) . . . . . . . . . . . . . . . . . . . . . . . . . . . . . . . . . . . . . . . 1-16
Satellite Radio . . . . . . . . . . . . . . . . . . . . . . . . . . . . . . . . . 1-17
Portable Audio Devices . . . . . . . . . . . . . . . . . . . . . . . . 1-17
Steering Wheel Controls . . . . . . . . . . . . . . . . . . . . . . . 1-18
Bluetooth
®. . . . . . . . . . . . . . . . . . . . . . . . . . . . . . . . . . . . . 1-18
Navigation System . . . . . . . . . . . . . . . . . . . . . . . . . . . . . 1-18
Cruise Control . . . . . . . . . . . . . . . . . . . . . . . . . . . . . . . . . 1-19
Side Blind Zone Alert (SBZA) . . . . . . . . . . . . . . . . . . 1-19
Rear Vision Camera (RVC) . . . . . . . . . . . . . . . . . . . . 1-19
Ultrasonic Parking Assist . . . . . . . . . . . . . . . . . . . . . . 1-20
Power Outlets . . . . . . . . . . . . . . . . . . . . . . . . . . . . . . . . . 1-20
Universal Remote System . . . . . . . . . . . . . . . . . . . . . 1-20
Sunroof . . . . . . . . . . . . . . . . . . . . . . . . . . . . . . . . . . . . . . . . 1-21
Performance and Maintenance . . . . . . . . . . . . . . . . . .1-22
StabiliTrak
®. . . . . . . . . . . . . . . . . . . . . . . . . . . . . . . . . . . . 1-22
Tire Pressure Monitor . . . . . . . . . . . . . . . . . . . . . . . . . . 1-22
Engine Oil Life System . . . . . . . . . . . . . . . . . . . . . . . . 1-23
Fuel E85 (85% Ethanol) . . . . . . . . . . . . . . . . . . . . . . . 1-23
Driving for Better Fuel Economy . . . . . . . . . . . . . . . 1-24
Roadside Assistance Program . . . . . . . . . . . . . . . . . 1-24
OnStar
®. . . . . . . . . . . . . . . . . . . . . . . . . . . . . . . . . . . . . . . 1-25
1-1
Page 13 of 560
Windows
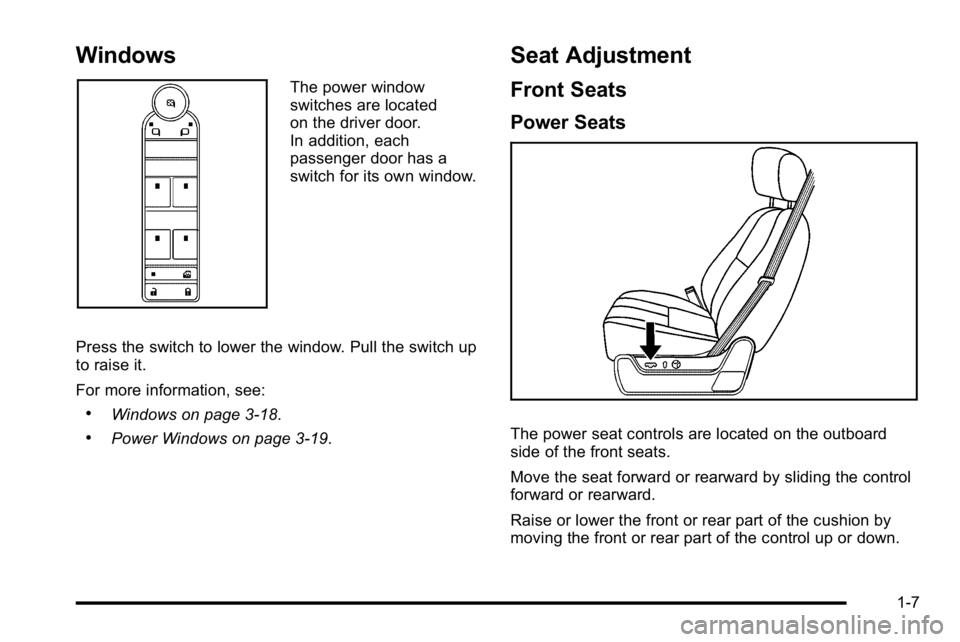
The power window
switches are located
on the driver door.
In addition, each
passenger door has a
switch for its own window.
Press the switch to lower the window. Pull the switch up
to raise it.
For more information, see:
.Windows on page 3‑18.
.Power Windows on page 3‑19.
Seat Adjustment
Front Seats
Power Seats
The power seat controls are located on the outboard
side of the front seats.
Move the seat forward or rearward by sliding the control
forward or rearward.
Raise or lower the front or rear part of the cushion by
moving the front or rear part of the control up or down.
1-7
Page 16 of 560
Rear Seats
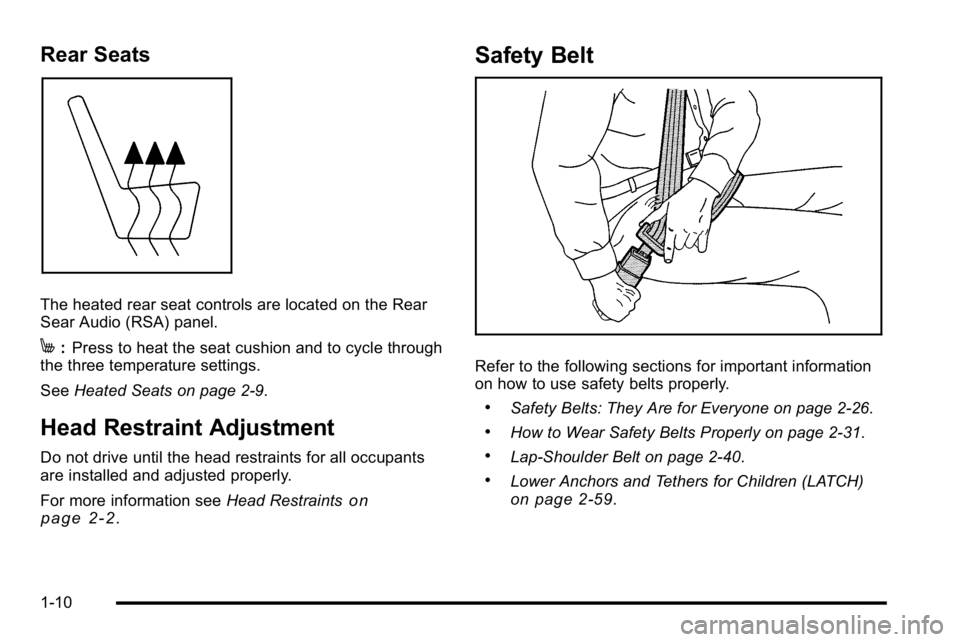
The heated rear seat controls are located on the Rear
Sear Audio (RSA) panel.
M:Press to heat the seat cushion and to cycle through
the three temperature settings.
See Heated Seats on page 2‑9.
Head Restraint Adjustment
Do not drive until the head restraints for all occupants
are installed and adjusted properly.
For more information see Head Restraints
on
page 2‑2.
Safety Belt
Refer to the following sections for important information
on how to use safety belts properly.
.Safety Belts: They Are for Everyone on page 2‑26.
.How to Wear Safety Belts Properly on page 2‑31.
.Lap-Shoulder Belt on page 2‑40.
.Lower Anchors and Tethers for Children (LATCH)on page 2‑59.
1-10
Page 17 of 560
Sensing System for Passenger
Airbag
The passenger sensing system, if equipped, will turn off
the right front passenger frontal airbag under certain
conditions. The driver airbags, seat‐mounted side
impact airbags, if equipped, and roof‐rail airbags are
not affected by this.
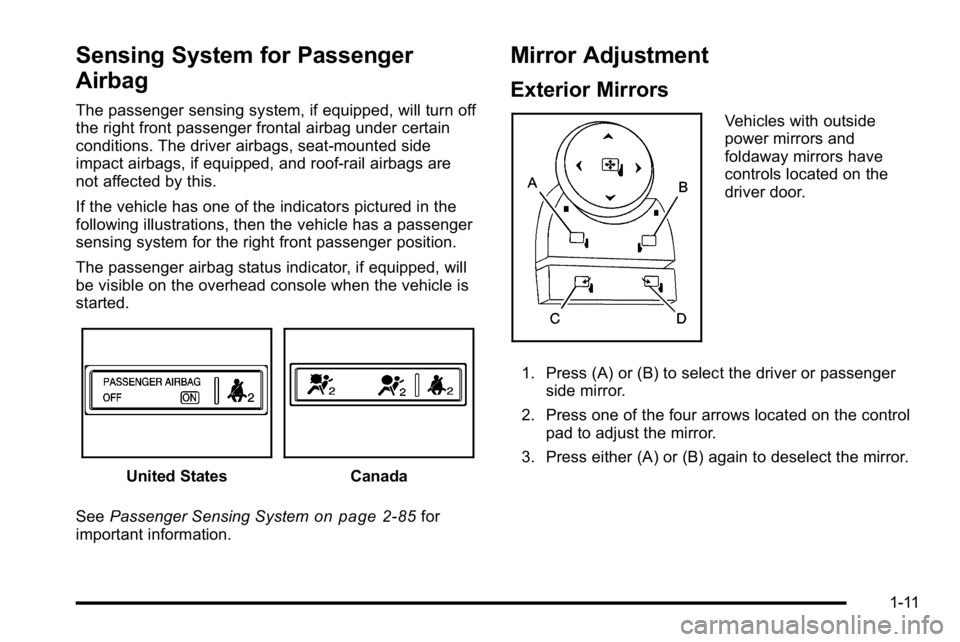
If the vehicle has one of the indicators pictured in the
following illustrations, then the vehicle has a passenger
sensing system for the right front passenger position.
The passenger airbag status indicator, if equipped, will
be visible on the overhead console when the vehicle is
started.
United StatesCanada
See Passenger Sensing System
on page 2‑85for
important information.
Mirror Adjustment
Exterior Mirrors
Vehicles with outside
power mirrors and
foldaway mirrors have
controls located on the
driver door.
1. Press (A) or (B) to select the driver or passenger side mirror.
2. Press one of the four arrows located on the control pad to adjust the mirror.
3. Press either (A) or (B) again to deselect the mirror.
1-11
Page 75 of 560
Shoulder Belt Height Adjuster
The vehicle has a shoulder belt height adjuster for the
driver and right front passenger positions.
Adjust the height so that the shoulder portion of the belt
is centered on the shoulder. The belt should be away
from the face and neck, but not falling off the shoulder.
Improper shoulder belt height adjustment could reduce
the effectiveness of the safety belt in a crash.
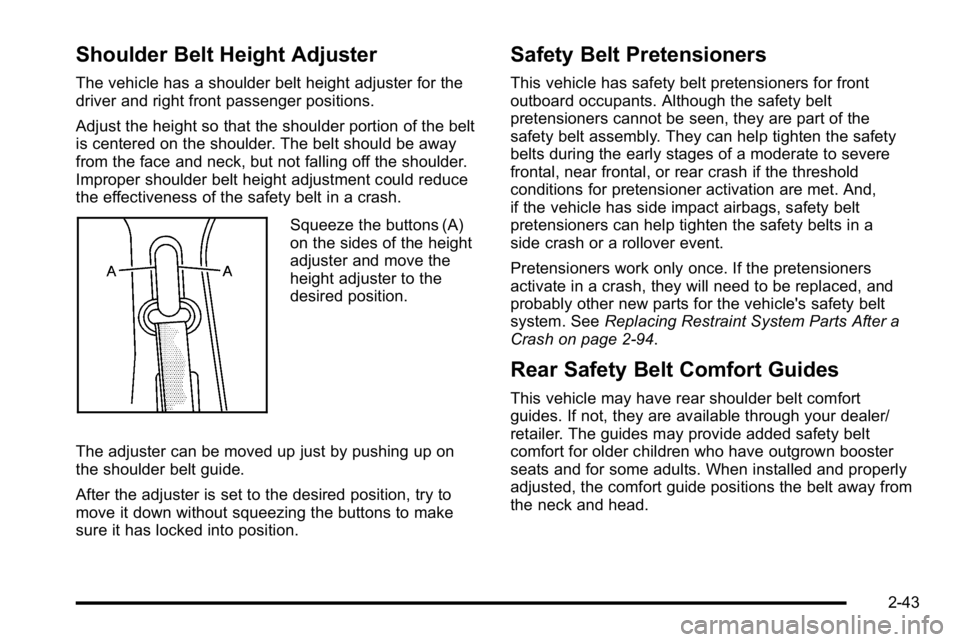
Squeeze the buttons (A)
on the sides of the height
adjuster and move the
height adjuster to the
desired position.
The adjuster can be moved up just by pushing up on
the shoulder belt guide.
After the adjuster is set to the desired position, try to
move it down without squeezing the buttons to make
sure it has locked into position.
Safety Belt Pretensioners
This vehicle has safety belt pretensioners for front
outboard occupants. Although the safety belt
pretensioners cannot be seen, they are part of the
safety belt assembly. They can help tighten the safety
belts during the early stages of a moderate to severe
frontal, near frontal, or rear crash if the threshold
conditions for pretensioner activation are met. And,
if the vehicle has side impact airbags, safety belt
pretensioners can help tighten the safety belts in a
side crash or a rollover event.
Pretensioners work only once. If the pretensioners
activate in a crash, they will need to be replaced, and
probably other new parts for the vehicle's safety belt
system. See Replacing Restraint System Parts After a
Crash on page 2‑94.
Rear Safety Belt Comfort Guides
This vehicle may have rear shoulder belt comfort
guides. If not, they are available through your dealer/
retailer. The guides may provide added safety belt
comfort for older children who have outgrown booster
seats and for some adults. When installed and properly
adjusted, the comfort guide positions the belt away from
the neck and head.
2-43
Page 217 of 560
The interior temperature sensors located in the
headliner above the driver side seat and if equipped, in
the headliner above the second row seats measure the
temperature of the air inside the vehicle.
There is also an exterior temperature sensor located
behind the front grille. This sensor reads the outside air
temperature and helps maintain the temperature inside
the vehicle. Any cover on the front of the vehicle could
cause a false reading in the displayed temperature.
The climate control system uses the information from
these sensors to maintain your comfort setting by
adjusting the outlet temperature, fan speed, and the air
delivery mode. The system may also supply cooler air
to the side of the vehicle facing the sun. The
recirculation mode will also be used as needed to
maintain cool outlet temperatures.
Outlet Adjustment
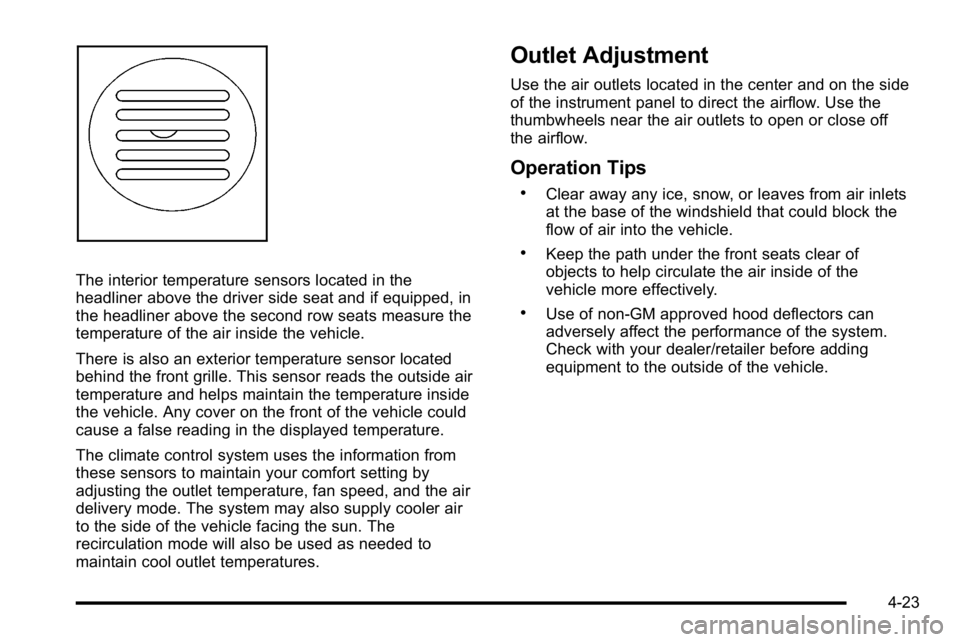
Use the air outlets located in the center and on the side
of the instrument panel to direct the airflow. Use the
thumbwheels near the air outlets to open or close off
the airflow.
Operation Tips
.Clear away any ice, snow, or leaves from air inlets
at the base of the windshield that could block the
flow of air into the vehicle.
.Keep the path under the front seats clear of
objects to help circulate the air inside of the
vehicle more effectively.
.Use of non‐GM approved hood deflectors can
adversely affect the performance of the system.
Check with your dealer/retailer before adding
equipment to the outside of the vehicle.
4-23
Page 287 of 560
For optimal sound quality, increase the portable audio
device's volume to the loudest level.
It is always best to power the portable audio device
through its own battery while playing.
O(Power/Volume):Turn clockwise or
counterclockwise to increase or decrease the
volume of the portable player. Additional volume
adjustments might have to be made from the portable
device if the volume is not loud or soft enough.
BAND : Press to listen to the radio when a portable
audio device is playing. The portable audio device also
continues to play.
CD/AUX (CD/Auxiliary) : Press to play a CD when a
portable audio device is playing. Press again and the
system begins playing audio from the connected
portable audio player. If a portable audio player is not
connected, “No Input Device Found” displays.
DVD/CD AUX (CD/Auxiliary) : Press this button to
cycle through DVD, CD, or Auxiliary when listening to
the radio. The DVD/CD text label and a message
showing track or chapter number displays when a disc
is in either slot. Press this button again and the system automatically searches for an auxiliary input device,
such as a portable audio player. If a portable audio
player is not connected,
“No Aux Input Device”displays.
If a disc is in both the DVD slot and the CD slot the
DVD/CD AUX button cycles between the two sources
and does not indicate “No Aux Input Device”. If a front
auxiliary device is connected, the DVD/CD AUX button
cycles through all available options, such as: DVD slot,
CD slot, Front Auxiliary, and Rear Auxiliary (if available).
See “Using the Auxiliary Input Jack(s)” later in this
section, or “Audio/Video (A/V) Jacks” under,Rear Seat
Entertainment (RSE) System
on page 4‑120for more
information.
Using the USB Port
Radios with a USB port can control a USB storage
device or an iPod®using the radio buttons and knobs.
See Using an MP3 (Radios with CD)on page 4‑94orUsing an MP3 (Radios with CD and DVD)on
page 4‑101for information about how to connect and
control a USB storage device or an iPod.
4-93
Page 440 of 560
Headlamp Aiming
The vehicle has a visual optical headlamp aiming
system. The aim of the headlamps have been preset at
the factory and should need no further adjustment.
However, if the vehicle is damaged in a crash, the aim
of the headlamps may be affected and adjustment may
be necessary.
If oncoming vehicles flash their high beams at you, this
may mean the vertical aim of your headlamps needs to
be adjusted.
It is recommended that the vehicle is taken to your
dealer/retailer for service if the headlamps need to
be adjusted. It is possible however, to re-aim the
headlamps as described.The vehicle should:.Be placed so the headlamps are 25 ft. (7.6 m) from
a light colored wall.
.Have all four tires on a level surface which is level
all the way to the wall.
.Be placed so it is perpendicular to the wall.
.Not have any snow, ice, or mud on it.
.Be fully assembled and all other work stopped
while headlamp aiming is being performed.
.Normally loaded with a full tank of fuel and one
person or 160 lbs (75 kg) sitting on the driver seat.
.Have the tires properly inflated.
.Have the spare tire is in its proper location in the
vehicle.
Headlamp aiming is done with the vehicle's low-beam
headlamps. The high-beam headlamps will be correctly
aimed if the low-beam headlamps are aimed properly.
6-50
Page 548 of 560

Cleaning (cont.)Underbody Maintenance . . . . . . . . . . . . . . . . . . . . . . . . .6-105
Washing Your Vehicle . . . . . . . . . . . . . . . . . . . . . . . . . . .6-102
Weatherstrips . . . . . . . . . . . . . . . . . . . . . . . . . . . . . . . . . . . .6-101
Windshield, Backglass, and Wiper Blades . . . . . . .6-103
Wood Panels . . . . . . . . . . . . . . . . . . . . . . . . . . . . . . . . . . . .6-101
Climate Control System Outlet Adjustment . . . . . . . . . . . . . . . . . . . . . . . . . . . . . . . . 4-23
Rear Air Conditioning and Heating System,Electronic . . . . . . . . . . . . . . . . . . . . . . . . . . . . . . . . . . . . . . . 4-24
Climate Control Systems Dual Automatic . . . . . . . . . . . . . . . . . . . . . . . . . . . . . . . . . . . 4-18
Climate Controls . . . . . . . . . . . . . . . . . . . . . . . . . . . . . . . . . . . 1-14
Clock, Setting . . . . . . . . . . . . . . . . . . . . . . . . . . . . . . . . . . . . . 4-76
Collision Damage Repair . . . . . . . . . . . . . . . . . . . . . . . . . . 8-12
Compass . . . . . . . . . . . . . . . . . . . . . . . . . . . . . . . . . . . . . . . . . . 4-53
Content Theft-Deterrent . . . . . . . . . . . . . . . . . . . . . . . . . . . 3-20
Control of a Vehicle . . . . . . . . . . . . . . . . . . . . . . . . . . . . . . . . . .5-3
Convenience Net . . . . . . . . . . . . . . . . . . . . . . . . . . . . . . . . . . 3-64
Coolant Engine . . . . . . . . . . . . . . . . . . . . . . . . . . . . . . . . . . . . . . . . . . . . 6-27
Engine Temperature Gage . . . . . . . . . . . . . . . . . . . . . . . . 4-34
Cooled Seats . . . . . . . . . . . . . . . . . . . . . . . . . . . . . . . . . . . . . . . .2-5
Cooling System . . . . . . . . . . . . . . . . . . . . . . . . . . . . . . . . . . . . 6-26
Courtesy Transportation Program . . . . . . . . . . . . . . . . . . 8-10
Cruise Control . . . . . . . . . . . . . . . . . . . . . . . . . . . . . . . . . . . . . . .4-8
Light . . . . . . . . . . . . . . . . . . . . . . . . . . . . . . . . . . . . . . . . . . . . . . 4-40
Cupholders . . . . . . . . . . . . . . . . . . . . . . . . . . . . . . . . . . . . . . . . 3-62 Customer Assistance . . . . . . . . . . . . . . . . . . . . . . . . . . . . . . . .8-6
Offices . . . . . . . . . . . . . . . . . . . . . . . . . . . . . . . . . . . . . . . . . . . . . 8-6
Text Telephone (TTY) Users . . . . . . . . . . . . . . . . . . . . . . . 8-6
Customer Information Service Publications Ordering Information . . . . . . . . 8-16
Customer Satisfaction Procedure . . . . . . . . . . . . . . . . . . . .8-2
D
Damage Repair, Collision . . . . . . . . . . . . . . . . . . . . . . . . . . 8-12
Data Recorders, Event . . . . . . . . . . . . . . . . . . . . . . . . . . . . 8-18
Daytime Running Lamps (DRL) . . . . . . . . . . . . . . . . . . . . 4-12
Defensive Driving . . . . . . . . . . . . . . . . . . . . . . . . . . . . . . . . . . . .5-2
Delayed Locking . . . . . . . . . . . . . . . . . . . . . . . . . . . . . . . . . . . 3-10
DIC Compass . . . . . . . . . . . . . . . . . . . . . . . . . . . . . . . . . . . . . 4-53
Disc, MP3 . . . . . . . . . . . . . . . . . . . . . . . . . . . . . . . . . . 4-94, 4-101
Doing Your Own Service Work . . . . . . . . . . . . . . . . . . . . . . .6-4
Dome Lamp Override . . . . . . . . . . . . . . . . . . . . . . . . . . . . . . 4-14
Dome Lamps . . . . . . . . . . . . . . . . . . . . . . . . . . . . . . . . . . . . . . 4-14
Door Delayed Locking . . . . . . . . . . . . . . . . . . . . . . . . . . . . . . . . . . 3-10
Locks . . . . . . . . . . . . . . . . . . . . . . . . . . . . . . . . . . . . . . . . . . . . . . 3-9
Power Locks . . . . . . . . . . . . . . . . . . . . . . . . . . . . . . . . . . . . . . 3-10
Programmable Automatic Door Locks . . . . . . . . . . . . 3-10
Rear Door Security Locks . . . . . . . . . . . . . . . . . . . . . . . . 3-10
Drive Systems All-Wheel Drive . . . . . . . . . . . . . . . . . . . . . . . . . . . . . . . . . . . 6-47
i - 4