check transmission fluid HONDA ACCORD 2002 CL7 / 7.G Owners Manual
[x] Cancel search | Manufacturer: HONDA, Model Year: 2002, Model line: ACCORD, Model: HONDA ACCORD 2002 CL7 / 7.GPages: 223, PDF Size: 3.8 MB
Page 149 of 223

This section also includes
Maintenance Schedules f or normal
driving and severe driving conditions,
a Maintenance Record, and instruc-
tions f or simple maintenance tasks
you may want to take care of
yourself .
If you have the skills and tools to per-
f orm more complex maintenance
tasks on your Honda, you may want
to purchase the Service Manual. See
page f or inf ormation on how to
obtain a copy, or see your Honda
dealer.
This section explains why it is
important to keep your car well
maintained and to f ollow basic
maintenance saf ety precautions.
......................
Maintenance Saf ety . 236
.
Important Safety Precautions . 237
.................
Maintenance Schedule . 238
...
Required Maintenance Record . 245
.......
Owner Maintenance Checks . 247
..............................
Fluid Locations . 248
......................................
Engine Oil . 250
..................................
Adding Oil . 250
....................
Recommended Oil . 250
..............................
Synthetic Oil . 251
....................................
Additives . 252
.....
Changing the Oil and Filter . 252
.............................
Cooling System . 255
............
Adding Engine Coolant . 255
.......
Replacing Engine Coolant . 257
....................
Windshield Washers . 262
.......................
Transmission Fluid . 263
Automatic .........................
Transmission . 263
5-speed Manual .........................
Transmission . 265
................
Brake and Clutch Fluid . 267
............................
Brake System . 267
...........................
Clutch System . 268
..............................
Power Steering . 268
.....................
Air Cleaner Element . 269 ....................................
Hood Latch . 272
....................................
Spark Plugs . 272
..............................
Replacement . 272
............................
Specif ications . 273
...........................................
Battery . 276
.................................
Wiper Blades . 279
..............
Air Conditioning System . 281
..................
Dust and Pollen Filter . 282
.....................................
Drive Belts . 282
....................................
Timing Belt . 283
...............................................
Tires . 283
......................................
Inf lation . 284
..................................
Inspection . 286
..............................
Maintenance . 286
.............................
Tire Rotation . 287
...
Replacing Tires and Wheels . 287
......................
Wheels and Tires . 288
..........................
Winter Driving . 289
.............................
Snow Tires . 289
............................
Tire Chains . 289
.............................................
Lights . 290
........................
Replacing Bulbs . 292
...........................
Storing Your Car . 301
359
Maintenance
Maint enance235
Page 162 of 223

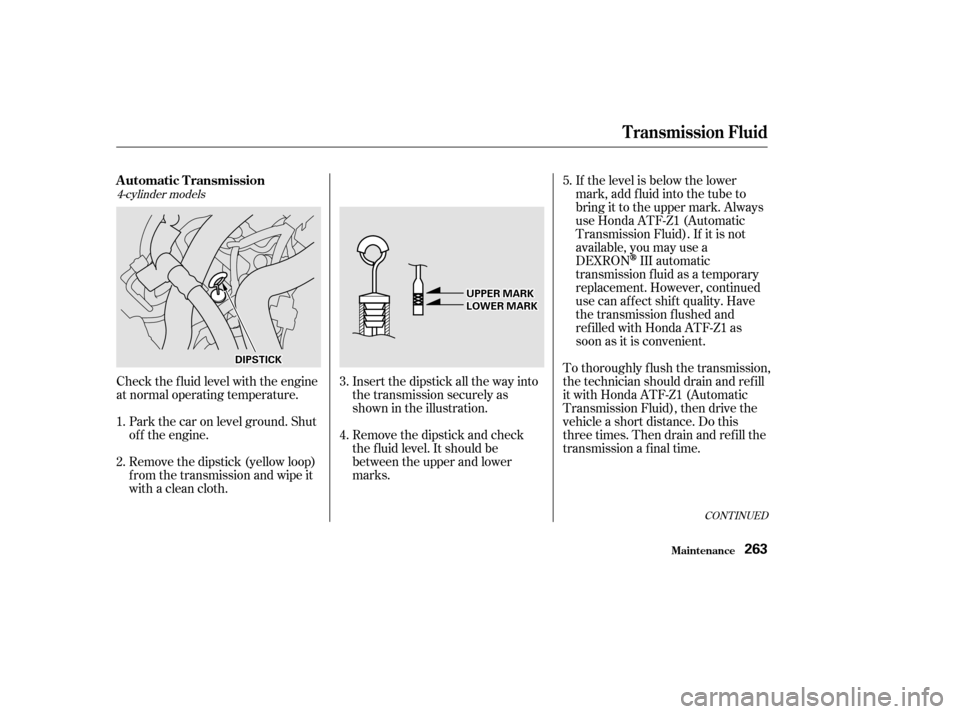
Remove the dipstick (yellow loop)
f rom the transmission and wipe it
with a clean cloth.
Check the f luid level with the engine
at normal operating temperature.
Insert the dipstick all the way into
the transmission securely as
shown in the illustration.
Remove the dipstick and check
the f luid level. It should be
between the upper and lower
marks.
Park the car on level ground. Shut
of f the engine. To thoroughly f lush the transmission,
the technician should drain and ref ill
it with Honda ATF-Z1 (Automatic
Transmission Fluid), then drive the
vehicle a short distance. Do this
three times. Then drain and ref ill the
transmission a final time.If the level is below the lower
mark, add f luid into the tube to
bring it to the upper mark. Always
use Honda ATF-Z1 (Automatic
Transmission Fluid). If it is not
available, you may use a
DEXRON
III automatic
transmission f luid as a temporary
replacement. However, continued
use can affect shift quality. Have
the transmission f lushed and
ref illed with Honda ATF-Z1 as
soon as it is convenient.
1. 2. 3.5.
4.
4-cylinder models
CONT INUED
Automatic Transmission
T ransmission Fluid
Maint enance263
UUPPPPEERRMMAARRKKLLOOWWEERRMMAARRKK
DDIIPPSSTTIICCKK
Page 163 of 223

To thoroughly f lush the transmission,
the technician should drain and ref ill
it with Honda ATF-Z1 (Automatic
Transmission Fluid), then drive the
vehicle a short distance. Do this
three times. Then drain and ref ill the
transmission a f inal time.Insert the dipstick all the way back
into the transmission securely as
shown in the illustration.
The transmission should be drained
and ref illed with new f luid according
to the time and distance recommen-
dations in the maintenance schedule.
If the level is below the lower
mark, add f luid into the tube to
bring it to the upper mark. Always
use Honda ATF-Z1 (Automatic
Transmission Fluid). If it is not
available, you may use a
DEXRON
III automatic
transmission f luid as a temporary
replacement. However, continued
use can affect shift quality. Have
the transmission f lushed and
ref illed with Honda ATF-Z1 as
soon as it is convenient.
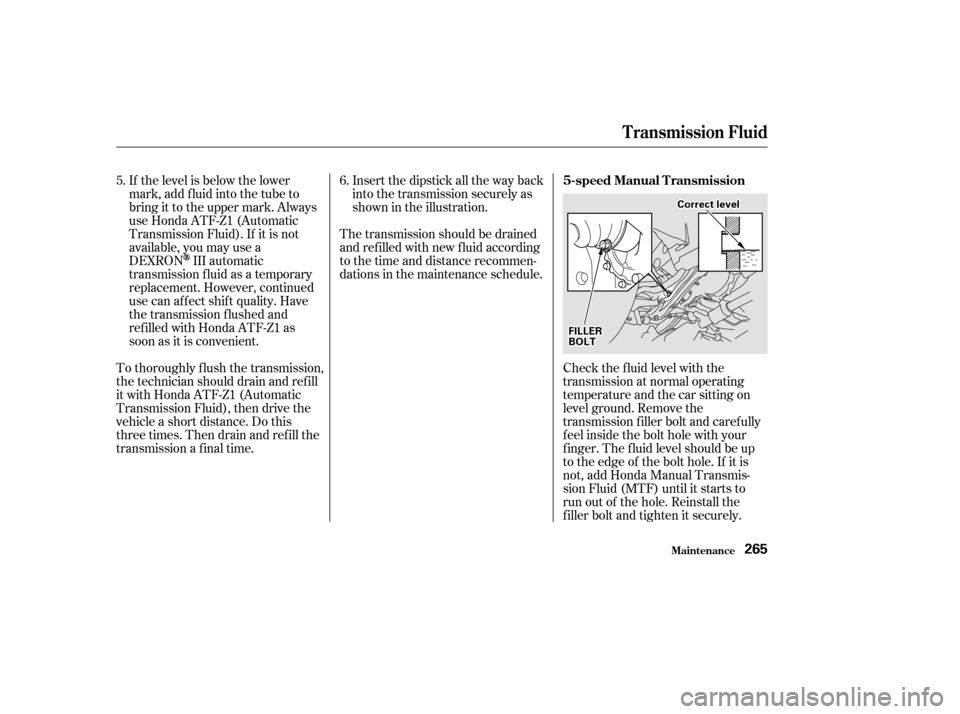
Check the f luid level with the
transmission at normal operating
temperature and the car sitting on
level ground. Remove the
transmission f iller bolt and caref ully
f eel inside the bolt hole with your
f inger. The f luid level should be up
to the edge of the bolt hole. If it is
not, add Honda Manual Transmis-
sion Fluid (MTF) until it starts to
run out of the hole. Reinstall the
f iller bolt and tighten it securely.
5.
6.
T ransmission Fluid
Maint enance
5-speed Manual Transmission
265
CCoorrrreeccttlleevveell
FFIILLLLEERRBBOOLLTT
Page 164 of 223

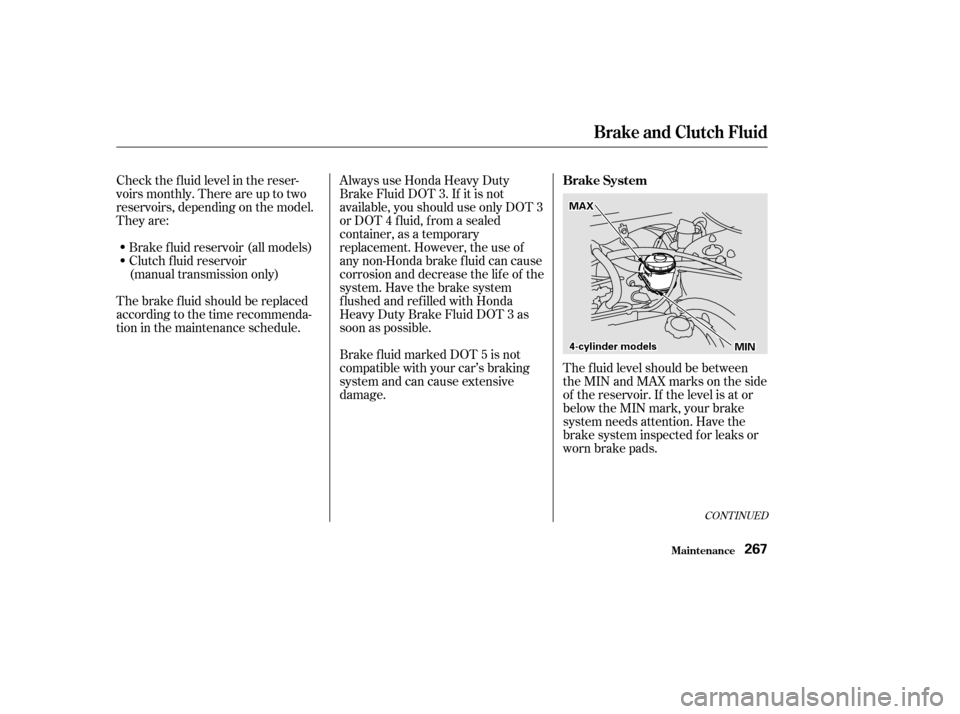
The f luid level should be between
theMINandMAXmarksontheside
of the reservoir. If the level is at or
below the MIN mark, your brake
system needs attention. Have the
brake system inspected f or leaks or
worn brake pads.
Always use Honda Heavy Duty
Brake Fluid DOT 3. If it is not
available, you should use only DOT 3
or DOT 4 f luid, f rom a sealed
container, as a temporary
replacement. However, the use of
any non-Honda brake fluid can cause
corrosion and decrease the lif e of the
system. Have the brake system
f lushed and ref illed with Honda
Heavy Duty Brake Fluid DOT 3 as
soon as possible.
Check the f luid level in the reser-
voirs monthly. There are up to two
reservoirs, depending on the model.
They are:
Brake f luid reservoir (all models)
Clutch f luid reservoir
(manual transmission only)
Brake f luid marked DOT 5 is not
compatible with your car’s braking
system and can cause extensive
damage.
The brake f luid should be replaced
according to the time recommenda-
tion in the maintenance schedule.
CONT INUED
Brake System
Brake and Clutch Fluid
Maint enance267
MMAAXX
44--ccyylliinnddeerrmmooddeellssMMIINN
Page 222 of 223

CONT INUED
...
Accessories and Modif ications . 202
................................
Accessories . 202
...
Additional Safety Precaution . 202
............................
Modif ications . 202
ACCESSORY (Ignition Key .......................................
Position) . 73
.............
Accessory Power Socket . 100
....................
Additives, Engine Oil . 252
.....................................
Airbag (SRS) . 9
.....................
Air Cleaner Element . 269
............................
Air Conditioning . 104
..............................
Maintenance . 281
.........................................
Usage . 104
.......................
Air Pressure, Tires . 284
.......................
Alcohol in Gasoline . 347
......................................
Antif reeze . 255
Anti-lock Brakes (ABS)
................................
Description . 220
...............................
Indicator . 57, 221
...................................
Operation . 220
.
Anti-thef t Steering Column Lock . 72
..........................
Appearance Care . 303
........
Audio System . 119, 131, 147, 164
.............
Automatic Speed Control . 185 ..............
Automatic Transmission . 212
..........................
Capacity, Fluid . 342
.......
Checking Fluid Level . 263, 264
.......................................
Shif ting . 212
.
Shif t Lever Position Indicator . 213
................
Shif t Lever Positions . 213
....................
Shif t Lock Release . 216
Battery ......
Charging System Light . 56, 326
............................
Jump Starting . 320
..............................
Maintenance . 276
............................
Specif ications . 343
..............................
Bef ore Driving . 193
..........................................
Belts, Seat . 8
.............................
Beverage Holder . 98
...................................
Body Repair . 310
Brakes
...........
Anti-lock System (ABS) . 220
.............
Break-in, New Linings . 194
....................
Bulb Replacement . 295
...........................................
Fluid . 267
.........................................
Parking . 95
.........................
System Indicator . 57 ........................
Wear Indicators . 219
.............................
Braking System . 219
........................
Break-in, New Car . 194
..
Brightness Control, Instruments . 65
........................
Brights, Headlights . 64
Bulb Replacement
..........................
Back-up Lights . 295
..............................
Brake Lights . 295
..............................
Ceiling Light . 298
..........................
Courtesy Light . 299
................
Front Parking Lights . 294
........
Front Side Marker Lights . 293
.................................
Headlights . 292
.........
High-mount Brake Light . 297
.................
License Plate Lights . 297
............................
Specif ications . 343
.....................................
Spotlight . 299
...............................
Trunk Light . 300
....................
Turn Signal Lights . 293
..............................
Bulbs, Halogen . 292
Index
A
B
I