clock HONDA ACCORD 2002 CL7 / 7.G Owners Manual
[x] Cancel search | Manufacturer: HONDA, Model Year: 2002, Model line: ACCORD, Model: HONDA ACCORD 2002 CL7 / 7.GPages: 223, PDF Size: 3.8 MB
Page 35 of 223

This section gives inf ormation about
the controls and displays that
contribute to the daily operation of
your Honda. All the essential
controls are within easy reach............................
Control Locations . 54
...............................
Indicator Lights . 55
.............................................
Gauges . 60
...............................
Speedometer . 60
.................................
Tachometer . 60
.....................................
Odometer . 60
...................................
Trip Meter . 61
...................
Temperature Gauge . 61
..................................
Fuel Gauge . 61
Maintenance Required
...................................
Indicator . 62
Controls Near the Steering .......................................
Wheel . 63
...................................
Headlights . 64 Automatic Lighting Off
.....................................
Feature . 65
............
Daytime Running Lights . 65
....
Instrument Panel Brightness . 65
................................
Turn Signals . 66
.....................
Windshield Wipers . 66
..................
Windshield Washers . 68
..........................
Hazard Warning . 68
.............
Rear Window Def ogger . 68
......
Steering Wheel Adjustment . 69
...............................
Keys and Locks . 70
..............................................
Keys . 70
....................
Immobilizer System . 71
............................
Ignition Switch . 72
..................................
Door Locks . 73
......................
Power Door Locks . 74
...................
Remote Transmitter . 75
..............
Childproof Door Locks . 79
...........................................
Trunk . 79
........
Emergency Trunk Opener . 80
....................................
Glove Box . 81
............................
Seat Adjustments . 82
.............
Front Seat Adjustments . 82
Driver’s Seat Manual Height
..............................
Adjustment . 83 Driver’s Seat Power Height
..............................
Adjustment . 83
Driver’s Seat Full Power ............................
Adjustments . 84
...........
Driver’s Lumbar Support . 85
Front Passenger’s Seat
............................
Adjustments . 86
..........................
Head Restraints . 86
.......................
Folding Rear Seat . 87
......................
Rear Seat Armrest . 88
....................................
Seat Heaters . 90
..............................
Power Windows . 91
.........................................
Moonroof . 92
.............................................
Mirrors . 93
....
Adjusting the Power Mirrors . 94
.................................
Parking Brake . 95
....................................
Digital Clock . 96
...................
Console Compartment . 97
..........................................
Coin Box . 97
.............................
Beverage Holder . 98
..........................................
Sun Visor . 99
..................................
Vanity Mirror . 99
........................
Sunglasses Holder . 100
.............
Accessory Power Socket . 100
...............................
Interior Lights . 101
Instruments and Controls
Inst rument s and Cont rols53
Page 45 of 223
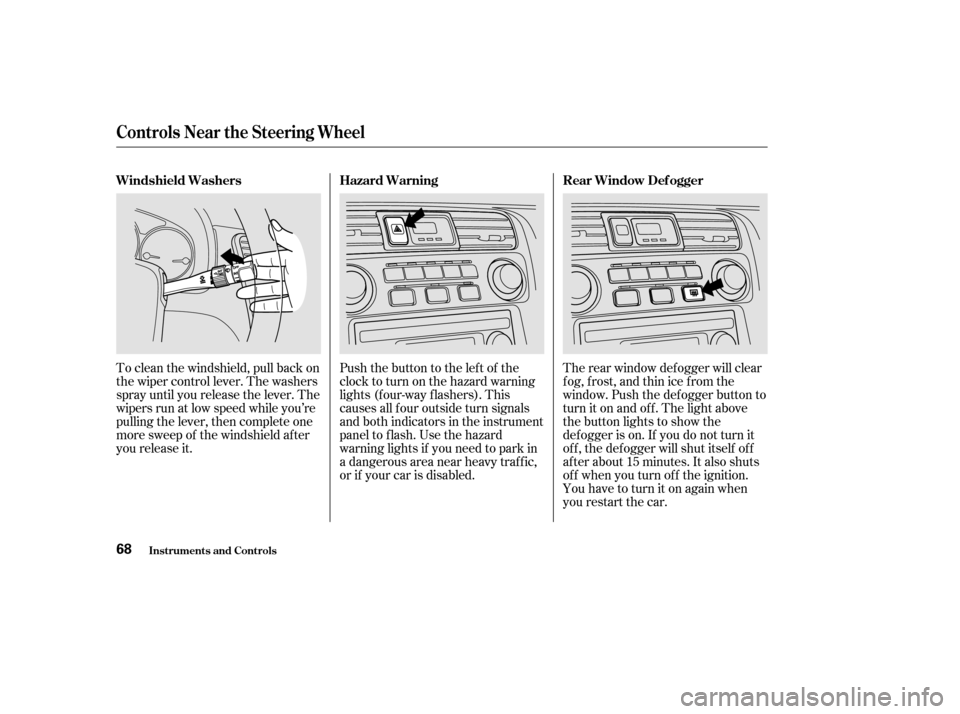
To clean the windshield, pull back on
the wiper control lever. The washers
spray until you release the lever. The
wipers run at low speed while you’re
pulling the lever, then complete one
more sweep of the windshield af ter
you release it.The rear window def ogger will clear
fog, frost, and thin ice from the
window. Push the def ogger button to
turn it on and of f . The light above
the button lights to show the
def ogger is on. If you do not turn it
of f , the def ogger will shut itself of f
af ter about 15 minutes. It also shuts
of f when you turn of f the ignition.
You have to turn it on again when
you restart the car.
Push the button to the left of the
clocktoturnonthehazardwarning
lights (f our-way f lashers). This
causes all f our outside turn signals
and both indicators in the instrument
panel to f lash. Use the hazard
warning lights if you need to park in
a dangerous area near heavy traffic,
or if your car is disabled.
Windshield Washers Hazard Warning Rear Window Def ogger
Controls Near the Steering Wheel
Inst rument s and Cont rols68
Page 61 of 223
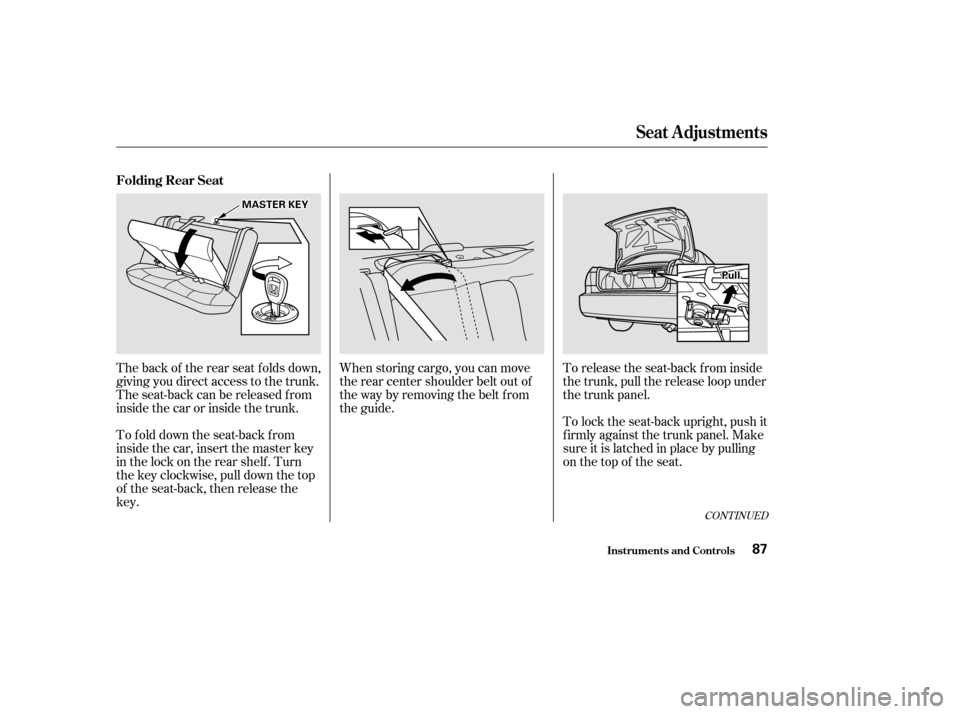
When storing cargo, you can move
therearcentershoulderbeltoutof
the way by removing the belt f rom
the guide.To release the seat-back from inside
the trunk, pull the release loop under
the trunk panel.
The back of the rear seat folds down,
giving you direct access to the trunk.
The seat-back can be released f rom
inside the car or inside the trunk.
To fold down the seat-back from
inside the car, insert the master key
in the lock on the rear shelf . Turn
the key clockwise, pull down the top
of the seat-back, then release thekey. To lock the seat-back upright, push it
firmly against the trunk panel. Make
sure it is latched in place by pulling
on the top of the seat.
CONT INUED
Folding Rear Seat
Seat A djustments
Inst rument s and Cont rols87
MMAASSTTEERRKKEEYY
PPuullll
Page 69 of 223
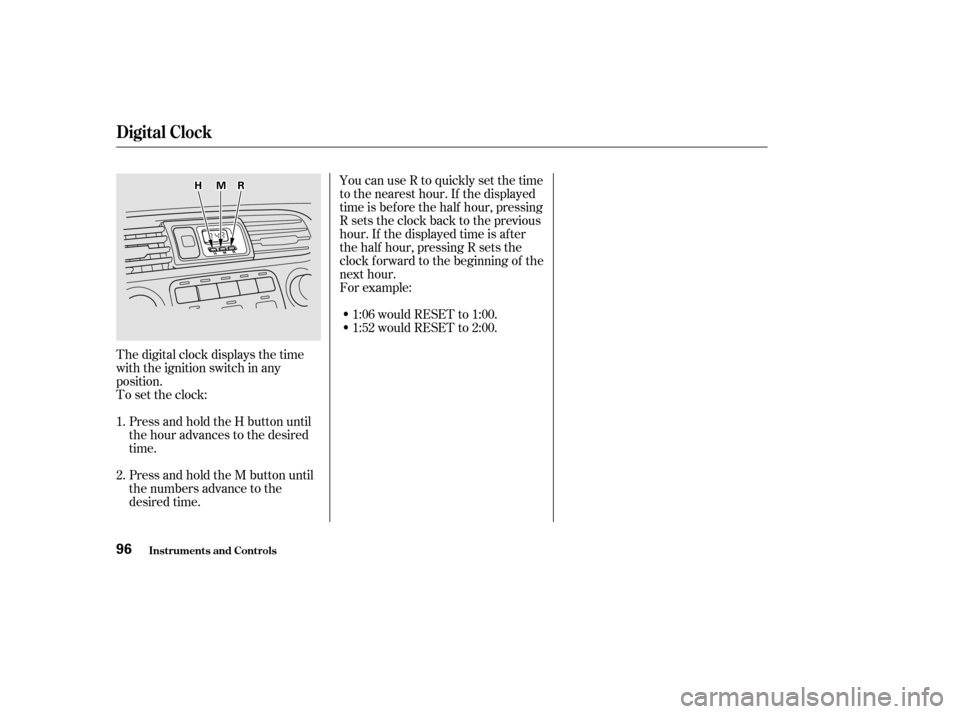
The digital clock displays the time
with the ignition switch in any
position.
To set the clock:Press and hold the H button until
the hour advances to the desired
time.
Press and hold the M button until
the numbers advance to the
desired time. You can use R to quickly set the time
to the nearest hour. If the displayed
time is before the half hour, pressing
Rsetstheclockbacktotheprevious
hour. If the displayed time is af ter
the half hour, pressing R sets the
clock f orward to the beginning of the
next hour.
For example:
1:06 would RESET to 1:00.
1:52 would RESET to 2:00.
1. 2.
Digital Clock
Inst rument s and Cont rols96
RRMMHH
Page 76 of 223
Proper use of the Heating and
Cooling system can make the
interior dry and comf ortable, and
keep the windows clear f or best
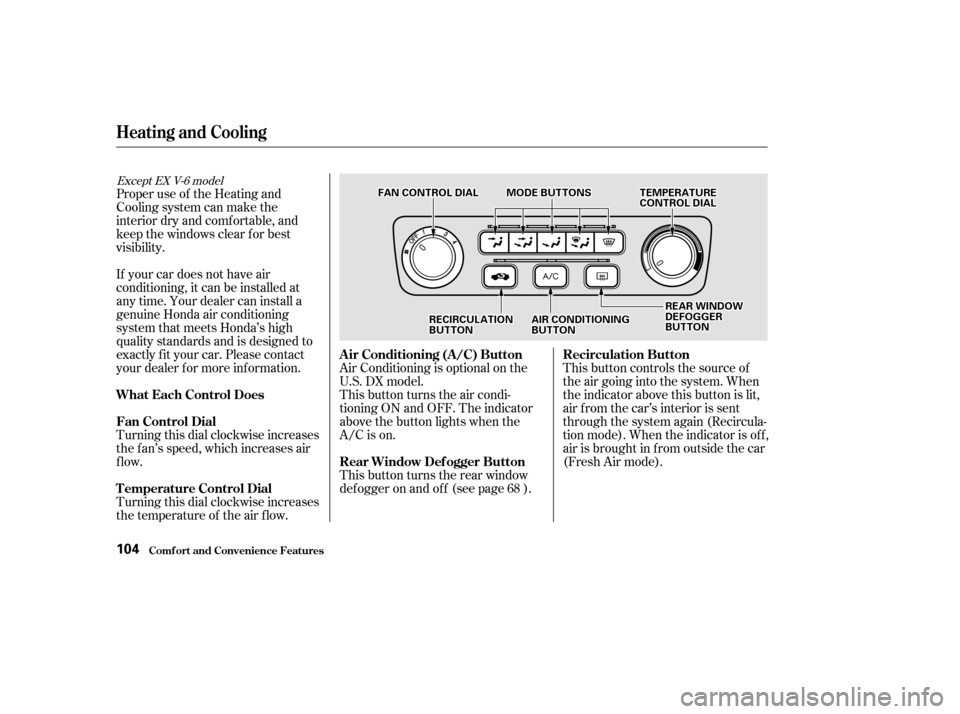
visibility.This button controls the source of
the air going into the system. When
the indicator above this button is lit,
air f rom the car’s interior is sent
through the system again (Recircula-
tion mode). When the indicator is off,
air is brought in f rom outside the car
(Fresh Air mode).
This button turns the air condi-
tioning ON and OFF. The indicator
above the button lights when the
A/C is on.
Air Conditioning is optional on the
U.S. DX model.
Turning this dial clockwise increases
the temperature of the air flow.
Turning this dial clockwise increases
the f an’s speed, which increases air
flow.
If your car does not have air
conditioning, it can be installed at
any time. Your dealer can install a
genuine Honda air conditioning
system that meets Honda’s high
quality standards and is designed to
exactly f it your car. Please contact
your dealer f or more inf ormation.
This button turns the rear window
def ogger on and of f (see page ).68
Except EX V-6 model
Comf ort and Convenience Feat ures
Heating and Cooling
Air Conditioning (A/C) Button Recirculation Button
Rear Window Def ogger Button
T emperature Control Dial
Fan Control Dial
What Each Control Does
104
TTEEMMPPEERRAATTUURREECCOONNTTRROOLLDDIIAALLFFAANNCCOONNTTRROOLLDDIIAALLMMOODDEEBBUUTTTTOONNSS
RREEAARRWWIINNDDOOWWDDEEFFOOGGGGEERRBBUUTTTTOONNRREECCIIRRCCUULLAATTIIOONNBBUUTTTTOONNAAIIRRCCOONNDDIITTIIOONNIINNGGBBUUTTTTOONN
Page 180 of 223
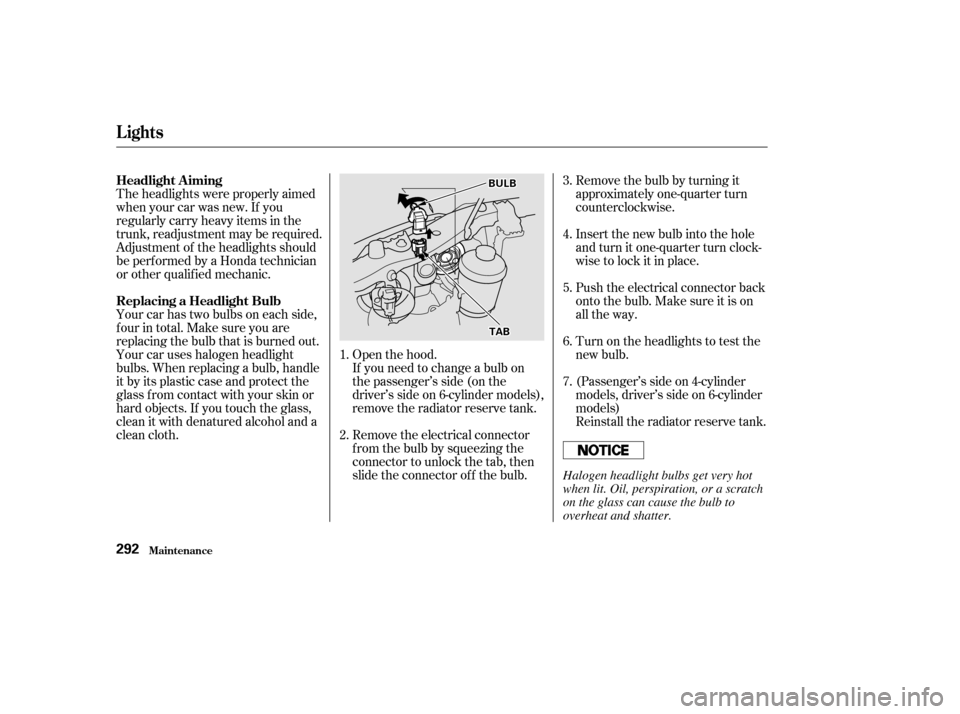
Open the hood.Turn on the headlights to test the
new bulb.
Push the electrical connector back
onto the bulb. Make sure it is on
all the way.
Remove the bulb by turning it
approximately one-quarter turn
counterclockwise.
Insert the new bulb into the hole
and turn it one-quarter turn clock-
wise to lock it in place.
If you need to change a bulb on
thepassenger’sside(onthe
driver’s side on 6-cylinder models),
remove the radiator reserve tank.
Remove the electrical connector
f rom the bulb by squeezing the
connector to unlock the tab, then
slide the connector of f the bulb. Reinstall the radiator reserve tank.
Theheadlightswereproperlyaimed
when your car was new. If you
regularly carry heavy items in the
trunk, readjustment may be required.
Adjustment of the headlights should
be perf ormed by a Honda technician
or other qualif ied mechanic.
Your car has two bulbs on each side,
four in total. Make sure you are
replacing the bulb that is burned out.
Your car uses halogen headlight
bulbs. When replacing a bulb, handle
it by its plastic case and protect the
glass from contact with your skin or
hard objects. If you touch the glass,
clean it with denatured alcohol and a
clean cloth.
1. 2.3. 4. 7.
6.
5.
(Passenger’s side on 4-cylinder
models, driver’s side on 6-cylinder
models)
Lights
Maint enance
Headlight A iming
Replacing a Headlight Bulb
292
BBUULLBB
TTAABB
Halogen headlight bulbs get very hot
when lit. Oil, perspiration, or a scratch
on the glass can cause the bulb to
overheat and shatter.