service HONDA CIVIC 1991 Owners Manual
[x] Cancel search | Manufacturer: HONDA, Model Year: 1991, Model line: CIVIC, Model: HONDA CIVIC 1991Pages: 136, PDF Size: 1.33 MB
Page 1 of 136
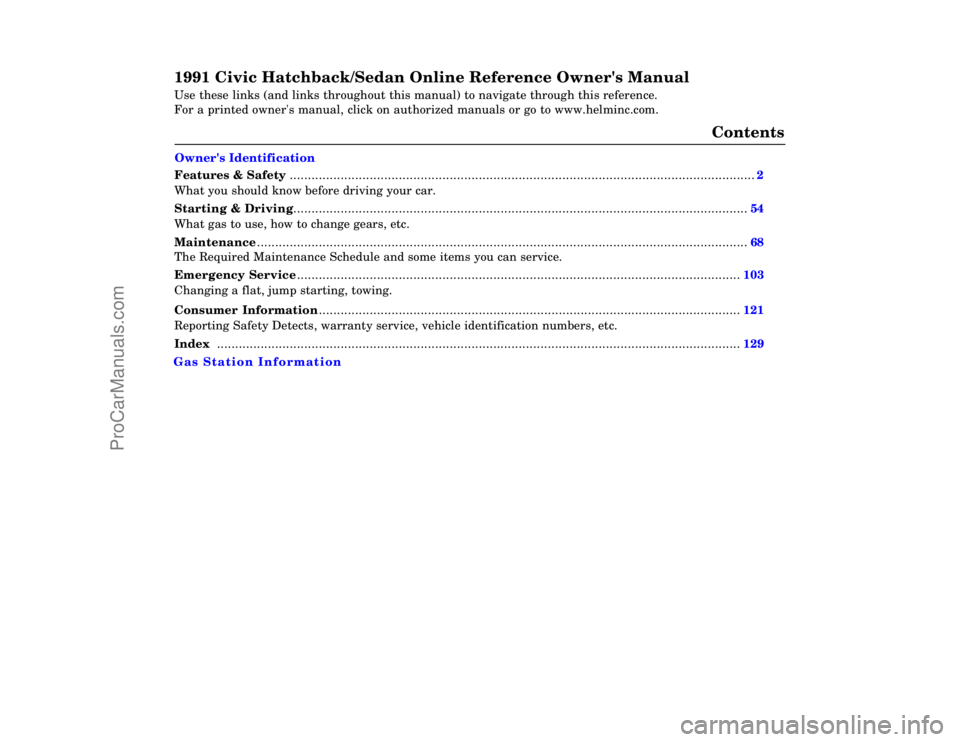
1991 Civic Hatchback/Sedan Online Reference Owner's Manual
Use these links (and links throughout this manual) to navigate through\
this reference.
For a printed owner's manual, click on authorized manuals or go to www.h\
elminc.com.
Features & Safety ........................................................................\
........................................................ 2
What you should know before driving your car.
Starting & Driving........................................................................\
..................................................... 54
What gas to use, how to change gears, etc.
Maintenance ........................................................................\
............................................................... 68
The Required Maintenance Schedule and some items you can service.
Emergency Service ........................................................................\
.................................................. 103
Changing a flat, jump starting, towing. Consumer Information ........................................................................\
............................................ 121
Reporting Safety Detects, warranty service, vehicle identification numbe\
rs, etc.
Index ........................................................................\
........................................................................
129
Gas Station Information
Contents
Owner's Identification
ProCarManuals.com
Page 3 of 136
Introduction
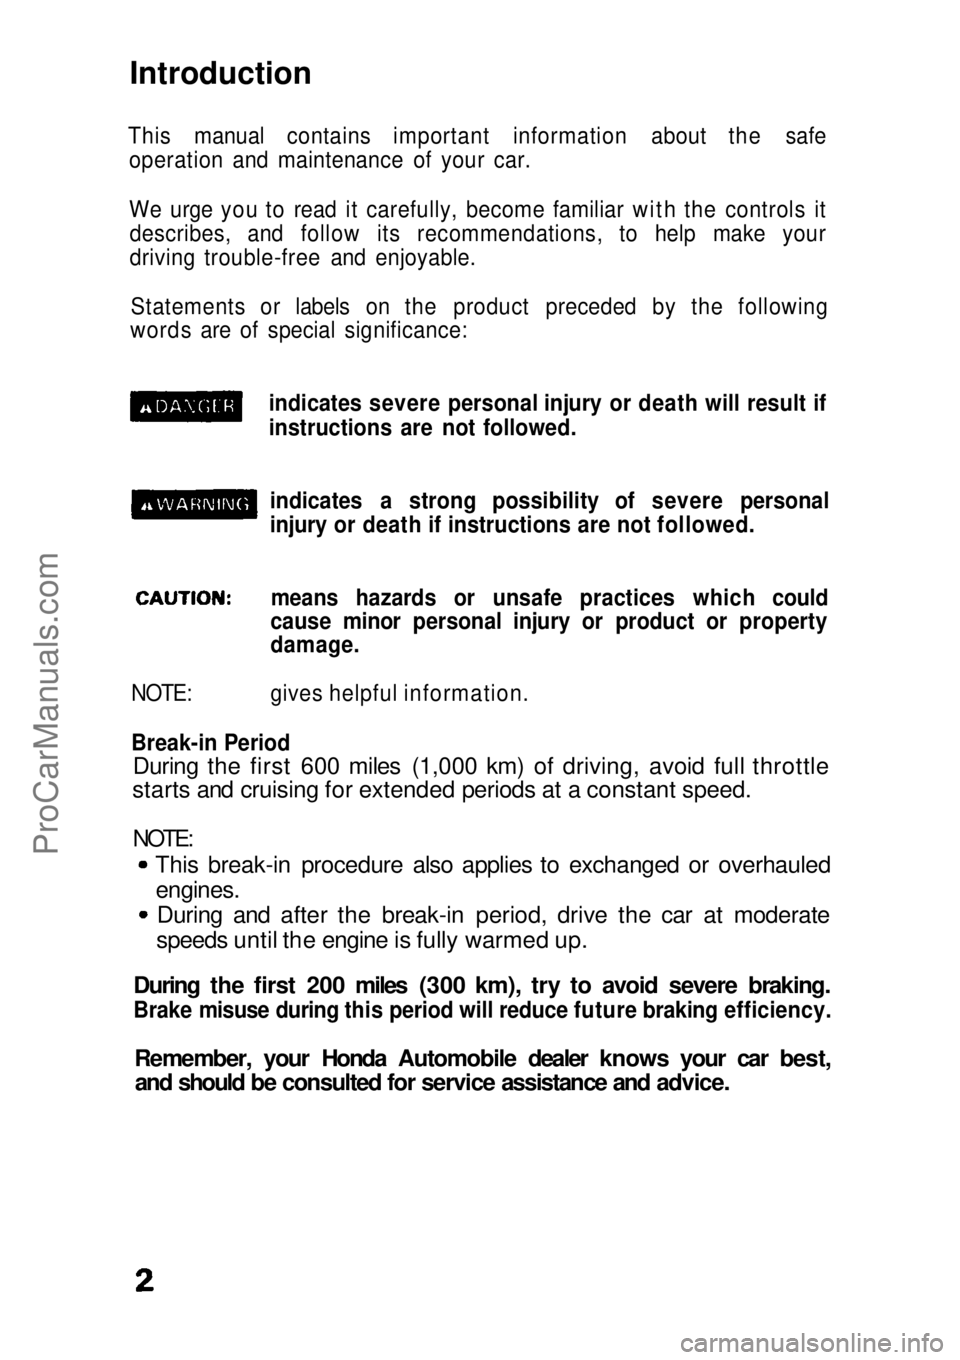
This manual contains important information about the safe operation and maintenance of your car.
We urge you to read it carefully, become familiar with the controls itdescribes, and follow its recommendations, to help make your
driving trouble-free and enjoyable.
Statements or labels on the product preceded by the following
words are of special significance:
indicates severe personal injury or death will result if
instructions are not followed.indicates a strong possibility of severe personal
injury or death if instructions are not followed.means hazards or unsafe practices which could
cause minor personal injury or product or property
damage.
NOTE: gives helpful information.
Break-in Period
During the first 600 miles (1,000 km) of driving, avoid full throttle
starts and cruising for extended periods at a constant speed.
NOTE:
This break-in procedure also applies to exchanged or overhauled
engines.
During and after the break-in period, drive the car at moderate
speeds until the engine is fully warmed up.
During the first 200 miles (300 km), try to avoid severe braking.
Brake misuse during this period will reduce future braking efficiency.
Remember, your Honda Automobile dealer knows your car best,and should be consulted for service assistance and advice.ProCarManuals.comMain Menu s t
Page 68 of 136

Your Honda automobile must be properly maintained to ensure that
it is in peak operating condition and the emission levels are within
the standards set by the Federal Clean Air Act. The following instructions and maintenance procedures are basedon the assumption that your car will be used exclusively for thepurpose for which it was designed:
1.To carry passengers and cargo within the load limits shown on the label in the glove box.
2. To be driven on reasonable road surfaces within legal limits.
3. To generally be driven daily over a distance of several miles.
4. Use gasoline from pumps labeled unleaded, with a pump octane number of 86 or higher. The pump octane number is an average of
the Research (R) octane and Motor (M) octane numbers.
NOTE: Failures which occur due to a lack of maintenance will not be
covered under warranty.
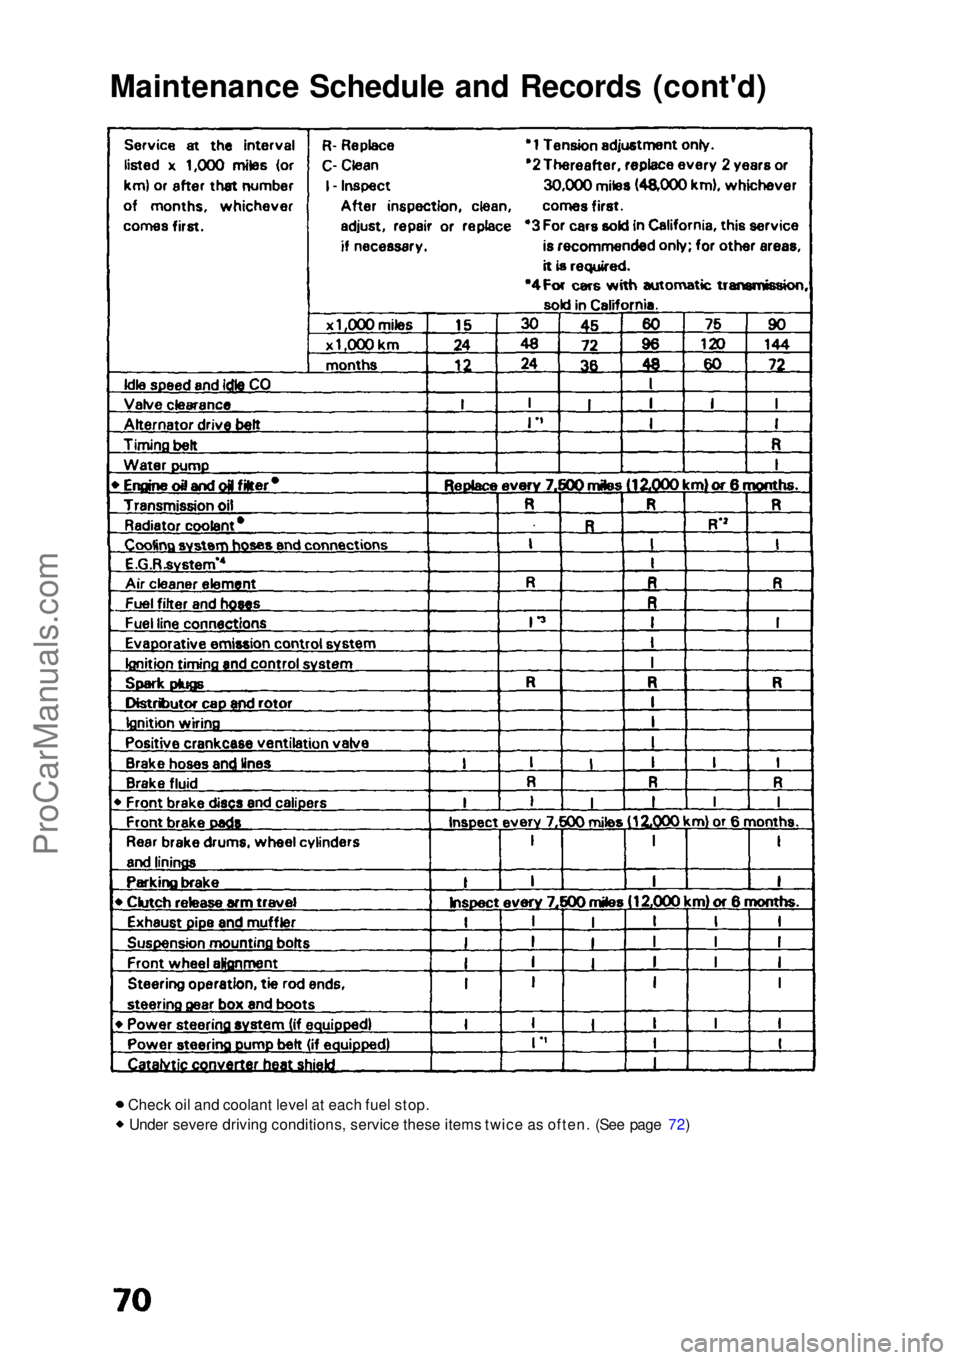
The Required Maintenance Schedule* specifies all maintenance
required to keep your car in peak operating condition. Work should
be done by a Honda dealer but may be done by any qualified service
facility or individual who is competent in this type of work.
Maintenance, replacement, or repair of emission control devices
and systems may be done by any automotive repair establishment
or individual using parts that are "certified" to EPA standards.
After the maintenance has been done, be sure to complete theMaintenance Records on pages 71 — 73. All required maintenance is
considered normal owner operating cost and you will be charged for it by your dealer.
* For vehicles sold in California, maintenance operations indicated by *3 on page 70 are recommended by the manufacturer. Othermaintenance operations are required by California regulations and
condition the emission warranty.
Maintenance Schedule and RecordsProCarManuals.comMain Menu s t
Page 70 of 136
Maintenance Schedule and Records (cont'd)
Check oil and coolant level at each fuel stop.Under severe driving conditions, service these items twice as often. (See page 72)ProCarManuals.comMain Menu s t
Page 72 of 136
Maintenance Schedule and Records (cont'd)
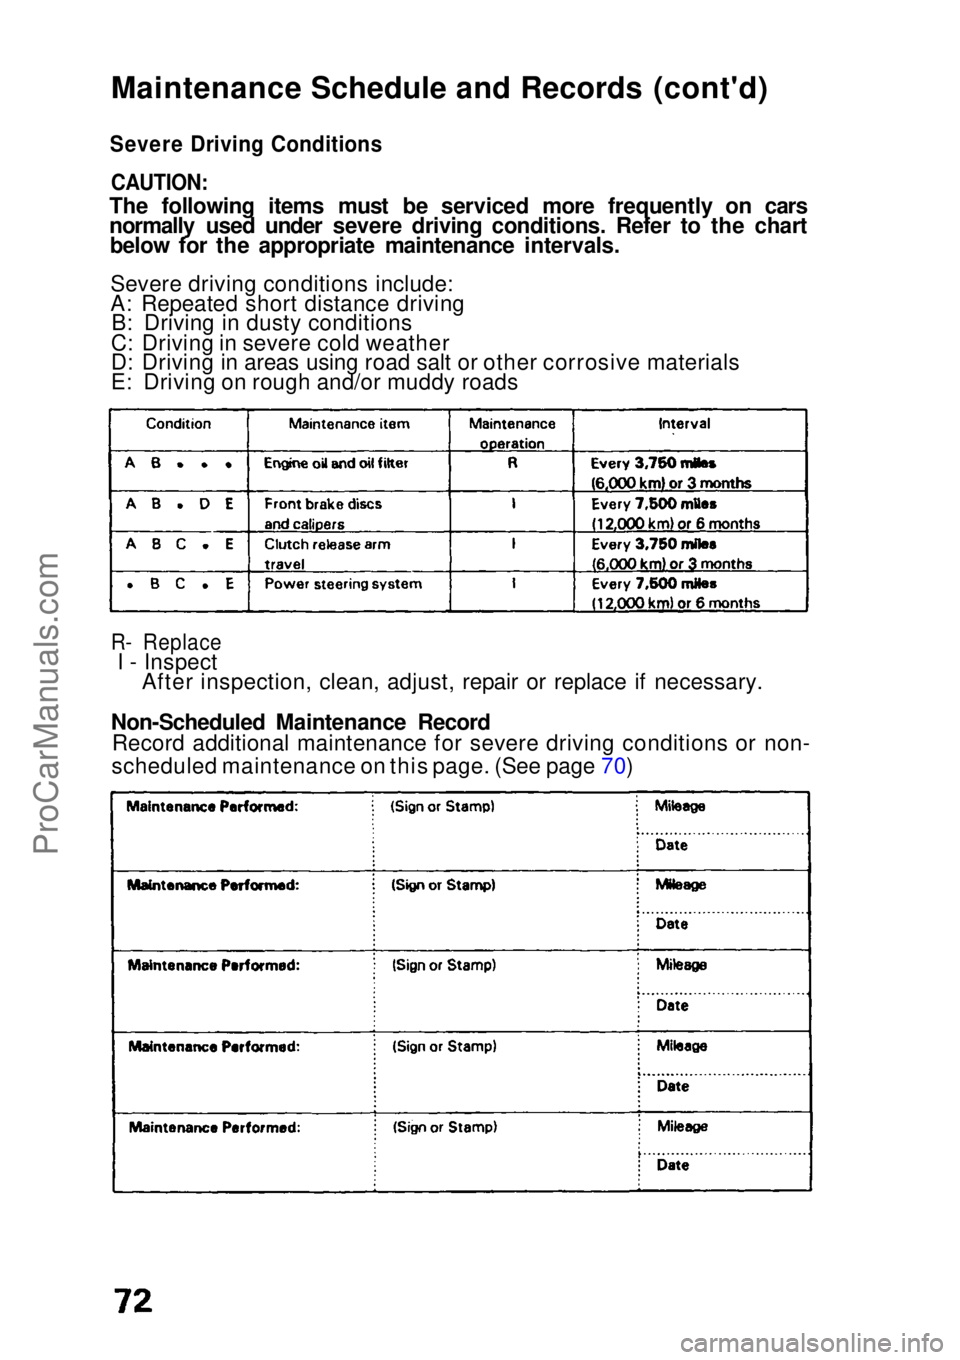
Severe Driving Conditions
CAUTION:
The following items must be serviced more frequently on cars
normally used under severe driving conditions. Refer to the chart below for the appropriate maintenance intervals.
Severe driving conditions include:
A: Repeated short distance driving B: Driving in dusty conditions
C: Driving in severe cold weather
D: Driving in areas using road salt or other corrosive materials
E: Driving on rough and/or muddy roads
R- Replace
I - Inspect After inspection, clean, adjust, repair or replace if necessary.
Non-Scheduled Maintenance Record Record additional maintenance for severe driving conditions or non-
scheduled maintenance on this page. (See page 70)ProCarManuals.comMain Menu s t
Page 75 of 136
Engine Oil and Filter
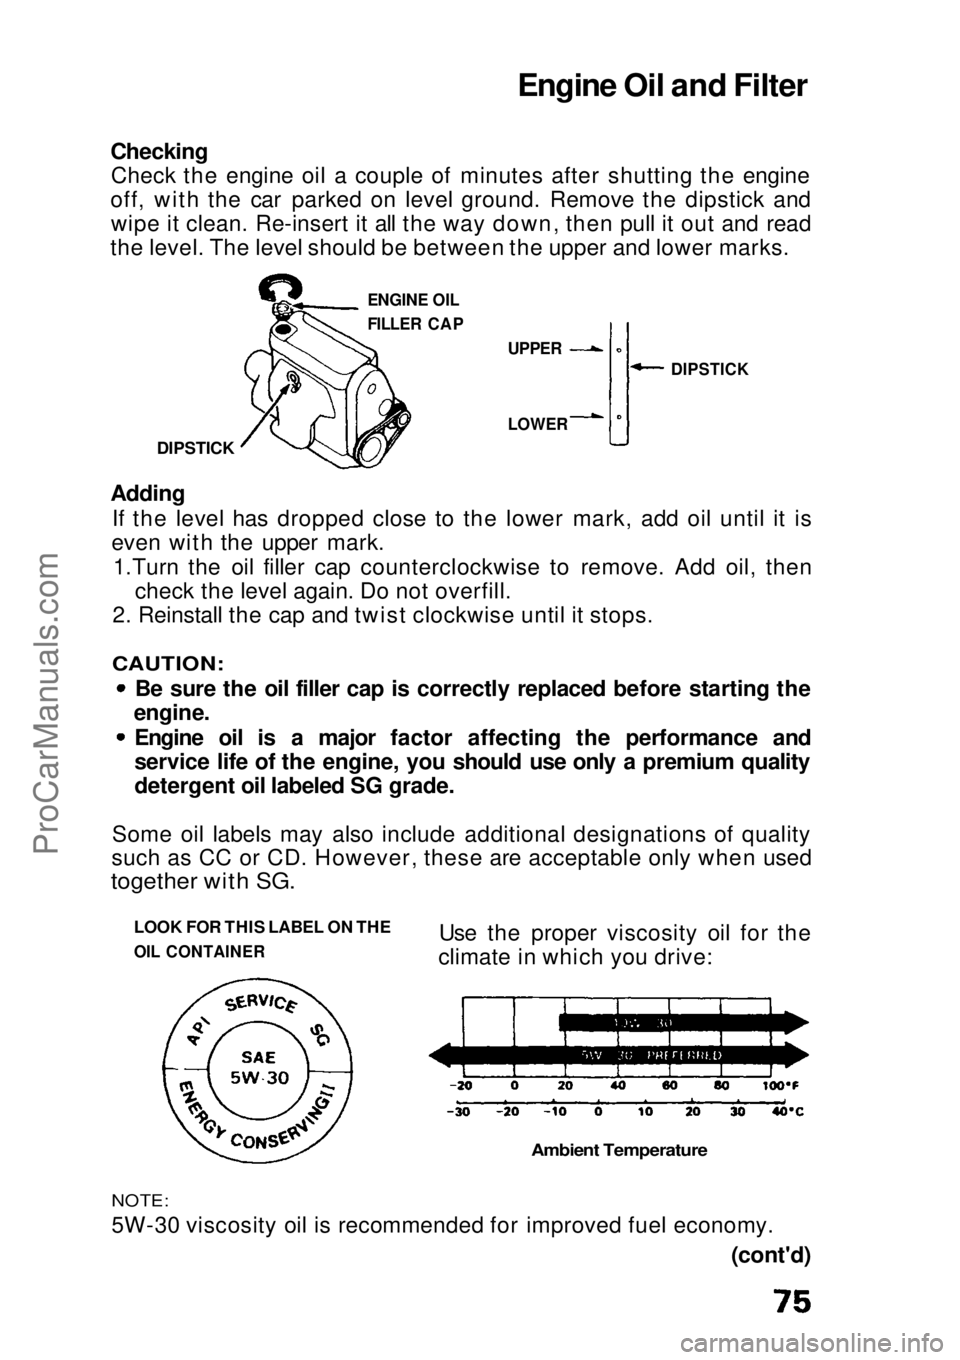
Checking
Check the engine oil a couple of minutes after shutting the engine
off, with the car parked on level ground. Remove the dipstick and wipe it clean. Re-insert it all the way down, then pull it out and read
the level. The level should be between the upper and lower marks.
DIPSTICK
ENGINE OIL
FILLER CAP
Adding
If the level has dropped close to the lower mark, add oil until it is
even with the upper mark.
1.Turn the oil filler cap counterclockwise to remove. Add oil, then check the level again. Do not overfill.
2. Reinstall the cap and twist clockwise until it stops.
CAUTION:
Be sure the oil filler cap is correctly replaced before starting the
engine.
Engine oil is a major factor affecting the performance and
service life of the engine, you should use only a premium quality
detergent oil labeled SG grade.
Some oil labels may also include additional designations of quality
such as CC or CD. However, these are acceptable only when used
together with SG.
LOOK FOR THIS LABEL ON THE
OIL CONTAINER
Use the proper viscosity oil for the
climate in which you drive:
Ambient Temperature
NOTE:
5W-30 viscosity oil is recommended for improved fuel economy.
(cont'd)
DIPSTICK
LOWER UPPERProCarManuals.comMain Menu s t
Page 77 of 136

6. Reinstall the filler cap securely.
7. Start the engine and make sure oil is not leaking from the drain
bolt or the filter.
8. Shut off the engine and recheck the oil level.
NOTE:Please dispose of used motor oil in a manner that is compatible with
the environment. We suggest you take it in a sealed container to
your local service station for reclamation. Do not throw it in the
trash or pour it on the ground.
CAUTION:
Used motor oil may cause skin cancer if repeatedly left in contact
with the skin for prolonged periods. Although this is unlikely
unless you handle used oil on a daily basis, it is still advisable to
thoroughly wash your hands with soap and water as soon as possible after handling used oil.ProCarManuals.comMain Menu s t
Page 89 of 136
Battery
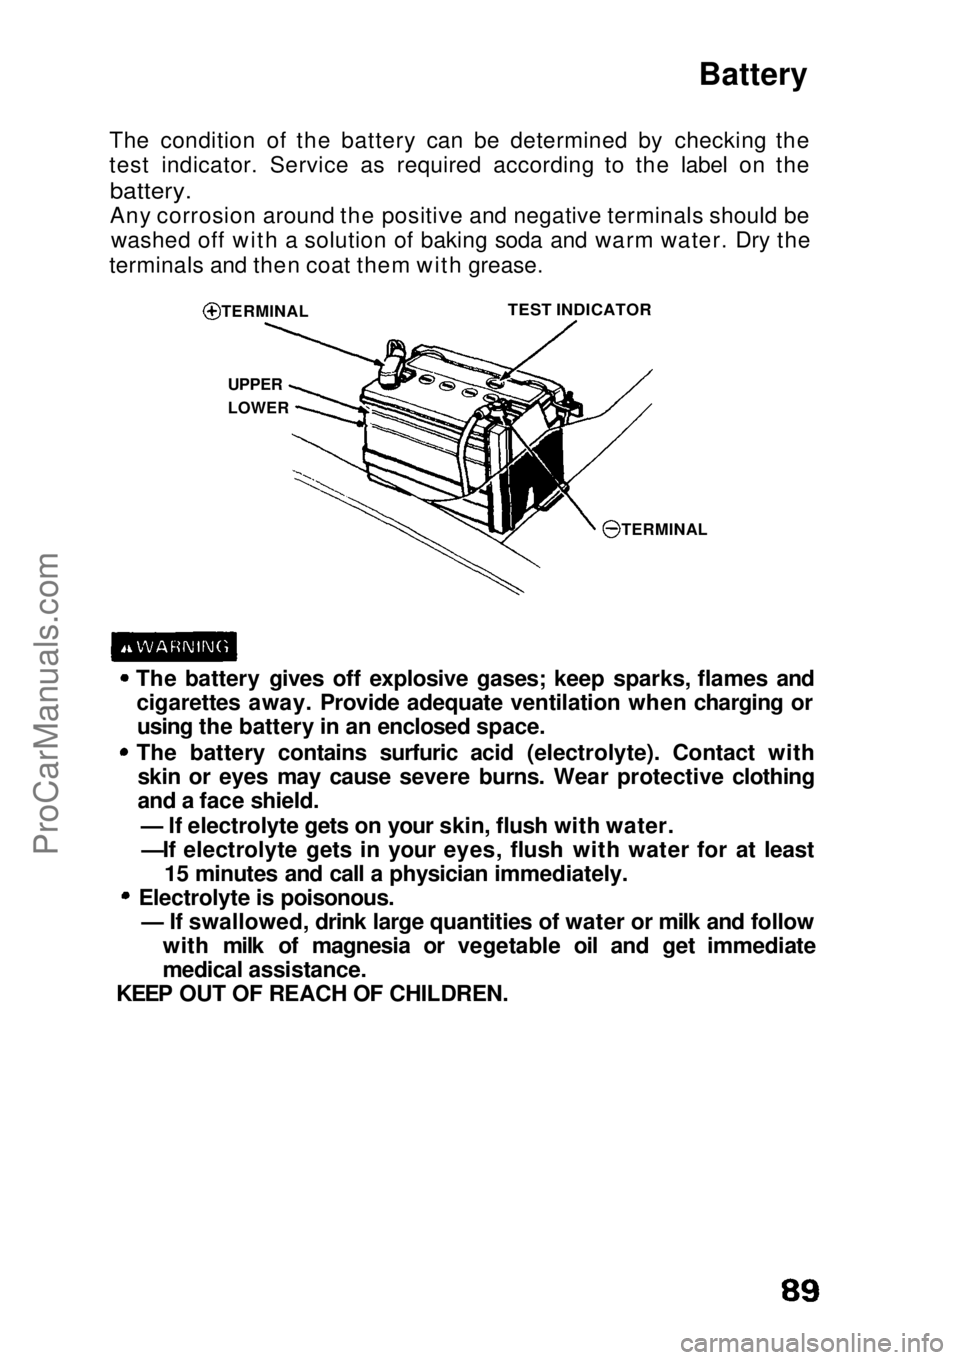
The condition of the battery can be determined by checking the
test indicator. Service as required according to the label on the
battery.
Any corrosion around the positive and negative terminals should be washed off with a solution of baking soda and warm water. Dry the
terminals and then coat them with grease.
TERMINAL
UPPER
LOWER
TEST INDICATOR
TERMINAL
The battery gives off explosive gases; keep sparks, flames and cigarettes away. Provide adequate ventilation when charging orusing the battery in an enclosed space.
The battery contains surfuric acid (electrolyte). Contact with skin or eyes may cause severe burns. Wear protective clothing
and a face shield.
— If electrolyte gets on your skin, flush with water.—If electrolyte gets in your eyes, flush with water for at least 15 minutes and call a physician immediately.
Electrolyte is poisonous. — If swallowed, drink large quantities of water or milk and follow with milk of magnesia or vegetable oil and get immediate
medical assistance.
KEEP OUT OF REACH OF CHILDREN.ProCarManuals.comMain Menu s t
Page 102 of 136
Appearance Care (cont'd)
Preventive Service
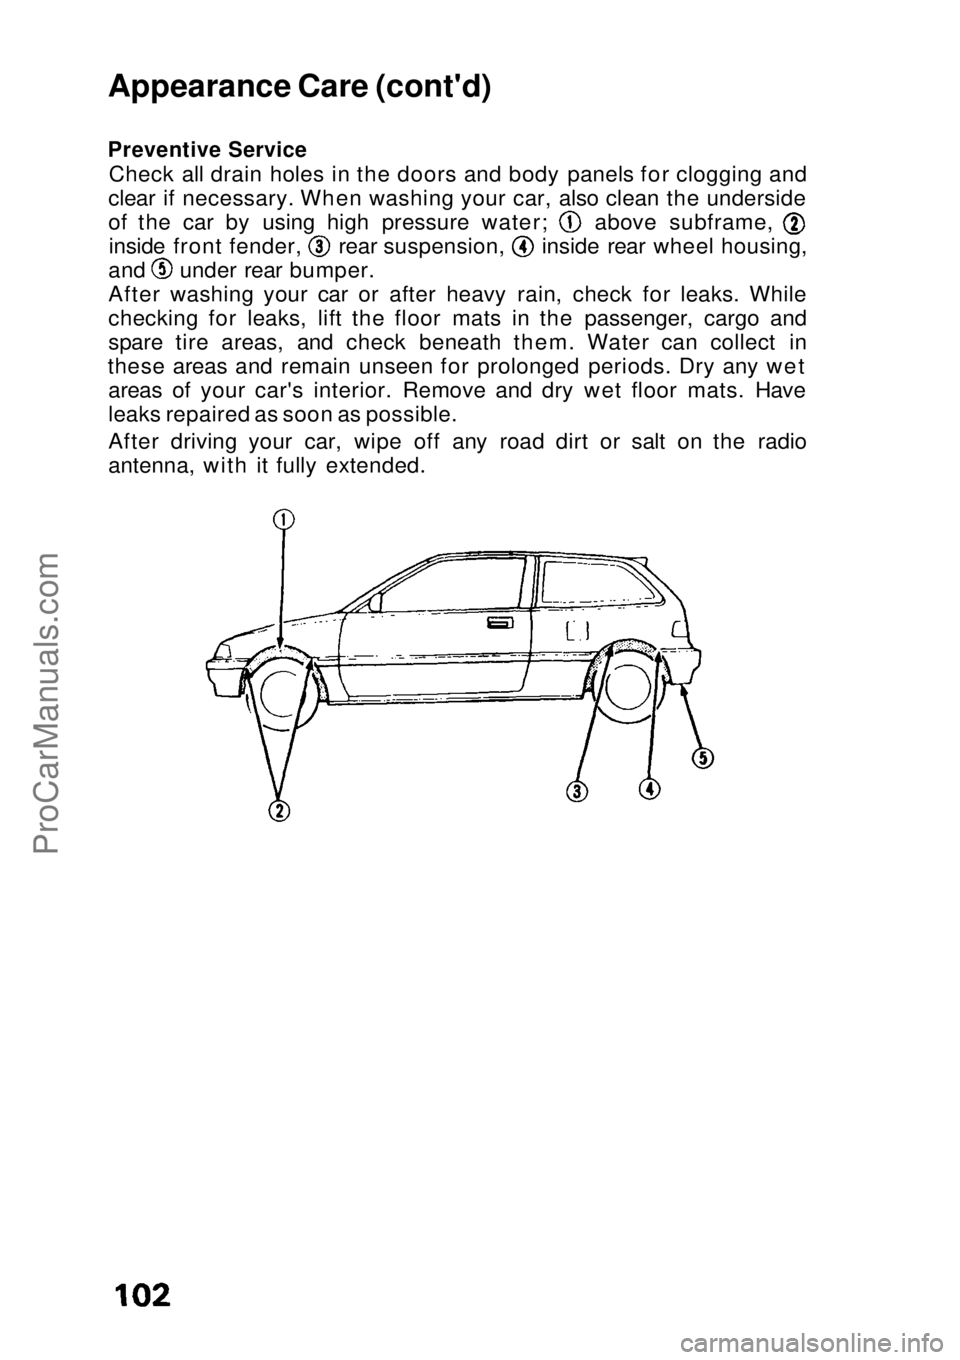
Check all drain holes in the doors and body panels for clogging and
clear if necessary. When washing your car, also clean the underside of the car by using high pressure water; above subframe,
inside front fender, rear suspension, inside rear wheel housing,
and under rear bumper.
After washing your car or after heavy rain, check for leaks. While
checking for leaks, lift the floor mats in the passenger, cargo and
spare tire areas, and check beneath them. Water can collect in
these areas and remain unseen for prolonged periods. Dry any wet areas of your car's interior. Remove and dry wet floor mats. Have
leaks repaired as soon as possible.
After driving your car, wipe off any road dirt or salt on the radio
antenna, with it fully extended.ProCarManuals.comMain Menu s t
Page 111 of 136
If towing is necessary, contact a professional towing service. Your
authorized Honda dealer can assist you with detailed towing
instructions.
Never use tow chains or rope to tow a car; your ability to safely
control the car may be adversely affected.
We recommend the following: Flat Bed Equipment —Entire car is winched on a flat bed vehicle.
This is the best way of transporting your Honda.
Wheel Lift Type—Tow with the front wheels off the ground.
If the car can only be towed with the front wheels on the ground:
make sure the transmission is full of fluid (see pages 78 — 79) and
tow with the transmission in neutral (N) and the ignition key in the 1
position.
CAUTION:
To avoid serious damage on automatic transmission cars, first
start the engine and shift to D4, then to N and shut the engine off. If the engine does not run or the transmission cannot be shifted
while the engine is running, the car must be transported on flat
bed equipment.
Check local regulations for towing.
CAUTION:
Do not exceed 35 mph (55 km/h) or tow for distances of more
than 50 miles (80 km).
If a sling type tow is used, the tow truck driver should position
wood spacer blocks between your car's frame and the chains
and lift straps to avoid damaging the bumper and the body. Do not use the bumpers to lift the car or to support the car's
weight while towing. TowingProCarManuals.comMain Menu s t