audio HONDA CIVIC 2014 9.G Owners Manual
[x] Cancel search | Manufacturer: HONDA, Model Year: 2014, Model line: CIVIC, Model: HONDA CIVIC 2014 9.GPages: 469, PDF Size: 17.32 MB
Page 1 of 469
ContentsThis owner’s manual should be considered a permanent part of the
vehicle and should remain with the vehicle when it is sold.
This owner’s manual covers all models of your vehicle. You may find
descriptions of equipment and features that are not on your
particular model.
Images throughout this owner’s manual (including the front cover)
represent features and equipment that are available on some, but
not all, models. Your particular model may not have some of these
features.
This owner’s manual is for vehicles sold in the United States and
Canada.
The information and specifications included in this publication were
in effect at the time of approval for printing. Honda Motor Co., Ltd.
reserves the right, however, to discontinue or change specifications
or design at any time without notice and without incurring any
obligation.
2Safe Driving P. 27For Safe Driving P. 28 Seat Belts P. 32 Airbags P. 392Instrument Panel P. 67Indicators P. 68 Gauges and Displays P. 822Controls P. 103Clock P. 104 Locking and Unlocking the Doors P. 106
Opening and Closing the Moonroof
* P. 130
Adjusting the Seats P. 146
Climate Control System
* P. 165
2 Features P. 169Audio System P. 170 Audio System Basic Operation P. 176, 179, 197
Customized Features
* P. 233 Bluetooth® HandsFreeLink ®
* P. 246, 277
2Driving P. 303Before Driving P. 304 Towing a Trailer P. 309
Rearview Camera
* P. 342 Refueling P. 343 Fuel Economy P. 346
2Maintenance P. 349Before Performing Maintenance P. 350 Maintenance Minder
TM P. 353
Checking and Maintaining Wiper Blades P. 389
Heating and Cooling System
*/Climate Control System
* Maintenance P. 403
2 Handling the Unexpected P. 409Tools P. 410 If a Tire Goes Flat P. 411
Overheating P. 433 Indicator, Coming On/Blinking P. 4352Information P. 443Specifications P. 444 Identification Numbers P. 448
Emissions Testing P. 451 Warranty Coverages P. 453
Page 2 of 469
Contents
Child Safety P. 52Exhaust Gas Hazard P. 64Safety Labels P. 65Opening and Closing the Trunk P. 121 Security System P. 125 Opening and Closing the Windows P. 128
Operating the Switches Around the Steering Wheel P. 131 Adjusting the Mirrors P. 144
Interior Lights/Interior Convenience Items P. 154 Heating and Cooling
* P. 161
Audio Error Messages P. 224General Information on the Audio System P. 230When Driving P. 313 Braking P. 337Parking Your Vehicle P. 341
Accessories and Modifications P. 347Maintenance Under the Hood P. 361 Replacing Light Bulbs P. 376
Checking and Maintaining Tires P. 391 Battery P. 400 Remote Transmitter Care
* P. 401
Cleaning P. 404
Engine Does Not Start P. 426 Jump Starting P. 429Shift Lever Does Not Move P. 432
Fuses P. 439 Emergency Towing P. 442Devices that Emit Radio Waves P. 449 Reporting Safety Defects P. 450
Authorized Manuals P. 455 Customer Service Information P. 456
Quick Reference Guide
P. 2
Safe Driving
P. 27
Instrument Panel
P. 67
Controls
P. 103
Features
P. 169
Driving
P. 303
Maintenance
P. 349
Handling the Unexpected
P. 409
Information
P. 443
Index
P. 457
Page 3 of 469
2Quick Reference Guide
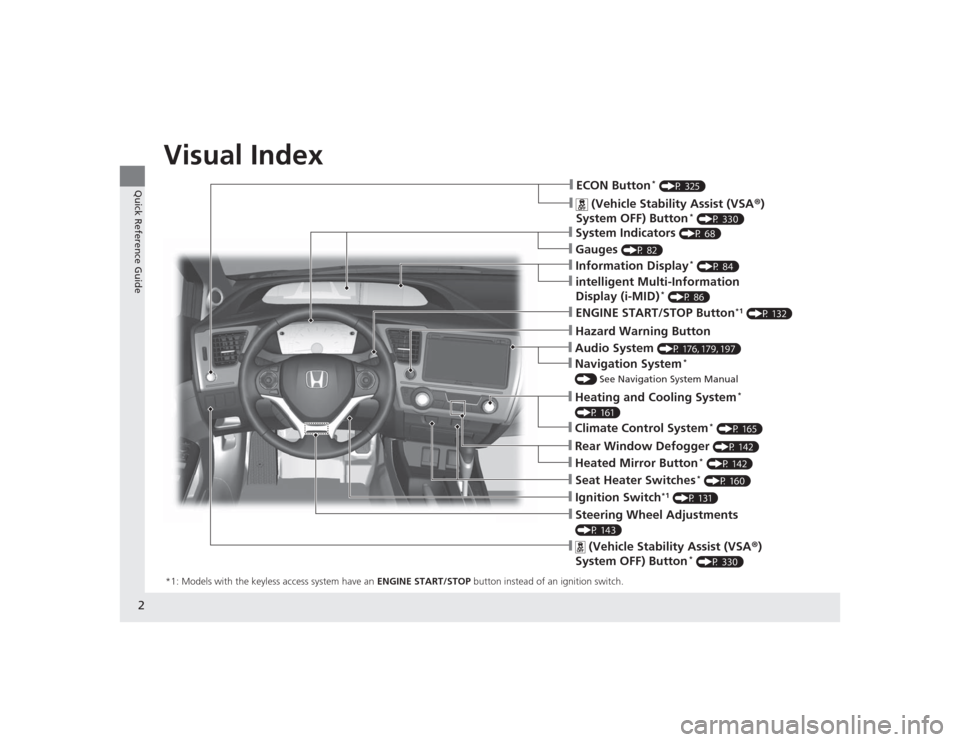
Quick Reference GuideVisual Index
❙Navigation System
*
() See Navigation System Manual❙Audio System
(P 176, 179, 197)
❙Hazard Warning Button❙Seat Heater Switches
* (P 160)
❙Ignition Switch
*1 (P 131)
❙Steering Wheel Adjustments (P 143)❙
(Vehicle Stability Assist (VSA ®)
System OFF) Button
* (P 330)
❙ECON Button
* (P 325)
❙
(Vehicle Stability Assist (VSA ®)
System OFF) Button
* (P 330)
❙Heating and Cooling System
*
(P 161)❙Climate Control System
* (P 165)
❙Rear Window Defogger
(P 142)
❙Heated Mirror Button
* (P 142)
❙System Indicators
(P 68)
❙Gauges
(P 82)
❙Information Display
* (P 84)
❙intelligent Multi-Information
Display (i-MID)
* (P 86)
❙ENGINE START/STOP Button
*1 (P 132)
*1: Models with the keyless access system have an ENGINE START/STOP button instead of an ignition switch.
Page 11 of 469
10Quick Reference Guide
Controls
(P 103)
Clock
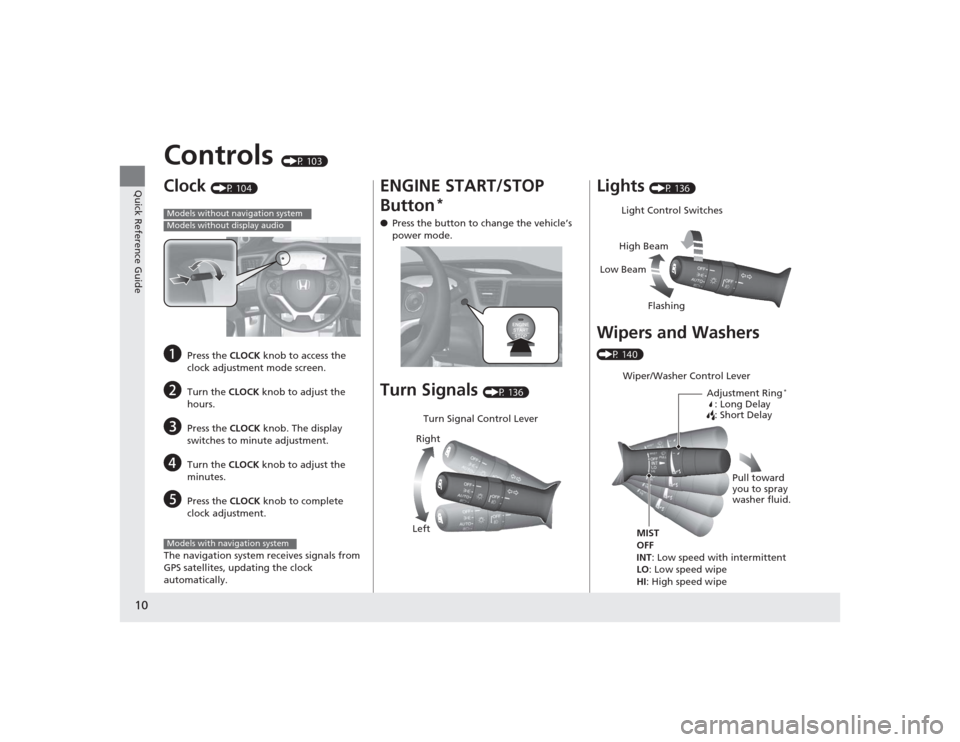
(P 104)
a
Press the CLOCK knob to access the
clock adjustment mode screen.
b
Turn the CLOCK knob to adjust the
hours.
c
Press the CLOCK knob. The display
switches to minute adjustment.
d
Turn the CLOCK knob to adjust the
minutes.
e
Press the CLOCK knob to complete
clock adjustment.
The navigation system receives signals from
GPS satellites, updating the clock
automatically.
Models without navigation systemModels without display audioModels with navigation system
ENGINE START/STOP
Button
*
● Press the button to change the vehicle’s
power mode.Turn Signals
(P 136)
Turn Signal Control Lever
Right
Left
Lights
(P 136)
Wipers and Washers (P 140)
Light Control Switches
Low Beam High Beam
FlashingWiper/Washer Control Lever Adjustment Ring
*
: Long Delay
: Short Delay
MIST
OFF
INT: Low speed with intermittent
LO: Low speed wipe
HI: High speed wipe Pull toward
you to spray
washer fluid.
Page 15 of 469
14Quick Reference Guide
Features
(P 169)
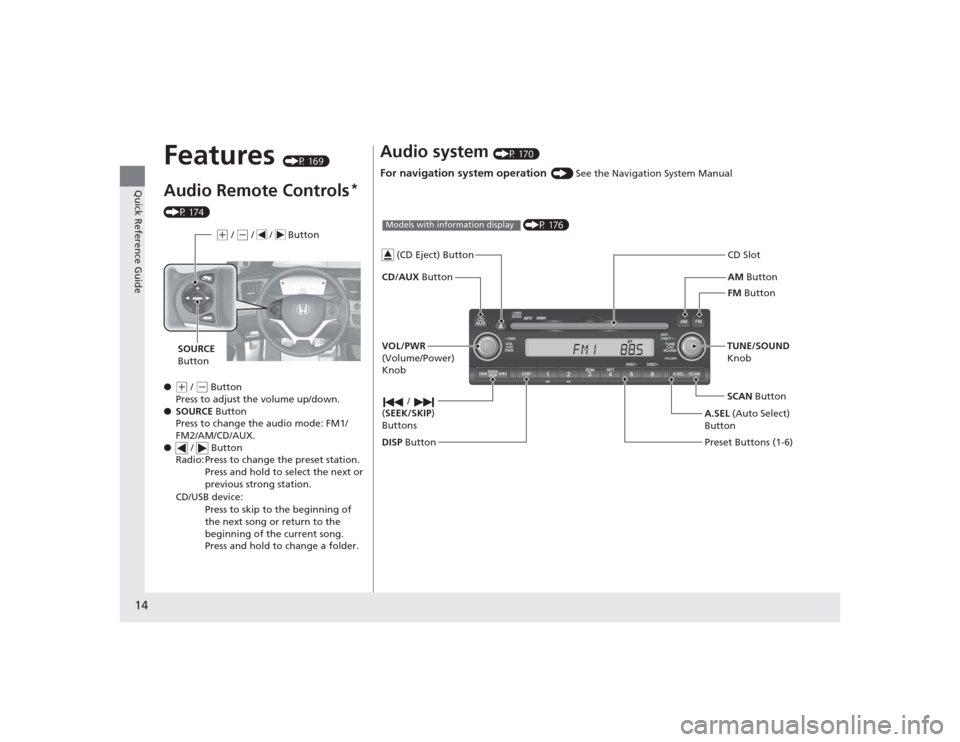
Audio Remote Controls
*
(P 174)
●
(+ / ( - Button
Press to adjust the volume up/down.
● SOURCE Button
Press to change the audio mode: FM1/
FM2/AM/CD/AUX.
● / Button
Radio: Press to change the preset station. Press and hold to select the next or
previous strong station.
CD/USB device: Press to skip to the beginning of
the next song or return to the
beginning of the current song.
Press and hold to change a folder.(+ / (- / / Button
SOURCE
Button
Audio system
(P 170)
For navigation system operation
() See the Navigation System Manual
AM Button
FM Button
CD/AUX
Button CD Slot
SCAN Button
Preset Buttons (1-6) TUNE/SOUND
Knob
/
( SEEK/SKIP )
Buttons
(P 176)
Models with information display
A.SEL (Auto Select)
Button
VOL/PWR
(Volume/Power)
Knob
DISP Button
(CD Eject) Button
Page 17 of 469
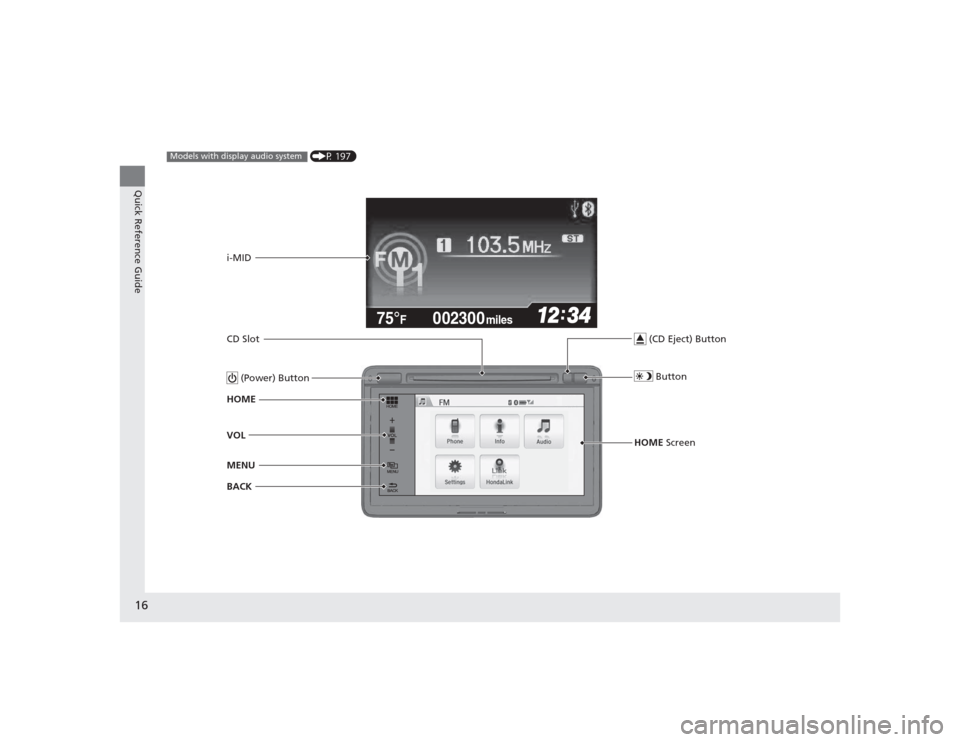
16Quick Reference Guide
002300
75°
F miles
(P 197)
Models with display audio system
MENU VOL HOME
BACK i-MID
(Power) ButtonCD Slot (CD Eject) Button
HOME Screen
Button
Page 87 of 469
86
uuGauges and Displays uintelligent Multi-Information Display (i-MID)
*
Instrument Panel
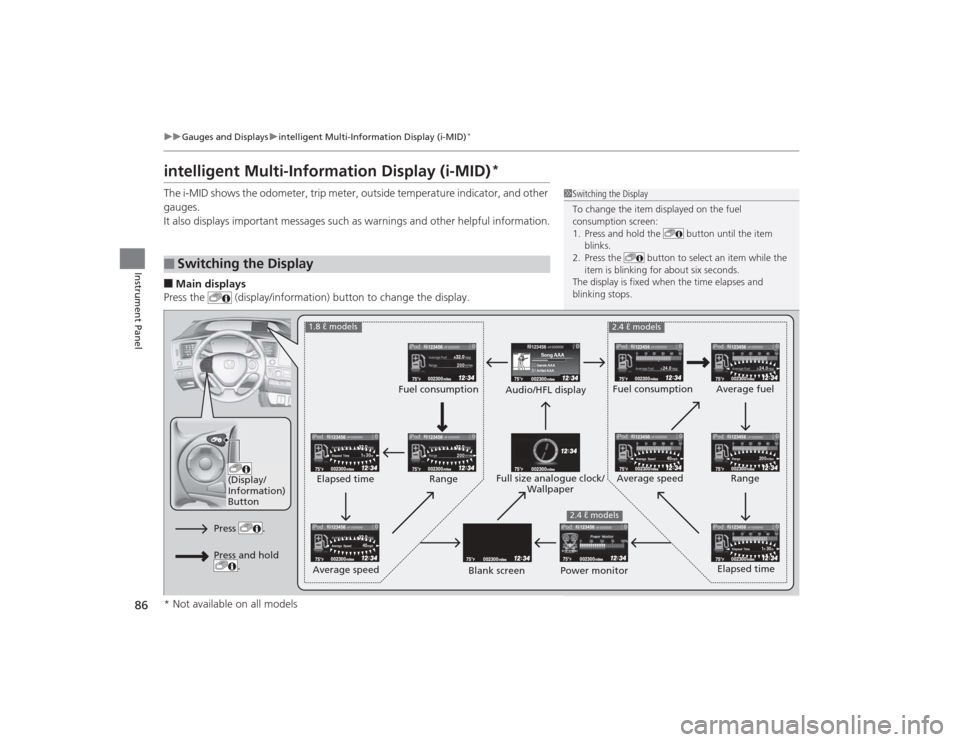
intelligent Multi-Information Display (i-MID)
*
The i-MID shows the odometer, trip meter, outside temperature indicator, and other
gauges.
It also displays important messages such as warnings and other helpful information.■Main displays
Press the (display/information) button to change the display.■
Switching the Display
1 Switching the Display
To change the item displayed on the fuel
consumption screen:
1. Press and hold the button until the item
blinks.
2. Press the button to select an item while the
item is blinking for about six seconds.
The display is fixed when the time elapses and
blinking stops.
123456Genre AAASong AAAArtist AAA
200200
1h 30m
Elapsed Time
1h 30m
Elapsed Time
24.0
24.0
40mph
Average Speed
40mph
Average Speed
200miles
Range
123456
123456123456
123456123456
123456
123456
123456
123456123456
(Display/
Information)
Button
Audio/HFL display Fuel consumption
Blank screen Full size analogue clock/
Wallpaper
2.4 ℓ models
Power monitor
1.8 ℓ models
2.4 ℓ models
Fuel consumption
Range
Elapsed time
Average speed Elapsed time
Average speed
Average fuel
Range
Press .Press and hold .
* Not available on all models
Page 105 of 469
104Controls
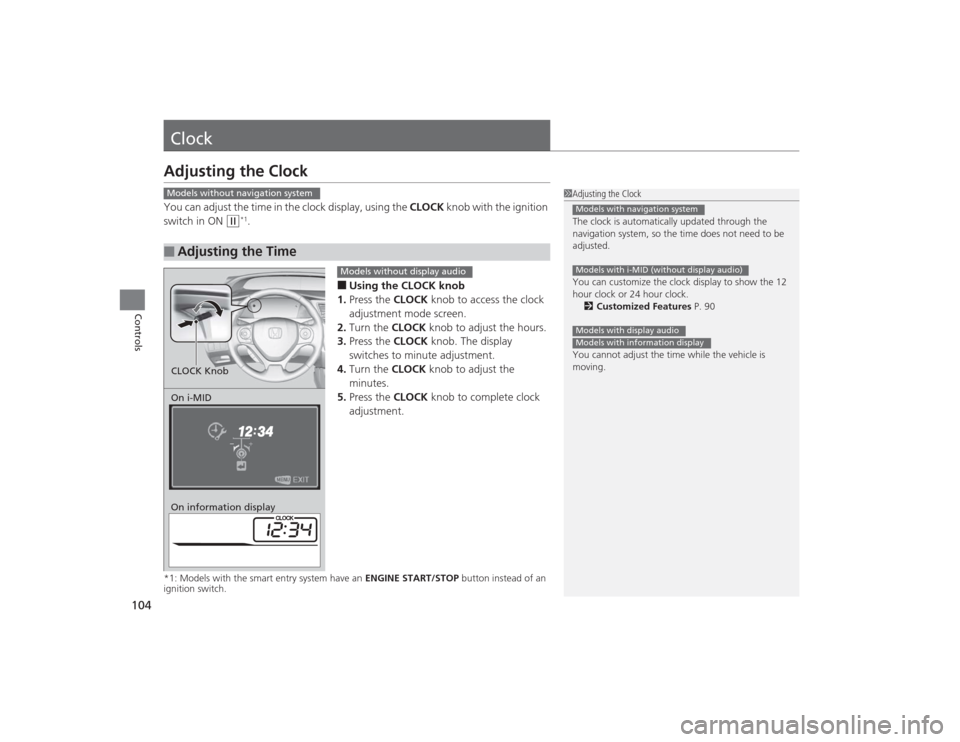
ClockAdjusting the ClockYou can adjust the time in the clock display, using the CLOCK knob with the ignition
switch in ON
(w
*1.
■Using the CLOCK knob
1. Press the CLOCK knob to access the clock
adjustment mode screen.
2. Turn the CLOCK knob to adjust the hours.
3. Press the CLOCK knob. The display
switches to minute adjustment.
4. Turn the CLOCK knob to adjust the
minutes.
5. Press the CLOCK knob to complete clock
adjustment.
*1: Models with the smart entry system have an ENGINE START/STOP button instead of an
ignition switch.■
Adjusting the Time
1 Adjusting the Clock
The clock is automatically updated through the
navigation system, so the time does not need to be
adjusted.
You can customize the clock display to show the 12
hour clock or 24 hour clock.
2 Customized Features P. 90
You cannot adjust the time while the vehicle is
moving.Models with navigation systemModels with i-MID (without display audio)Models with display audioModels with information display
Models without navigation systemOn i-MID
On information displayCLOCK Knob
Models without display audio
Page 106 of 469
105
uuClock uAdjusting the Clock
Controls
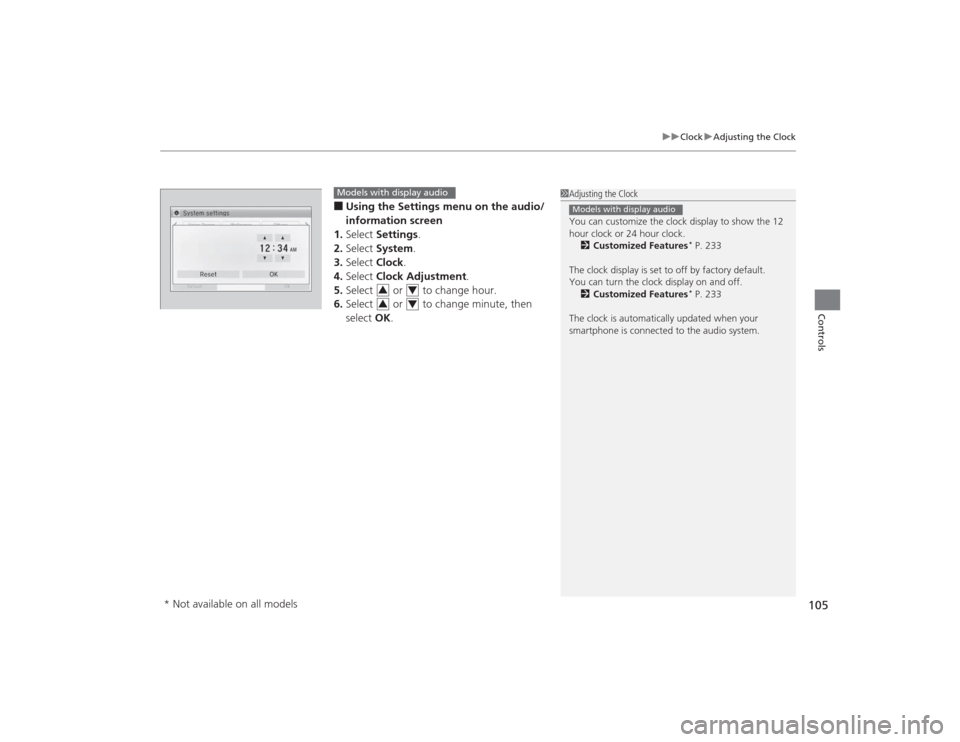
■Using the Settings menu on the audio/
information screen
1. Select Settings .
2. Select System.
3. Select Clock.
4. Select Clock Adjustment .
5. Select or to change hour.
6. Select or to change minute, then
select OK.
1Adjusting the Clock
You can customize the clock display to show the 12
hour clock or 24 hour clock.
2 Customized Features
* P. 233
The clock display is set to off by factory default.
You can turn the clock display on and off. 2 Customized Features* P. 233
The clock is automatically updated when your
smartphone is connected to the audio system.
Models with display audio
Models with display audio
3
4
3
4
* Not available on all models
Page 132 of 469
131Controls
Operating the Switches Around the Steering WheelIgnition Switch
*
1Ignition Switch
*
You cannot take the key out unless the shift lever is
in (P.
If you open the driver's door when the key is in LOCK
( 0 or ACCESSORY
(q, a warning buzzer will sound
to remind you to take the key out.
When this happens, the following messages appear
on the i-MID
*:
•In LOCK
( 0: REMOVE KEY .
•In ACCESSORY
(q: RETURN IGNITION SWITCH
TO LOCK (0) POSITION The buzzer will stop when
you take the key out.
If the key won't turn from LOCK
( 0 to ACCESSORY
(q, turn the key while moving the steering wheel left
and right. The steering wheel will unlock, allowing
the key to turn.
3
WARNING
Removing the key from the ignition switch
while driving locks the steering. This can
cause you to lose control of the vehicle.
Remove the key from the ignition switch
only when parked.Manual transmission modelsAutomatic transmission (CVT) modelsAll models
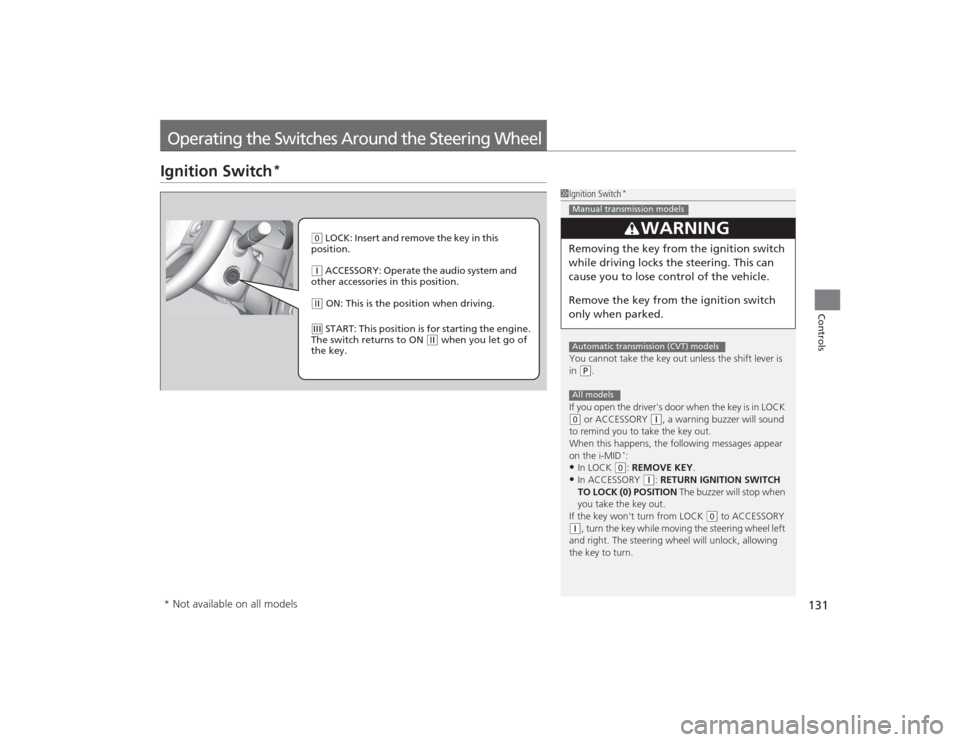
( 0 LOCK: Insert and remove the key in this
position.( q ACCESSORY: Operate the audio system and
other accessories in this position.( w ON: This is the position when driving.(e START: This position is for starting the engine.
The switch returns to ON
( w when you let go of
the key.
* Not available on all models