fuel pressure HONDA CIVIC COUPE 1998 Owners Manual
[x] Cancel search | Manufacturer: HONDA, Model Year: 1998, Model line: CIVIC COUPE, Model: HONDA CIVIC COUPE 1998Pages: 251, PDF Size: 2.04 MB
Page 53 of 251
Indicator Lights
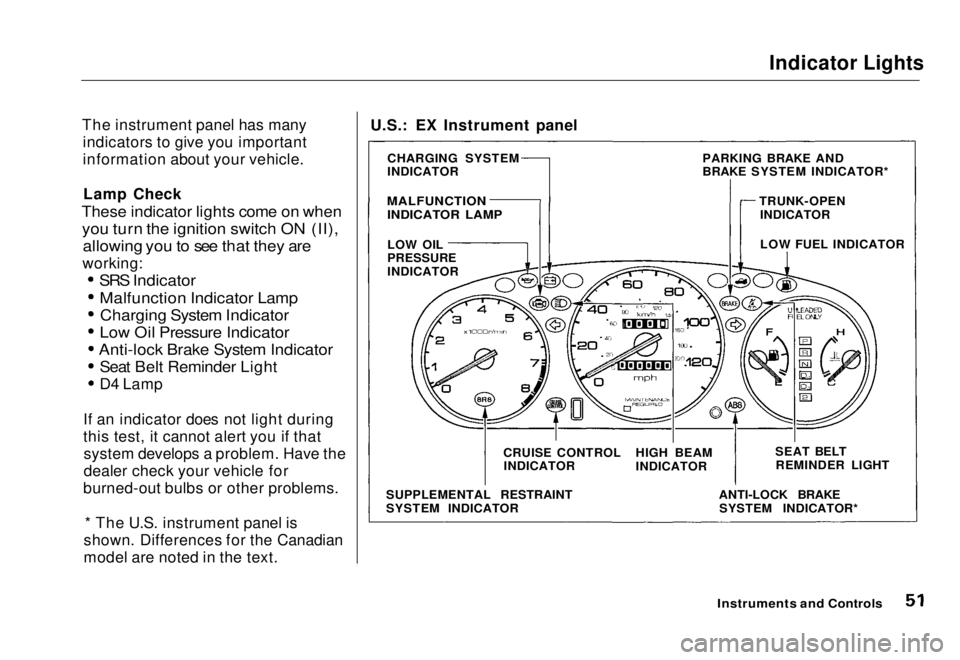
The instrument panel has many indicators to give you important
information about your vehicle.
Lamp Check
These indicator lights come on when
you turn the ignition switch ON (II), allowing you to see that they are
working:
SRS Indicator
Malfunction Indicator LampCharging System Indicator
Low Oil Pressure Indicator
Anti-lock Brake System Indicator
Seat Belt Reminder Light
D4 Lamp
If an indicator does not light during
this test, it cannot alert you if that system develops a problem. Have the
dealer check your vehicle for
burned-out bulbs or other problems.
* The U.S. instrument panel is
shown. Differences for the Canadian
model are noted in the text.
Instruments and Controls
U.S.: EX Instrument panel
CHARGING SYSTEM
INDICATOR
MALFUNCTION
INDICATOR LAMP
LOW OIL
PRESSURE
INDICATOR
SUPPLEMENTAL RESTRAINT
SYSTEM INDICATOR CRUISE CONTROL
INDICATOR HIGH BEAM
INDICATOR
ANTI-LOCK BRAKESYSTEM INDICATOR* SEAT BELT
REMINDER LIGHT
LOW FUEL INDICATOR
PARKING BRAKE AND
BRAKE SYSTEM INDICATOR*
TRUNK-OPENINDICATORMain Menu Table of Contents s t
Page 54 of 251
Indicator Lights
* Differences in the indicators for Canadian models are noted in the text.
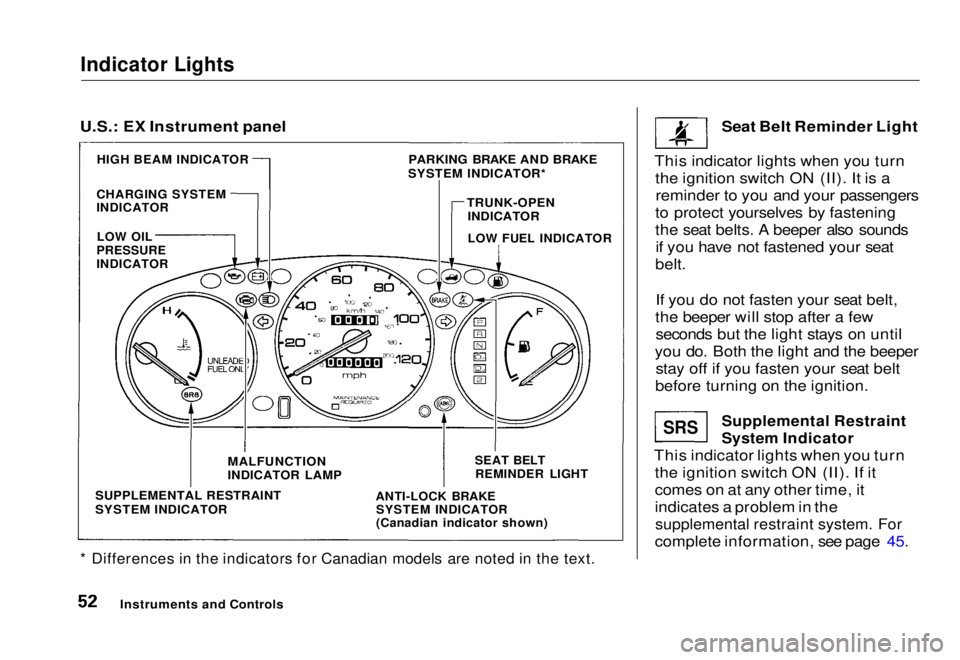
Seat Belt Reminder Light
This indicator lights when you turn the ignition switch ON (II). It is areminder to you and your passengers
to protect yourselves by fastening
the seat belts. A beeper also sounds if you have not fastened your seat
belt.
If you do not fasten your seat belt,
the beeper will stop after a few seconds but the light stays on until
you do. Both the light and the beeper stay off if you fasten your seat belt
before turning on the ignition.
Supplemental Restraint
System Indicator
This indicator lights when you turn the ignition switch ON (II). If it
comes on at any other time, it
indicates a problem in the
supplemental restraint system. For
complete information, see page 45.
Instruments and Controls
SRS
U.S.: EX Instrument panel
PARKING BRAKE AND BRAKE
SYSTEM INDICATOR*
HIGH BEAM INDICATOR
CHARGING SYSTEM
INDICATOR
TRUNK-OPEN
INDICATOR
LOW FUEL INDICATOR
LOW OIL
PRESSURE
INDICATOR
SUPPLEMENTAL RESTRAINT
SYSTEM INDICATOR
MALFUNCTION
INDICATOR LAMP
ANTI-LOCK BRAKE
SYSTEM INDICATOR
(Canadian indicator shown)
SEAT BELT
REMINDER LIGHTMain Menu Table of Contents s t
Page 111 of 251
Service Station Procedures
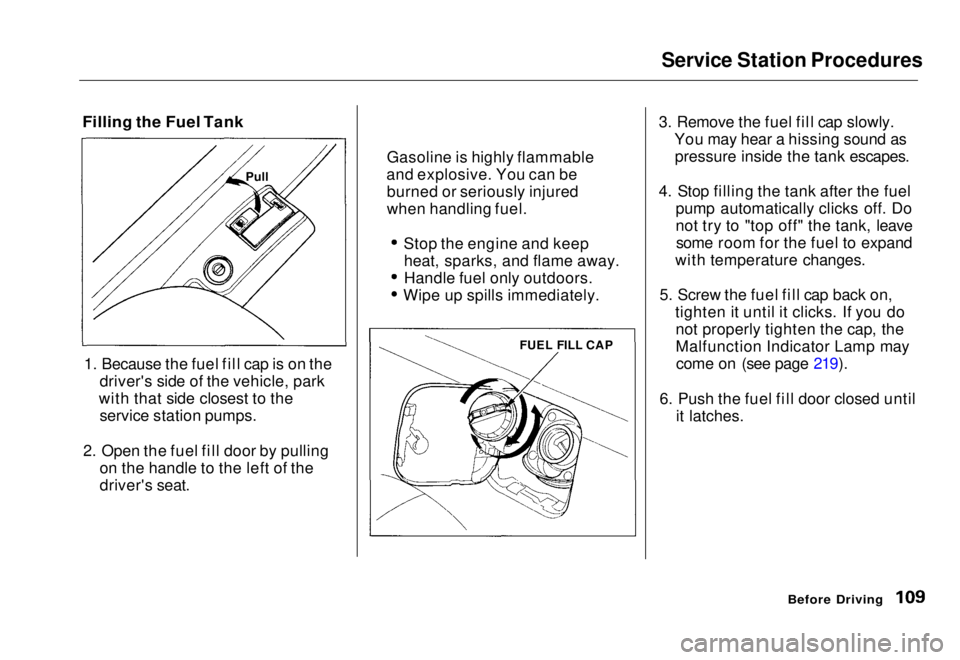
Filling the Fuel Tank
1. Because the fuel fill cap is on the driver's side of the vehicle, park
with that side closest to the service station pumps.
2. Open the fuel fill door by pulling on the handle to the left of the
driver's seat. 3. Remove the fuel fill cap slowly.
You may hear a hissing sound aspressure inside the tank escapes.
4. Stop filling the tank after the fuel pump automatically clicks off. Do
not try to "top off" the tank, leavesome room for the fuel to expand
with temperature changes.
5. Screw the fuel fill cap back on, tighten it until it clicks. If you donot properly tighten the cap, the
Malfunction Indicator Lamp maycome on (see page 219).
6. Push the fuel fill door closed until it latches.
Before Driving
Gasoline is highly flammable
and explosive. You can be burned or seriously injured
when handling fuel.
Stop the engine and keepheat, sparks, and flame away.
Handle fuel only outdoors. Wipe up spills immediately.
Pull
FUEL FILL CAPMain Menu Table of Contents s t
Page 115 of 251
Fuel Economy
The condition of your vehicle and your driving habits are the two mostimportant things that affect the fuel
mileage you get.
Vehicle Condition Always maintain your vehicle accord- ing to the maintenance schedule.
This will keep it in top operating
condition.
An important part of that mainte- nance is the Owner Maintenance
Checks (see page 153). For
example, an underinflated tire
causes more "rolling resistance,"
which uses fuel. It also wears out
faster, so check the tire pressure at
least monthly.
In winter, the build-up of snow on
your vehicle's underside adds weight and rolling resistance. Frequent
cleaning helps your fuel mileage and
reduces the chance of corrosion. Driving Habits
You can improve fuel economy by driving moderately. Rapid acceler-
ation, abrupt cornering, and hard
braking use more fuel.
Always drive in the highest gear that allows the engine to run and acceler-ate smoothly.
Depending on traffic conditions, try
to maintain a constant speed. Every time you slow down and speed up,
your vehicle uses extra fuel. Use the cruise control, when appropriate, to
increase fuel economy. A cold engine uses more fuel than a
warm engine. It is not necessary to "warm-up" a cold engine by letting it
idle for a long time. You can drive
away in about a minute, no matter
how cold it is outside. The engine
will warm up faster, and you get better fuel economy. To cut down on
the number of "cold starts," try tocombine several short trips into one.
The air conditioning puts an extra load on the engine which makes ituse more fuel. Turn off the A/C to
cut down on air conditioning use.
Use the flow-through ventilation
when the outside air temperature is moderate.
Before DrivingMain Menu Table of Contents s t
Page 154 of 251
Owner Maintenance Checks
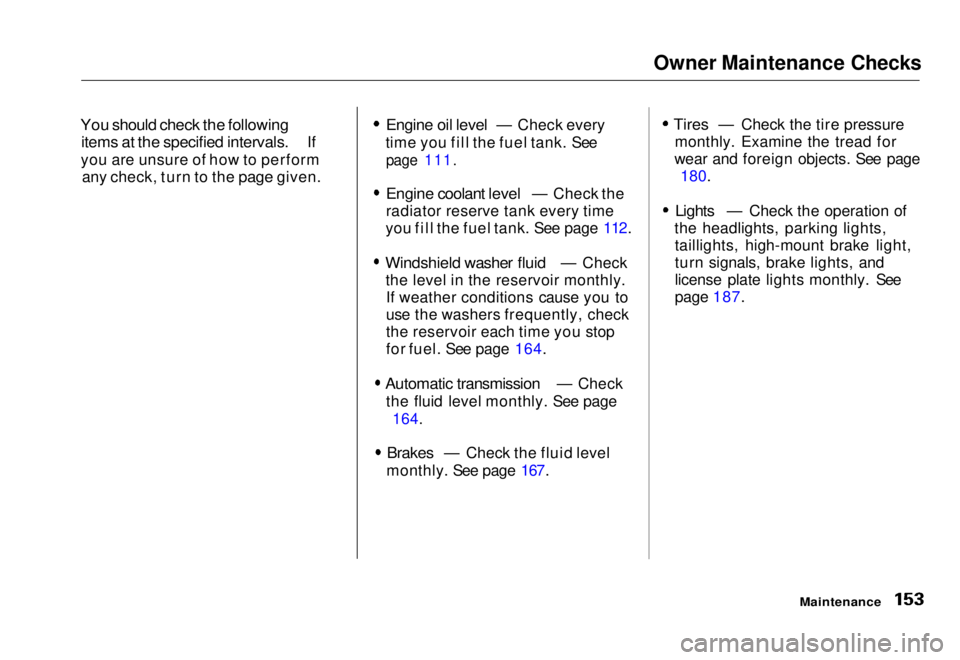
You should check the following
items at the specified intervals.
If
you are
unsure of how to perform
any check, turn to the
page given.
Engine oil level
— Check every
time you
fill the fuel tank. See
page 111.
Engine coolant level
— Check the
radiator reserve
tank every time
you fill the fuel tank. See page 112.
Windshield washer fluid
— Check
the level
in the reservoir monthly.
If weather conditions cause you to
use the washers frequently, check
the reservoir each time you stop
for fuel. See page 164.
Automatic transmission
— Check
the flui d
level monthly. See page
164.
Brakes — Check the fluid level
monthly. Se e
page 167.
Tires
— Check the tire pressure
monthly. Examin e
the tread for
wear and foreign objects. See page 180.
Lights — Check the operation of
the headlights ,
parking lights,
taillights, high-mount brake light,
turn signals, brake lights, and
license plate lights monthly. See
page 187.
MaintenanceMain Menu Table of Contents s t
Page 180 of 251
Tires
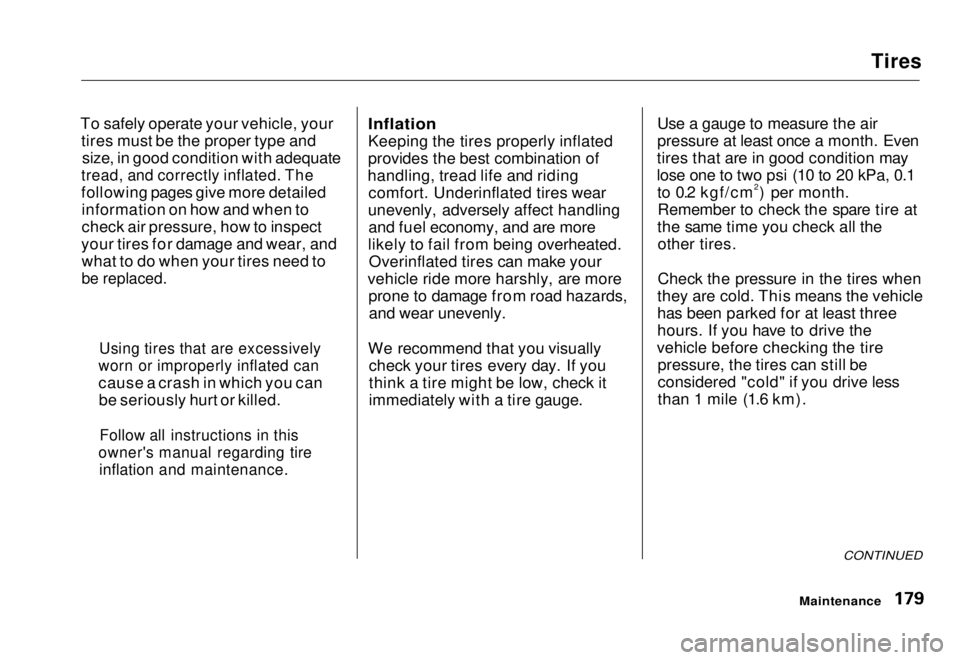
To safely operate your vehicle, your tires must be the proper type andsize, in good condition with adequate
tread, and correctly inflated. The
following pages give more detailed information on how and when to
check air pressure, how to inspect
your tires for damage and wear, and what to do when your tires need to
be replaced.
Inflation
Keeping the tires properly inflated
provides the best combination of
handling, tread life and riding comfort. Underinflated tires wear
unevenly, adversely affect handling and fuel economy, and are more
likely to fail from being overheated. Overinflated tires can make your
vehicle ride more harshly, are more prone to damage from road hazards,and wear unevenly.
We recommend that you visually check your tires every day. If you
think a tire might be low, check it
immediately with a tire gauge. Use a gauge to measure the air
pressure at least once a month. Even
tires that are in good condition may
lose one to two psi (10 to 20 kPa, 0.1 to 0.2 kgf/cm2) per month.Remember to check the spare tire at
the same time you check all the other tires.
Check the pressure in the tires when
they are cold. This means the vehicle
has been parked for at least three
hours. If you have to drive the
vehicle before checking the tire pressure, the tires can still be
considered "cold" if you drive less
than 1 mile (1.6 km).
CONTINUED
Maintenance
Using tires that are excessively
worn or improperly inflated can
cause a crash in which you can be seriously hurt or killed.
Follow all instructions in this
owner's manual regarding tire
inflation and maintenance.Main Menu Table of Contents s t
Page 229 of 251
Technical Information
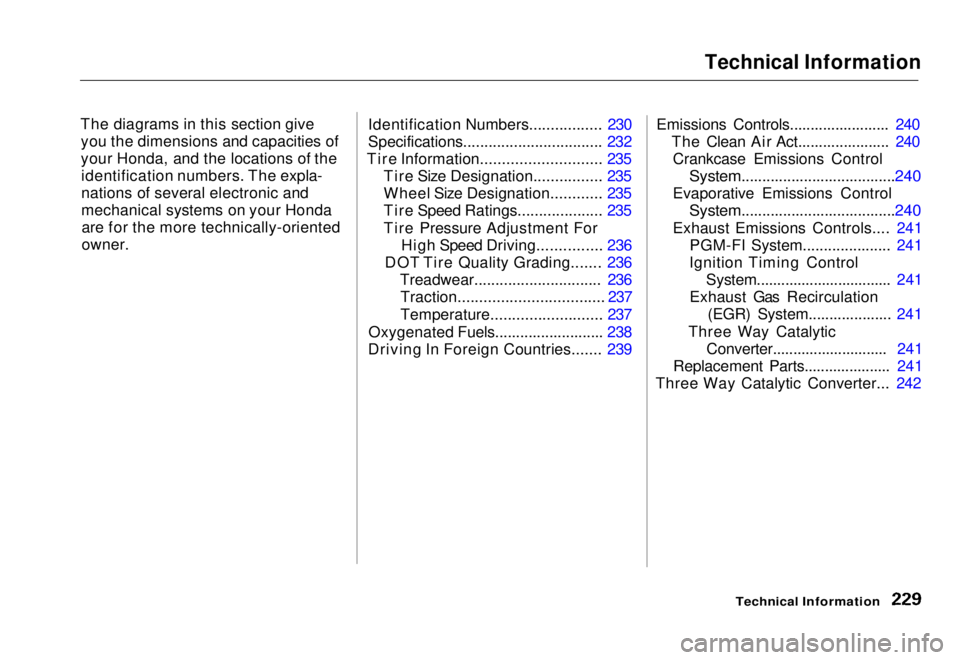
The diagrams in this section give you the dimensions and capacities of
your Honda, and the locations of theidentification numbers. The expla-
nations of several electronic and
mechanical systems on your Hondaare for the more technically-oriented
owner. Identification Numbers................. 230
Specifications................................. 232
Tire Information............................ 235 Tire Size Designation................ 235
Wheel Size Designation............ 235
Tire Speed Ratings.................... 235
Tire Pressure Adjustment For High Speed Driving............... 236
DOT Tire Quality Grading....... 236 Treadwear.............................. 236Traction.................................. 237
Temperature.......................... 237
Oxygenated Fuels.......................... 238
Driving In Foreign Countries....... 239 Emissions Controls........................ 240
The Clean Air Act...................... 240Crankcase Emissions Control
System.....................................240
Evaporative Emissions Control
System.....................................240
Exhaust Emissions Controls.... 241 PGM-FI System..................... 241
Ignition Timing Control System................................. 241
Exhaust Gas Recirculation (EGR) System.................... 241
Three Way Catalytic Converter............................ 241
Replacement Parts..................... 241
Three Way Catalytic Converter... 242
Technical InformationMain Menu s t
Page 246 of 251
Gasoline:
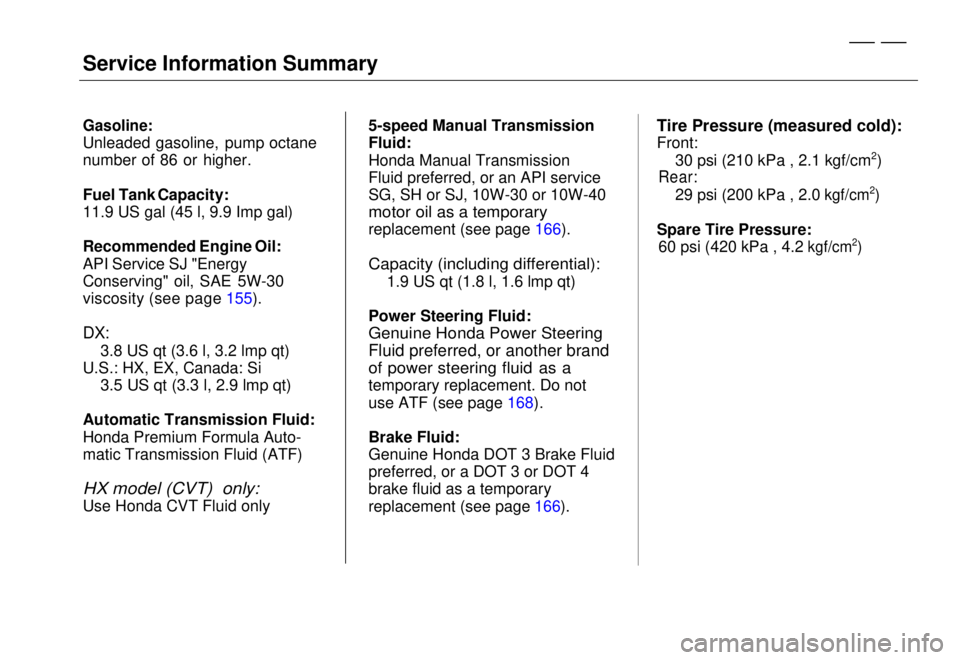
Unleaded gasoline, pump octane
number of 86 or higher.
Fuel Tank Capacity:
11.9 US gal (45 l, 9.9 Imp gal)
Recommended Engine Oil:
API Service SJ "Energy
Conserving" oil, SAE 5W-30
viscosity (see page 155).
DX:
3.8 US qt (3.6 l, 3.2 lmp qt)
U.S.: HX, EX, Canada: Si
3.5 US qt (3.3 l, 2.9 lmp qt)
Automatic Transmission Fluid:
Honda Premium
Formula Auto-
matic Transmission Fluid (ATF)
HX model (CVT)
only:
Use Honda CVT Fluid only 5-speed Manual Transmission
Fluid:
Honda Manual Transmission
Fluid preferred, or an API service
SG, SH or SJ,
10W-30 or 10W-40
motor oil as a temporary
replacement (see page 166).
Capacity (including differential):
1.9 US qt (1.8 l, 1.6 lmp qt)
Power Steering Fluid:
Genuine Honda Power Steering
Fluid preferred, or another brand
of power steering fluid as a
temporary replacement. Do not
use ATF (see page 168).
Brake
Fluid:
Genuine Honda DOT 3 Brake Fluid
preferred, or a DOT 3 or DOT 4
brake fluid as a temporary
replacement (see page
166).
Tire Pressure (measured cold):
Front:
30 psi (210 kPa , 2.1 kgf/cm2)
Rear:
29 psi (200 kPa , 2.0
kgf/cm2
)
Spare Tire Pressure:
60 psi (420 kPa , 4.2
kgf/cm 2
)
Service
Information SummaryMain Menu s t
Page 249 of 251
Index
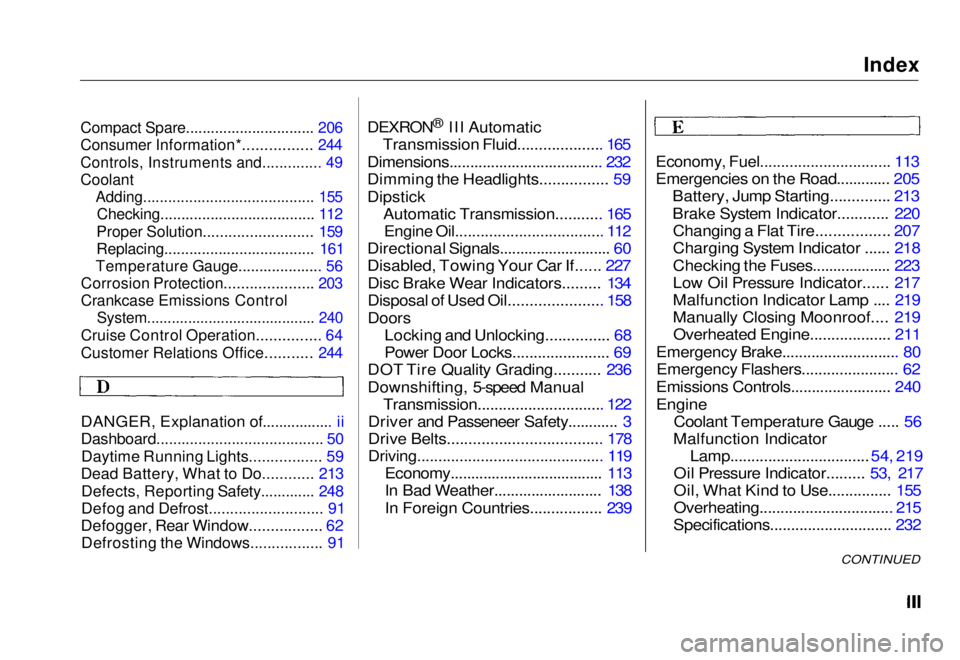
Compact Spare............................... 206
Consumer Information*................ 244
Controls, Instruments and.............. 49
Coolant
Adding......................................... 155
Checking..................................... 112
Proper Solution.......................... 159
Replacing.................................... 161
Temperature Gauge.................... 56
Corrosion Protection..................... 203
Crankcase Emissions Control
System......................................... 240
Cruise Control Operation............... 64
Customer Relations Office........... 244
DANGER, Explanation of................. ii
Dashboard........................................ 50
Daytime Running Lights................. 59
Dead Battery, What to Do............ 213
Defects, Reporting Safety............. 248
Defog and Defrost........................... 91
Defogger, Rear Window................. 62
Defrosting the Windows................. 91
DEXRON
®
III Automatic
Transmission Fluid.................... 165
Dimensions..................................... 232
Dimming the Headlights................ 59
Dipstick Automatic Transmission........... 165
Engine Oil................................... 112
Directional Signals........................... 60
Disabled, Towing Your Car If...... 227
Disc Brake Wear Indicators......... 134
Disposal of Used Oil...................... 158
Doors
Locking and Unlocking............... 68
Power Door Locks....................... 69
DOT Tire Quality Grading........... 236
Downshifting, 5-speed Manual Transmission.............................. 122
Driver and Passeneer Safety............ 3
Drive Belts.................................... 178
Driving............................................ 119
Economy..................................... 113
In Bad Weather.......................... 138
In Foreign Countries................. 239
Economy, Fuel............................... 113
Emergencies on the Road............. 205
Battery, Jump Starting.............. 213
Brake System Indicator............ 220Changing a Flat Tire................. 207
Charging System Indicator ...... 218
Checking the Fuses................... 223
Low Oil Pressure Indicator...... 217
Malfunction Indicator Lamp .... 219
Manually Closing Moonroof.... 219Overheated Engine................... 211
Emergency Brake............................ 80 Emergency Flashers....................... 62
Emissions Controls........................ 240
Engine
Coolant Temperature Gauge ..... 56
Malfunction Indicator
Lamp.................................
54, 219
Oil Pressur e
Indicator......... 53,
217
Oil, Wha
t
Kind to Use............... 155
Overheating................................ 215
Specifications............................. 232
CONTINUEDMain Menu s t
Page 251 of 251
Index
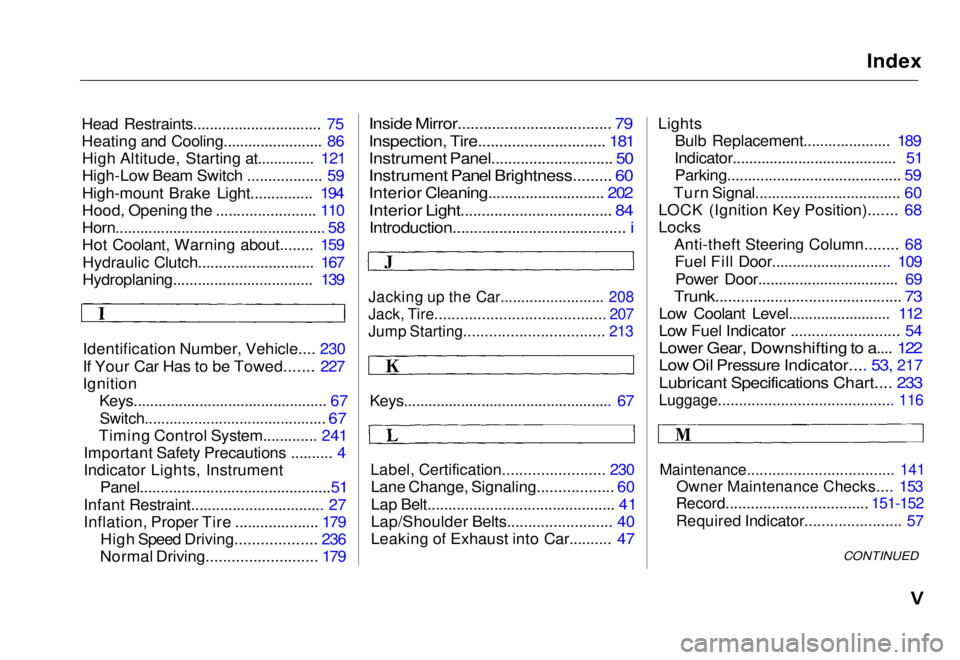
Head Restraints............................... 75
Heating and Cooling........................ 86 High Altitude, Starting at.............. 121
High-Low Beam Switch .................. 59
High-mount Brake Light............... 194
Hood, Opening the ........................ 110
Horn................................................... 58
Hot Coolant, Warning about........ 159
Hydraulic Clutch............................ 167
Hydroplaning.................................. 139
Identification Number, Vehicle.... 230
If Your Car Has to be Towed....... 227
Ignition
Keys............................................... 67
Switch............................................ 67
Timing Contro l
System............. 241
Important Safety Precautions .......... 4
Indicator Lights, Instrument
Panel..............................................51
Infant Restraint................................ 27
Inflation, Proper Tire .................... 179 High Speed Driving................... 236
Normal Driving.......................... 179
Inside Mirror.................................... 79
Inspection, Tire.............................. 181
Instrument Panel............................. 50
Instrument Panel Brightness......... 60
Interior Cleaning............................ 202
Interior Light.................................... 84
Introduction......................................... i
Jacking up the Car......................... 208
Jack, Tire........................................ 207
Jump Starting................................. 213
Keys................................................... 67
Label, Certification........................ 230
Lane Change, Signaling.................. 60
Lap Belt............................................. 41
Lap/Shoulder Belts......................... 40
Leaking of Exhaust into Car.......... 47 Lights
Bulb Replacement..................... 189
Indicator........................................ 51 Parking.......................................... 59
Turn Signal................................... 60
LOCK (Ignition Key Position)....... 68
Locks
Anti-theft Steering Column........ 68Fuel Fill Door............................. 109
Power Door.................................. 69
Trunk............................................ 73
Low Coolant Level......................... 112
Low Fuel Indicator .......................... 54
Lower Gear, Downshifting to a.... 122
Low Oil Pressure Indicator.... 53,
217
Lubricant Specification s
Chart.... 233
Luggage.......................................... 116
Maintenance................................... 141
Owner Maintenance Checks.... 153
Record.................................. 151-152
Required Indicator....................... 57
CONTINUEDMain Menu s t