clutch HONDA CIVIC COUPE 1999 Owners Manual
[x] Cancel search | Manufacturer: HONDA, Model Year: 1999, Model line: CIVIC COUPE, Model: HONDA CIVIC COUPE 1999Pages: 269, PDF Size: 2.42 MB
Page 68 of 269
Steering Wheel Controls
cruise control. To resume the set
speed, press and hold the
RESUME/accel button until the
CRUISE CONTROL light on the
instrument panel comes on. When
climbing a steep hill, the automatic
transmission may downshift to
hold the set speed.
Changing the Set Speed
You can increase the set cruising speed in any of these ways: Press and hold the RESUME/
accel button. The car will acceler-
ate. When you reach the desired
cruising speed, release the button. Push on the accelerator pedal. Ac-
celerate to the desired cruising
speed and press the SET/decel
button.
To increase your speed in very
small amounts, tap the RESUME/
accel button repeatedly. Each time you do this, your vehicle will go
about 1 mph (1.6 km/h) faster.
You can decrease the set cruising speed in any of these ways: Press and hold the SET/decel
button. The car will decelerate. Release the button when you
reach the desired speed. To slow down in very small
amounts, tap the SET/decel
button repeatedly. Each time you do this, your vehicle will go about 1 mph (1.6 km/h) slower. Tap the brake or clutch pedal
lightly with your foot. TheCRUISE CONTROL light on the
instrument panel will go out.
When the car slows to the desired speed, press the SET/decel button.
The car will then maintain the desired speed.
CONTINUED
Instruments and Controls
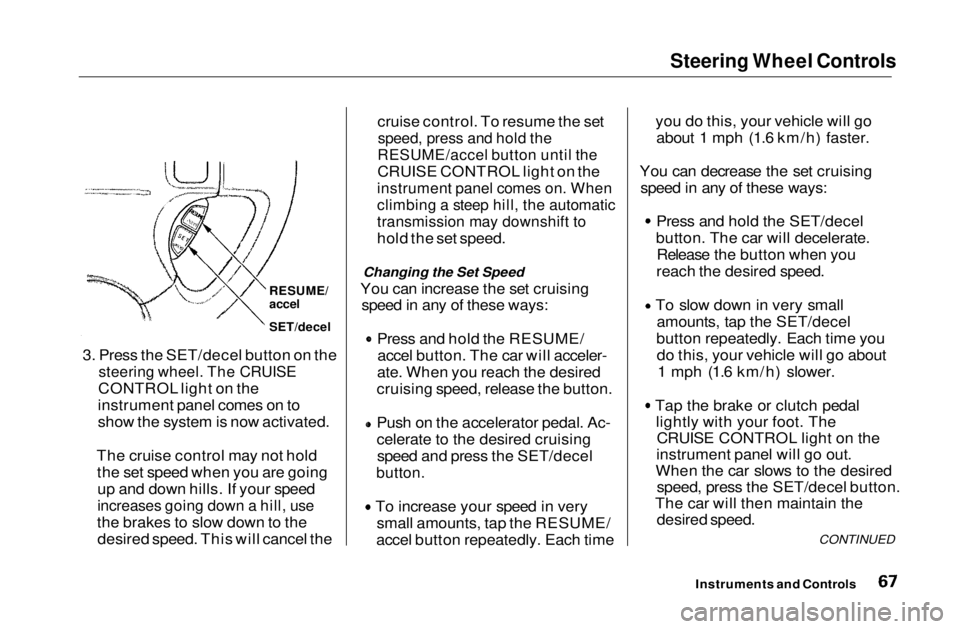
3. Press the SET/decel button on the
steering wheel. The CRUISE
CONTROL light on the
instrument panel comes on to
show the system is now activated.
The cruise control may not hold the set speed when you are goingup and down hills. If your speed
increases going down a hill, use
the brakes to slow down to the desired speed. This will cancel the
RESUME/
accel
SET/decelMain Menu Table of Contents s t
Page 69 of 269
Steering Wheel Controls
Even with the cruise control turned
on, you can still use the accelerator
pedal to speed up for passing. After
completing the pass, take your foot
off the accelerator pedal. The car
will return to the set cruising speed.
Resting your foot on the brake or
clutch pedal will cause the cruise
control to cancel. Cancelling the Cruise Control
You can cancel the cruise control in any of these ways: Tap the brake or clutch pedal.
Press the SET/decel and RE-
SUME/accel buttons at the same
time.
Press the Cruise Control Master
Switch.
When you tap the brake or clutch pedal, or press the SET and RE-SUME buttons at the same time, the
CRUISE CONTROL light on the
instrument panel will go out and thecar will begin to slow down. You can
use the accelerator pedal in the
normal way.
The system remembers the previously-set cruising speed. To
return to that speed, accelerate toabove 25 mph (40 km/h) and press
the RESUME/accel button until the
CRUISE CONTROL light comes on.
The car will accelerate to the same cruising speed as before.
Pressing the Cruise Control Master
Switch turns the system completely off and erases the previous cruising
speed from memory. To use the
system again, refer to Using the
Cruise Control.
Instruments and ControlsMain Menu Table of Contents s t
Page 137 of 269

Starting the Engine
1. Apply the parking brake.
2. In cold weather, turn off all
electrical accessories to reduce
the drain on the battery.
3. Manual Transmission:
Push the clutch pedal down all the
way. START (III) does not function unless the clutch pedal is
depressed.
Automatic Transmission (Including
CVT):
Make sure the shift lever is in
Park. Press on the brake pedal.
4. Without touching the accelerator
pedal, turn the ignition key to the
START (III) position. If the enginedoes not start right away, do not
hold the key in START (III) for
more than 15 seconds at a time.
Pause for at least 10 seconds
before trying again.
5. If the engine does not start within
15 seconds, or starts but stalls
right away, repeat step 4 with the accelerator pedal pressed half-way
down. If the engine starts, release
pressure on the accelerator pedalso the engine does not race.
6. If the engine still does not start, press the accelerator pedal all the
way down and hold it there while starting in order to clear flooding.
As before, keep the ignition key in the START (III) position for nomore than 15 seconds. Return tostep 5 if the engine does not start.
If it starts, lift your foot off the
accelerator pedal so the engine does not race.
Starting in Cold Weather at High
Altitude (Above 8,000 feet/
2,400 meters)
An engine is harder to start in cold weather. The thinner air found at
high altitude above 8,000 feet (2,400 meters) adds to the problem.
Use the following procedure:
1. Turn off all electrical accessories to reduce the drain on the battery.
2. Push the accelerator pedal half- way to the floor and hold it there
while starting the engine. Do nothold the ignition key in START (III) for more than 15 seconds.
When the engine starts, release the accelerator pedal gradually as
the engine speeds up and smoothsout.
3. If the engine fails to start in step 2, push the accelerator pedal to the
floor and hold it there while you try to start the engine for no more
than 15 seconds. If the enginedoes not start, return to step 2.
DrivingMain Menu Table of Contents s t
Page 138 of 269
5-speed Manual Transmission
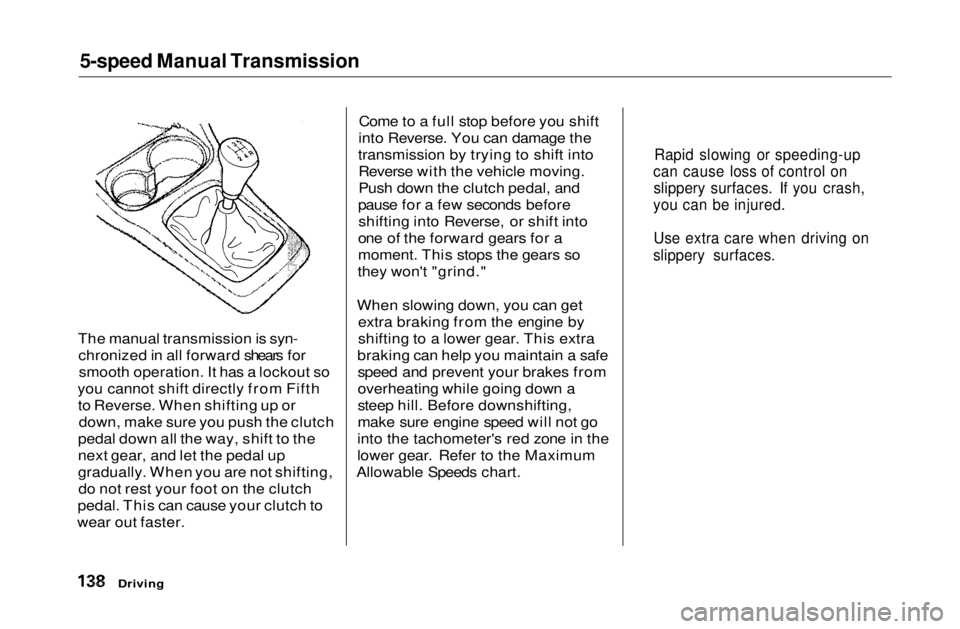
The manual transmission is syn- chronized in all forward shears forsmooth operation. It has a lockout so
you cannot shift directly from Fifth to Reverse. When shifting up or down, make sure you push the clutch
pedal down all the way, shift to the
next gear, and let the pedal up
gradually. When you are not shifting, do not rest your foot on the clutch
pedal. This can cause your clutch to
wear out faster. Come to a full stop before you shift
into Reverse. You can damage the
transmission by trying to shift into Reverse with the vehicle moving.
Push down the clutch pedal, and
pause for a few seconds before shifting into Reverse, or shift into
one of the forward gears for a
moment. This stops the gears so
they won't "grind."
When slowing down, you can get extra braking from the engine by
shifting to a lower gear. This extra
braking can help you maintain a safe speed and prevent your brakes from
overheating while going down a
steep hill. Before downshifting,
make sure engine speed will not go
into the tachometer's red zone in the
lower gear. Refer to the Maximum
Allowable Speeds chart.
Driving
Rapid slowing or speeding-up
can cause loss of control on slippery surfaces. If you crash,
you can be injured.
Use extra care when driving on
slippery surfaces.Main Menu Table of Contents s t
Page 156 of 269
Maintenance
This section explains why it is important to keep your car wellmaintained and to follow basic
maintenance safety precautions.
This section also includes Maintenance Schedules for normal
driving and severe driving conditions,
a Maintenance Record, and instruc-
tions for simple maintenance tasks
you may want to take care of yourself.
If you have the skills and tools to per-form more complex maintenance
tasks on your Honda, you may want
to purchase the Service Manual. See
page 263 for information on how to obtain a copy, or see your Honda
dealer.
Maintenance Safety....................... 158
Important Safety Precautions.. 159
Maintenance Schedule.................. 160
Maintenance Record..................... 167 Owner Maintenance Checks........ 169
Fluid Locations............................... 170
Engine Oil....................................... 171
Adding Oil................................... 171
Recommended Oil..................... 171Synthetic Oil............................... 172
Additives..................................... 172
Changing the Oil and Filter...... 173
Cooling System.............................. 175
Adding Engine Coolant............. 175Replacing Engine Coolant........ 177
Windshield Washers..................... 180
Transmission Fluid........................ 180
Automatic
Transmission.......................... 180
5-speed Manual
Transmission.......................... 182
Brake and Clutch Fluid................. 182
Brake System............................. 183
Clutch System............................ 183
Power Steering............................... 184
Air Cleaner Element...................... 185 Hood Latch..................................... 186
Spark Plugs..................................... 187
Replacement............................... 187
Specifications............................. 188
Battery............................................ 189
Wiper Blades.................................. 191
Air Conditioning System............... 193 Drive Belts...................................... 194
Timing Belt..................................... 194
Tires................................................ 195 Inflation....................................... 195
Recommended Tire Pressures
for Normal Driving............ 196
Inspection................................... 197
Maintenance............................... 197
Tire Rotation.............................. 198
Replacing Tires and Wheels .... 199
Wheels and Tires....................... 200
Winter Driving........................... 200
Snow Tires.............................. 200
Tire Chains............................. 201
Lights.............................................. 202 Replacing Bulbs......................... 204
Storing Your Car............................ 212
MaintenanceMain Menu s t
Page 169 of 269
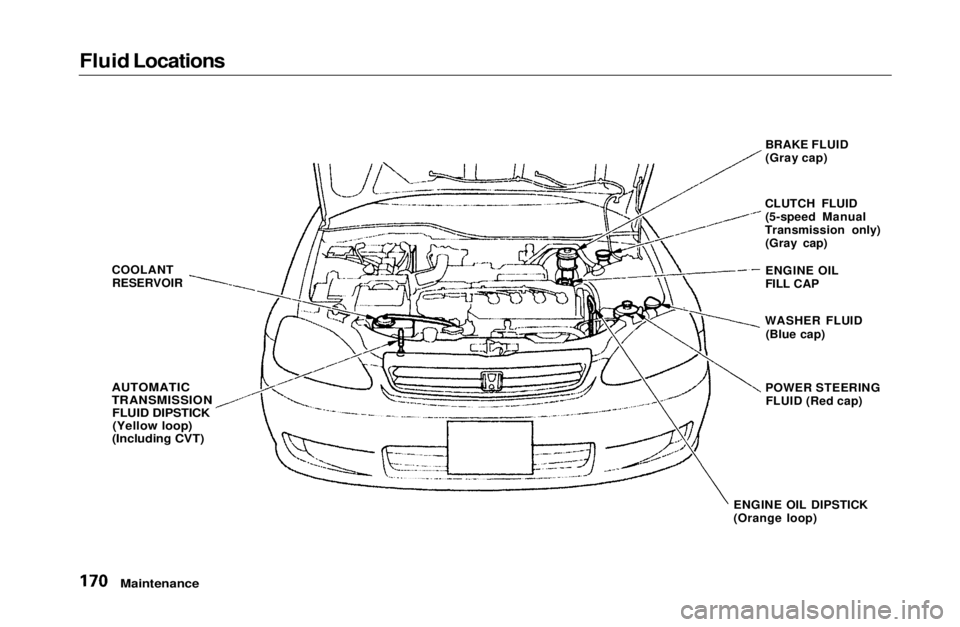
Fluid Locations
Maintenance
COOLANT
RESERVOIR
AUTOMATIC
TRANSMISSION
FLUID DIPSTICK(Yellow loop)
(Including CVT)
BRAKE FLUID
(Gray cap)
CLUTCH FLUID (5-speed Manual
Transmission only) (Gray cap)
ENGINE OIL DIPSTICK
(Orange loop) ENGINE OIL
FILL CAP
WASHER FLUID (Blue cap)
POWER STEERING FLUID (Red cap)Main Menu Table of Contents s t
Page 181 of 269
Transmission Fluid, Brake and Clutch Fluid
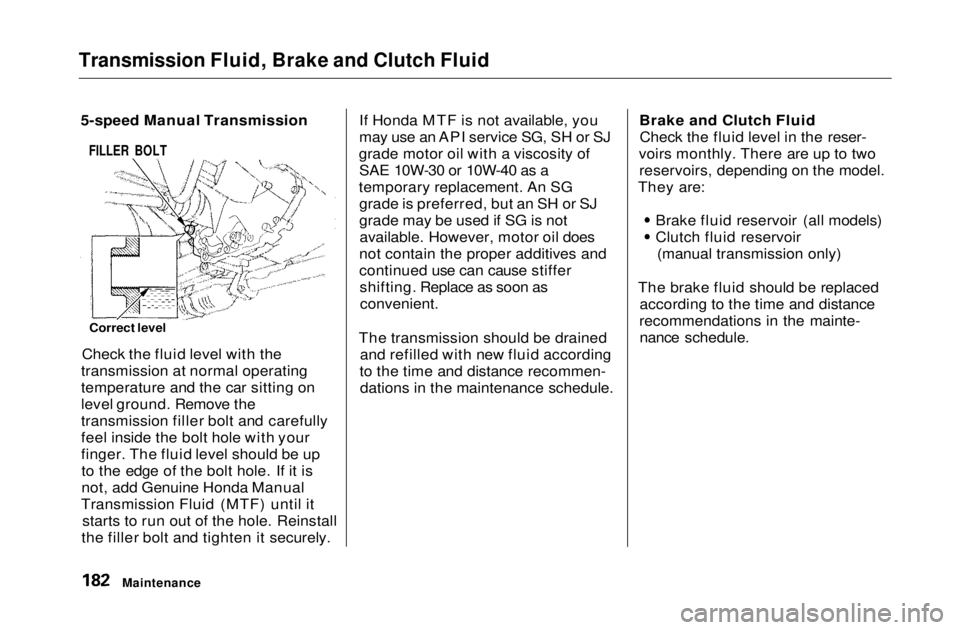
5-speed Manual Transmission
FILLER BOLT
Correct level
Check the fluid level with the
transmission at normal operating
temperature and the car sitting on
level ground. Remove the
transmission filler bolt and carefully
feel inside the bolt hole with your
finger. The fluid level should be up to the edge of the bolt hole. If it is
not, add Genuine Honda Manual
Transmission Fluid (MTF) until it starts to run out of the hole. Reinstall
the filler bolt and tighten it securely. If Honda MTF is not available, you
may use an API service SG, SH or SJ
grade motor oil with a viscosity of SAE 10W-30 or 10W-40 as a
temporary replacement. An SG grade is preferred, but an SH or SJ
grade may be used if SG is notavailable. However, motor oil does
not contain the proper additives and
continued use can cause stiffer shifting. Replace as soon asconvenient.
The transmission should be drained and refilled with new fluid according
to the time and distance recommen- dations in the maintenance schedule. Brake and Clutch Fluid
Check the fluid level in the reser-
voirs monthly. There are up to two reservoirs, depending on the model.
They are:
Brake fluid reservoir (all models) Clutch fluid reservoir
(manual transmission only)
The brake fluid should be replaced according to the time and distance
recommendations in the mainte- nance schedule.
MaintenanceMain Menu Table of Contents s t
Page 182 of 269
Brake and Clutch Fluid
Always use Genuine Honda DOT 3 brake fluid. If it is not available, you should use only DOT 3 or DOT 4
fluid, from a sealed container, as a temporary replacement. However,
the use of any non-Honda brake fluidcan cause corrosion and decrease
the life of the system. Have the
brake system flushed and refilled
with Honda DOT 3 brake fluid as soon as possible.
Brake fluid marked DOT 5 is not
compatible with your car's braking system and can cause extensive
damage.
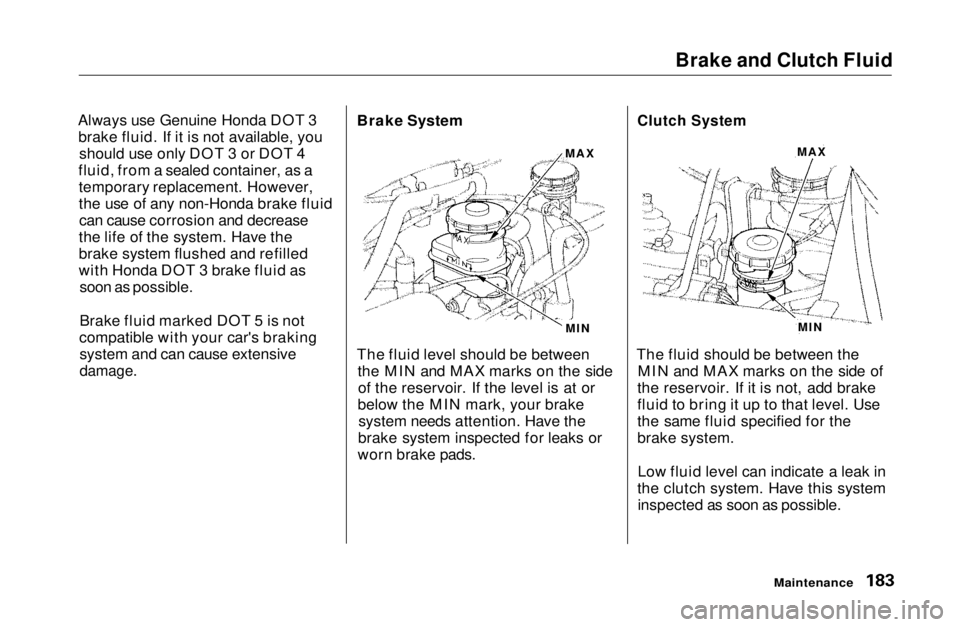
Brake System
MIN
The fluid level should be between the MIN and MAX marks on the sideof the reservoir. If the level is at or
below the MIN mark, your brake system needs attention. Have the
brake system inspected for leaks or
worn brake pads.
Clutch System
The fluid should be between the MIN and MAX marks on the side of
the reservoir. If it is not, add brake
fluid to bring it up to that level. Use
the same fluid specified for the
brake system.
Low fluid level can indicate a leak in
the clutch system. Have this system inspected as soon as possible.
Maintenance
MAX
MAX
MINMain Menu Table of Contents s t
Page 225 of 269
If Your Engine Won't Start
Diagnosing why your engine won't
start falls into two areas, depending
on what you hear when you turn the
key to START (III):
You hear nothing, or almostnothing. The engine's starter
motor does not operate at all, oroperates very slowly.
You can hear the starter motor operating normally, or the starter
motor sounds like it is spinning
faster than normal, but the engine does not start up and run. Nothing Happens or the Starter
Motor Operates Very Slowly
When you turn the ignition switch to START (III), you do not hear the
normal noise of the engine trying to start. You may hear a clicking sound
or series of clicks, or nothing at all. Check these things:
Check the transmission interlock.
If you have a manual transmission,
the clutch pedal must be pushed all the way to the floor or thestarter will not operate. With an
automatic transmission, it must be
in Park or Neutral.
Turn the ignition switch to ON (II).
Turn on the headlights and check their brightness. If the headlightsare very dim or don't light at all,
the battery is discharged. See
Jump Starting on page 227.
Turn the ignition switch to START
(III). If the headlights do not dim,
check the condition of the fuses. If
the fuses are OK, there is proba-
bly something wrong with the electrical circuit for the ignitionswitch or starter motor. You will
need a qualified technician to
determine the problem. (See
Emergency Towing on page 241.)
If the headlights dim noticeably or
go out when you try to start the engine, either the battery is dis-
charged or the connections are
corroded. Check the condition of
the battery and terminal connec-
tions (see page 189). You can
then try jump starting the vehicle
from a booster battery (see page 227).
Taking Care of the UnexpectedMain Menu Table of Contents s t
Page 260 of 269
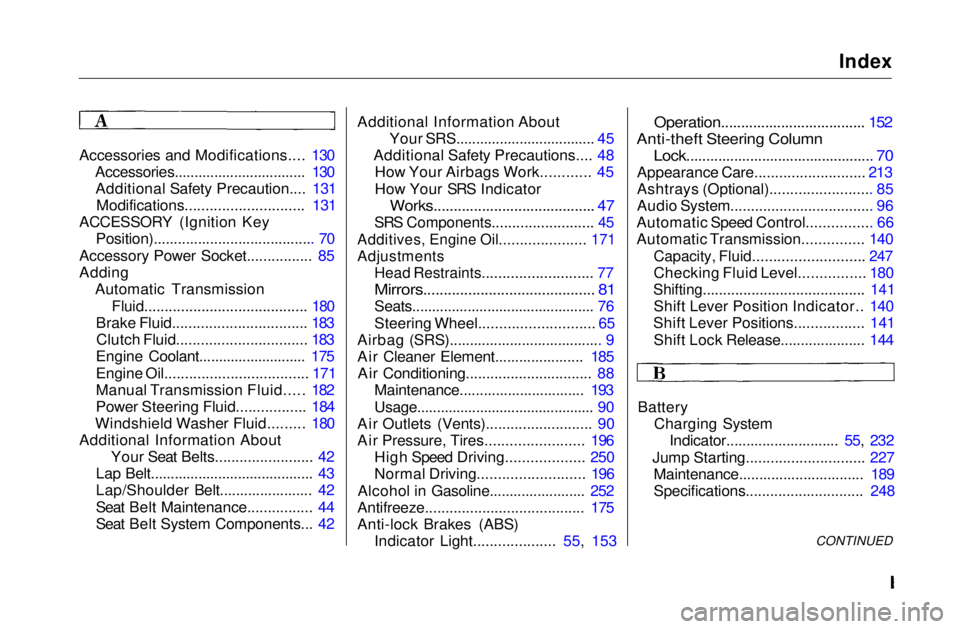
Index
Accessories and Modifications.... 130 Accessories................................. 130Additional Safety Precaution.... 131 Modifications............................. 131
ACCESSORY (Ignition Key Position)........................................ 70
Accessory Power Socket................ 85
Adding Automatic Transmission
Fluid........................................ 180
Brake Fluid................................. 183 Clutch Fluid................................ 183
Engine Coolant........................... 175
Engine Oil................................... 171
Manual Transmission Fluid..... 182
Power Steering Fluid................. 184
Windshield Washer Fluid......... 180
Additional Information About Your Seat Belts........................ 42
Lap Belt......................................... 43
Lap/Shoulder Belt....................... 42
Seat Belt Maintenance................ 44
Seat Belt System Components... 42 Additional Information About
Your SRS................................... 45
Additional Safety Precautions.... 48 How Your Airbags Work............ 45
How Your SRS Indicator
Works........................................ 47
SRS Components......................... 45
Additives, Engine Oil..................... 171
Adjustments
Head Restraints........................... 77
Mirrors.......................................... 81
Seats.............................................. 76
Steering Wheel............................ 65
Airbag (SRS)...................................... 9
Air Cleaner Element...................... 185 Air Conditioning............................... 88 Maintenance............................... 193
Usage............................................. 90
Air Outlets (Vents).......................... 90
Air Pressure, Tires........................ 196 High Speed Driving................... 250
Normal Driving.......................... 196
Alcohol in Gasoline........................ 252
Antifreeze....................................... 175
Anti-lock Brakes (ABS) Indicator Light.................... 55, 153
Operation.................................... 152
Anti-theft Steering Column
Lock............................................... 70
Appearance Care........................... 213
Ashtrays (Optional)......................... 85
Audio System................................... 96
Automatic Speed Control................ 66
Automatic Transmission............... 140
Capacity, Fluid........................... 247
Checking Fluid Level................ 180
Shifting........................................ 141
Shift Lever Position Indicator.. 140
Shift Lever Positions................. 141
Shift Lock Release..................... 144
Battery Charging SystemIndicator............................ 55, 232
Jump Starting............................. 227 Maintenance............................... 189
Specifications............................. 248
CONTINUEDMain Menu s t