HONDA CLARITY ELECTRIC 2019 Owner's Manual (in English)
Manufacturer: HONDA, Model Year: 2019, Model line: CLARITY ELECTRIC, Model: HONDA CLARITY ELECTRIC 2019Pages: 559, PDF Size: 28.11 MB
Page 531 of 559
529
uuFuses uFuse Locations
Continued
Handling the Unexpected
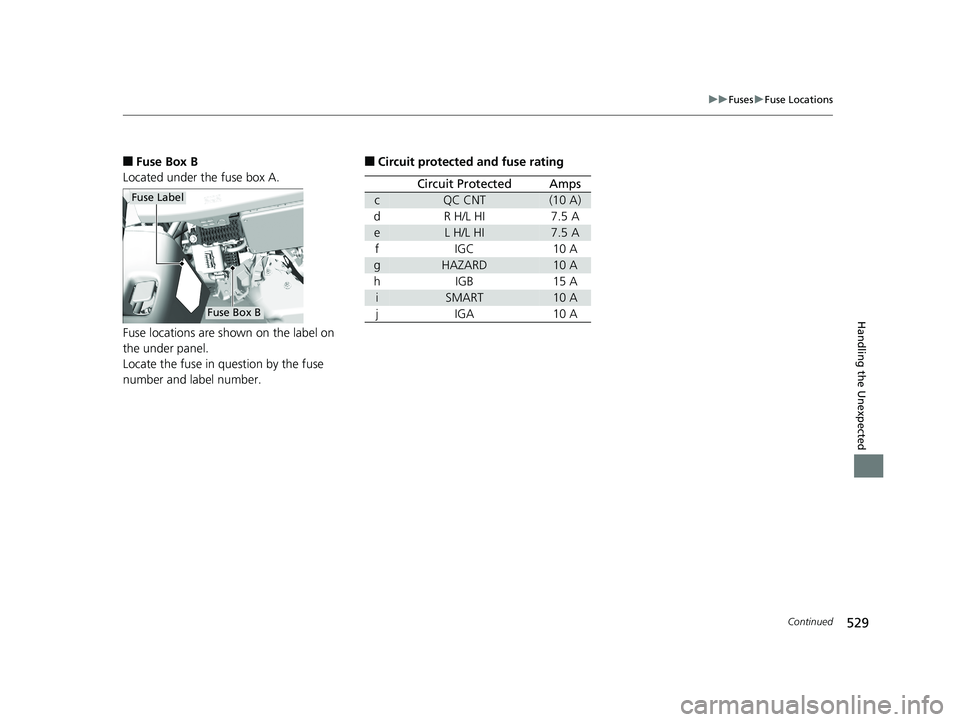
■Fuse Box B
Located under the fuse box A.
Fuse locations are shown on the label on
the under panel.
Locate the fuse in question by the fuse
number and label number.
Fuse Label
Fuse Box B
■Circuit protected and fuse rating
Circuit ProtectedAmps
cQC CNT(10 A)
dR H/L HI7.5 A
eL H/L HI7.5 A
fIGC10 A
gHAZARD10 A
hIGB15 A
iSMART10 A
jIGA10 A
19 CLARITY BEV-31TRV6200.book 529 ページ 2018年10月29日 月曜日 午前10時54分
Page 532 of 559
530
uuFuses uFuse Locations
Handling the Unexpected
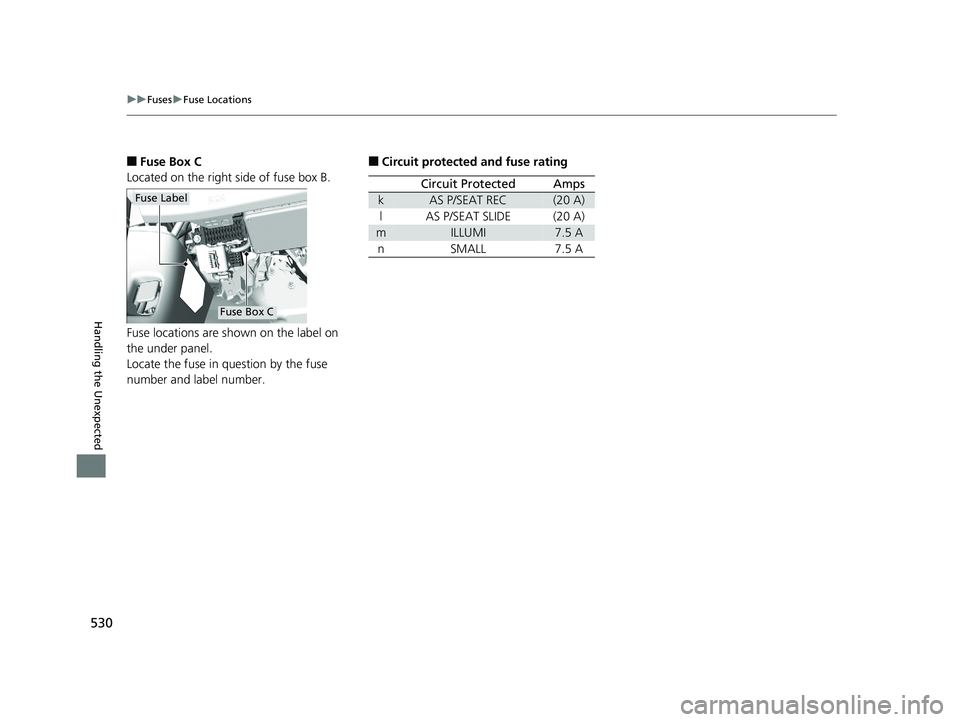
■Fuse Box C
Located on the right side of fuse box B.
Fuse locations are shown on the label on
the under panel.
Locate the fuse in question by the fuse
number and label number.
Fuse Label
Fuse Box C
■Circuit protected and fuse rating
Circuit ProtectedAmps
kAS P/SEAT REC(20 A)
lAS P/SEAT SLIDE(20 A)
mILLUMI7.5 A
nSMALL7.5 A
19 CLARITY BEV-31TRV6200.book 530 ページ 2018年10月29日 月曜日 午前10時54分
Page 533 of 559
531
uuFuses uFuse Locations
Handling the Unexpected
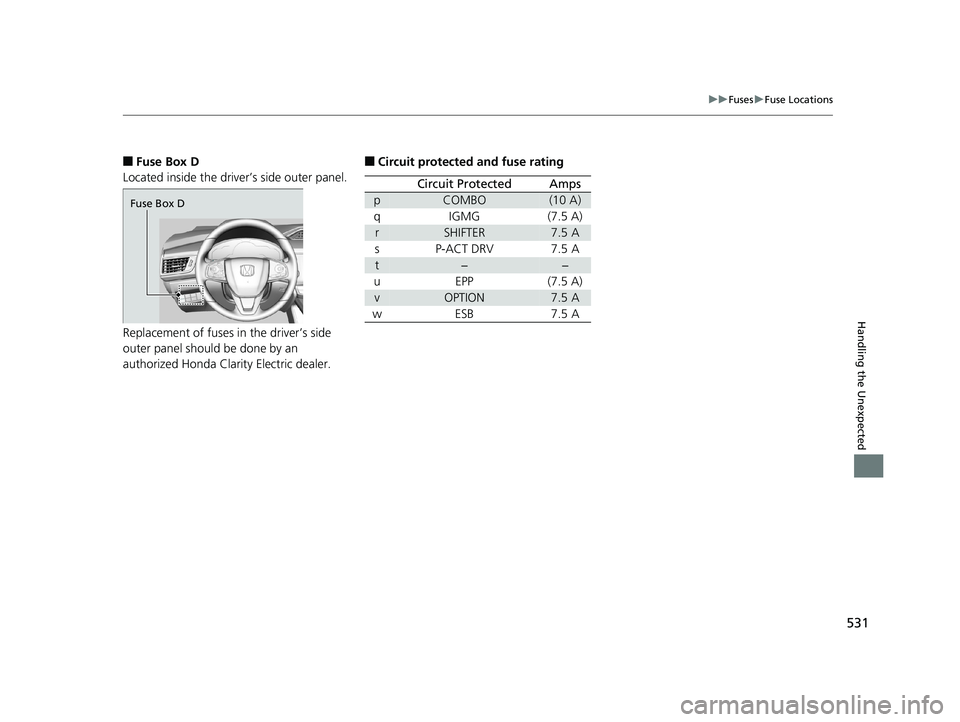
■Fuse Box D
Located inside the driver’s side outer panel.
Replacement of fuses in the driver’s side
outer panel should be done by an
authorized Honda Clarity Electric dealer.
Fuse Box D
■Circuit protected and fuse rating
Circuit ProtectedAmps
pCOMBO(10 A)
qIGMG(7.5 A)
rSHIFTER7.5 A
sP-ACT DRV7.5 A
t−−
uEPP(7.5 A)
vOPTION7.5 A
wESB7.5 A
19 CLARITY BEV-31TRV6200.book 531 ページ 2018年10月29日 月曜日 午前10時54分
Page 534 of 559
532
uuFuses uInspecting and Changing Fuses
Handling the Unexpected
Inspecting and Changing Fuses
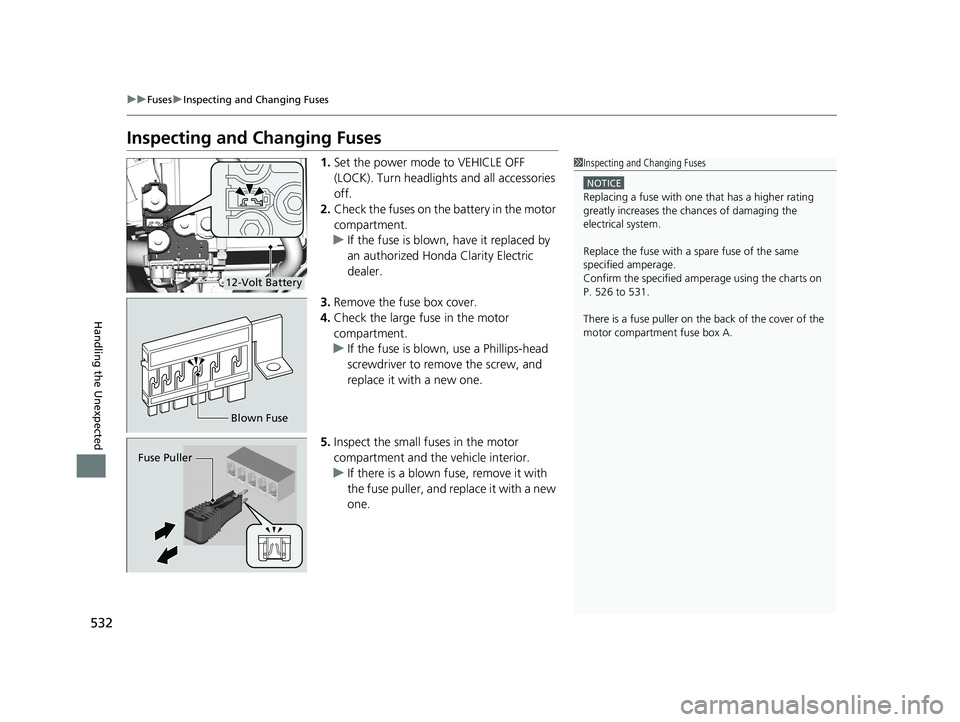
1. Set the power mode to VEHICLE OFF
(LOCK). Turn headlight s and all accessories
off.
2. Check the fuses on the battery in the motor
compartment.
u If the fuse is blown, have it replaced by
an authorized Honda Clarity Electric
dealer.
3. Remove the fuse box cover.
4. Check the large fuse in the motor
compartment.
u If the fuse is blown, use a Phillips-head
screwdriver to remove the screw, and
replace it with a new one.
5. Inspect the small fuses in the motor
compartment and the vehicle interior.
u If there is a blown fuse, remove it with
the fuse puller, and replace it with a new
one.1Inspecting and Changing Fuses
NOTICE
Replacing a fuse with on e that has a higher rating
greatly increases the chances of damaging the
electrical system.
Replace the fuse with a spare fuse of the same
specified amperage.
Confirm the specified amperage using the charts on
P. 526 to 531.
There is a fuse puller on the back of the cover of the
motor compartment fuse box A.
12-Volt Battery
Blown Fuse
Fuse Puller
19 CLARITY BEV-31TRV6200.book 532 ページ 2018年10月29日 月曜日 午前10時54分
Page 535 of 559
533
Handling the Unexpected
Emergency Towing
Call a professional towing service if you need to tow your vehicle.
■Flat bed equipment
The operator loads your vehicle on the back of a flat bed truck.
This is the only way you can safely transport your vehicle.
Any other towing method will dama ge the vehicle’s drive system.
1Emergency Towing
NOTICE
Trying to lift or tow your vehicle by the bumpers will
cause serious damage. The bumpers are not designed
to support the vehicle's weight.
NOTICE
Improper towing, such as towing behind a
motorhome or other motor vehicle can damage the
transmission.
Never tow your vehicle with just a rope or chain.
It is very dangerous, since ropes or chains may shift
from side to side or break.
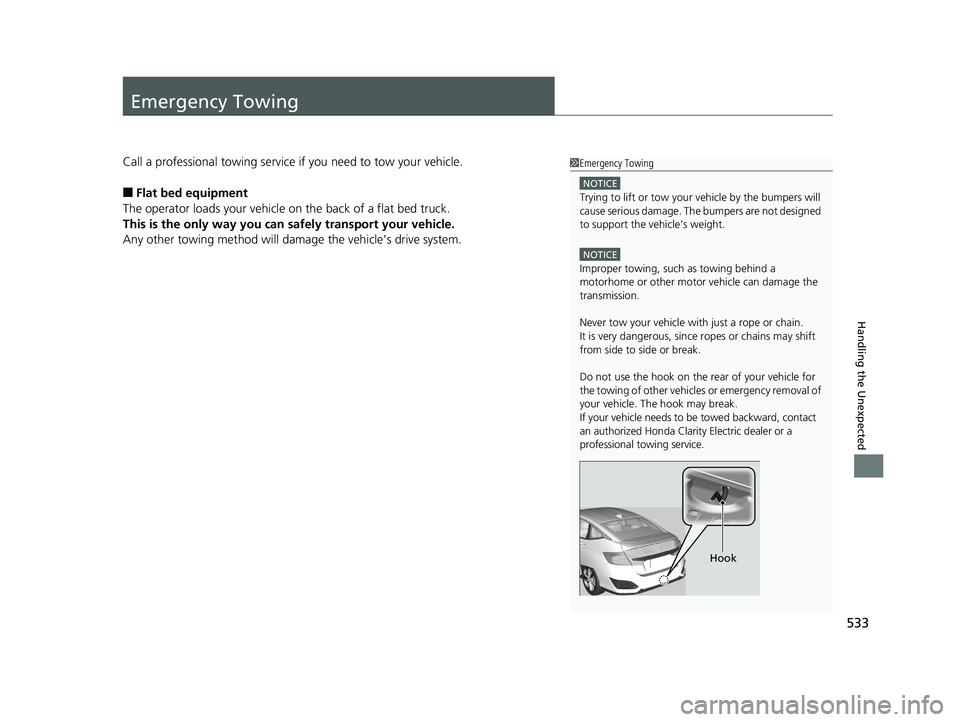
Do not use the hook on the rear of your vehicle for
the towing of other vehicles or emergency removal of
your vehicle. The hook may break.
If your vehicle needs to be towed backward, contact
an authorized Honda Clarity Electric dealer or a
professional towing service.
Hook
19 CLARITY BEV-31TRV6200.book 533 ページ 2018年10月29日 月曜日 午前10時54分
Page 536 of 559
534
Handling the Unexpected
When You Cannot Open the Charge Lid
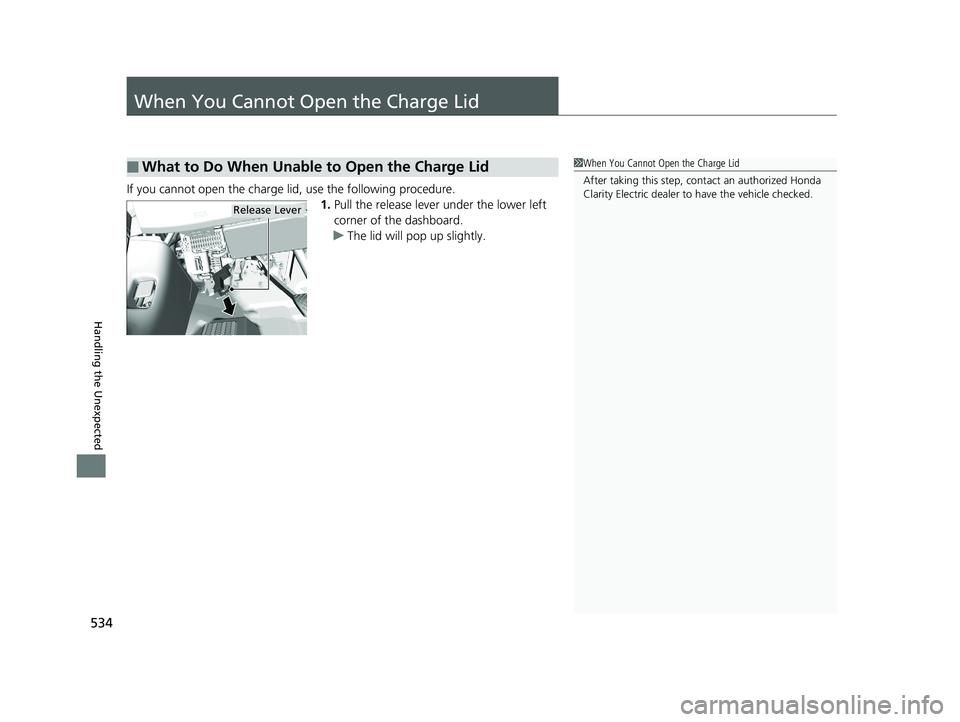
If you cannot open the charge lid, use the following procedure.1.Pull the release lever under the lower left
corner of the dashboard.
u The lid will pop up slightly.
■What to Do When Unable to Open the Charge Lid1When You Cannot Open the Charge Lid
After taking this step, cont act an authorized Honda
Clarity Electric dealer to have the vehicle checked.
Release Lever
19 CLARITY BEV-31TRV6200.book 534 ページ 2018年10月29日 月曜日 午前10時54分
Page 537 of 559
535
Handling the Unexpected
When You Cannot Disengage the Charging Connector
The Charging Connector Release Problem. Use Release Lever To Disconnect
message appears on the driver informatio n interface when you cannot disengage
the charging connector.
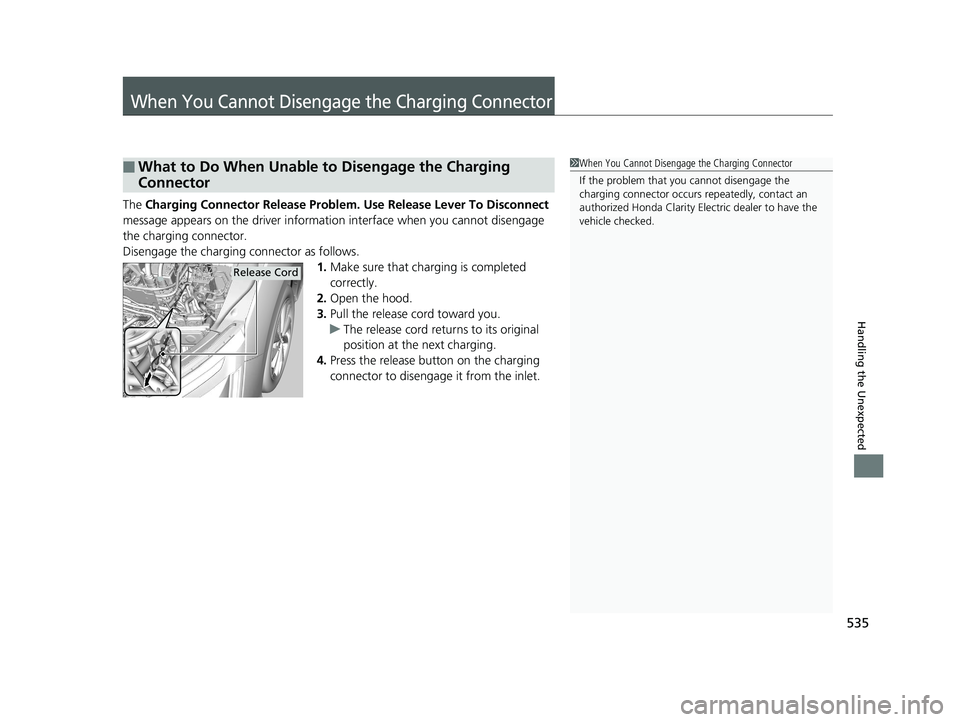
Disengage the charging connector as follows.
1.Make sure that charging is completed
correctly.
2. Open the hood.
3. Pull the release cord toward you.
u The release cord returns to its original
position at the next charging.
4. Press the release button on the charging
connector to disengage it from the inlet.
■What to Do When Unable to Disengage the Charging
Connector1When You Cannot Disengage the Charging Connector
If the problem that y ou cannot disengage the
charging connector occurs repeatedly, contact an
authorized Honda Clarity Electric dealer to have the
vehicle checked.
Release Cord
19 CLARITY BEV-31TRV6200.book 535 ページ 2018年10月29日 月曜日 午前10時54分
Page 538 of 559
536
Handling the Unexpected
When You Cannot Open the Trunk
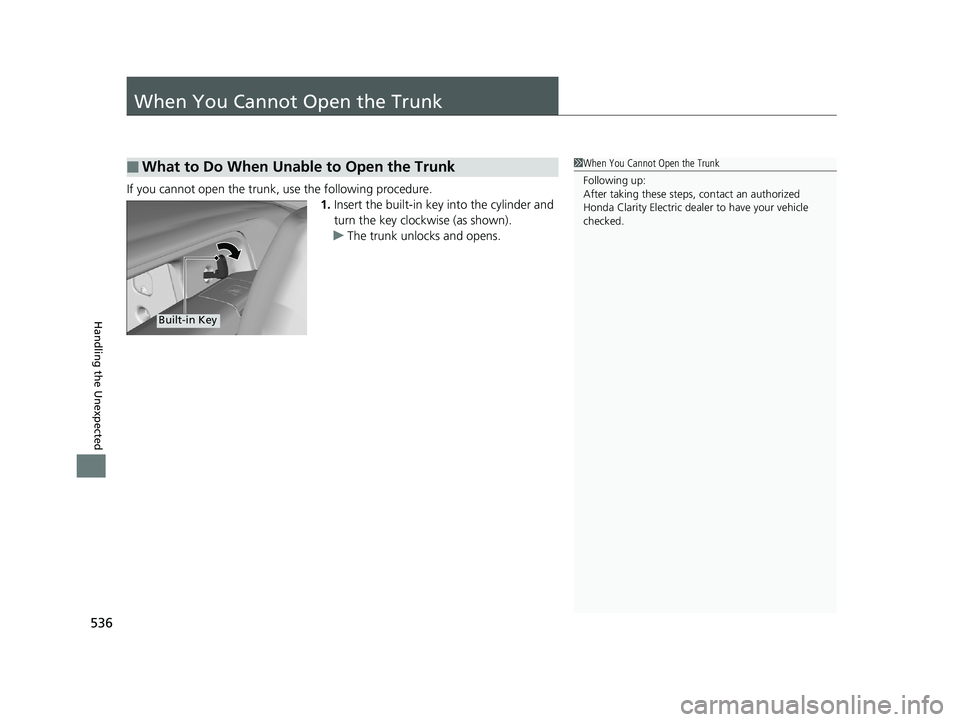
If you cannot open the trunk, use the following procedure.1.Insert the built-in key into the cylinder and
turn the key clockwise (as shown).
u The trunk unlocks and opens.
■What to Do When Unable to Open the Trunk1When You Cannot Open the Trunk
Following up:
After taking these steps, contact an authorized
Honda Clarity Electric deal er to have your vehicle
checked.
Built-in Key
19 CLARITY BEV-31TRV6200.book 536 ページ 2018年10月29日 月曜日 午前10時54分
Page 539 of 559
537
Information
This chapter includes your vehicle’s specifications, locations of identification numbers, and other
information required by regulation.
Specifications.................................... 538
Identification Numbers Vehicle Identification Number (VIN), Motor
Number, and Transmission Number .. 540
Devices that Emit Radio Waves ....... 541
Reporting Safety Defects ................. 542
Warranty Coverages ........................ 543
Authorized Manuals ......................... 545
Customer Service Information ......... 546
19 CLARITY BEV-31TRV6200.book 537 ページ 2018年10月29日 月曜日 午前10時54分
Page 540 of 559
538
Information
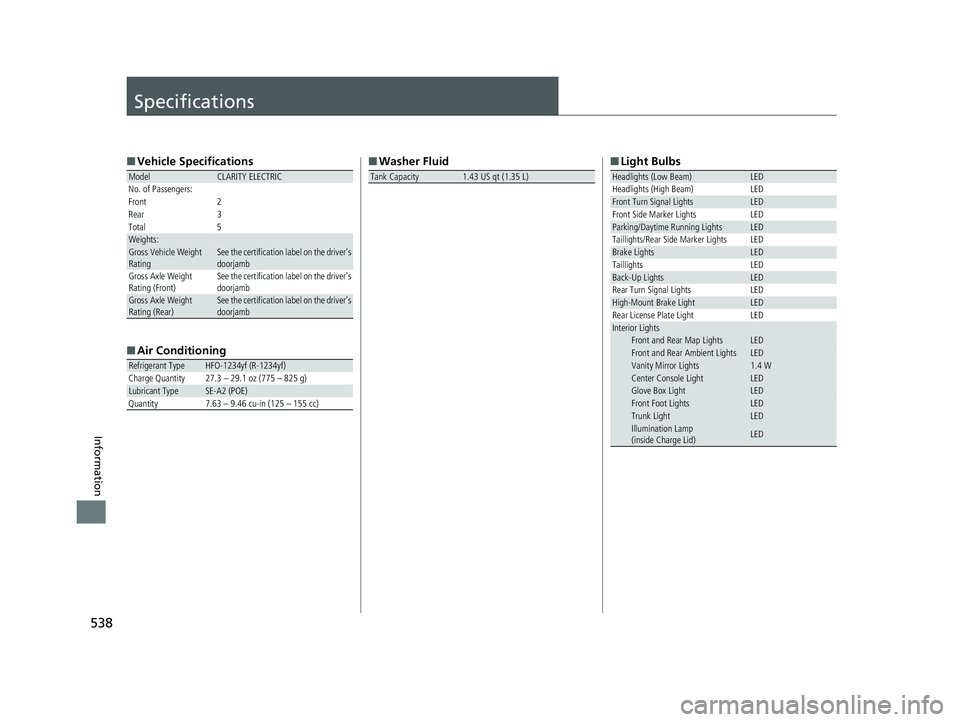
Specifications
■Vehicle Specifications
■ Air Conditioning
ModelCLARITY ELECTRIC
No. of Passengers:
Front 2
Rear 3
Total 5
Weights:Gross Vehicle Weight
Rating See the certification label on the driver’s
doorjamb
Gross Axle Weight
Rating (Front)See the certification label on the driver’s
doorjamb
Gross Axle Weight
Rating (Rear)See the certification label on the driver’s
doorjamb
Refrigerant TypeHFO-1234yf (R-1234yf)
Charge Quantity 27.3 – 29.1 oz (775 – 825 g)
Lubricant TypeSE-A2 (POE)
Quantity 7.63 – 9.46 cu-in (125 – 155 cc)
■ Washer Fluid
Tank Capacity1.43 US qt (1.35 L)
■Light Bulbs
Headlights (Low Beam)LED
Headlights (High Beam) LED
Front Turn Signal LightsLED
Front Side Marker Lights LED
Parking/Daytime Running LightsLED
Taillights/Rear Side Marker Lights LED
Brake LightsLED
Taillights LED
Back-Up LightsLED
Rear Turn Signal Lights LED
High-Mount Brake LightLED
Rear License Plate Light LED
Interior LightsFront and Rear Map LightsLEDFront and Rear Ambient LightsLEDVanity Mirror Lights1.4 WCenter Console LightLEDGlove Box LightLEDFront Foot LightsLEDTrunk LightLEDIllumination Lamp
(inside Charge Lid)LED
19 CLARITY BEV-31TRV6200.book 538 ページ 2018年10月29日 月曜日 午前10時54分