audio HONDA CLARITY PLUG-IN 2020 (in English) User Guide
[x] Cancel search | Manufacturer: HONDA, Model Year: 2020, Model line: CLARITY PLUG-IN, Model: HONDA CLARITY PLUG-IN 2020Pages: 595, PDF Size: 30.43 MB
Page 133 of 595
131
uuGauges and Driver Information Interface uDriver Information Interface
Continued
Instrument Panel
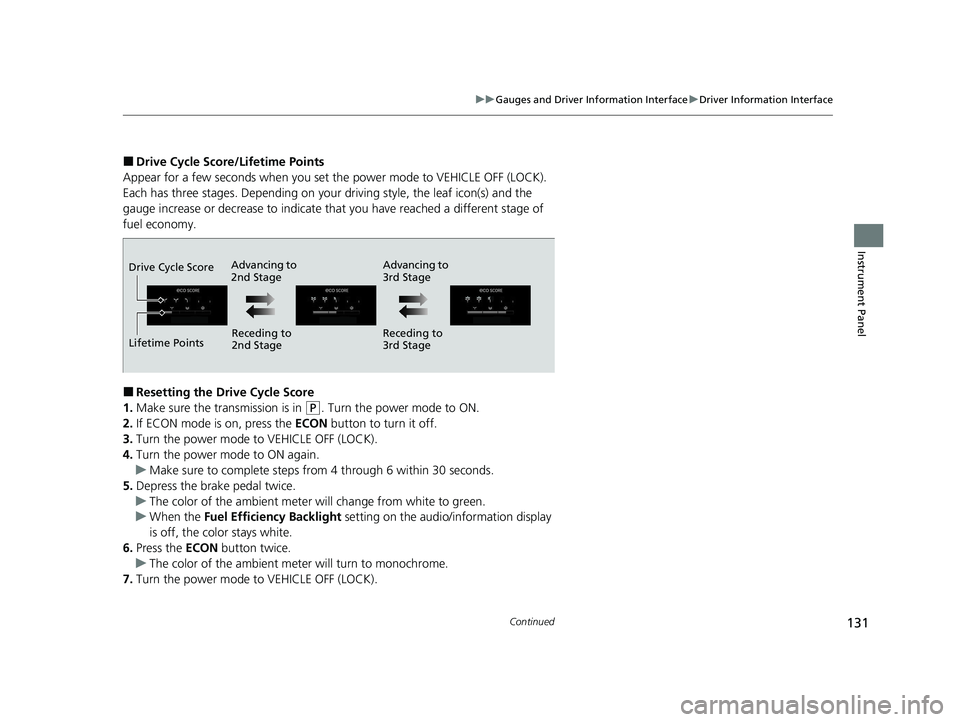
■Drive Cycle Score/Lifetime Points
Appear for a few seconds when you set the power mode to VEHICLE OFF (LOCK).
Each has three stages. Depending on your driving style, the leaf icon(s) and the
gauge increase or decrease to indicate that you have reached a different stage of
fuel economy.
■Resetting the Drive Cycle Score
1. Make sure the transmission is in
(P. Turn the power mode to ON.
2. If ECON mode is on, press the ECON button to turn it off.
3. Turn the power mode to VEHICLE OFF (LOCK).
4. Turn the power mode to ON again.
u Make sure to complete steps fro m 4 through 6 within 30 seconds.
5. Depress the brake pedal twice.
u The color of the ambient meter wi ll change from white to green.
u When the Fuel Efficiency Backlight setting on the audio/information display
is off, the color stays white.
6. Press the ECON button twice.
u The color of the ambient mete r will turn to monochrome.
7. Turn the power mode to VEHICLE OFF (LOCK).
Advancing to
2nd Stage Advancing to
3rd Stage
Receding to
2nd Stage Receding to
3rd Stage
Lifetime Points Drive Cycle Score
20 CLARITY PHEV-31TRW6200.book 131 ページ 2019年9月24日 火曜日 午後12時9分
Page 135 of 595
133
uuGauges and Driver Information Interface uDriver Information Interface
Instrument Panel
• Shows the customized feature (charge timer).
2 Using a Timer P. 471
•Use the audio/information screen to custom ize certain features.
2Customized Features P. 306
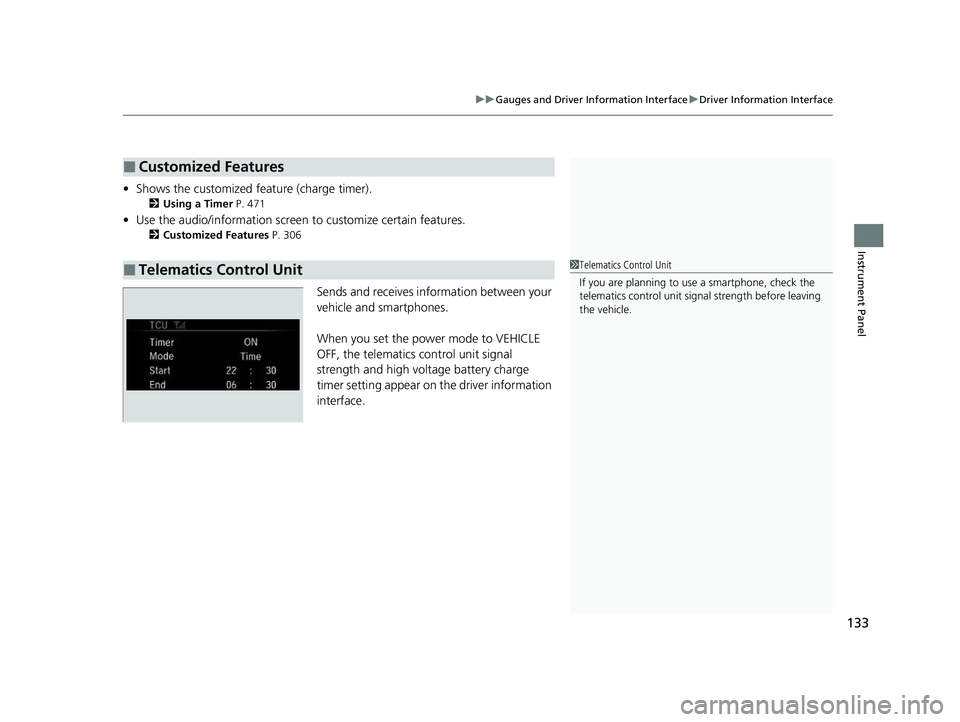
Sends and receives information between your
vehicle and smartphones.
When you set the power mode to VEHICLE
OFF, the telematics control unit signal
strength and high voltage battery charge
timer setting appear on the driver information
interface.
■Customized Features
■Telematics Control Unit1Telematics Control Unit
If you are planning to use a smartphone, check the
telematics control unit sign al strength before leaving
the vehicle.
20 CLARITY PHEV-31TRW6200.book 133 ページ 2019年9月24日 火曜日 午後12時9分
Page 138 of 595
136
Controls
Clock
Adjusting the Clock
You can adjust the time manually in the audio/information screen, with the power
mode in ON.
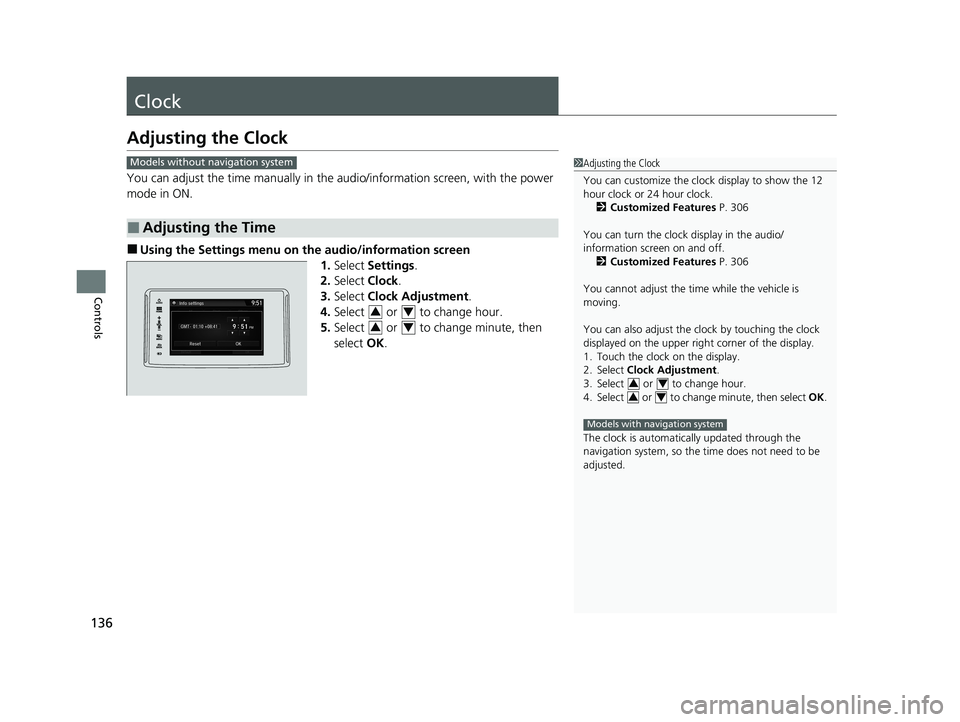
■Using the Settings menu on the audio/information screen
1.Select Settings .
2. Select Clock.
3. Select Clock Adjustment .
4. Select or to change hour.
5. Select or to change minute, then
select OK.
■Adjusting the Time
1Adjusting the Clock
You can customize the clock display to show the 12
hour clock or 24 hour clock.
2 Customized Features P. 306
You can turn the clock display in the audio/
information screen on and off. 2 Customized Features P. 306
You cannot adjust the time while the vehicle is
moving.
You can also adjust the clock by touching the clock
displayed on the upper right corner of the display.
1. Touch the clock on the display.
2. Select Clock Adjustment .
3. Select or to change hour.
4. Select or to change minute, then select OK.
The clock is automatica lly updated through the
navigation system, so the ti me does not need to be
adjusted.
34
34
Models with navigation system
Models without navigation system
34
34
20 CLARITY PHEV-31TRW6200.book 136 ページ 2019年9月24日 火曜日 午後12時9分
Page 142 of 595
uuLocking and Unlocking the Doors uLocking/Unlocking the Doors from the Outside
140
Controls
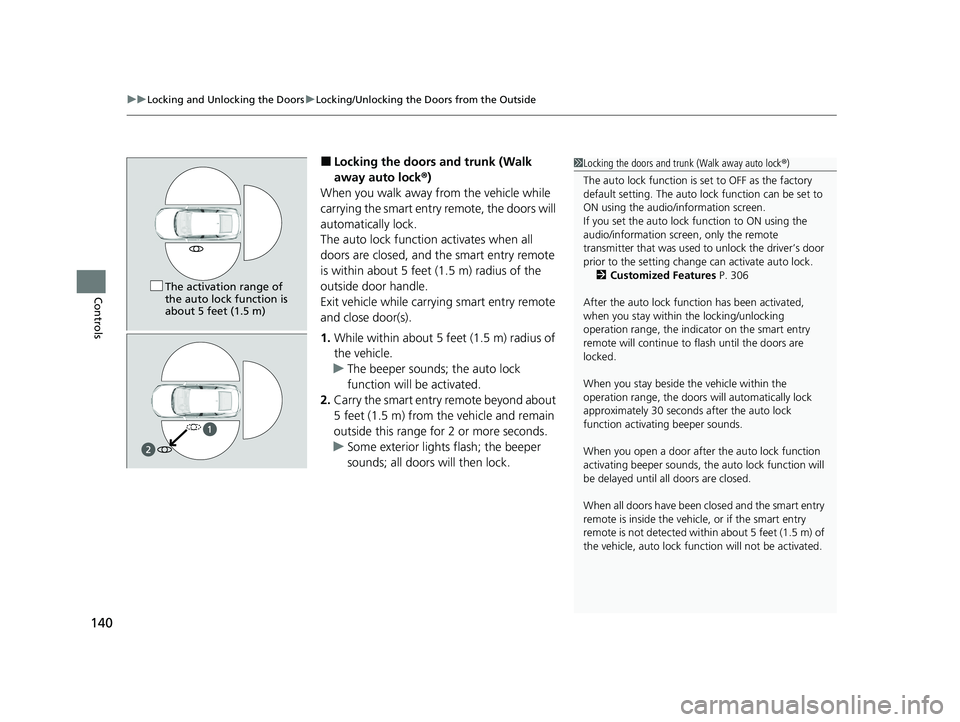
■Locking the doors and trunk (Walk
away auto lock ®)
When you walk away from the vehicle while
carrying the smart entry remote, the doors will
automatically lock.
The auto lock function activates when all
doors are closed, and the smart entry remote
is within about 5 feet (1.5 m) radius of the
outside door handle.
Exit vehicle while carrying smart entry remote
and close door(s).
1. While within about 5 feet (1.5 m) radius of
the vehicle.
u The beeper sounds; the auto lock
function will be activated.
2. Carry the smart entry remote beyond about
5 feet (1.5 m) from the vehicle and remain
outside this range fo r 2 or more seconds.
u Some exterior lights flash; the beeper
sounds; all doors will then lock.1Locking the doors and trunk (Walk away auto lock ®)
The auto lock function is set to OFF as the factory
default setting. The auto lo ck function can be set to
ON using the audio/information screen.
If you set the auto lock function to ON using the
audio/information screen, only the remote
transmitter that was used to unlock the driver’s door
prior to the setting change can activate auto lock. 2 Customized Features P. 306
After the auto lock function has been activated,
when you stay within the locking/unlocking
operation range, the indicator on the smart entry
remote will continue to flash until the doors are
locked.
When you stay beside the vehicle within the
operation range, the doors wi ll automatically lock
approximately 30 seconds after the auto lock
function activating beeper sounds.
When you open a door after the auto lock function
activating beeper sounds, the auto lock function will
be delayed until al l doors are closed.
When all doors have been closed and the smart entry
remote is inside the vehicle, or if the smart entry
remote is not detect ed within about 5 feet (1.5 m) of
the vehicle, auto lock func tion will not be activated.
The activation range of
the auto lock function is
about 5 feet (1.5 m)
20 CLARITY PHEV-31TRW6200.book 140 ページ 2019年9月24日 火曜日 午後12時9分
Page 144 of 595
uuLocking and Unlocking the Doors uLocking/Unlocking the Doors from the Outside
142
Controls
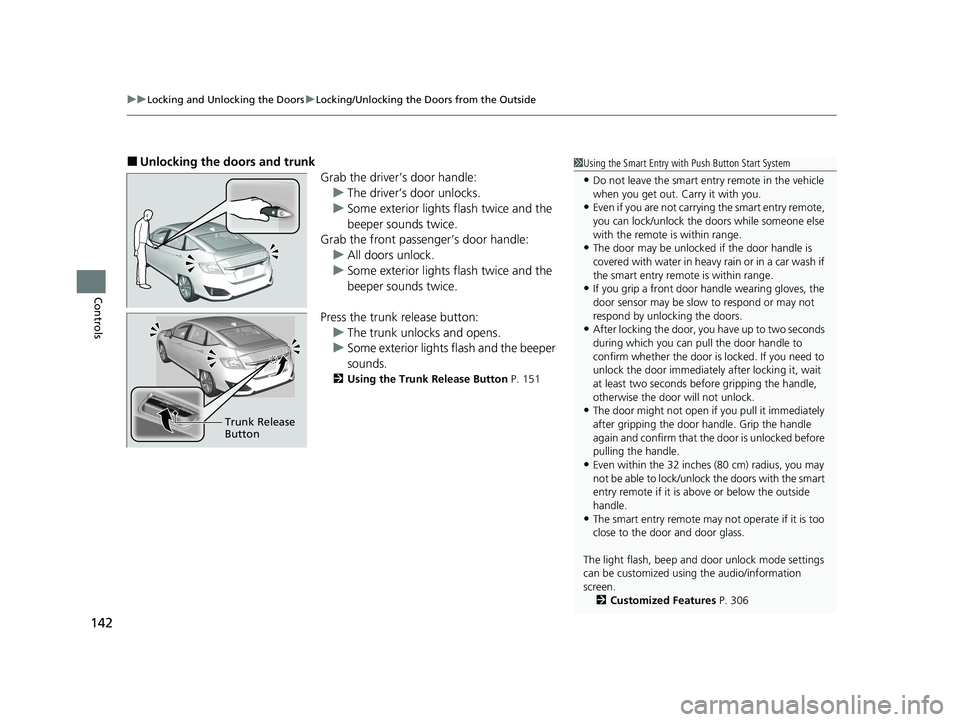
■Unlocking the doors and trunk
Grab the driver’s door handle:u The driver’s door unlocks.
u Some exterior lights flash twice and the
beeper sounds twice.
Grab the front passenger’s door handle:
u All doors unlock.
u Some exterior lights flash twice and the
beeper sounds twice.
Press the trunk release button: u The trunk unlocks and opens.
u Some exterior lights flash and the beeper
sounds.
2 Using the Trunk Release Button P. 151
Trunk Release
Button
1Using the Smart Entry with Push Button Start System
•Do not leave the smart entry remote in the vehicle
when you get out. Carry it with you.
•Even if you are not carrying the smart entry remote,
you can lock/unlock the doors while someone else
with the remote is within range.
•The door may be unlocked if the door handle is
covered with water in heavy rain or in a car wash if
the smart entry remote is within range.
•If you grip a front door handle wearing gloves, the
door sensor may be slow to respond or may not
respond by unlocking the doors.
•After locking the door, yo u have up to two seconds
during which you can pull the door handle to
confirm whether the door is locked. If you need to
unlock the door immediately after locking it, wait
at least two seconds befo re gripping the handle,
otherwise the door will not unlock.
•The door might not open if you pull it immediately
after gripping the door handle. Grip the handle
again and confirm that th e door is unlocked before
pulling the handle.
•Even within the 32 inches (80 cm) radius, you may
not be able to lock/unlock the doors with the smart
entry remote if it is a bove or below the outside
handle.
•The smart entry remote may not operate if it is too
close to the door and door glass.
The light flash, beep and door unlock mode settings
can be customized using the audio/information
screen.
2 Customized Features P. 306
20 CLARITY PHEV-31TRW6200.book 142 ページ 2019年9月24日 火曜日 午後12時9分
Page 149 of 595
Continued147
uuLocking and Unlocking the Doors uLocking/Unlocking the Doors from the Inside
Controls
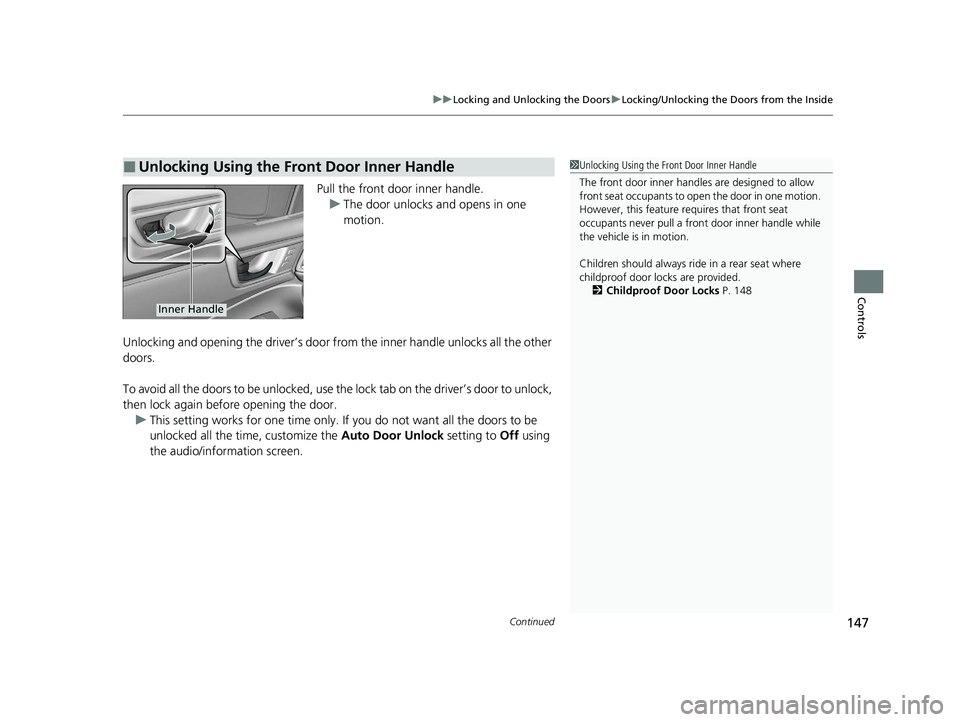
Pull the front door inner handle.
u The door unlocks and opens in one
motion.
Unlocking and opening the driver’s door from the inner handle unlocks all the other
doors.
To avoid all the doors to be unlocked, use th e lock tab on the driver’s door to unlock,
then lock again before opening the door. u This setting works for one time only. If you do not want all the doors to be
unlocked all the time, customize the Auto Door Unlock setting to Off using
the audio/information screen.
■Unlocking Using the Front Door Inner Handle1 Unlocking Using the Front Door Inner Handle
The front door inne r handles are designed to allow
front seat occupants to ope n the door in one motion.
However, this feature requires that front seat
occupants never pull a front door inner handle while
the vehicle is in motion.
Children should always ride in a rear seat where
childproof door locks are provided. 2 Childproof Door Locks P. 148
Inner Handle
20 CLARITY PHEV-31TRW6200.book 147 ページ 2019年9月24日 火曜日 午後12時9分
Page 151 of 595
149
uuLocking and Unlocking the Doors uAuto Door Locking/Unlocking
Controls
Auto Door Locking/Unlocking
Your vehicle locks or unlocks all doors automatically when a certain condition is met.
■Drive lock mode
All doors lock when the vehicle’s speed reaches about 10 mph (15 km/h).
■Driver’s door open mode
All doors unlock when the driver’s door is opened.
■Auto Door Locking
■Auto Door Unlocking
1 Auto Door Locking/Unlocking
You can turn off or cha nge to another auto door
locking/unlocking sett ing using the audio/
information screen. 2 Customized Features P. 306
20 CLARITY PHEV-31TRW6200.book 149 ページ 2019年9月24日 火曜日 午後12時9分
Page 155 of 595
153Continued
Controls
Security System
Immobilizer System
The immobilizer system prevents a key that has not been pre-registered from
starting the power system. Each key cont ains electronic transmitters that use
electronic signals to verify the key.
Pay attention to the follo wing when pressing the POWER button:
• Do not allow objects that emit strong radio waves near the POWER button.
• Make sure the key is not covered by or touching a metal object.
• Do not bring a key from another vehicle’s immobilizer system near the POWER
button.
• Do not put the key near magnetic items. Electronic devices, such as televisions
and audio systems emit strong magnetic fields. Note that even a key chain can
become magnetic.
Security System Alarm
The security system alarm activates when the trunk, hood or doors are forcibly
opened. The alarm does not activate if the trunk or doors are opened with the key,
remote transmitter or smart entry system.
However, the alarm activates if a door is op ened with the key and then the hood is
opened before the power mode is set to ON.
■When the security system alarm activates
The horn sounds intermittently and some exterior lights flash.
■To deactivate the security system alarm
Unlock the vehicle using the key, remote transmitter or smart entry system. The
system, along with the horn and flashing lights, is deactivated.
1 Immobilizer System
NOTICE
Leaving the key in the vehicl e can result in theft or
accidental movement of the vehicle.
Always take the key with you whenever you leave the
vehicle unattended.
Do not alter the system or add other devices to it.
Doing so may damage the system and make your
vehicle inoperable.
Canadian models only: Apply and hold the brake
pedal before turning the vehicle on the first time after
the 12-volt battery ha s been disconnected.
1Security System Alarm
Do not alter the system or add other devices to it.
Doing so may damage the system and make your
vehicle inoperable.
The security alarm continues for a maximum of two
minutes until the security system alarm deactivates.
20 CLARITY PHEV-31TRW6200.book 153 ページ 2019年9月24日 火曜日 午後12時9分
Page 160 of 595
158
Controls
Operating the Switches Around the Steering Wheel
POWER Button
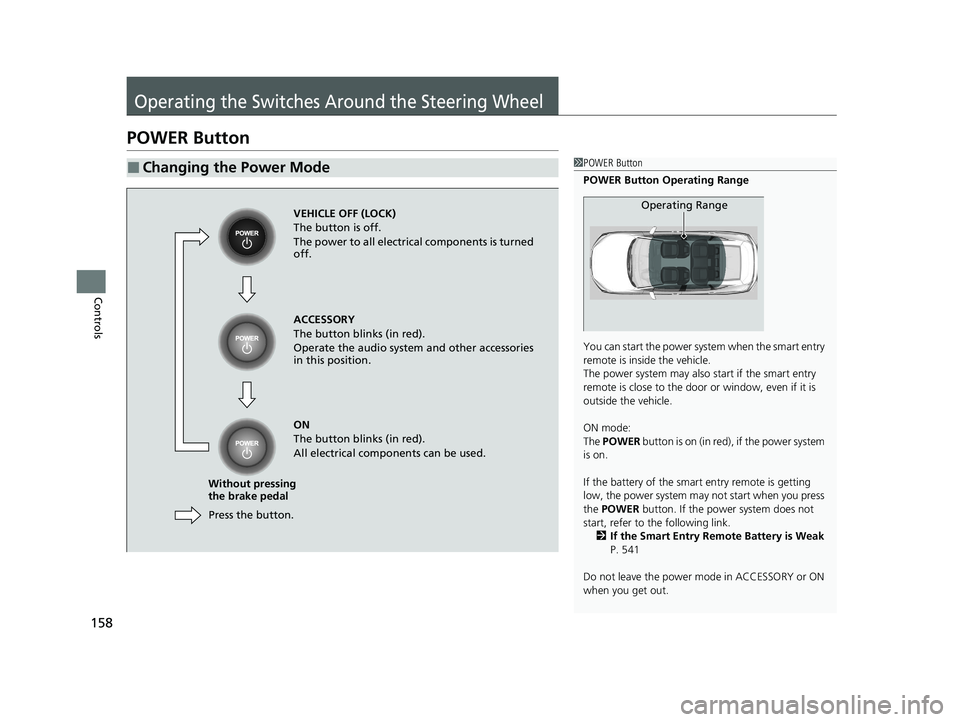
■Changing the Power Mode1POWER Button
POWER Button Operating Range
You can start the power system when the smart entry
remote is inside the vehicle.
The power system may also start if the smart entry
remote is close to the door or window, even if it is
outside the vehicle.
ON mode:
The POWER button is on (in red), if the power system
is on.
If the battery of the smar t entry remote is getting
low, the power system may not start when you press
the POWER button. If the power system does not
start, refer to the following link.
2 If the Smart Entry Remote Battery is Weak
P. 541
Do not leave the power mode in ACCESSORY or ON
when you get out.
Operating RangeVEHICLE OFF (LOCK)
The button is off.
The power to all electrical components is turned
off.
Press the button.
Without pressing
the brake pedal ACCESSORY
The button blinks (in red).
Operate the audio system and other accessories
in this position.
ON
The button blinks (in red).
All electrical components can be used.
20 CLARITY PHEV-31TRW6200.book 158 ページ 2019年9月24日 火曜日 午後12時9分
Page 172 of 595
170
uuOperating the Switches Around the Steering Wheel uDriving Position Memory System*
Controls
Driving Position Memory System*
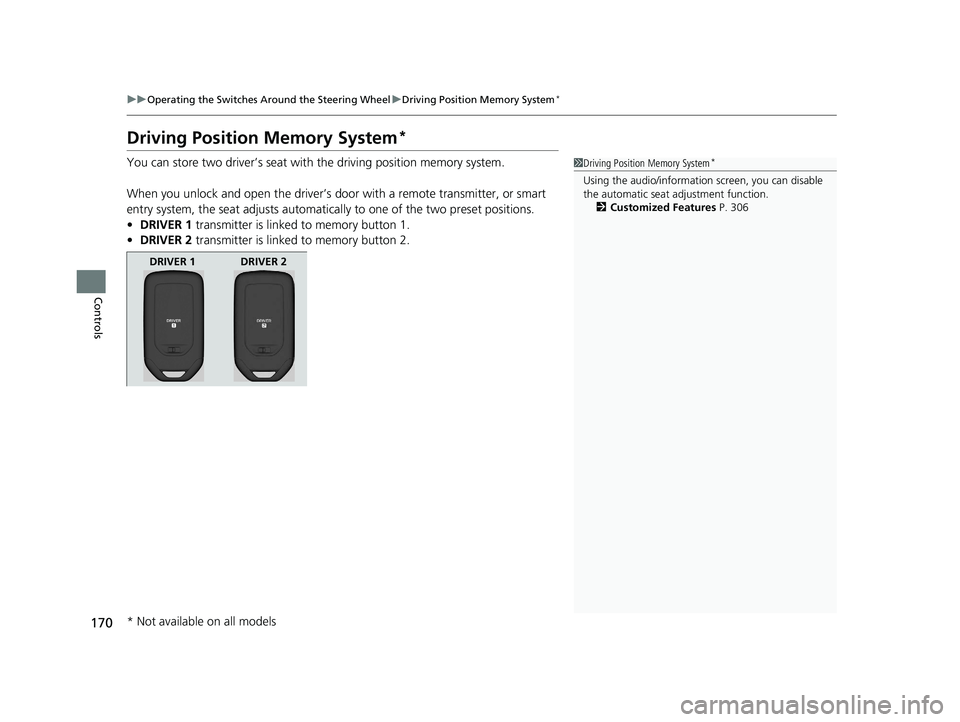
You can store two driver’s seat with the driving position memory system.
When you unlock and open the driver’s do or with a remote transmitter, or smart
entry system, the seat adjusts automatica lly to one of the two preset positions.
• DRIVER 1 transmitter is linked to memory button 1.
• DRIVER 2 transmitter is linked to memory button 2.1Driving Position Memory System*
Using the audio/informati on screen, you can disable
the automatic seat adjustment function. 2 Customized Features P. 306
DRIVER 1 DRIVER 2
* Not available on all models
20 CLARITY PHEV-31TRW6200.book 170 ページ 2019年9月24日 火曜日 午後12時9分