wheel HONDA CR-V 2000 RD1-RD3 / 1.G Owner's Manual
[x] Cancel search | Manufacturer: HONDA, Model Year: 2000, Model line: CR-V, Model: HONDA CR-V 2000 RD1-RD3 / 1.GPages: 322, PDF Size: 4.64 MB
Page 186 of 322

Off-Highwa
y Guideline s
I f Yo u Encounte r Wate r
Avoi d drivin g throug h dee p water . I f
yo u encounte r wate r i n you r rout e ( a
smal l strea m o r larg e puddle , fo r
example) , evaluat e it carefull y befor e
goin g ahead . Mak e sur e it i s shallow ,
flowin g slowly , an d ha s fir m groun d
underneath . I f yo u ar e no t sur e o f
th e dept h o r th e ground , tur n aroun d
an d fin d anothe r route . Drivin
g throug h dee p wate r ca n als o
damag e you r vehicle . Th e wate r ca n
ge t int o th e transmissio n an d
differential , dilutin g th e lubrican t
an d causin g a n eventua l failure . I t
ca n als o was h th e greas e ou t o f th e
whee l bearings .
I f Yo u Ge t Stuc k
Avoi d drivin g o n sof t sand , dee p mud ,
o r othe r surface s wher e yo u coul d
ge t stuck . I f yo u d o happe n to ge t
stuc k becaus e o f inclemen t weathe ro
r othe r conditions , choos e a saf e
an d appropriat e cours e o f action .
Yo u shoul d neve r us e a jac k t o tr y
gettin g unstuck . A jac k onl y work s
o n firm , leve l ground . Also , you r
vehicl e coul d easil y sli p of f th e jac k
an d hur t yo u o r someon e else .
4-Wheel Drive Vehicles
I f yo u spi n th e wheel s excessivel y
tryin g to ge t unstuck , yo u ma y
overhea t th e component s o f th e
4-whee l driv e system . I f thi s happens ,
th e 4-whee l driv e syste m shut s of f
an d onl y th e fron t wheel s receiv e
power . I f thi s happens , sto p an d
allo w everythin g to coo l down . Th e
4-whee l driv e syste m wil l wor k agai n
afte r it s temperatur e drops .
I f yo u sli p th e clutc h fo r a lon g tim e
whil e tryin g to ge t unstuck , yo u ma y
overhea t an d damag e it .
Drivin g
Page 187 of 322
Maintenanc
e
Thi s sectio n explain s wh y i t i s
importan t t o kee p you r vehicl e wel l
maintaine d an d t o follo w basi c
maintenanc e safet y precautions .
Thi s sectio n als o include s
Maintenanc e Schedule s fo r norma l
drivin g an d sever e drivin g conditions ,
a Maintenanc e Record , an d instruc -
tion s fo r simpl e maintenanc e task s
yo u ma y wan t t o tak e car e o f
yourself .
I f yo u hav e th e skill s an d tool s t o per -
for m mor e comple x maintenanc e
task s o n you r Honda , yo u ma y wan t
t o purchas e th e Servic e Manual . Se e
pag e 29 3 fo r informatio n o n ho w to
obtai n a copy , o r se e you r Hond a
dealer .
Maintenanc e Safety...................... . 18 4
Importan t Safet y Precautions. . 18 5
Maintenanc e Schedule................. . 18 6 Require
d Maintenanc e Record... . 19 3
Owne r Maintenanc e Checks....... . 19 5
Flui d Locations.............................. . 19 6
Engin e Oil...................................... . 19 7
Addin g Oil.................................. . 19 7
Recommende d Oil.................... . 19 7
Syntheti c Oil.............................. . 19 8
Additives.................................... . 19 8
Changin g th e Oi l an d Filter..... . 19 9
Coolin g System............................. . 20 1
Addin g Engin e Coolant............ . 20 1
Replacin g Engin e Coolant....... . 20 3
Windshiel d Washers.................... . 20 6
Transmissio n Fluid....................... . 20 7
Automati c Transmission.......... . 20 7
5-spee d Manua l
Transmission......................... . 20 8
Rea r Differentia l Fluid................. . 20 9
Brak e an d Clutc h Fluid................ . 21 0
Brak e System............................ . 21 0
Clutc h System........................... . 21 1
Powe r Steering.............................. . 21 1
Ai r Cleane r Element..................... . 21 2
Hoo d Latch.................................... . 21 3
Spar k Plugs.................................... . 21 3
Replacement.............................. . 21 3
Specifications............................
. 21 4
Battery........................................... . 21 5
Wipe r Blades................................. . 21 7
Ai r Conditionin g System.............. . 21 9
Ai r Conditionin g Filter................. . 22 0
Driv e Belts..................................... . 22 0
Timin g Belt.................................... . 22 1
Tires............................................... . 22 1
Inflation...................................... . 22 1
Recommende d Tir e
Pressure s fo r Norma l
Driving........................... . 22 2
Inspection.................................. . 22 3
Maintenance.............................. . 22 3
Tir e Rotation............................. . 22 4
Replacin g Tire s an d Wheels... . 22 5
Wheel s an d Tires...................... . 22 6
Winte r Driving.......................... . 22 6
Sno w Tires............................. . 22 6
Tir e Chains............................ . 22 7
Lights............................................. . 22 8
Headligh t Aiming..................... . 23 0
Replacin g Bulbs........................ . 23 2
Storin g You r Vehicle.................... . 23 9
Maintenanc e
Page 215 of 322
Brak
e an d Clutc h Fluid , Powe r Steerin g
Clutc h Syste m
MI N
MAX
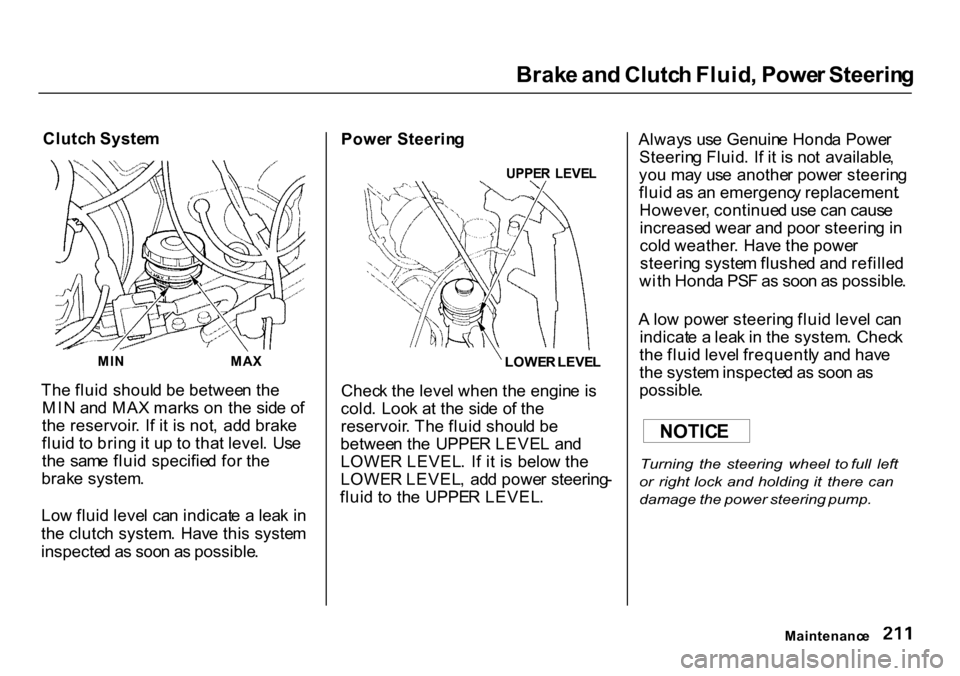
Th e flui d shoul d b e betwee n th e
MI N an d MA X mark s o n th e sid e o f
th e reservoir . I f i t i s not , ad d brak e
flui d t o brin g it u p t o tha t level . Us e
th e sam e flui d specifie d fo r th e
brak e system .
Lo w flui d leve l ca n indicat e a lea k i n
th e clutc h system . Hav e thi s syste m
inspecte d a s soo n a s possible . Powe
r Steerin g
UPPER LEVE L
LOWE R LEVE L
Chec k th e leve l whe n th e engin e i s
cold . Loo k a t th e sid e o f th e
reservoir . Th e flui d shoul d b e
betwee n th e UPPE R LEVE L an d
LOWE R LEVEL . I f i t i s belo w th e
LOWE R LEVEL , ad d powe r steering -
flui d t o th e UPPE R LEVEL . Alway
s us e Genuin e Hond a Powe r
Steerin g Fluid . I f i t i s no t available ,
yo u ma y us e anothe r powe r steerin g
flui d a s a n emergenc y replacement .
However , continue d us e ca n caus e
increase d wea r an d poo r steerin g in
col d weather . Hav e th e powe r
steerin g syste m flushe d an d refille d
wit h Hond a PS F a s soo n a s possible .
A lo w powe r steerin g flui d leve l ca n
indicat e a lea k in th e system . Chec k
th e flui d leve l frequentl y an d hav e
th e syste m inspecte d a s soo n a s
possible .
Turning the steering wheel to full left
or right lock and holding it there can
damage the power steering pump.
Maintenanc e
NOTIC
E
Page 228 of 322

Tire
s
Mak e sur e th e installe r balance s th e
wheel s whe n yo u hav e ne w tire s
installed . Thi s increase s ridin g
comfor t an d tir e life . You r vehicle' s
origina l tire s wer e dynami c o r "spin "
balance d a t th e factory . Fo r bes t
results , hav e th e installe r perfor m a
dynami c balance .
(Only on vehicles equipped with
aluminum wheels)
Improper wheel weights can damage
your vehicle's aluminum wheels. Use
only Genuine Honda wheel weights for
balancing.
Tir
e Rotatio n
T o hel p increas e tir e lif e an d
distribut e wea r mor e evenly , yo u
shoul d hav e th e tire s rotate d ever y
7,50 0 mile s (12,00 0 km) . Mov e th e
tire s t o th e position s show n in th e
char t eac h tim e the y ar e rotated . Whe
n shoppin g fo r replacemen t
tires , yo u ma y fin d tha t som e tire s
ar e "directional. " Thi s mean s the y
ar e designe d t o rotat e onl y i n on e
direction . I f yo u us e directiona l tires ,
the y shoul d b e rotate d onl y front-to -
back .
Maintenanc e
NOTIC
E
Fron
t Fron
t
(Fo r Non-directiona l
Tire s an d Wheels )
(Fo
r Directiona l
Tire s an d Wheels )
Page 229 of 322

Tire
s
Replacin g Tire s an d Wheel s
Th e tire s tha t cam e wit h you r
vehicl e wer e selecte d to matc h th e
performanc e capabilities of th e
vehicl e whil e providin g th e bes t
combinatio n o f handling , rid e
comfort , an d lon g life . Yo u shoul d
replac e the m wit h radia l tire s o f th e
sam e size , loa d range , spee d rating ,
an d maximu m col d tir e pressur e
ratin g (a s show n o n th e tire' s
sidewall) . Mixin g radia l an d bias-pl y
tire s o n you r vehicl e ca n reduc e it s
brakin g ability , traction , an d steerin g
accuracy .
I
t i s bes t t o replac e al l fou r tire s a t
th e sam e time . I f tha t i s no t possibl e
o r necessary , the n replac e th e tw o
fron t tire s o r th e tw o rea r tire s a s a
pair . Replacin g jus t on e tir e ca n
seriousl y affec t you r vehicle' s han -
dling . Th
e AB S work s b y comparin g th e
spee d o f th e wheels . Whe n replacin g
tires , us e th e sam e siz e originall y
supplie d wit h th e vehicle . Tir e siz e
an d constructio n ca n affec t whee l
spee d an d ma y caus e th e syste m to
wor k inconsistently .
I f yo u eve r nee d t o replac e a wheel ,
mak e sur e th e wheel' s specification s
matc h thos e o f th e origina l whee l
tha t cam e o n you r vehicle . Re -
placemen t wheels are availabl e a t
you r Hond a dealer .
Maintenanc e
Installin
g imprope r tire s o n you r
vehicl e ca n affec t handlin g an d
stability . Thi s ca n caus e a cras h
i n whic h yo u ca n b e seriousl y
hur t o r killed .
Alway s us e th e siz e an d typ e o f
tire s recommende d i n thi s
owner' s manual .
Page 230 of 322

Tire
s
Wheel s an d Tire s
Wheels :
15 x 6J J
Tires :
205/70R15 95 S
Se e pag e 28 0 fo r informatio n abou t
DO T Tir e Qualit y Grading .
Winte
r Drivin g
Tire s tha t ar e marke d " M + S " o r
"Al l Season " o n th e sidewal l hav e a n
all-weathe r trea d design . The y
shoul d b e suitabl e fo r mos t winte r
drivin g conditions . Tire s withou t
thes e marking s ar e designe d fo r
optimu m tractio n in dr y conditions .
The y ma y no t provid e adequat e
performanc e in winte r driving .
Fo r th e bes t performanc e in snow y
o r ic y conditions , yo u shoul d instal l
sno w tire s o r tir e chains . The y ma y
b e require d b y loca l law s unde r
certai n conditions .
Snow Tires
I f yo u moun t sno w tire s o n you r
Honda , mak e sur e the y ar e radia l
tire s o f th e sam e siz e an d loa d rang e
a s th e origina l tires . Moun t sno w
tire s o n al l fou r wheel s t o balanc e
you r vehicle' s handlin g in al l weathe r
conditions. Keep in min d th e tractio n
provide d b y sno w tire s o n dr y road s
ma y no t b e a s hig h a s you r vehicle' s
origina l equipmen t tires . Yo u shoul d
driv e cautiousl y eve n whe n th e road s
ar e clear . Chec k wit h th e tir e deale r
fo r maximu m spee d recommenda -
tions .
Maintenanc e
Page 231 of 322
Tire
s
Tire Chains
Moun t sno w chain s o n you r vehicl e
whe n warrante d b y drivin g condi -
tion s o r require d b y local laws .
Us e onl y SA E clas s "S " chains . Onl y
certai n brand s o f chain s wil l fi t you r
CR- V withou t comin g in contac t wit h
th e bod y o r causin g mechanica l
damage . Befor e buyin g an y type s o f
chains , yo u shoul d consul t wit h you r
Hond a deale r abou t th e design s an d
brand s tha t wil l wor k o n you r CR-V .
Also , mak e sur e yo u purchas e th e
correc t siz e fo r you r tires . Instal
l th e chain s onl y o n th e fron t
tires . Mountin g an y typ e o f chain s o n
th e rea r tire s wil l damag e th e bod y
an d suspension . Whe n installin g th e
chains , follo w th e manufacturer' s
instruction s an d moun t the m a s
tightl y a s yo u can . Driv e slowl y whe n
the y ar e installed . I f yo u hea r the m
comin g in contac t wit h th e body ,
sto p an d investigat e them . Mak e
sur e th e chain s ar e installe d tightly ,
an d tha t the y ar e no t contactin g th e
brak e line s o r suspension . Remov e
th e chain s a s soo n a s yo u begi n
drivin g o n cleare d roads .
Chains
that are the wrong size or
design, or are improperly installed, can
damage your vehicle's brake lines,
suspension, body, and wheels. Stop
driving if they are hitting any part of
the vehicle.
Maintenance
NOTIC
E
Page 240 of 322
Light
s
3 . Pul l th e bul b straigh t ou t o f it s
socket . Pus h th e ne w bul b in unti l
i t bottom s in th e socket .
4 . Tur n o n th e parkin g light s an d
chec k tha t th e ne w bul b is
working .
5 . Reinstal l th e socket . Sna p th e
cove r bac k in place .
Replacin
g a Rea r Sid e Marke r
Ligh t Bul b
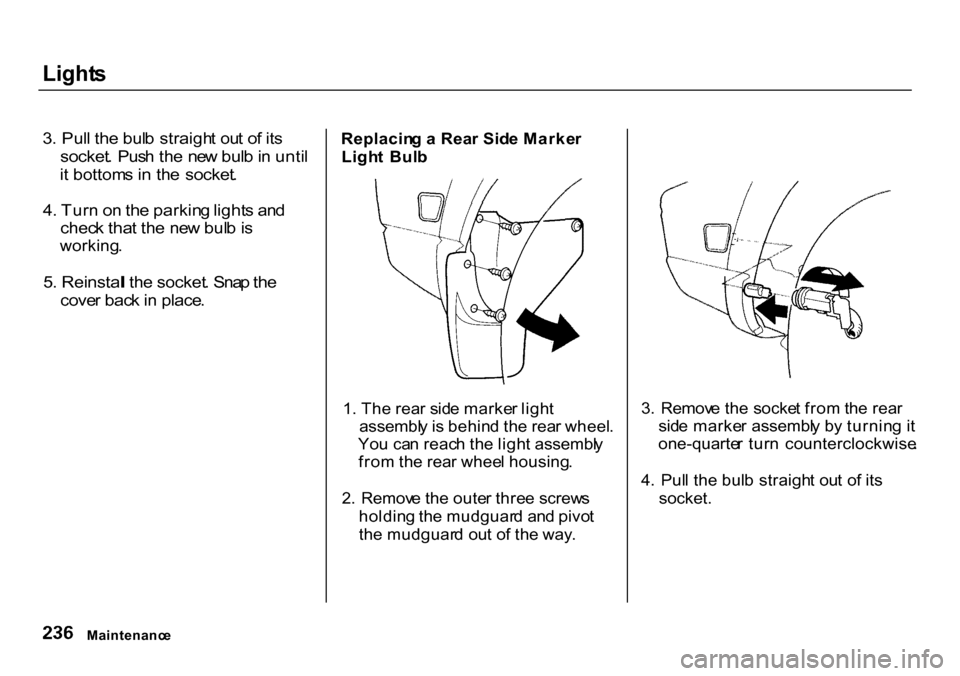
1 . Th e rea r sid e marke r ligh t
assembl y is behin d th e rea r wheel .
Yo u ca n reac h th e ligh t assembl y
fro m th e rea r whee l housing .
2 . Remov e th e oute r thre e screw s
holdin g th e mudguar d an d pivo t
th e mudguar d ou t o f th e way . 3
. Remov e th e socke t fro m th e rea r
sid e marke r assembl y b y turnin g i t
one-quarte r tur n counterclockwise .
4 . Pul l th e bul b straigh t ou t o f it s
socket.
Maintenanc e
Page 243 of 322
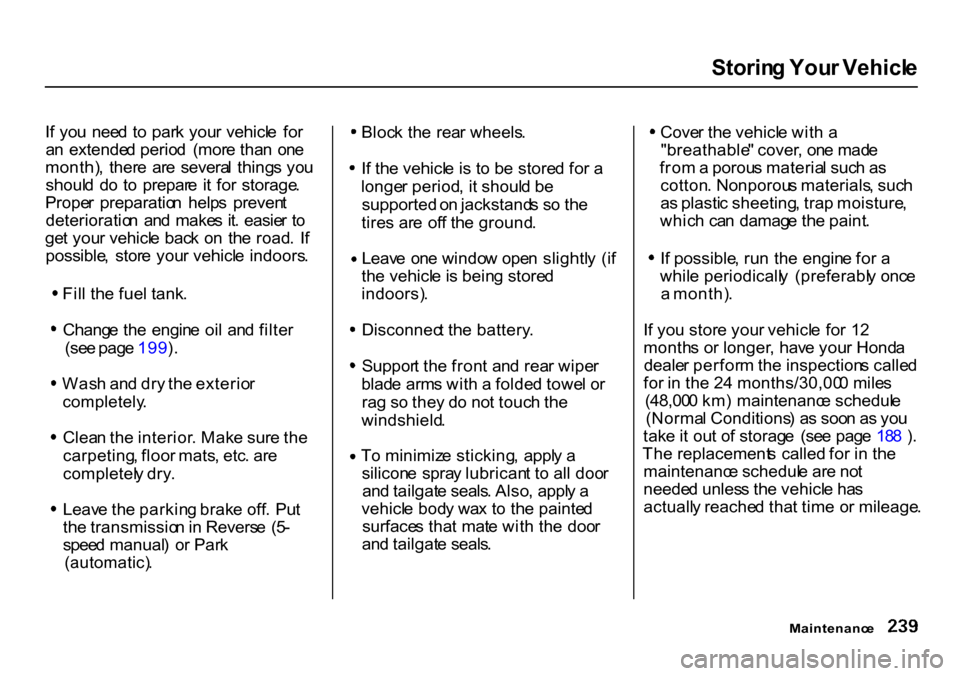
Storin
g You r Vehicl e
I f yo u nee d t o par k you r vehicl e fo r
a n extende d perio d (mor e tha n on e
month) , ther e ar e severa l thing s yo u
shoul d d o t o prepar e i t fo r storage .
Prope r preparatio n help s preven t
deterioratio n an d make s it . easie r t o
ge t you r vehicl e bac k o n th e road . I f
possible , stor e you r vehicl e indoors .
Fil l th e fue l tank .
Chang e th e engin e oi l an d filte r
(se e pag e 199 ).
Was h an d dr y th e exterio r
completely .
Clea n th e interior . Mak e sur e th e
carpeting , floo r mats , etc . ar e
completel y dry .
Leav e th e parkin g brak e off . Pu t
th e transmissio n in Revers e (5 -
spee d manual ) o r Par k
(automatic) .
Bloc
k th e rea r wheels .
I f th e vehicl e is t o b e store d fo r a
longe r period , i t shoul d b e
supported on jackstand s s o th e
tire s ar e of f th e ground .
Leav e on e windo w ope n slightl y (i f
th e vehicl e is bein g store d
indoors) .
Disconnec t th e battery .
Suppor t th e fron t an d rea r wipe r
blad e arm s wit h a folde d towe l o r
ra g s o the y d o no t touc h th e
windshield .
T o minimiz e sticking , appl y a
silicon e spra y lubrican t t o al l doo r
an d tailgat e seals . Also , appl y a
vehicl e bod y wa x t o th e painte d
surface s tha t mat e wit h th e doo r
an d tailgat e seals . Cove
r th e vehicl e wit h a
"breathable " cover , on e mad e
fro m a porou s materia l suc h a s
cotton . Nonporou s materials , suc h
a s plasti c sheeting , tra p moisture ,
whic h ca n damag e th e paint .
I f possible , ru n th e engin e fo r a
whil e periodicall y (preferabl y onc e
a month) .
I f yo u stor e you r vehicl e fo r 1 2
month s o r longer , hav e you r Hond a
deale r perfor m th e inspection s calle d
fo r i n th e 2 4 months/30,00 0 mile s
(48,00 0 km ) maintenanc e schedul e
(Norma l Conditions ) a s soo n a s yo u
tak e it ou t o f storag e (se e pag e 18 8 ) .
Th e replacement s called for i n th e
maintenanc e schedul e ar e no t
neede d unles s th e vehicl e ha s
actuall y reache d tha t tim e o r mileage .
Maintenanc e
Page 245 of 322
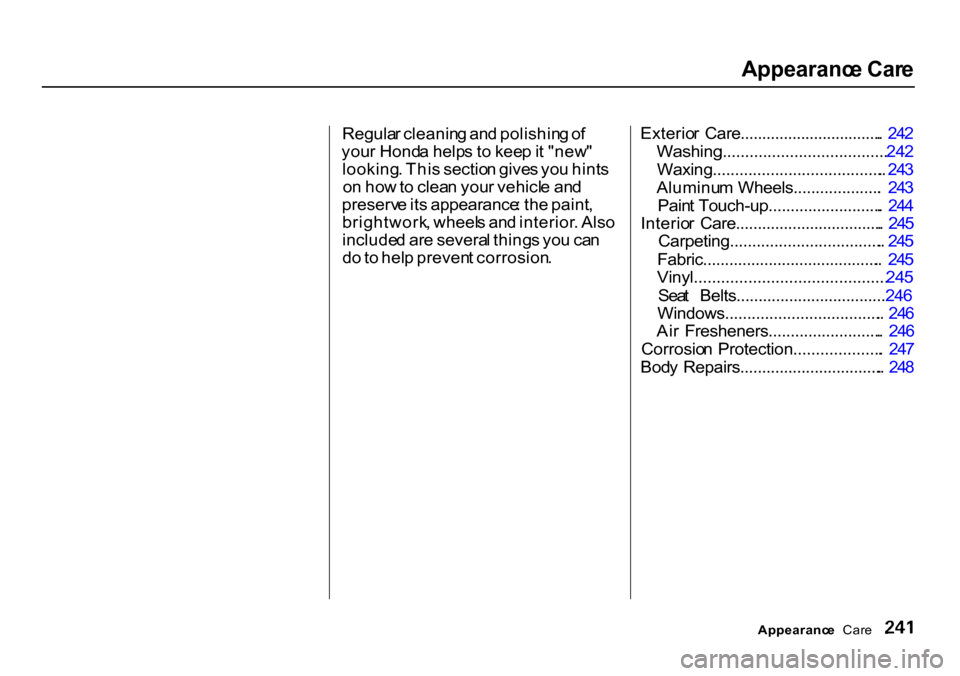
Appearanc
e Car e
Regula r cleanin g an d polishin g o f
you r Hond a help s t o kee p it "new "
looking . Thi s sectio n give s yo u hint s
o n ho w to clea n you r vehicl e an d
preserv e it s appearance : th e paint ,
brightwork , wheel s an d interior . Als o
include d ar e severa l thing s yo u ca n
d o to hel p preven t corrosion . Exterio
r Care................................. . 24 2
Washing..................................... 24 2
Waxing....................................... . 24 3
Aluminu m Wheels.................... . 24 3
Pain t Touch-up.......................... . 24 4
Interio r Care.................................. . 24 5
Carpeting................................... . 24 5
Fabric......................................... . 24 5
Vinyl........................................... 24 5
Sea t Belts.................................. 24 6
Windows.................................... .
24
6
Ai r Fresheners.......................... . 24 6
Corrosio n Protection.................... . 24 7
Bod y Repairs................................. . 24 8
Appearanc e Car e