HONDA CR-V 2000 RD1-RD3 / 1.G Repair Manual
Manufacturer: HONDA, Model Year: 2000, Model line: CR-V, Model: HONDA CR-V 2000 RD1-RD3 / 1.GPages: 322, PDF Size: 4.64 MB
Page 61 of 322
Gauge
s
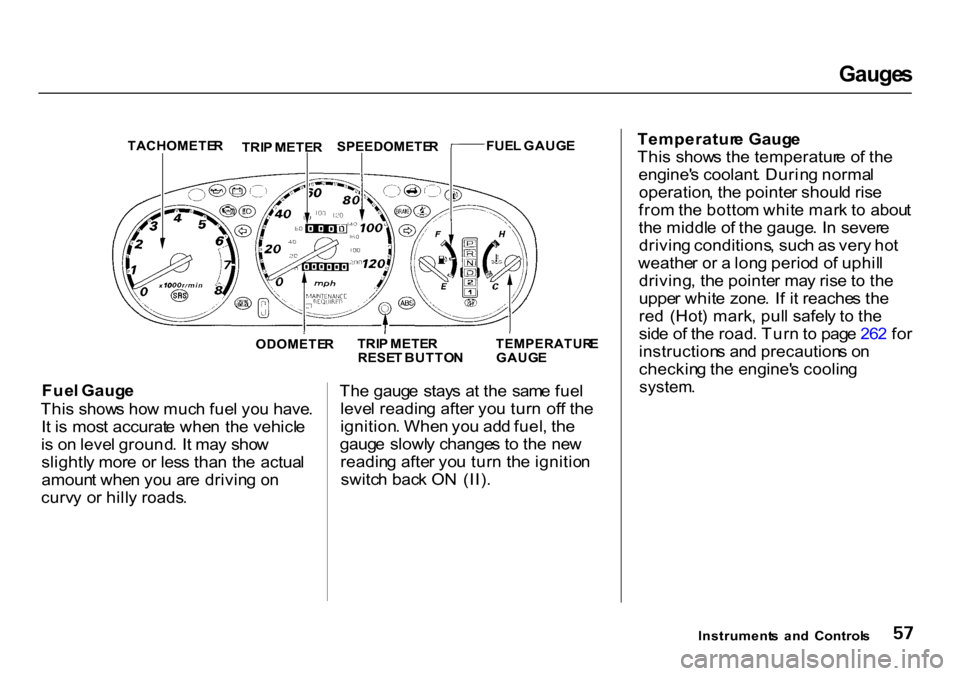
TACHOMETE R
FUEL GAUG E
ODOMETE R
TEMPERATUR
E
GAUG E
Fue l Gaug e
Thi s show s ho w muc h fue l yo u have .
I t i s mos t accurat e whe n th e vehicl e
i s o n leve l ground . I t ma y sho w
slightl y mor e o r les s tha n th e actua l
amoun t whe n yo u ar e drivin g o n
curv y o r hill y roads . Th
e gaug e stay s a t th e sam e fue l
leve l readin g afte r yo u tur n of f th e
ignition . Whe n yo u ad d fuel , th e
gaug e slowl y change s t o th e ne w
readin g afte r yo u tur n th e ignitio n
switc h bac k O N (II) . Temperatur
e Gaug e
Thi s show s th e temperatur e o f th e
engine' s coolant . Durin g norma l
operation , th e pointe r shoul d ris e
fro m th e botto m whit e mar k t o abou t
th e middl e o f th e gauge . I n sever e
drivin g conditions , suc h a s ver y ho t
weathe r o r a lon g perio d o f uphil l
driving , th e pointe r ma y ris e to th e
uppe r whit e zone . I f i t reache s th e
re d (Hot ) mark , pul l safel y t o th e
sid e o f th e road . Tur n to pag e 26 2 fo r
instruction s an d precaution s o n
checkin g th e engine' s coolin g
system .
Instrument s an d Control s
TRI
P METE R
SPEEDOMETE
R
TRI P METE R
RESE T BUTTO N
Page 62 of 322
Gauge
s
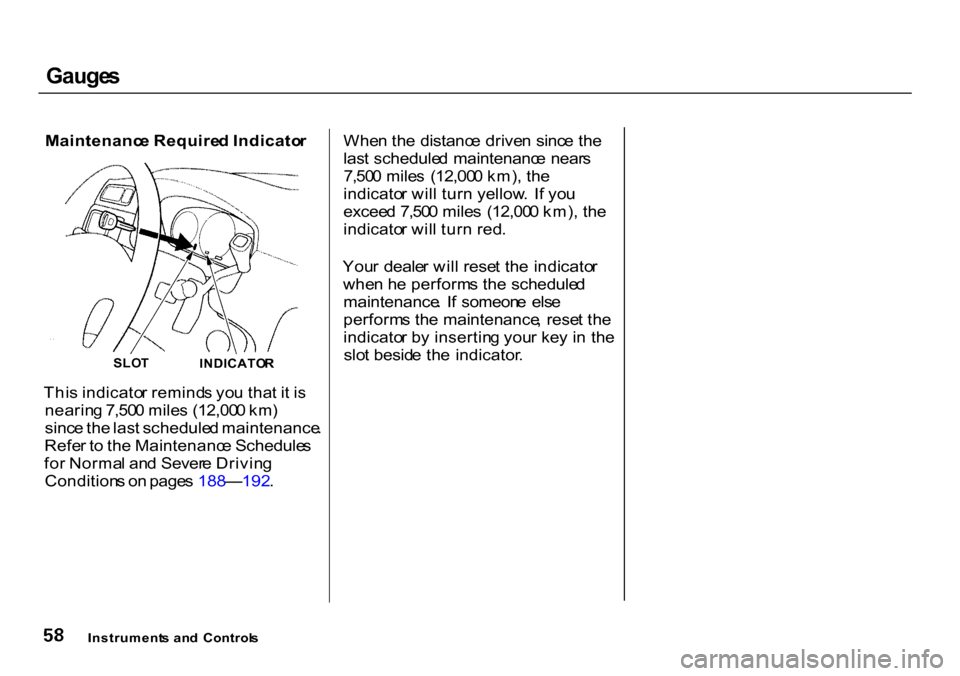
Maintenanc e Require d Indicato r
Thi s indicato r remind s yo u tha t i t i s
nearin g 7,50 0 mile s (12,00 0 km )
sinc e th e las t schedule d maintenance .
Refe r t o th e Maintenanc e Schedule s
fo r Norma l an d Sever e Drivin g
Condition s o n page s 188 —192 . Whe
n th e distanc e drive n sinc e th e
las t schedule d maintenanc e near s
7,50 0 mile s (12,00 0 km) , th e
indicato r wil l tur n yellow . I f yo u
excee d 7,50 0 mile s (12,00 0 km) , th e
indicato r wil l tur n red .
You r deale r wil l rese t th e indicato r
whe n h e perform s the schedule d
maintenance . I f someon e els e
perform s th e maintenance , rese t th e
indicato r b y insertin g you r ke y i n th e
slo t besid e th e indicator .
Instrument s an d Control s
SLO
T
INDICATO R
Page 63 of 322
Control
s Nea r th e Steerin g Whee l
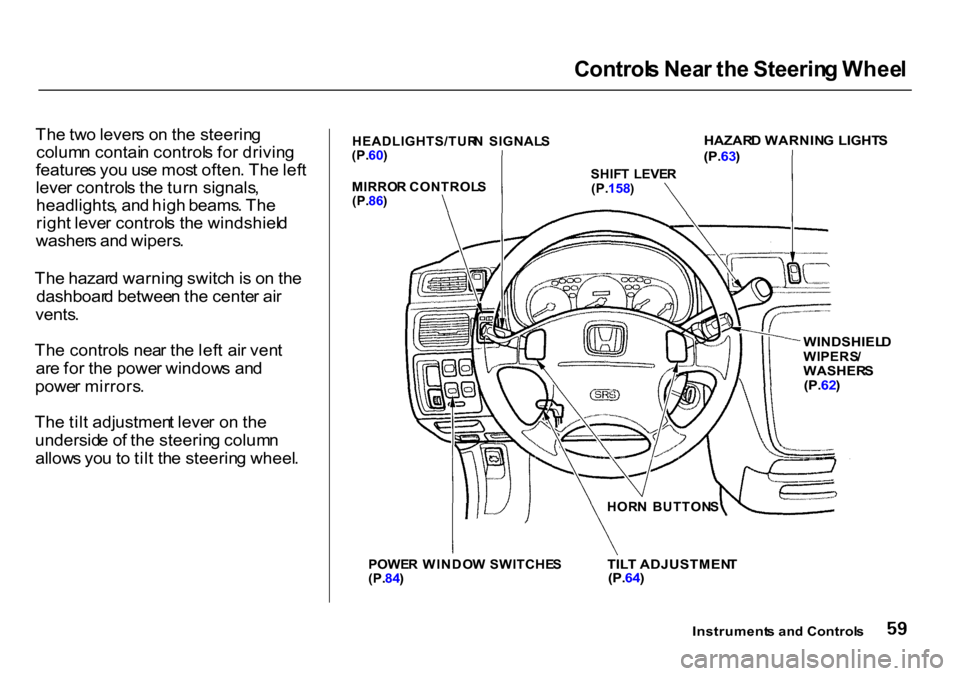
Th e tw o lever s o n th e steerin g
colum n contai n control s fo r drivin g
feature s yo u us e mos t often . Th e lef t
leve r control s th e tur n signals ,
headlights , an d hig h beams . Th e
righ t leve r control s th e windshiel d
washer s an d wipers .
Th e hazar d warnin g switc h is o n th e
dashboar d betwee n th e cente r ai r
vents .
Th e control s nea r th e lef t ai r ven t
ar e fo r th e powe r window s an d
powe r mirrors .
Th e til t adjustmen t leve r o n th e
undersid e o f th e steerin g colum n
allow s yo u to til t th e steerin g wheel . HEADLIGHTS/TUR
N SIGNAL S
(P. 60)
WINDSHIELD
WIPERS /
WASHER S
(P. 62)
POWE R WINDO W SWITCHE S
(P. 84)
Instruments an d Control s
TIL
T ADJUSTMEN T
(P. 64)
HOR
N BUTTON S
SHIF
T LEVE R
(P. 158 )
MIRRO
R CONTROL S
(P. 86)
HAZAR
D WARNIN G LIGHT S
(P. 63)
Page 64 of 322
Control
s Nea r th e Steerin g Whee l
Headlight s
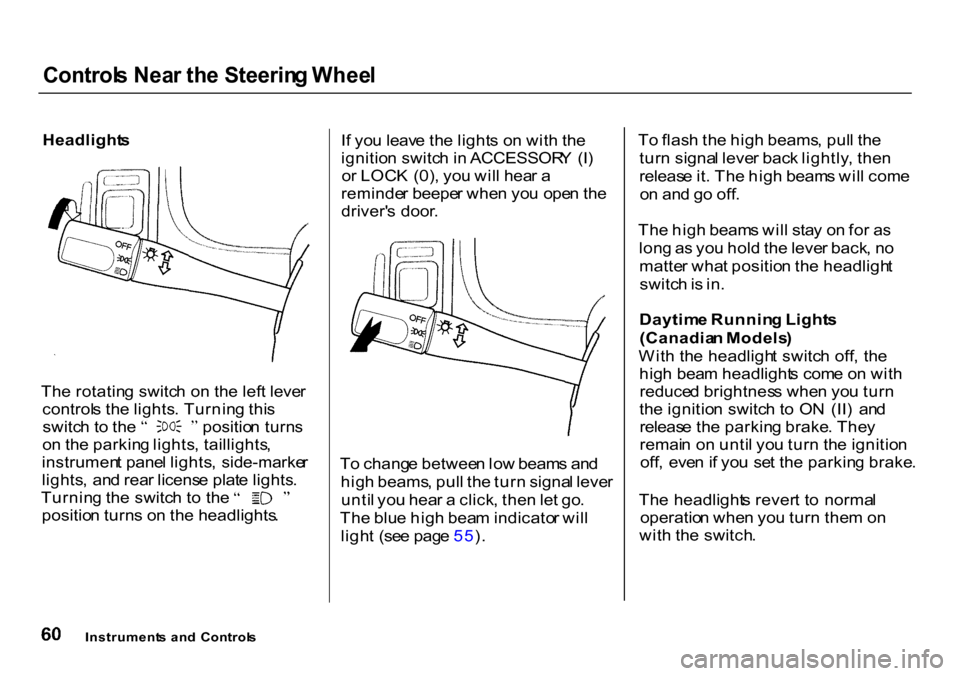
Th e rotatin g switc h o n th e lef t leve r
control s th e lights . Turnin g thi s switc
h t o th e positio n turn s
o n th e parkin g lights , taillights ,
instrumen t pane l lights , side-marke r
lights , an d rea r licens e plat e lights .Turnin
g th e switc h t o th e
positio n turn s o n th e headlights .I
f yo u leav e th e light s o n wit h th e
ignitio n switc h in ACCESSOR Y (I )
o r LOC K (0) , yo u wil l hea r a
reminde r beepe r whe n yo u ope n th e
driver' s door .
T o chang e betwee n lo w beam s an d
hig h beams , pul l th e tur n signa l leve r
unti l yo u hea r a click , the n le t go .
Th e blu e hig h bea m indicato r wil l
ligh t (se e pag e 55 ). T
o flas h th e hig h beams , pul l th e
tur n signa l leve r bac k lightly , the n
releas e it . Th e hig h beam s wil l com e
o n an d g o off .
Th e hig h beam s wil l sta y o n fo r a s
lon g a s yo u hol d th e leve r back , n o
matte r wha t positio n th e headligh t
switc h is in .
Daytim e Runnin g Light s
(Canadia n Models )
Wit h th e headligh t switc h off , th e
hig h bea m headlight s com e o n wit h
reduce d brightnes s whe n yo u tur n
th e ignitio n switc h t o O N (II ) an d
releas e th e parkin g brake . The y
remai n o n unti l yo u tur n th e ignitio n
off , eve n if yo u se t th e parkin g brake .
Th e headlight s rever t t o norma l
operatio n whe n yo u tur n the m o n
wit h th e switch .
Instrument s an d Control s
Page 65 of 322
Control
s Nea r th e Steerin g Whee l
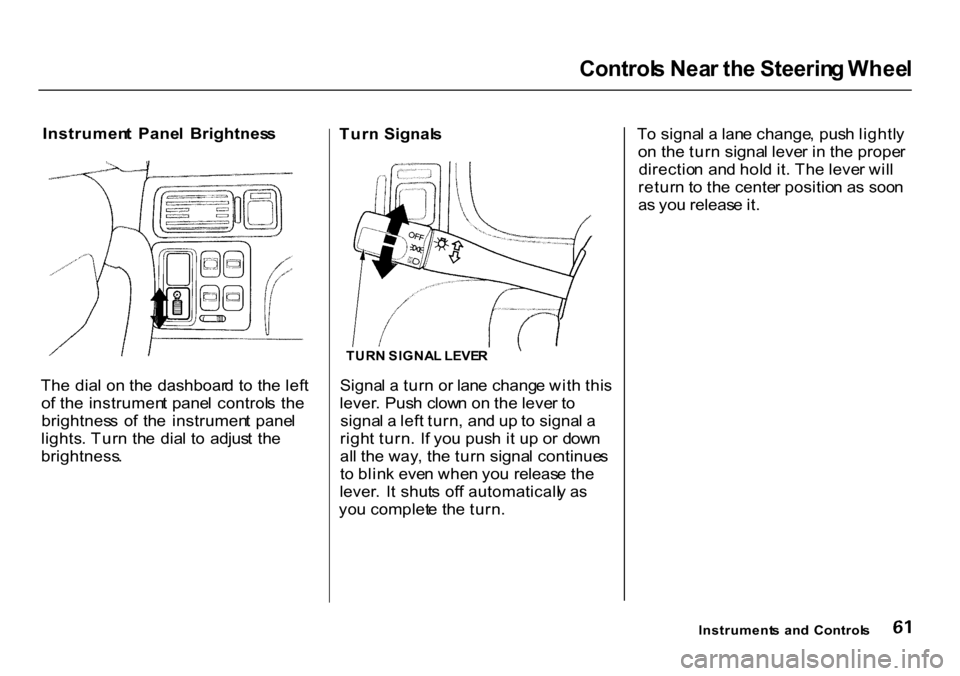
Instrumen t Pane l Brightnes s
Th e dia l o n th e dashboar d t o th e lef t
o f th e instrumen t pane l control s th e
brightnes s o f th e instrumen t pane l
lights . Tur n th e dia l t o adjus t th e
brightness . Tur
n Signal s
Signa l a tur n o r lan e chang e wit h thi s
lever . Pus h clow n o n th e leve r t o
signa l a lef t turn , an d u p to signa l a
righ t turn . I f yo u pus h i t u p o r dow n
al l th e way , th e tur n signa l continue s
t o blin k eve n whe n yo u releas e th e
lever . I t shut s of f automaticall y a s
yo u complet e th e turn . T
o signa l a lan e change , pus h lightl y
o n th e tur n signa l leve r i n th e prope r
directio n an d hol d it . Th e leve r wil l
retur n t o th e cente r positio n a s soo n
a s yo u releas e it .
Instrument s an d Control s
TUR
N SIGNA L LEVE R
Page 66 of 322
Control
s Nea r th e Steerin g Whee l
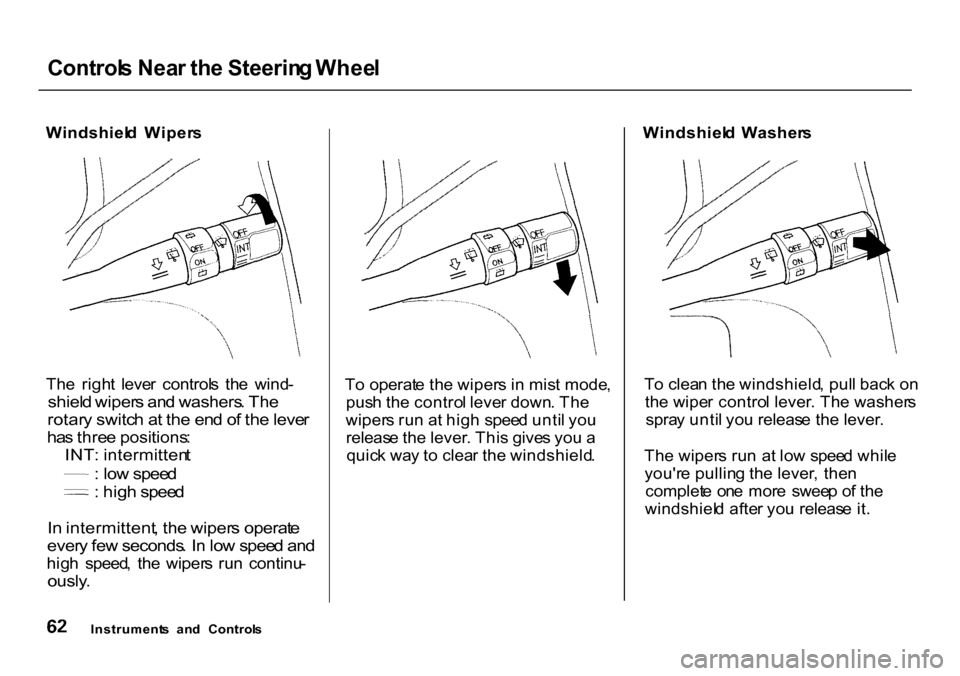
Windshiel d Wiper s
Th e righ t leve r control s th e wind -
shiel d wiper s an d washers . Th e
rotar y switc h a t th e en d o f th e leve r
ha s thre e positions :
INT : intermitten t
:
lo w spee d
:
hig h spee d
I n intermittent , th e wiper s operat e
ever y fe w seconds . I n lo w spee d an d
hig h speed , th e wiper s ru n continu -
ously .
T
o operat e th e wiper s i n mis t mode ,
pus h th e contro l leve r down . Th e
wiper s ru n a t hig h spee d unti l yo u
releas e th e lever . Thi s give s yo u a
quic k wa y t o clea r th e windshield .Windshiel
d Washer s
T o clea n th e windshield , pul l bac k o n
th e wipe r contro l lever . Th e washer s
spra y unti l yo u releas e th e lever .
Th e wiper s ru n a t lo w spee d whil e
you'r e pullin g th e lever , the n
complet e on e mor e swee p o f th e
windshiel d afte r yo u releas e it .
Instrument s an d Control s
Page 67 of 322
Control
s Nea r th e Steerin g Whee l
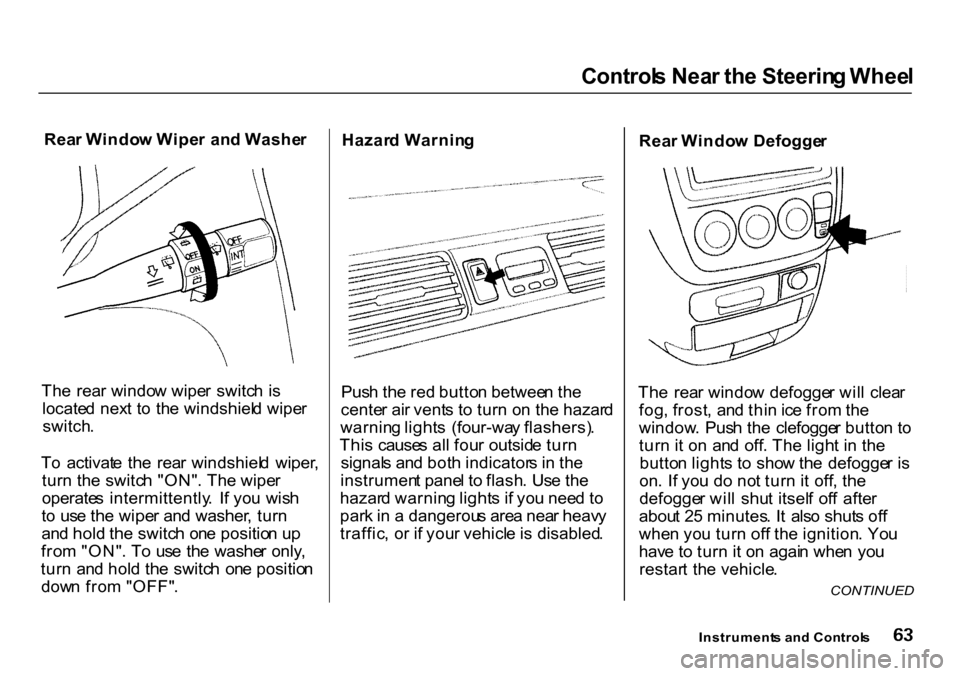
Rea r Windo w Wipe r an d Washe r
Th e rea r windo w wipe r switc h i s
locate d nex t t o th e windshiel d wipe r
switch .
T o activat e th e rea r windshiel d wiper ,
tur n th e switc h "ON" . Th e wipe r
operate s intermittently . I f yo u wis h
t o us e th e wipe r an d washer , tur n
an d hol d th e switc h on e positio n u p
fro m "ON" . T o us e th e washe r only ,
tur n an d hol d th e switc h on e positio n
dow n fro m "OFF" . Hazar
d Warnin g
Pus h th e re d butto n betwee n th e
cente r ai r vent s t o tur n o n th e hazar d
warnin g light s (four-wa y flashers) .
Thi s cause s al l fou r outsid e tur n
signal s an d bot h indicator s i n th e
instrumen t pane l t o flash . Us e th e
hazar d warnin g light s i f yo u nee d t o
par k in a dangerou s are a nea r heav y
traffic , o r i f you r vehicl e is disabled .Rea
r Windo w Defogge r
Th e rea r windo w defogge r wil l clea r
fog , frost , an d thi n ic e fro m th e
window . Pus h th e clefogge r butto n t o
tur n it o n an d off . Th e ligh t i n th e
butto n light s t o sho w th e defogge r i s
on . I f yo u d o no t tur n it off , th e
defogge r wil l shu t itsel f of f afte r
abou t 2 5 minutes . I t als o shut s of f
whe n yo u tur n of f th e ignition . Yo u
hav e t o tur n it o n agai n whe n yo u
restar t th e vehicle .
Instrument s an d Control s
CONTINUED
Page 68 of 322
Control
s Nea r th e Steerin g Whee l
Mak e sur e th e rea r windo w is clea r
an d yo u hav e goo d visibilit y befor e
startin g to drive .
Th e defogge r wire s o n th e insid e o f
th e rea r windo w ca n b e accidentall y
damaged . Whe n cleanin g th e glass ,
alway s wip e sid e t o side . Steerin
g Whee l Adjustmen t
See page 18 for important safety
information about how to properly
position the steering wheel.
Mak e an y steerin g whee l adjustmen t
befor e yo u star t driving .
Instrument s an d Control s Adjustin
g th e steerin g whee l
positio n whil e drivin g ma y
caus e yo u t o los e contro l o f th e
vehicl e an d b e seriousl y injure d
i n a crash .
Adjus t th e steerin g whee l onl y
whe n th e vehicl e is stopped .
Page 69 of 322
Control
s Nea r th e Steerin g Whee l
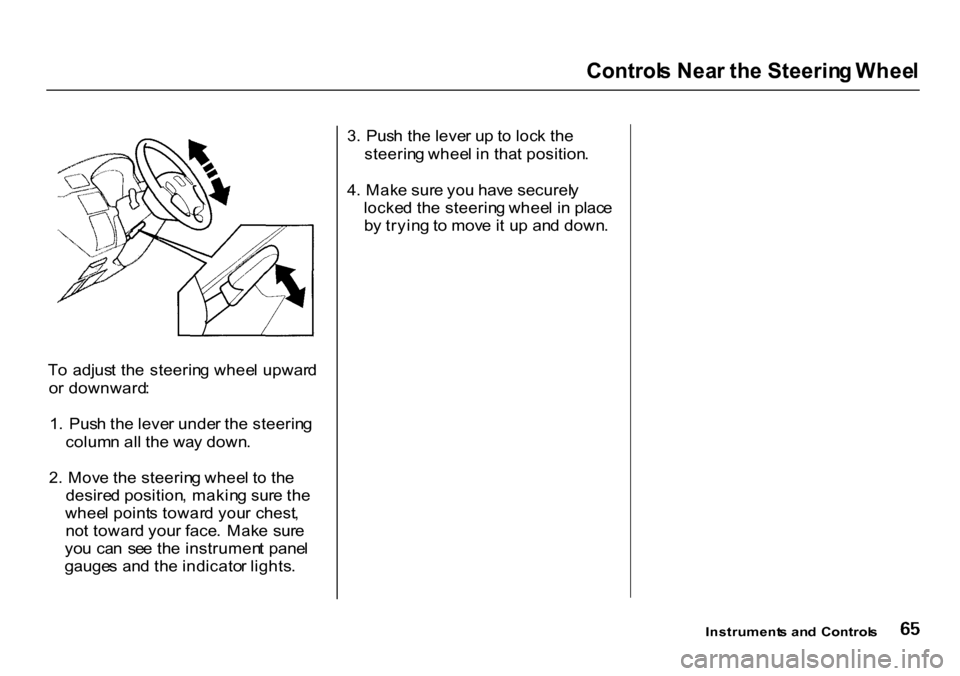
T o adjus t th e steerin g whee l upwar d
o r downward :
1 . Pus h th e leve r unde r th e steerin g
colum n al l th e wa y down .
2 . Mov e th e steerin g whee l t o th e
desire d position , makin g sur e th e
whee l point s towar d you r chest ,
no t towar d you r face . Mak e sur e
yo u ca n se e th e instrumen t pane l
gauge s an d th e indicato r lights . 3
. Pus h th e leve r u p to loc k th e
steerin g whee l i n tha t position .
4 . Mak e sur e yo u hav e securel y
locke d th e steerin g whee l i n plac e
b y tryin g to mov e it u p an d down .
Instruments an d Control s
Page 70 of 322
Steerin
g Whee l Control s
Cruis e Contro l
Cruis e contro l allow s yo u t o maintai n
a se t spee d abov e 2 5 mp h (4 0 km/h )
withou t keepin g you r foo t o n th e
accelerato r pedal . I t shoul d b e use d
fo r cruisin g o n straight , ope n
highways . I t i s no t recommende d fo r
condition s suc h a s cit y driving ,
windin g roads , slipper y roads , heav y
rain , o r ba d weather . Yo u shoul d
hav e ful l contro l o f th e vehicl e unde r
thos e conditions .
The
cruise control, as it operates,
moves the accelerator pedal. You can
damage your vehicle's accelerator
mechanism by resting your foot under
the pedal and blocking the movement.
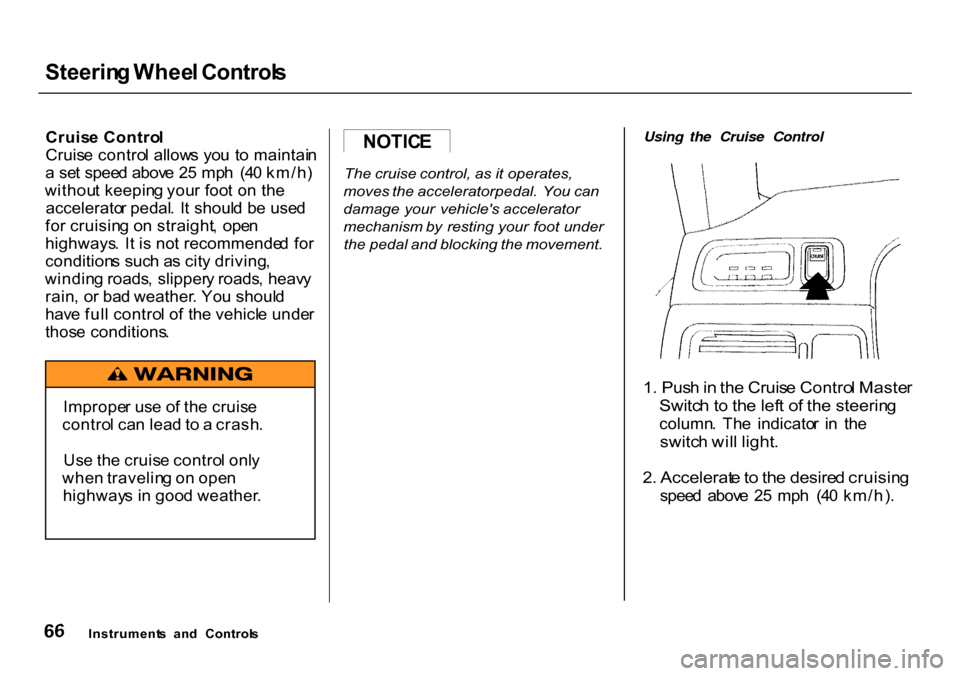
Using the Cruise Control
1 . Pus h in th e Cruis e Contro l Maste r
Switc h to th e lef t o f th e steerin g
column . Th e indicato r i n th e
switc h wil l light .
2 . Accelerat e to th e desire d cruisin g
spee d abov e 2 5 mp h (4 0 km/h) .
Instrument s an d Control s
NOTIC
E
Imprope r us e o f th e cruis e
contro l ca n lea d t o a crash .
Us e th e cruis e contro l onl y
whe n travelin g o n ope n
highway s i n goo d weather .