HONDA CR-V 2013 RM1, RM3, RM4 / 4.G Owners Manual
Manufacturer: HONDA, Model Year: 2013, Model line: CR-V, Model: HONDA CR-V 2013 RM1, RM3, RM4 / 4.GPages: 361, PDF Size: 6.58 MB
Page 91 of 361
uuGauges and DisplaysuMulti-Information Display
90
Instrument Panel
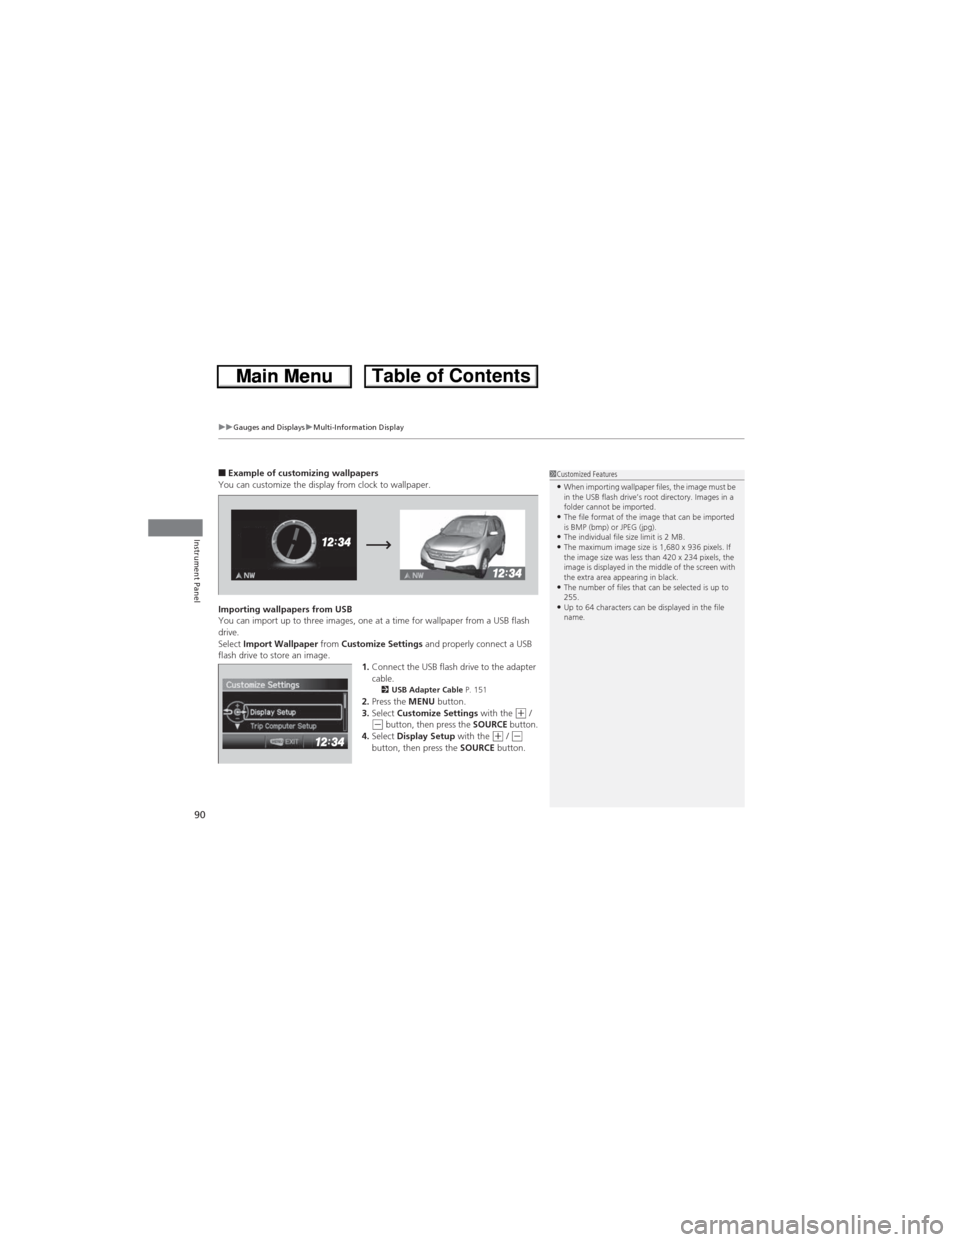
■Example of customizing wallpapers
You can customize the display from clock to wallpaper.
Importing wallpapers from USB
You can import up to three images, one at a time for wallpaper from a USB flash
drive.
Select Import Wallpaper from Customize Settings and properly connect a USB
flash drive to store an image.
1.Connect the USB flash drive to the adapter
cable.
2USB Adapter Cable P. 1512.Press the MENU button.
3.Select Customize Settings with the (+ / (- button, then press the SOURCE button.
4.Select Display Setup with the (+ / (-
button, then press the SOURCE button.
1Customized Features•When importing wallpaper files, the image must be
in the USB flash drive’s root directory. Images in a
folder cannot be imported.
•The file format of the image that can be imported
is BMP (bmp) or JPEG (jpg).
•The individual file size limit is 2 MB.•The maximum image size is 1,680 x 936 pixels. If
the image size was less than 420 x 234 pixels, the
image is displayed in the middle of the screen with
the extra area appearing in black.
•The number of files that can be selected is up to
255.
•Up to 64 characters can be displayed in the file
name.
Page 92 of 361
91
uuGauges and DisplaysuMulti-Information Display
Continued
Instrument Panel
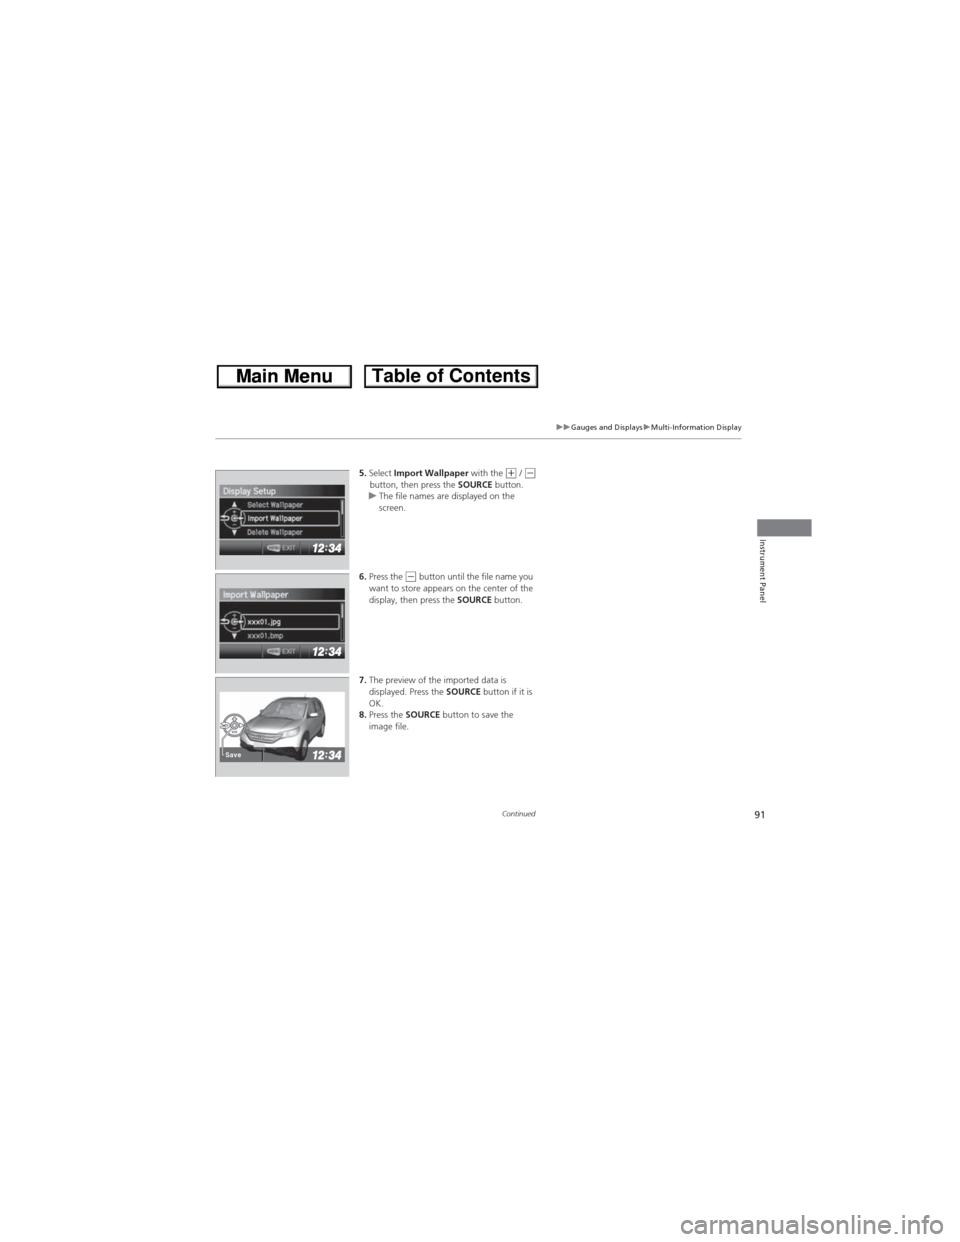
5.Select Import Wallpaper with the (+ / (-button, then press the SOURCE button.
uThe file names are displayed on the
screen.
6.Press the
(- button until the file name you
want to store appears on the center of the
display, then press the SOURCE button.
7.The preview of the imported data is
displayed. Press the SOURCE button if it is
OK.
8.Press the SOURCE button to save the
image file.
Save
Page 93 of 361
92
uuGauges and DisplaysuMulti-Information Display
Instrument Panel
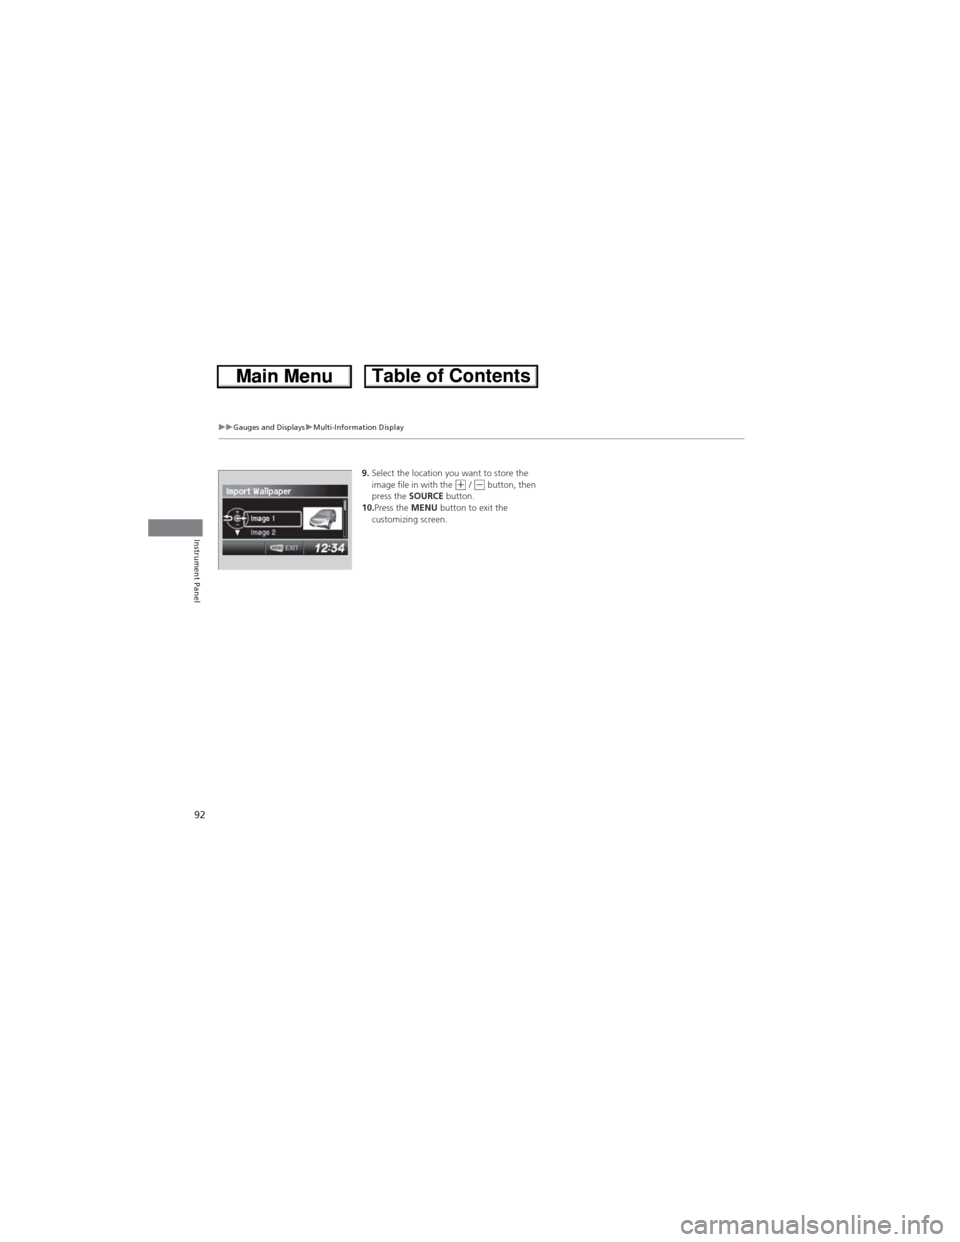
9.Select the location you want to store the
image file in with the (+ / (- button, then
press the SOURCE button.
10.Press the MENU button to exit the
customizing screen.
Page 94 of 361
93
uuGauges and DisplaysuMulti-Information Display
Instrument Panel
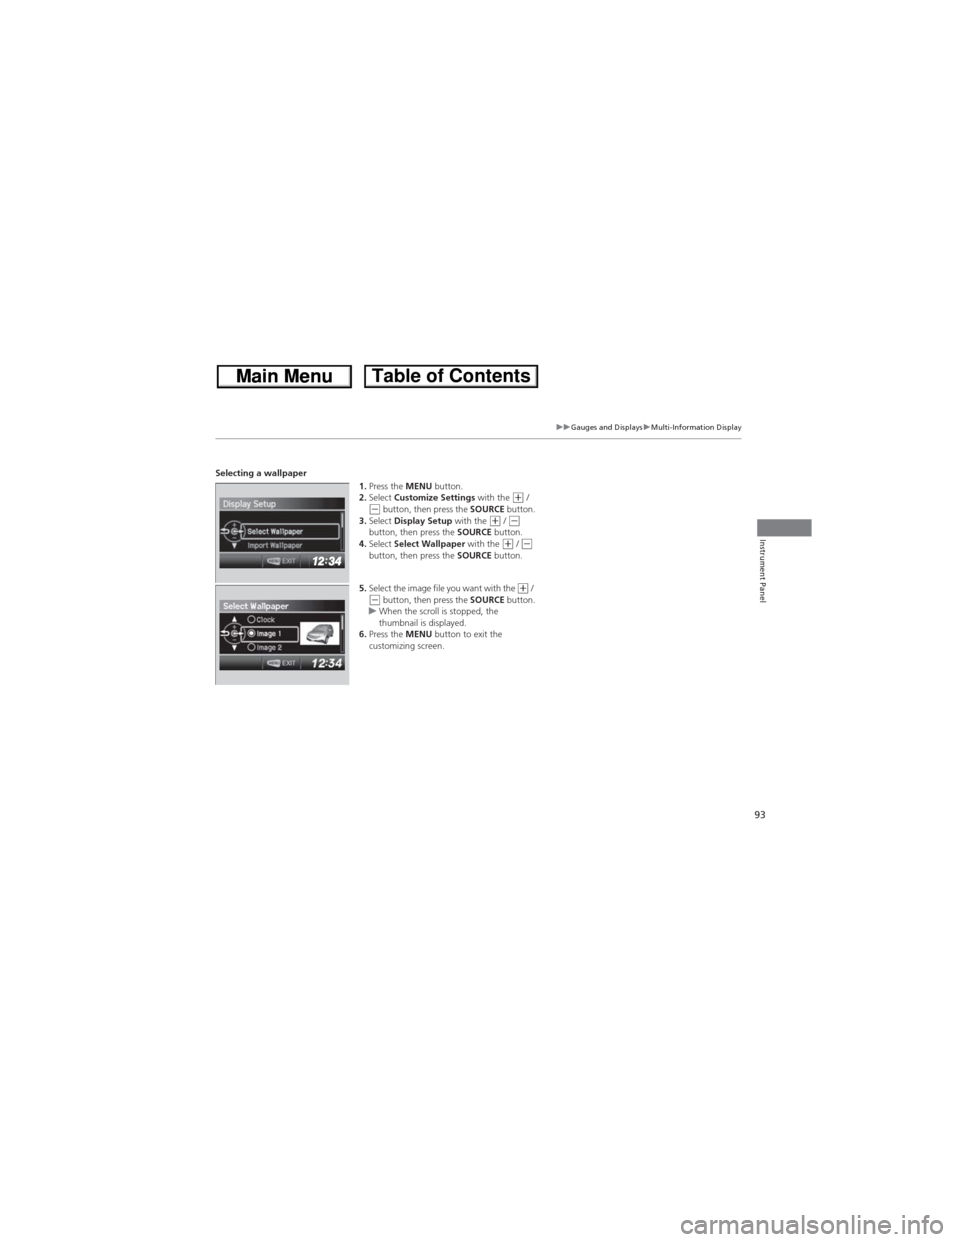
Selecting a wallpaper
1.Press the MENU button.
2.Select Customize Settings with the
(+ / (- button, then press the SOURCE button.
3.Select Display Setup with the (+ / (-
button, then press the SOURCE button.
4.Select Select Wallpaper with the
(+ / (-
button, then press the SOURCE button.
5.Select the image file you want with the
(+ / (- button, then press the SOURCE button.
uWhen the scroll is stopped, the
thumbnail is displayed.
6.Press the MENU button to exit the
customizing screen.
Page 95 of 361

94
Page 96 of 361
95
Controls
This chapter explains how to operate the various controls necessary for driving.
Clock.................................................... 96
Locking and Unlocking the Doors
Key Types and Functions .................... 97
Locking/Unlocking the Doors from the
Outside ............................................ 99
Locking/Unlocking the Doors from the
Inside ............................................. 101
Childproof Door Locks ..................... 102
Auto Door Locking/Unlocking .......... 103
Opening and Closing the Tailgate... 104
Security System................................ 106
Immobilizer System .......................... 106
Security System Alarm
*.................... 106Opening and Closing the Windows..... 108
Opening and Closing the Moonroof*.. 110Operating the Switches Around the
Steering Wheel
Ignition Switch ................................. 111
Turn Signals ..................................... 112
Light Switches.................................. 112
Fog Lights
*...................................... 114
Daytime Running Lights ................... 114
Wipers and Washers ........................ 115
Brightness Control ........................... 117
Rear Defogger/Heated Door Mirror
*
Button ........................................... 118
Adjusting the Steering Wheel........... 119Adjusting the Mirrors....................... 120
Interior Rearview Mirror ................... 120
Power Door Mirrors ......................... 121
Adjusting the Seats.......................... 122
Adjusting the Seat Positions ............. 122
Interior Lights/Interior Convenience
Items................................................ 132
Interior Lights .................................. 132
Interior Convenience Items .............. 133
Heating and Cooling System*......... 142
Using Vents, Heating and A/C.......... 142
Climate Control System*.................. 145
Using Automatic Climate Control .... 145
Automatic Climate Control Sensors ... 148
* Not available on all models
Page 97 of 361
96
Controls
Clock
Adjusting the Clock
You can adjust the time in the clock display with the ignition switch in ON (w.
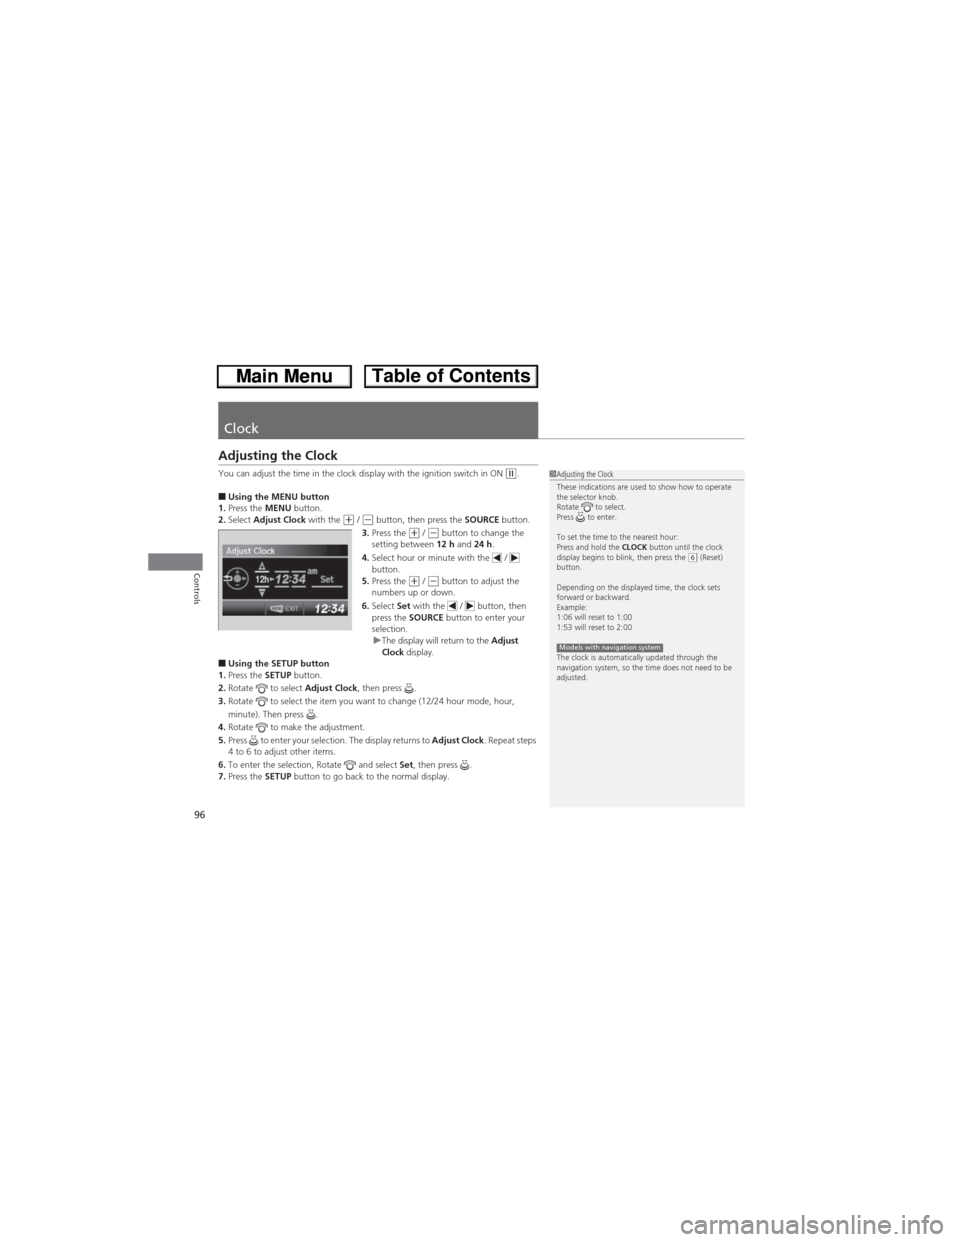
■Using the MENU button
1.Press the MENU button.
2.Select Adjust Clock with the
(+ / (- button, then press the SOURCE button.
3.Press the (+ / (- button to change the
setting between 12 h and 24 h.
4.Select hour or minute with the /
button.
5.Press the
(+ / (- button to adjust the
numbers up or down.
6.Select Set with the / button, then
press the SOURCE button to enter your
selection.
uThe display will return to the Adjust
Clock display.
■Using the SETUP button
1.Press the SETUP button.
2.Rotate to select Adjust Clock, then press .
3.Rotate to select the item you want to change (12/24 hour mode, hour,
minute). Then press .
4.Rotate to make the adjustment.
5.Press to enter your selection. The display returns to Adjust Clock. Repeat steps
4 to 6 to adjust other items.
6.To enter the selection, Rotate and select Set, then press .
7.Press the SETUP button to go back to the normal display.
1Adjusting the Clock
These indications are used to show how to operate
the selector knob.
Rotate to select.
Press to enter.
To set the time to the nearest hour:
Press and hold the CLOCK button until the clock
display begins to blink, then press the
(6 (Reset)
button.
Depending on the displayed time, the clock sets
forward or backward.
Example:
1:06 will reset to 1:00
1:53 will reset to 2:00
The clock is automatically updated through the
navigation system, so the time does not need to be
adjusted.
Models with navigation system
Page 98 of 361
97Continued
Controls
Locking and Unlocking the Doors
Key Types and Functions
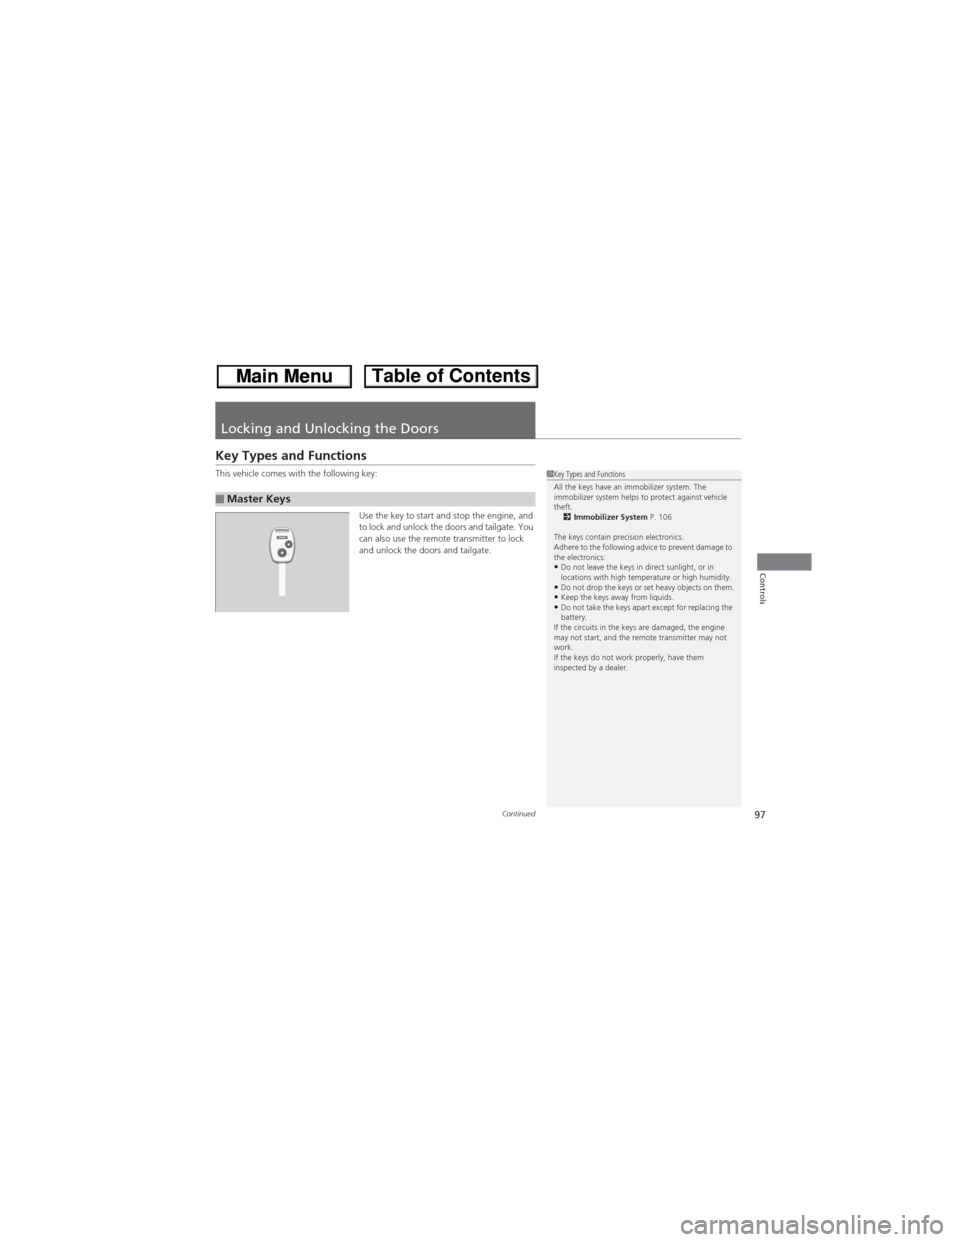
This vehicle comes with the following key:
Use the key to start and stop the engine, and
to lock and unlock the doors and tailgate. You
can also use the remote transmitter to lock
and unlock the doors and tailgate.
■Master Keys
1Key Types and Functions
All the keys have an immobilizer system. The
immobilizer system helps to protect against vehicle
theft.
2Immobilizer System P. 106
The keys contain precision electronics.
Adhere to the following advice to prevent damage to
the electronics:
•Do not leave the keys in direct sunlight, or in
locations with high temperature or high humidity.
•Do not drop the keys or set heavy objects on them.•Keep the keys away from liquids.•Do not take the keys apart except for replacing the
battery.
If the circuits in the keys are damaged, the engine
may not start, and the remote transmitter may not
work.
If the keys do not work properly, have them
inspected by a dealer.
Page 99 of 361
uuLocking and Unlocking the DoorsuKey Types and Functions
98
Controls
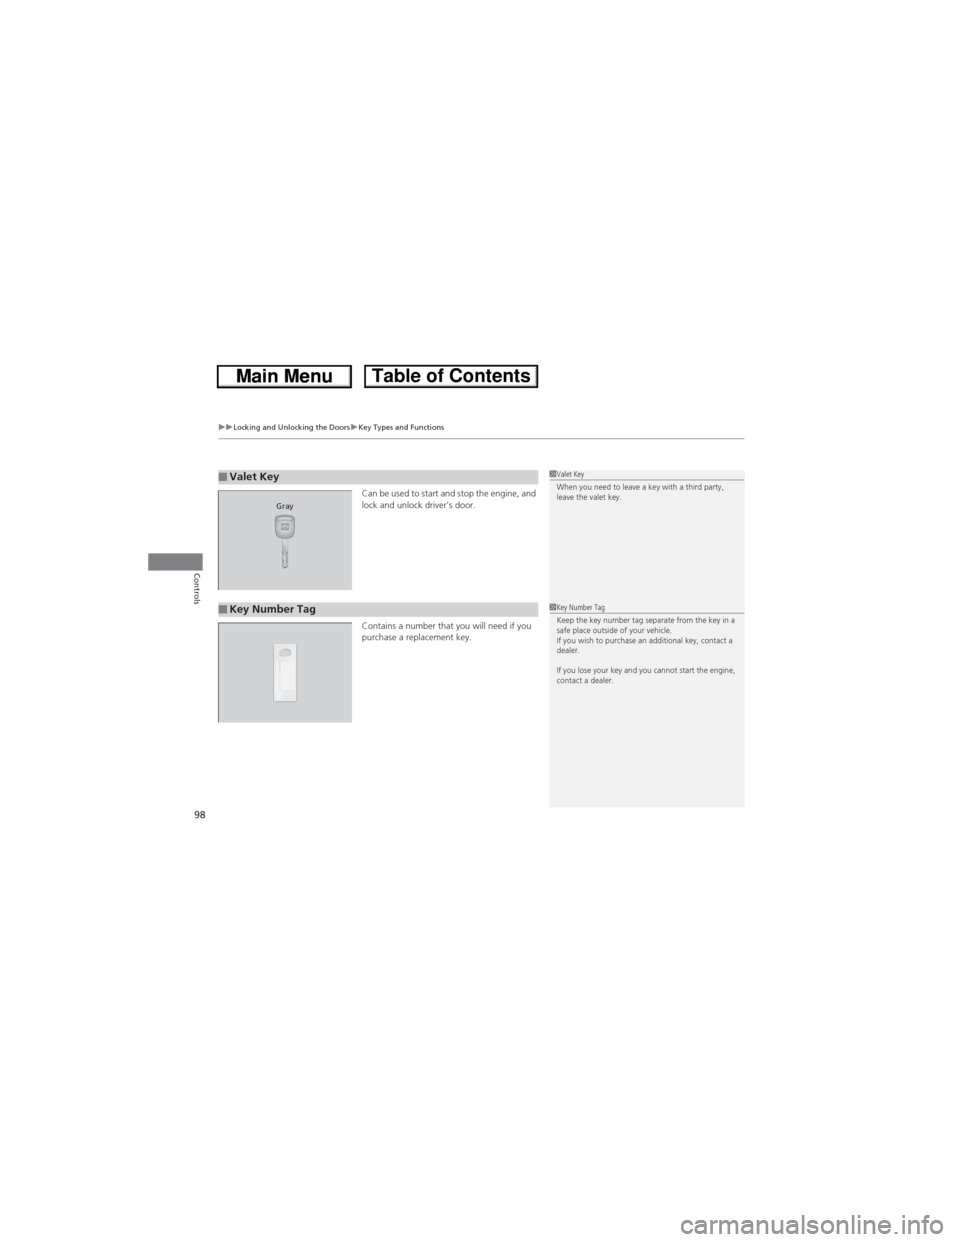
Can be used to start and stop the engine, and
lock and unlock driver's door.
Contains a number that you will need if you
purchase a replacement key.■Valet Key1Valet Key
When you need to leave a key with a third party,
leave the valet key.
Gray
■Key Number Tag1Key Number Tag
Keep the key number tag separate from the key in a
safe place outside of your vehicle.
If you wish to purchase an additional key, contact a
dealer.
If you lose your key and you cannot start the engine,
contact a dealer.
Page 100 of 361
99
uuLocking and Unlocking the DoorsuLocking/Unlocking the Doors from the Outside
Continued
Controls
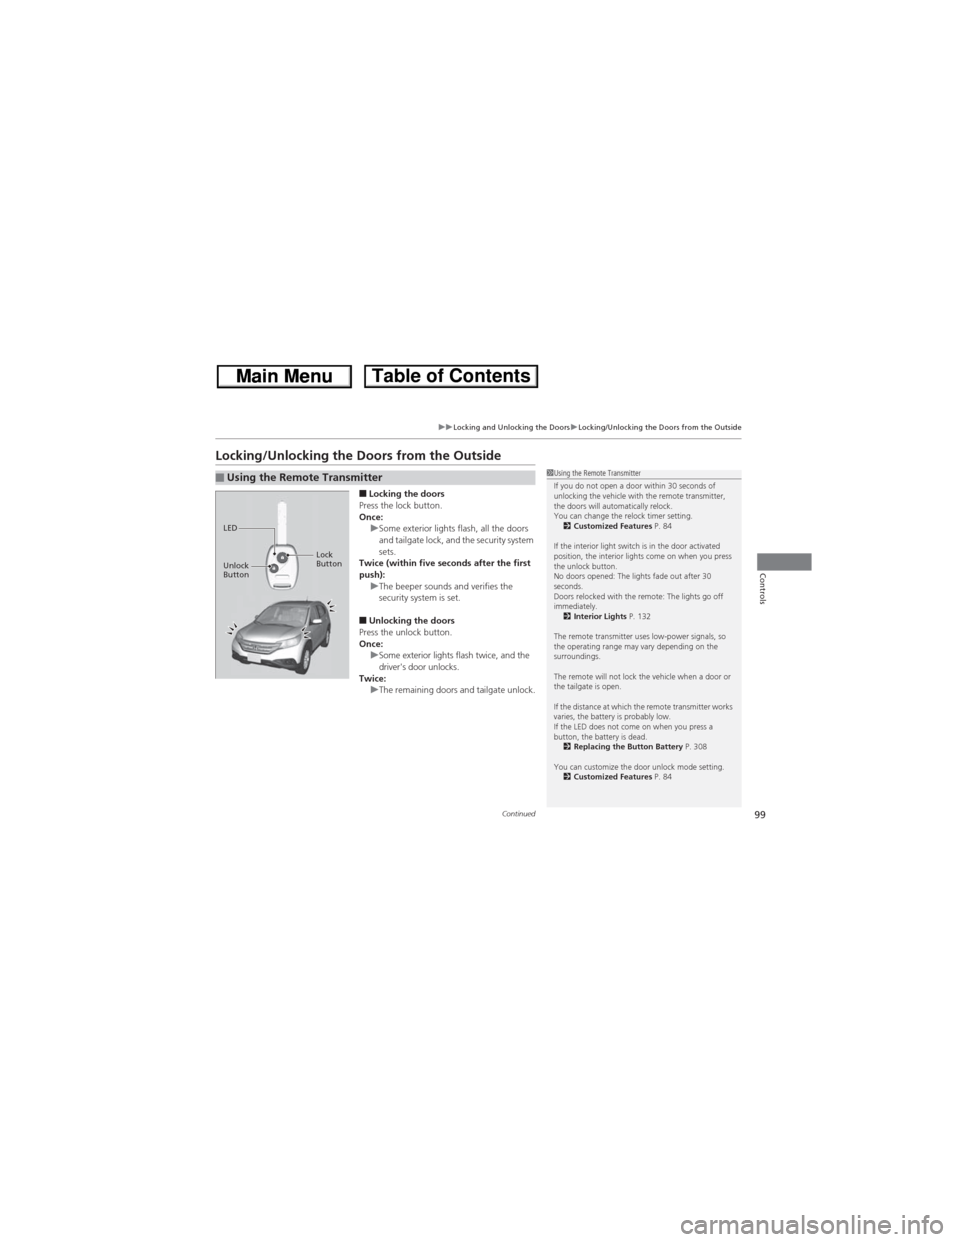
Locking/Unlocking the Doors from the Outside
■Locking the doors
Press the lock button.
Once:
uSome exterior lights flash, all the doors
and tailgate lock, and the security system
sets.
Twice (within five seconds after the first
push):
uThe beeper sounds and verifies the
security system is set.
■Unlocking the doors
Press the unlock button.
Once:
uSome exterior lights flash twice, and the
driver's door unlocks.
Twice:
uThe remaining doors and tailgate unlock.
■Using the Remote Transmitter1Using the Remote Transmitter
If you do not open a door within 30 seconds of
unlocking the vehicle with the remote transmitter,
the doors will automatically relock.
You can change the relock timer setting.
2Customized Features P. 84
If the interior light switch is in the door activated
position, the interior lights come on when you press
the unlock button.
No doors opened: The lights fade out after 30
seconds.
Doors relocked with the remote: The lights go off
immediately.
2Interior Lights P. 132
The remote transmitter uses low-power signals, so
the operating range may vary depending on the
surroundings.
The remote will not lock the vehicle when a door or
the tailgate is open.
If the distance at which the remote transmitter works
varies, the battery is probably low.
If the LED does not come on when you press a
button, the battery is dead.
2Replacing the Button Battery P. 308
You can customize the door unlock mode setting.
2Customized Features P. 84
LED
Unlock
ButtonLock
Button