ECO mode HONDA CR-V 2015 RM1, RM3, RM4 / 4.G Workshop Manual
[x] Cancel search | Manufacturer: HONDA, Model Year: 2015, Model line: CR-V, Model: HONDA CR-V 2015 RM1, RM3, RM4 / 4.GPages: 533, PDF Size: 24.82 MB
Page 201 of 533
200
Controls
Climate Control System*
Using Automatic Climate Control
The automatic climate control system maintains the interior temperature you select.
The system also selects the proper mix of heated or cooled air that raises or lowers
the interior temperature to your pr eference as quickly as possible.
Use the system when the engine is running.
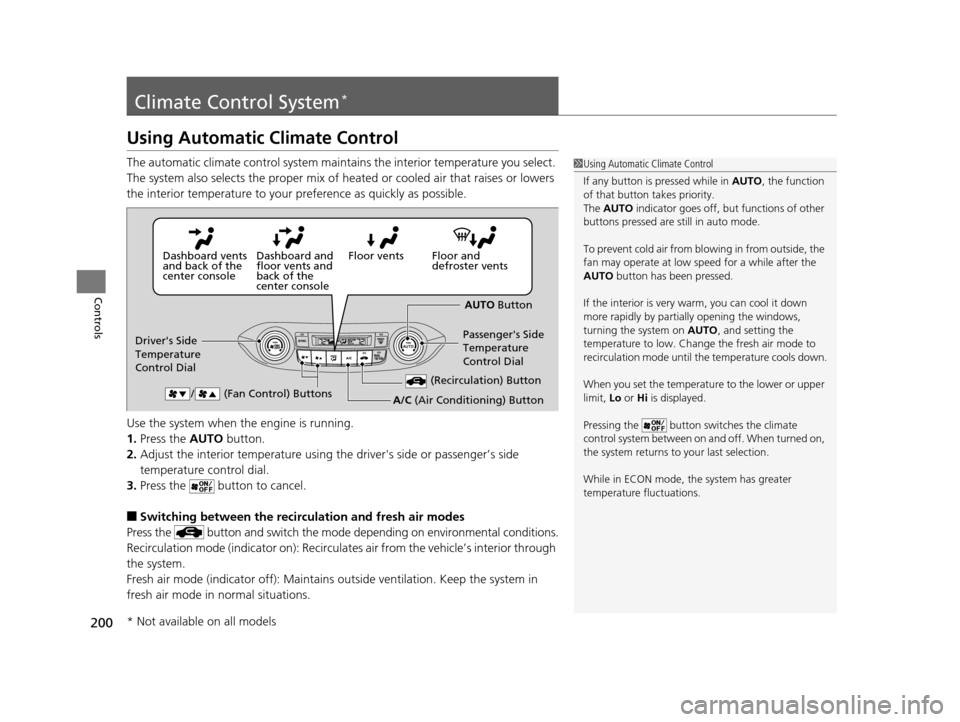
1. Press the AUTO button.
2. Adjust the interior temperature using the driver's side or passenger’s side
temperature control dial.
3. Press the button to cancel.
■Switching between the recirculation and fresh air modes
Press the button and switch the mode depending on environmental conditions.
Recirculation mode (indicator on): Recirculat es air from the vehicle’s interior through
the system.
Fresh air mode (indicator off): Maintains ou tside ventilation. Keep the system in
fresh air mode in normal situations.
1 Using Automatic Climate Control
If any button is pressed while in AUTO, the function
of that button takes priority.
The AUTO indicator goes off, but functions of other
buttons pressed are st ill in auto mode.
To prevent cold air from bl owing in from outside, the
fan may operate at low speed for a while after the
AUTO button has been pressed.
If the interior is very warm, you can cool it down
more rapidly by partial ly opening the windows,
turning the system on AUTO, and setting the
temperature to low. Change the fresh air mode to
recirculation mode until the temperature cools down.
When you set the temperat ure to the lower or upper
limit, Lo or Hi is displayed.
Pressing the button switches the climate
control system between on and off. When turned on,
the system returns to your last selection.
While in ECON mode, the system has greater
temperature fluctuations.
Floor and
defroster vents
Floor vents
Dashboard and
floor vents and
back of the
center console
Dashboard vents
and back of the
center console
AUTO Button
Driver's Side
Temperature
Control Dial Passenger's Side
Temperature
Control Dial
/ (Fan Control) Buttons
(Recirculation) Button
A/C (Air Conditioning) Button
* Not available on all models
15 CR-V-31T0A6300.book 200 ページ 2015年2月2日 月曜日 午前10時35分
Page 208 of 533
207
uuAudio System uAuxiliary Input Jack*
Features
Auxiliary Input Jack*
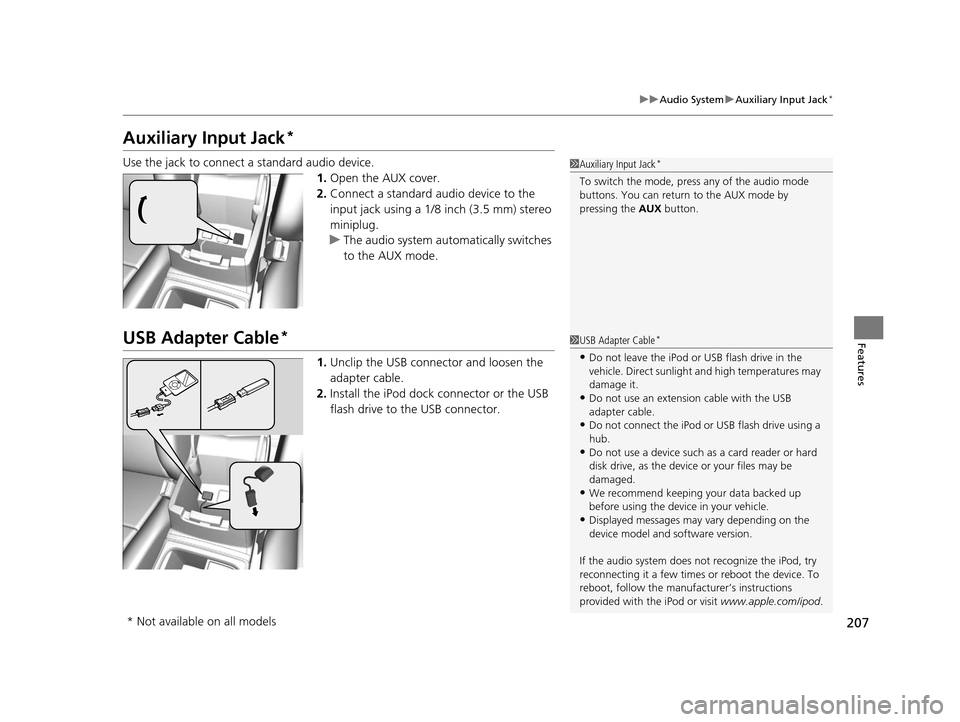
Use the jack to connect a standard audio device.
1.Open the AUX cover.
2. Connect a standard audio device to the
input jack using a 1/8 inch (3.5 mm) stereo
miniplug.
u The audio system auto matically switches
to the AUX mode.
USB Adapter Cable*
1. Unclip the USB connec tor and loosen the
adapter cable.
2. Install the iPod dock connector or the USB
flash drive to the USB connector.
1Auxiliary Input Jack*
To switch the mode, pres s any of the audio mode
buttons. You can return to the AUX mode by
pressing the AUX button.
1USB Adapter Cable*
•Do not leave the iPod or USB flash drive in the
vehicle. Direct sunlight and high temperatures may
damage it.
•Do not use an extension cable with the USB
adapter cable.
•Do not connect the iPod or USB flash drive using a
hub.
•Do not use a device such as a card reader or hard
disk drive, as the device or your files may be
damaged.
•We recommend keeping y our data backed up
before using the device in your vehicle.
•Displayed messages may vary depending on the
device model and software version.
If the audio system does not recognize the iPod, try
reconnecting it a few times or reboot the device. To
reboot, follow the manufac turer’s instructions
provided with the iPod or visit www.apple.com/ipod.
* Not available on all models
15 CR-V-31T0A6300.book 207 ページ 2015年2月2日 月曜日 午前10時35分
Page 209 of 533
208
uuAudio System uUSB Port(s)*
Features
USB Port(s)*
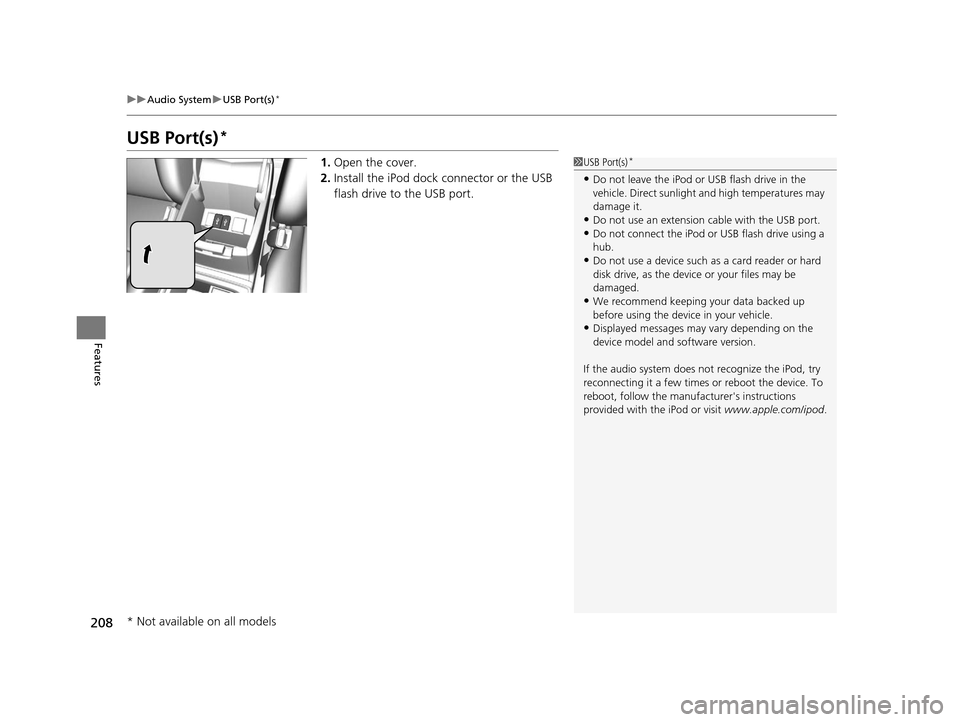
1. Open the cover.
2. Install the iPod dock connector or the USB
flash drive to the USB port.1USB Port(s)*
•Do not leave the iPod or USB flash drive in the
vehicle. Direct sunlight and high temperatures may
damage it.
•Do not use an extension cable with the USB port.•Do not connect the iPod or USB flash drive using a
hub.
•Do not use a device such as a card reader or hard
disk drive, as the device or your files may be
damaged.
•We recommend keeping y our data backed up
before using the device in your vehicle.
•Displayed messages may vary depending on the
device model and software version.
If the audio system does not recognize the iPod, try
reconnecting it a few times or reboot the device. To
reboot, follow the manufac turer's instructions
provided with the iPod or visit www.apple.com/ipod.
* Not available on all models
15 CR-V-31T0A6300.book 208 ページ 2015年2月2日 月曜日 午前10時35分
Page 210 of 533
209
uuAudio System uHDMI ® Port*
Features
HDMI ® Port*
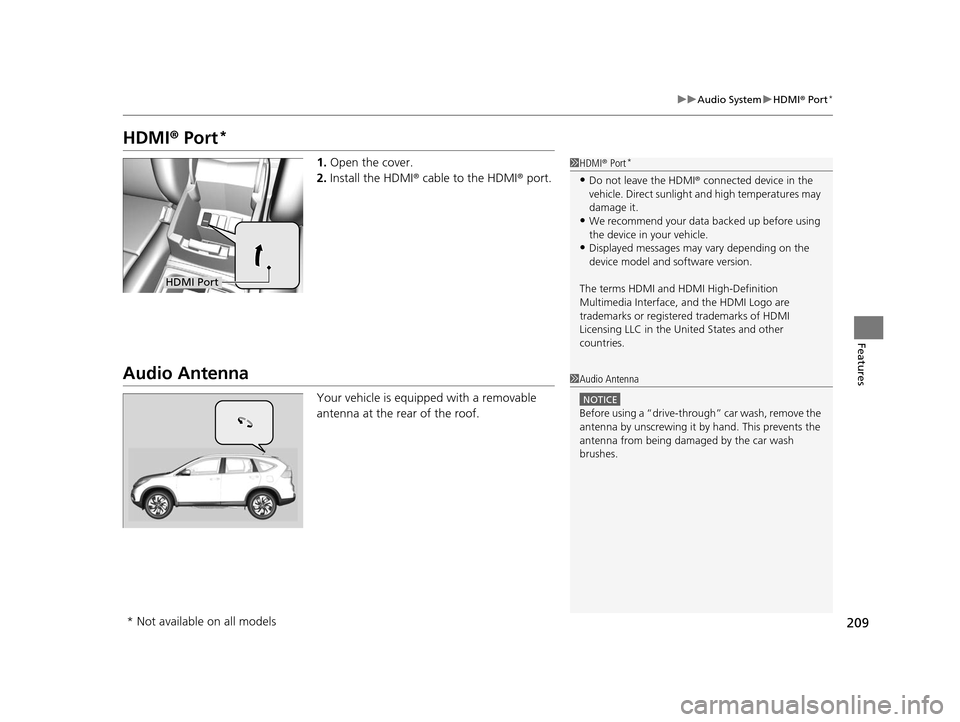
1. Open the cover.
2. Install the HDMI ® cable to the HDMI ® port.
Audio Antenna
Your vehicle is equipped with a removable
antenna at the rear of the roof.
1HDMI ® Port*
•Do not leave the HDMI ® connected device in the
vehicle. Direct sunlight and high temperatures may
damage it.
•We recommend your data backed up before using
the device in your vehicle.
•Displayed messages may vary depending on the
device model and software version.
The terms HDMI and HDMI High-Definition
Multimedia Interface, and the HDMI Logo are
trademarks or registered trademarks of HDMI
Licensing LLC in the United States and other
countries.
HDMI Port
1 Audio Antenna
NOTICE
Before using a
Page 211 of 533
210
uuAudio System uAudio System Theft Protection
Features
Audio System Theft Protection
The audio system is disabled when it is di sconnected from the power source, such as
when the battery is disconnected or goes dead. In certain conditions, the system
may display ENTER CODE
*1/Enter Code*2.
■Reactivating the audio system
1. Turn the ignition switch to ON
(w*3.
2. Turn on the audio system.
3. Press and hold the audio system power button for more than two seconds.
u The audio system is reac tivated when the audio co ntrol unit establishes a
connection with the vehicle control unit. If the control unit fails to recognize
the audio unit, you must go to a dealer and have the audio unit checked.
*1: Models with one display
*2: Models with two displays
*3: Models with the smart entry system have an ENGINE START/STOP button
instead of an ignition switch.
15 CR-V-31T0A6300.book 210 ページ 2015年2月2日 月曜日 午前10時35分
Page 220 of 533
Continued219
uuAudio System Basic Operation uPlaying a CD
Features
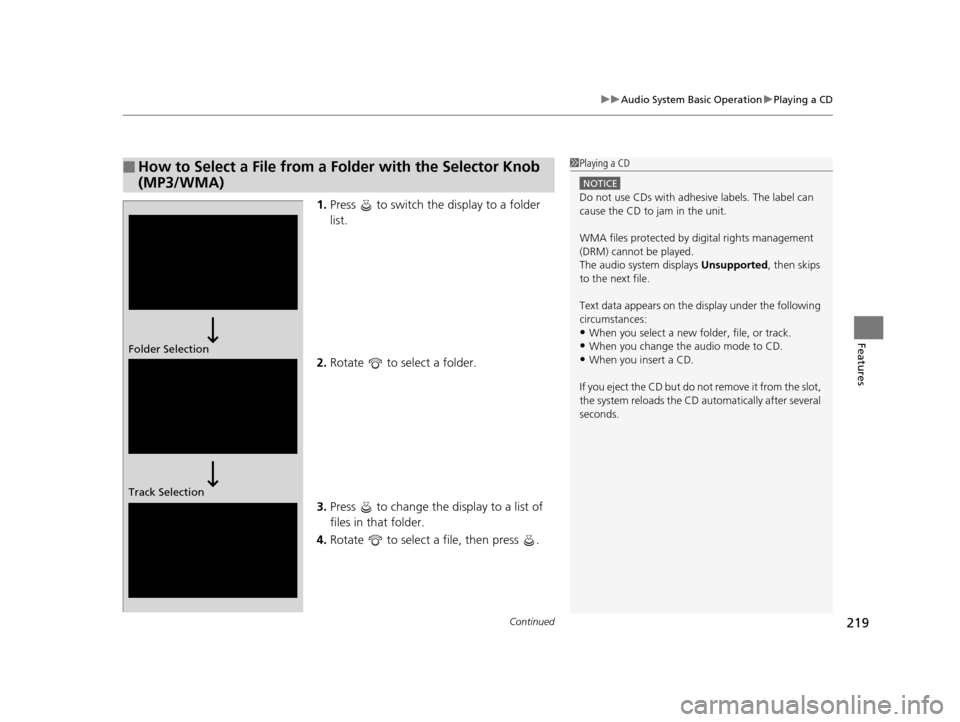
1. Press to switch the display to a folder
list.
2. Rotate to select a folder.
3. Press to change the display to a list of
files in that folder.
4. Rotate to select a file, then press .
■How to Select a File from a Folder with the Selector Knob
(MP3/WMA)1Playing a CD
NOTICE
Do not use CDs with adhesive labels. The label can
cause the CD to jam in the unit.
WMA files protected by di gital rights management
(DRM) cannot be played.
The audio system displays Unsupported, then skips
to the next file.
Text data appears on the di splay under the following
circumstances:
•When you select a new folder, file, or track.
•When you change the audio mode to CD.
•When you insert a CD.
If you eject the CD but do not remove it from the slot,
the system reloads the CD automatically after several
seconds.Folder Selection
Track Selection
15 CR-V-31T0A6300.book 219 ページ 2015年2月2日 月曜日 午前10時35分
Page 227 of 533
226
uuAudio System Basic Operation uPlaying a USB Flash Drive
Features
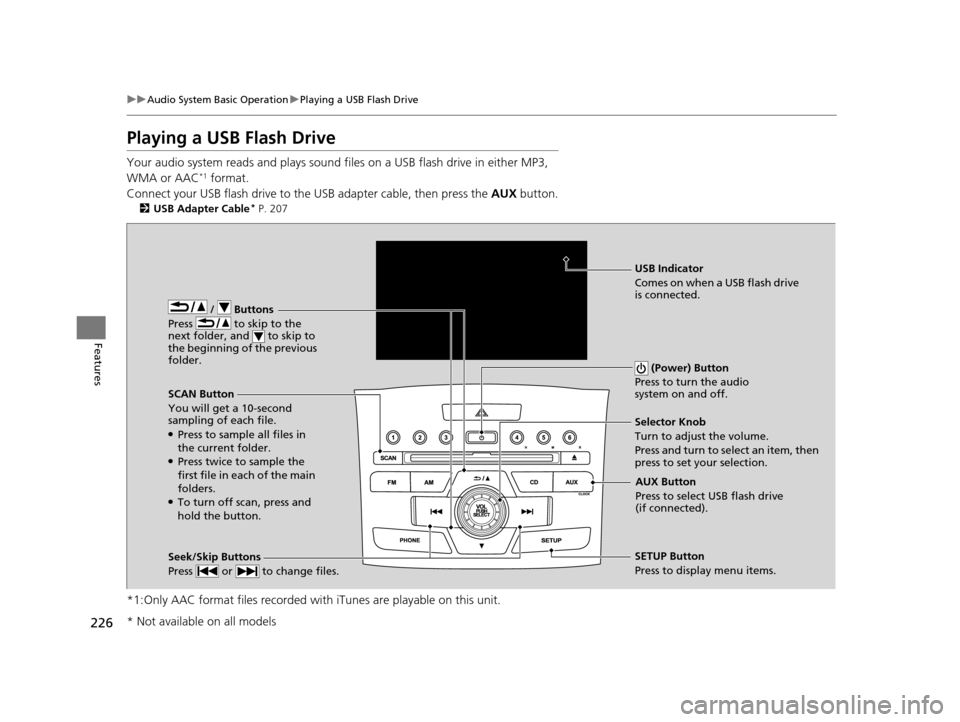
Playing a USB Flash Drive
Your audio system reads and plays sound fi les on a USB flash drive in either MP3,
WMA or AAC*1 format.
Connect your USB flash drive to the USB adapter cable, then press the AUX button.
2USB Adapter Cable* P. 207
*1:Only AAC format files recorded with iTunes are playable on this unit.
/ Buttons
Press to skip to the
next folder, and to skip to
the beginning of the previous
folder.
SCAN Button
You will get a 10-second
sampling of each file.
●Press to sample all files in
the current folder.
●Press twice to sample the
first file in each of the main
folders.
●To turn off scan, press and
hold the button. (Power) Button
Press to turn the audio
system on and off.
Seek/Skip Buttons
Press or to change files.SETUP Button
Press to display menu items. Selector Knob
Turn to adjust the volume.
Press and turn to select an item, then
press to set your selection.
AUX Button
Press to select USB flash drive
(if connected).
USB Indicator
Comes on when a USB flash drive
is connected.
* Not available on all models
15 CR-V-31T0A6300.book 226 ページ 2015年2月2日 月曜日 午前10時35分
Page 231 of 533
uuAudio System Basic Operation uPlaying Bluetooth ® Audio
230
Features
1. Make sure that your phone is paired and
connected to HFL.
2. Press the AUX button.
If the phone is not recognized, another HFL-
compatible phone, which is not compatible
for Bluetooth ® Audio, may already be
connected.
■To pause or resume a file
1. Press the SETUP button.
2. Rotate to select Resume/Pause, then press .
Each time you press , the setting sw itches between pause and resume.
■To Play Bluetooth® Audio Files1To Play Bluetooth ® Audio Files
To play the audio files, y ou may need to operate your
phone. If so, follow the phone maker's operating
instructions.
The pause function may no t be available on some
phones.
If any audio device is conne cted to the auxiliary input
jack, you may need to press the AUX button
repeatedly to select the Bluetooth® Audio system.
Switching to another mode pauses the music playing
from your phone.
15 CR-V-31T0A6300.book 230 ページ 2015年2月2日 月曜日 午前10時35分
Page 233 of 533
uuAudio System Basic Operation u
232
Features
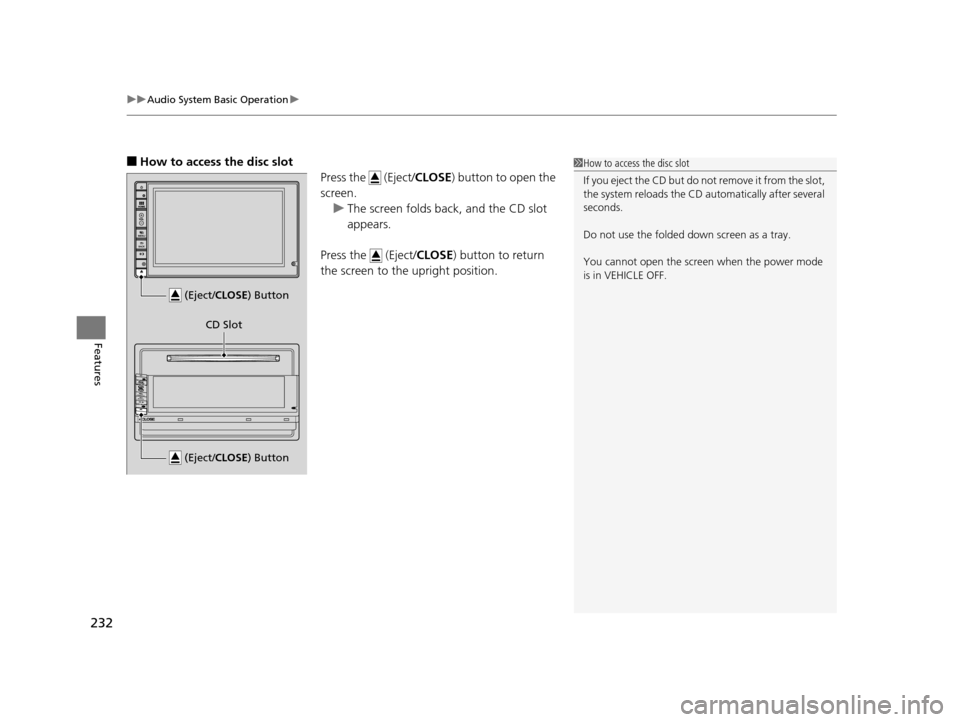
■How to access the disc slot
Press the (Eject/CLOSE) button to open the
screen.
u The screen folds back, and the CD slot
appears.
Press the (Eject/ CLOSE) button to return
the screen to the upright position.1 How to access the disc slot
If you eject the CD but do not remove it from the slot,
the system reloads the CD automatically after several
seconds.
Do not use the folded down screen as a tray.
You cannot open the screen when the power mode
is in VEHICLE OFF.
(Eject/CLOSE ) Button
(Eject/CLOSE) Button
CD Slot
15 CR-V-31T0A6300.book 232 ページ 2015年2月2日 月曜日 午前10時35分
Page 241 of 533
uuAudio System Basic Operation uPlaying AM/FM Radio
240
Features
To store a station:
1. Tune to the selected station.
2. Press the button.
3. Select Save Preset .
4. Select the preset number for the station you want to store.
You can also store a preset station by the following procedure.
1. Select open/close icon to display a channel list.
2. Select Preset tab.
3. Press and hold the preset number for the st ation you want to store until you hear
a beep.
Provides text data information related to your selected RDS-capable FM station.
■To find an RDS station from Station List
1. Press the button while listening to an FM station.
2. Select Station List .
3. Select the station.
■Manual update
Updates your available station list at any time.
1. Press the button while listening to an FM station.
2. Select Station List .
3. Select Refresh .
■Preset Memory
■Radio Data System (RDS)
1Playing AM/FM Radio
The ST indicator appears on the display indicating
stereo FM broadcasts.
Stereo reproduction in AM is not available.
Switching the Audio Mode
Press the SOURCE button on the steering wheel or
select SOURCE on the list.
2 Audio Remote Controls P. 211
You can also switch the mode by selecting Change
Source on the MENU screen.
You can store 6 AM stations and 12 FM stations into
the preset memory.
1 Radio Data System (RDS)
When you select an RDS-capable FM station, the RDS
automatically turns on, and the frequency display
changes to the station name. However, when the
signals of that station become weak, the display
changes from the statio n name to the frequency.
15 CR-V-31T0A6300.book 240 ページ 2015年2月2日 月曜日 午前10時35分