display HONDA CR-V 2018 Owner's Manual (in English)
[x] Cancel search | Manufacturer: HONDA, Model Year: 2018, Model line: CR-V, Model: HONDA CR-V 2018Pages: 679, PDF Size: 23.22 MB
Page 518 of 679
uuWhen Driving uLaneWatchTM*
516
Driving
■Customizing the LaneWatch settings
You can customize the following items using the audio/information screen.
• Show with Turn Signal : Selects whether LaneWatch monitor comes on when
you operate the turn signal light lever.
• Display Time after Turn Signal Off : Changes the remaining Lane Watch
display time after you pull the turn signal lever back.
• Reference Line : Selects whether the reference lines appear on the LaneWatch
monitor.
• Display : Adjusts display settings.
2Customized Features P. 351
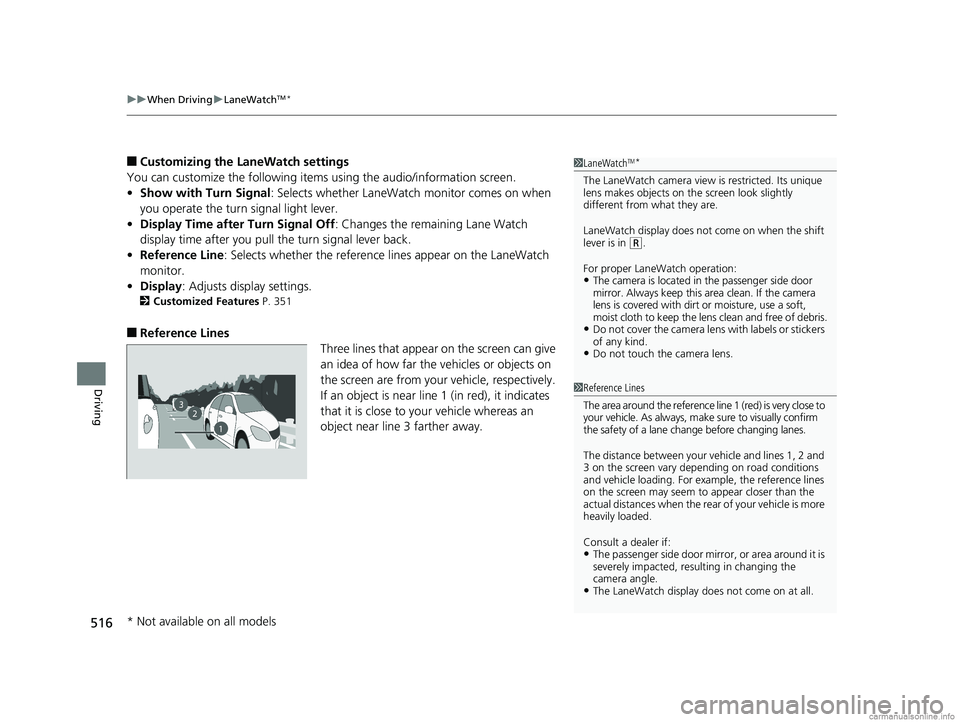
■Reference Lines
Three lines that appear on the screen can give
an idea of how far the vehicles or objects on
the screen are from your vehicle, respectively.
If an object is near line 1 (in red), it indicates
that it is close to your vehicle whereas an
object near line 3 farther away.
1 LaneWatchTM*
The LaneWatch camera view is restricted. Its unique
lens makes objects on the screen look slightly
different from what they are.
LaneWatch display does not come on when the shift
lever is in
( R.
For proper LaneWatch operation:
•The camera is located in the passenger side door
mirror. Always keep this area clean. If the camera
lens is covered with dirt or moisture, use a soft,
moist cloth to keep the lens clean and free of debris.
•Do not cover the camera lens with labels or stickers
of any kind.
•Do not touch the camera lens.
23
1
1Reference Lines
The area around the reference line 1 (red) is very close to
your vehicle. As always, m ake sure to visually confirm
the safety of a lane chan ge before changing lanes.
The distance betwee n your vehicle and lines 1, 2 and
3 on the screen vary depending on road conditions
and vehicle loading. For ex ample, the reference lines
on the screen may seem to appear closer than the
actual distances when the rear of your vehicle is more
heavily loaded.
Consult a dealer if:
•The passenger side door mirr or, or area around it is
severely impacted, resulting in changing the
camera angle.
•The LaneWatch display doe s not come on at all.
* Not available on all models
18 CR-V-31TLA6100.book 516 ページ 2017年9月7日 木曜日 午後3時56分
Page 521 of 679
Continued519
uuWhen Driving uTire Pressure Monitoring System (TPMS)
Driving
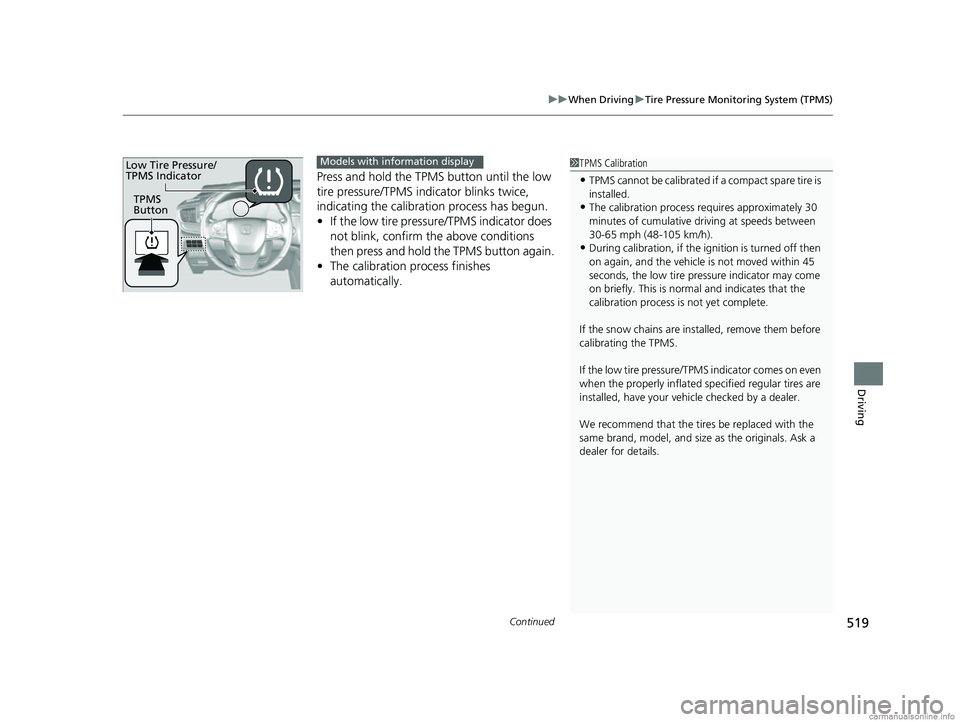
Press and hold the TPM S button until the low
tire pressure/TPMS indicator blinks twice,
indicating the calibration process has begun.
• If the low tire pressure/TPMS indicator does
not blink, confirm the above conditions
then press and hold the TPMS button again.
• The calibration process finishes
automatically.
1TPMS Calibration
•TPMS cannot be calibrated if a compact spare tire is
installed.
•The calibration process requires approximately 30
minutes of cumulative dr iving at speeds between
30-65 mph (48-105 km/h).
•During calibration, if the ignition is turned off then
on again, and the vehicle is not moved within 45
seconds, the low tire pres sure indicator may come
on briefly. This is norma l and indicates that the
calibration process is not yet complete.
If the snow chains are installed, remove them before
calibrating the TPMS.
If the low tire pressure/TPMS indicator comes on even
when the properly inflated specified regular tires are
installed, have your vehicle checked by a dealer.
We recommend that the tires be replaced with the
same brand, model, and size as the originals. Ask a
dealer for details.
TPMS
Button
Low Tire Pressure/
TPMS IndicatorModels with info rmation display
18 CR-V-31TLA6100.book 519 ページ 2017年9月7日 木曜日 午後3時56分
Page 522 of 679
uuWhen Driving uTire Pressure Monitoring System (TPMS)
520
Driving
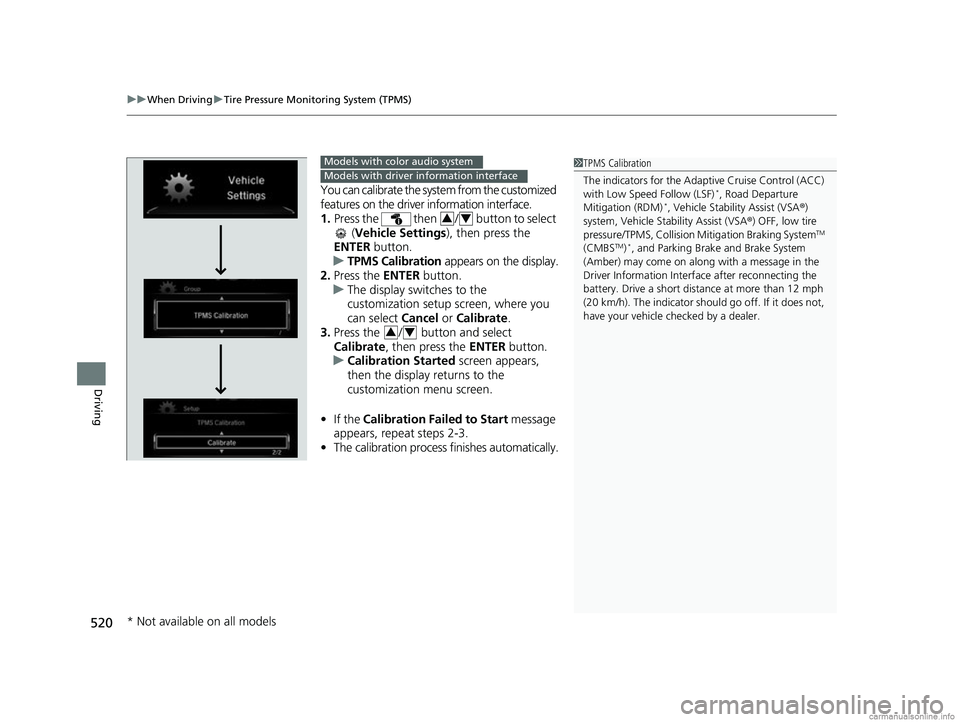
You can calibrate the system from the customized
features on the driver information interface.
1. Press the then / button to select
(Vehicle Settings ), then press the
ENTER button.
u TPMS Calibration appears on the display.
2. Press the ENTER button.
u The display switches to the
customization setup screen, where you
can select Cancel or Calibrate .
3. Press the / button and select
Calibrate , then press the ENTER button.
u Calibration Started screen appears,
then the display returns to the
customization menu screen.
• If the Calibration Failed to Start message
appears, repeat steps 2-3.
• The calibration process finishes automatically.
1TPMS Calibration
The indicators for the Adaptive Cruise Control (ACC)
with Low Speed Follow (LSF)
*, Road Departure
Mitigation (RDM)*, Vehicle Stability Assist (VSA ®)
system, Vehicle Stability Assist (VSA ®) OFF, low tire
pressure/TPMS, Collisi on Mitigation Braking System
TM
(CMBSTM)*, and Parking Brake and Brake System
(Amber) may come on along with a message in the
Driver Information Interf ace after reconnecting the
battery. Drive a short distance at more than 12 mph
(20 km/h). The indicator shoul d go off. If it does not,
have your vehicle ch ecked by a dealer.
Models with color audio system
Models with driver information interface
34
34
* Not available on all models
18 CR-V-31TLA6100.book 520 ページ 2017年9月7日 木曜日 午後3時56分
Page 523 of 679
521
uuWhen Driving uTire Pressure Monitoring System (TPMS)
Driving
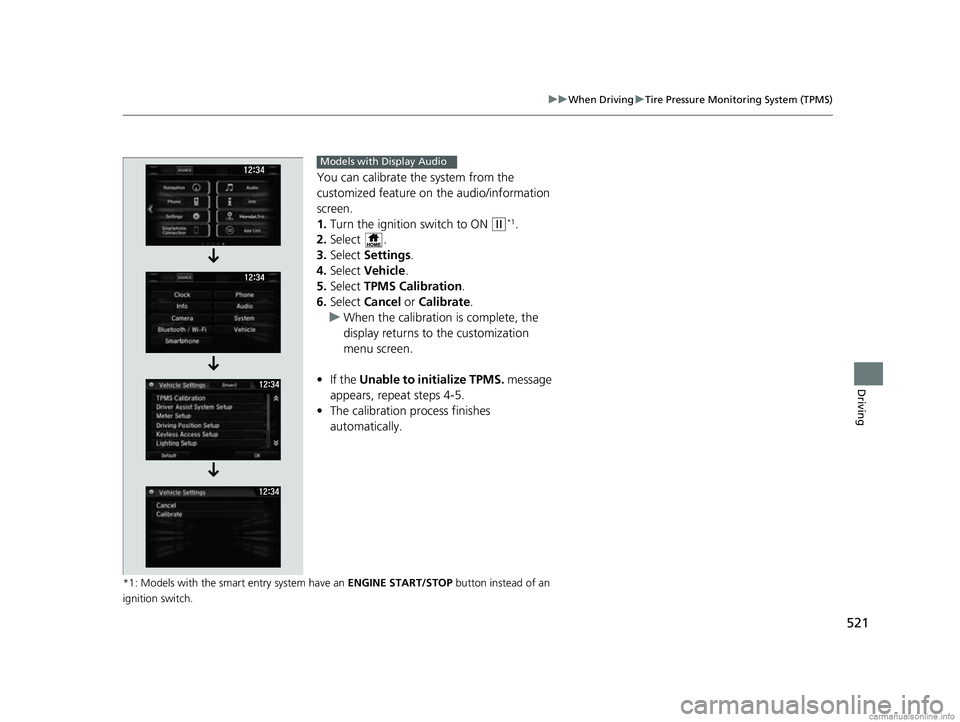
You can calibrate the system from the
customized feature on the audio/information
screen.
1. Turn the ignition switch to ON
(w*1.
2. Select .
3. Select Settings .
4. Select Vehicle .
5. Select TPMS Calibration .
6. Select Cancel or Calibrate .
u When the calibration is complete, the
display returns to the customization
menu screen.
• If the Unable to initialize TPMS. message
appears, repeat steps 4-5.
• The calibration process finishes
automatically.
*1: Models with the smart entry system have an ENGINE START/STOP button instead of an
ignition switch.
Models with Display Audio
18 CR-V-31TLA6100.book 521 ページ 2017年9月7日 木曜日 午後3時56分
Page 536 of 679
uuBraking uCollision Mitigation Braking SystemTM (CMBSTM)*
534
Driving
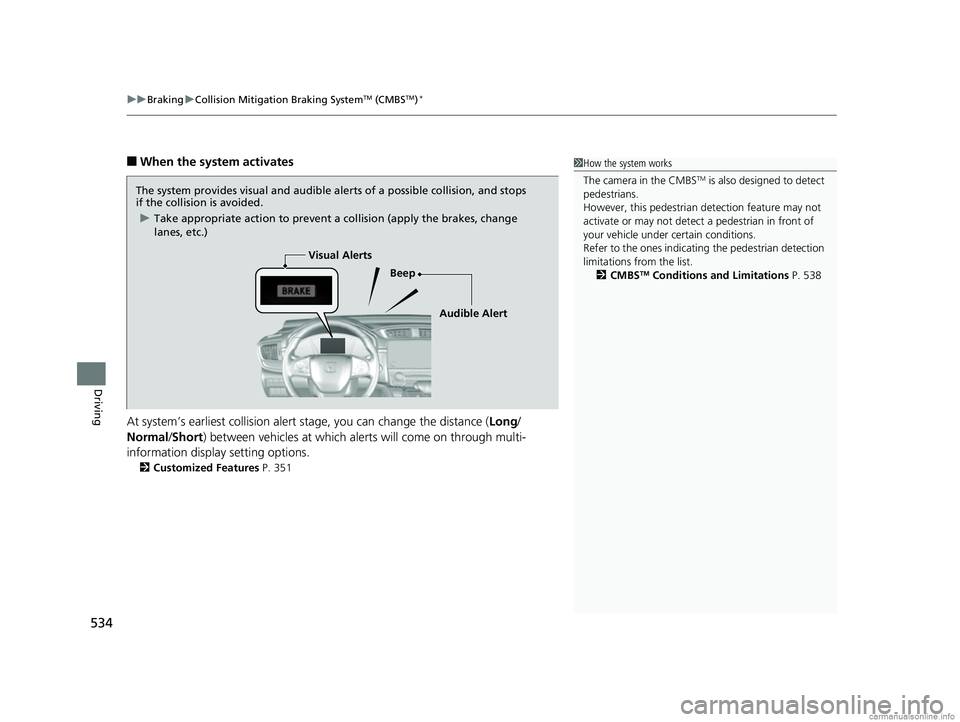
■When the system activates
At system’s earliest collision alert stage, you can change the distance ( Long/
Normal /Short) between vehicles at which aler ts will come on through multi-
information display setting options.
2 Customized Features P. 351
1How the system works
The camera in the CMBS
TM is also designed to detect
pedestrians.
However, this pedestrian detection feature may not
activate or may not detect a pedestrian in front of
your vehicle under certain conditions.
Refer to the ones indicating the pedestrian detection
limitations from the list. 2 CMBS
TM Conditions and Limitations P. 538
The system provides visual and audible alerts of a possible collision, and stops
if the collision is avoided.
u Take appropriate action to prevent a collision (apply the brakes, change
lanes, etc.)
Beep
Visual Alerts
Audible Alert
18 CR-V-31TLA6100.book 534 ページ 2017年9月7日 木曜日 午後3時56分
Page 546 of 679
uuParking Your Vehicle uCross Traffic Monitor*
544
Driving
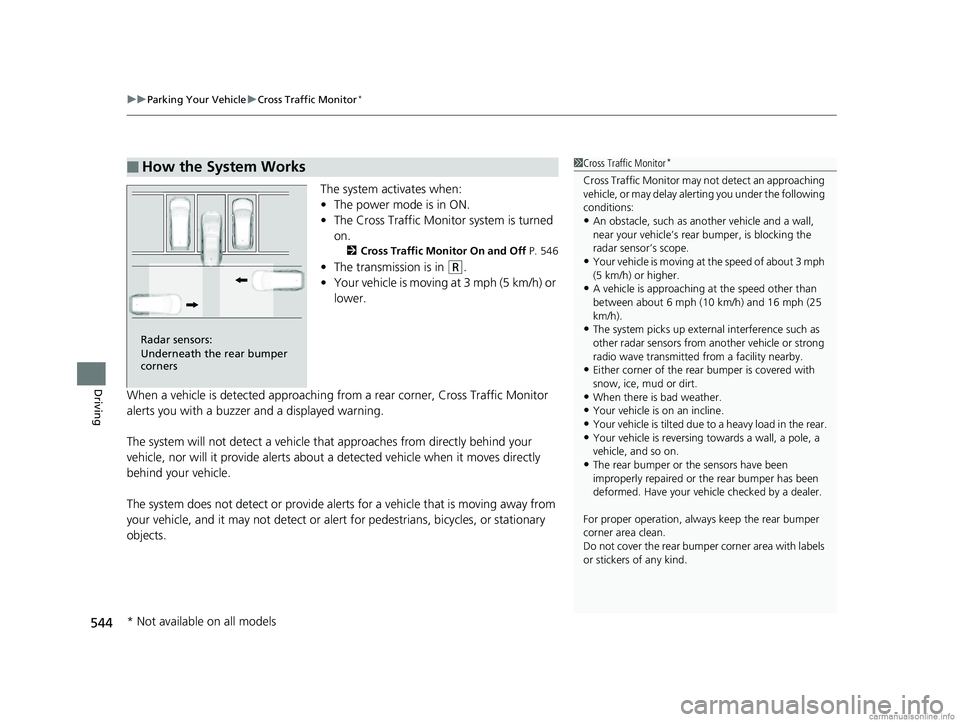
The system activates when:
• The power mode is in ON.
• The Cross Traffic Monitor system is turned
on.
2 Cross Traffic Monitor On and Off P. 546
•The transmission is in (R.
• Your vehicle is moving at 3 mph (5 km/h) or
lower.
When a vehicle is detected approaching from a rear corner, Cross Traffic Monitor
alerts you with a buzzer and a displayed warning.
The system will not detect a vehicle that approaches from directly behind your
vehicle, nor will it provide alerts about a detected vehicle when it moves directly
behind your vehicle.
The system does not detect or provide aler ts for a vehicle that is moving away from
your vehicle, and it may not detect or ale rt for pedestrians, bicycles, or stationary
objects.
■How the System Works1 Cross Traffic Monitor*
Cross Traffic Monitor may not detect an approaching
vehicle, or may delay aler ting you under the following
conditions:
•An obstacle, such as a nother vehicle and a wall,
near your vehicle’s rear bumper, is blocking the
radar sensor’s scope.
•Your vehicle is moving at the speed of about 3 mph
(5 km/h) or higher.
•A vehicle is approaching at the speed other than
between about 6 mph (10 km/h) and 16 mph (25
km/h).
•The system picks up external interference such as
other radar sensors from an other vehicle or strong
radio wave transmitted fr om a facility nearby.
•Either corner of the rear bumper is covered with
snow, ice, mud or dirt.
•When there is bad weather.
•Your vehicle is on an incline.
•Your vehicle is tilt ed due to a heavy load in the rear.
•Your vehicle is reversing towards a wall, a pole, a
vehicle, and so on.
•The rear bumper or the sensors have been
improperly repaired or the rear bumper has been
deformed. Have your vehi cle checked by a dealer.
For proper operation, always keep the rear bumper
corner area clean.
Do not cover the rear bumper corner area with labels
or stickers of any kind.
Radar sensors:
Underneath the rear bumper
corners
* Not available on all models
18 CR-V-31TLA6100.book 544 ページ 2017年9月7日 木曜日 午後3時56分
Page 547 of 679
Continued545
uuParking Your Vehicle uCross Traffic Monitor*
Driving
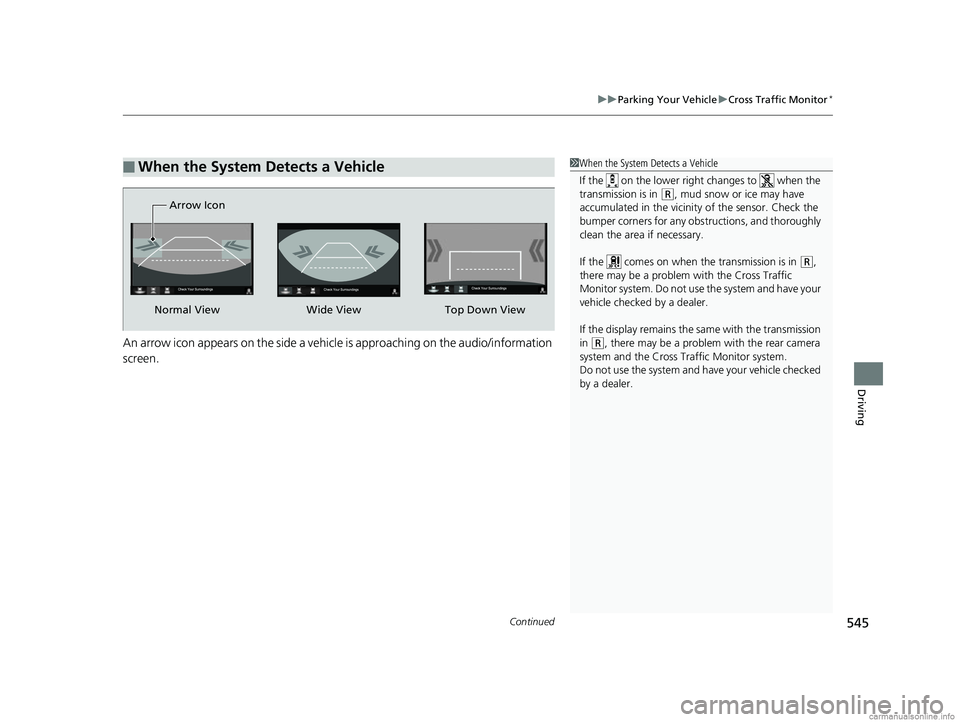
An arrow icon appears on the side a vehicle is approaching on the audio/information
screen.
■When the System Detects a Vehicle1 When the System Detects a Vehicle
If the on the lower right changes to when the
transmission is in
(R, mud snow or ice may have
accumulated in the vicinity of the sensor. Check the
bumper corners for any obs tructions, and thoroughly
clean the area if necessary.
If the comes on when the transmission is in
( R,
there may be a problem with the Cross Traffic
Monitor system. Do not use the system and have your
vehicle checked by a dealer.
If the display remains the same with the transmission
in
( R, there may be a problem with the rear camera
system and the Cross Traffic Monitor system.
Do not use the system and have your vehicle checked
by a dealer.
Wide View
Normal View Arrow IconTop Down View
18 CR-V-31TLA6100.book 545 ページ 2017年9月7日 木曜日 午後3時56分
Page 549 of 679
547Continued
Driving
Multi-View Rear Camera
About Your Multi-View Rear Camera
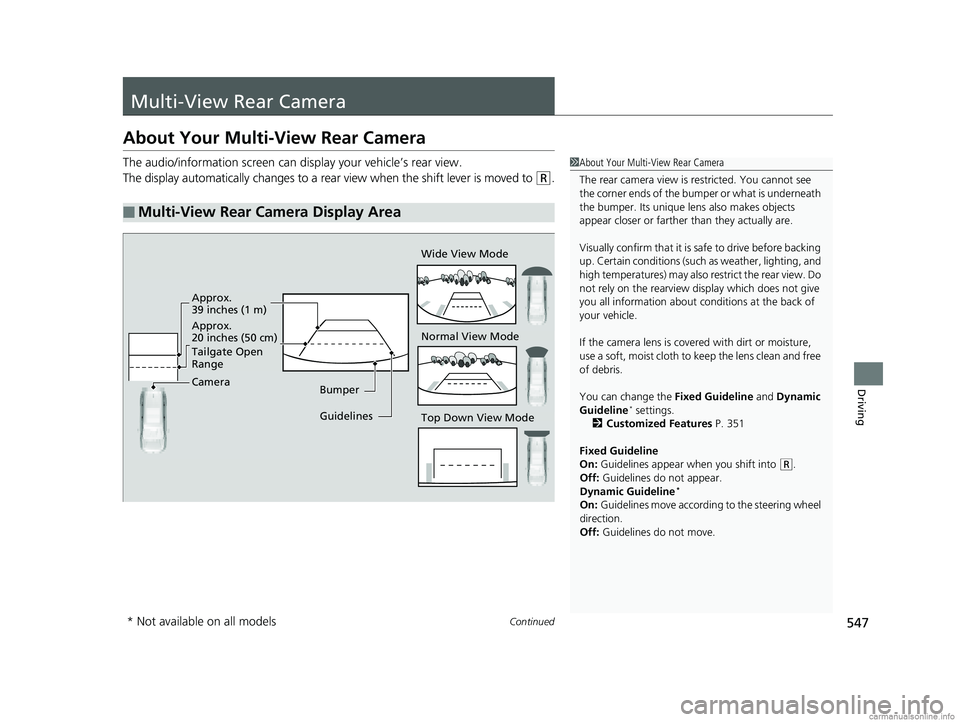
The audio/information screen can display your vehicle’s rear view.
The display automatically changes to a rear view when the shift lever is moved to
(R.
■Multi-View Rear Camera Display Area
1About Your Multi-View Rear Camera
The rear camera view is restricted. You cannot see
the corner ends of the bum per or what is underneath
the bumper. Its unique le ns also makes objects
appear closer or farther than they actually are.
Visually confirm that it is safe to drive before backing
up. Certain conditions (such as weather, lighting, and
high temperatures) may also re strict the rear view. Do
not rely on the rearview display which does not give
you all information about conditions at the back of
your vehicle.
If the camera lens is cove red with dirt or moisture,
use a soft, moist cloth to keep the lens clean and free
of debris.
You can change the Fixed Guideline and Dynamic
Guideline
* settings.
2 Customized Features P. 351
Fixed Guideline
On: Guidelines appear when you shift into
(R.
Off: Guidelines do not appear.
Dynamic Guideline
*
On: Guidelines move according to the steering wheel
direction.
Off: Guidelines do not move.
Guidelines Bumper Wide View Mode
Normal View Mode
Top Down View Mode
Approx.
39 inches (1 m)
Approx.
20 inches (50 cm)
Tailgate Open
Range
Camera
* Not available on all models
18 CR-V-31TLA6100.book 547 ページ 2017年9月7日 木曜日 午後3時56分
Page 550 of 679
548
uuMulti-View Rear Camera uAbout Your Multi-View Rear Camera
Driving
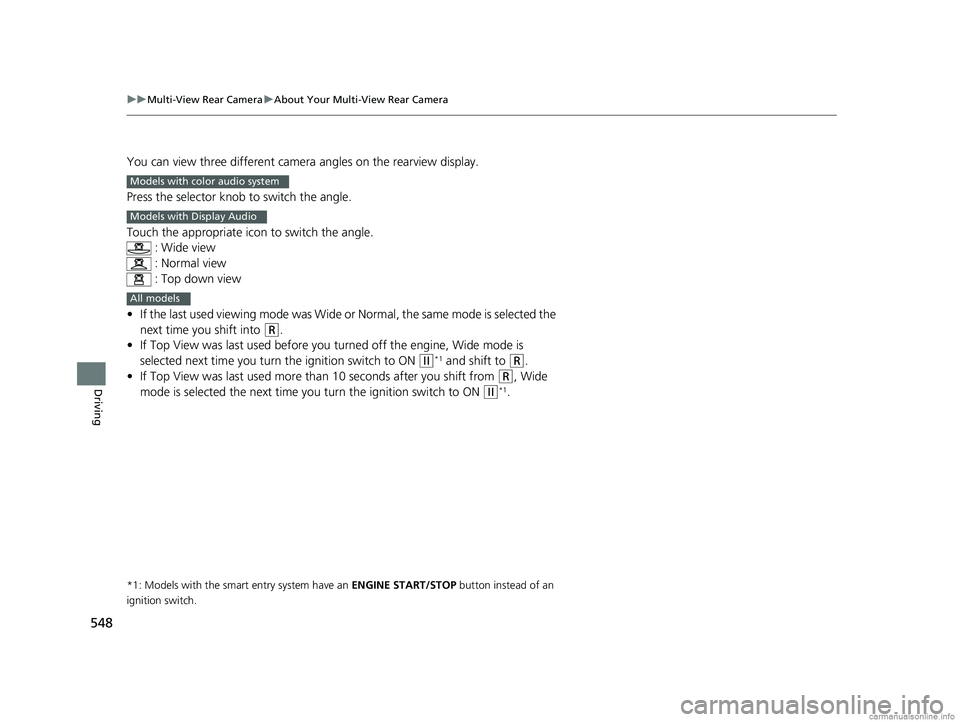
You can view three different camera angles on the rearview display.
Press the selector knob to switch the angle.
Touch the appropriate icon to switch the angle. : Wide view
: Normal view
: Top down view
• If the last used viewing mode was Wide or Normal, the same mode is selected the
next time you shift into
(R.
• If Top View was last used before you turned off the engine, Wide mode is
selected next time you turn the ignition switch to ON
(w*1 and shift to (R.
• If Top View was last used more th an 10 seconds after you shift from
(R, Wide
mode is selected the next time y ou turn the ignition switch to ON
(w*1.
*1: Models with the smart entry system have an ENGINE START/STOP button instead of an
ignition switch.
Models with color audio system
Models with Display Audio
All models
18 CR-V-31TLA6100.book 548 ページ 2017年9月7日 木曜日 午後3時56分
Page 554 of 679
552
Driving
Fuel Economy and CO2 Emissions
Improving Fuel Economy and Reducing CO2
Emissions
Achieving fuel economy and reducing CO2 emissions is dependent on several
factors, including driving conditions, load weight, idling time, driving habits, and
vehicle condition. Depending on these and other factors, you may not achieve the
rated fuel economy of this vehicle.
You can optimize your fuel economy with proper maintenance of your vehicle.
Always maintain your vehicle in accordance with the messages displayed on the
information display
*/driver information interface*.
• Use the recommended viscosity engine oil, displaying the API Certification Seal.
• Maintain the specified tire pressure.
• Do not load the vehicl e with excess cargo.
• Keep your vehicle clean. A buildup of snow or mud on your vehicle's underside
adds weight and increases wind resistance.
■Maintenance and Fuel Economy
1Improving Fuel Economy and Reducing CO2 Emissions
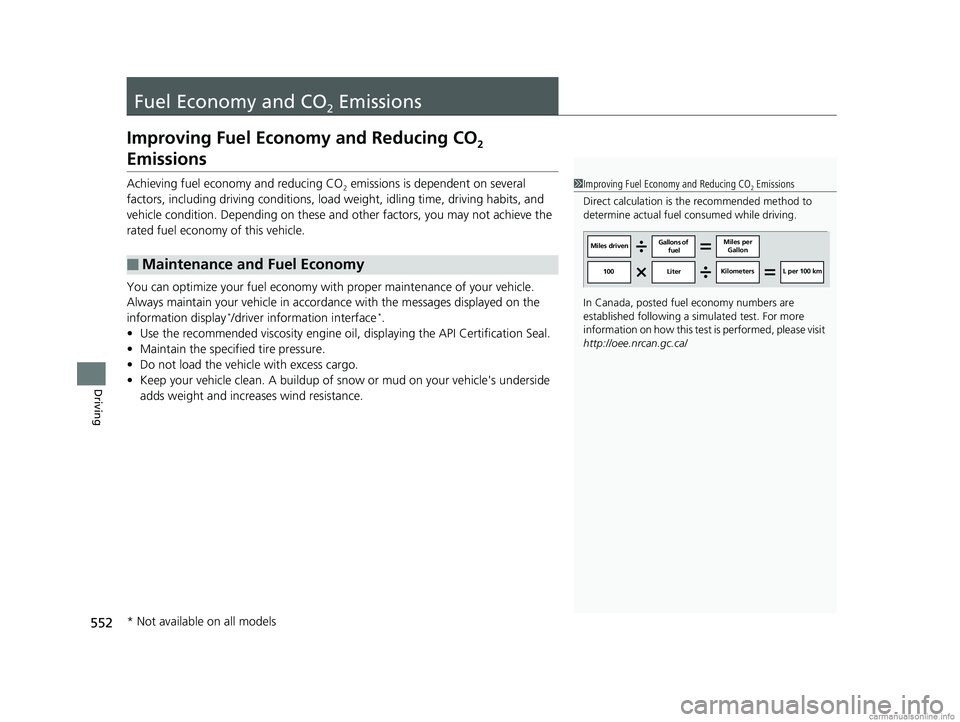
Direct calculation is the recommended method to
determine actual fuel consumed while driving.
In Canada, posted fuel economy numbers are
established following a simulated test. For more
information on how this test is performed, please visit
http://oee.nrcan.gc.ca/
Miles driven Gallons of
fuel Miles per
Gallon
100 LiterKilometers L per 100 km
* Not available on all models
18 CR-V-31TLA6100.book 552 ページ 2017年9月7日 木曜日 午後3時56分