ac replacement HONDA CR-V 2018 Owner's Manual (in English)
[x] Cancel search | Manufacturer: HONDA, Model Year: 2018, Model line: CR-V, Model: HONDA CR-V 2018Pages: 679, PDF Size: 23.22 MB
Page 79 of 679
77
Safe Driving
Safety Labels
Label Locations
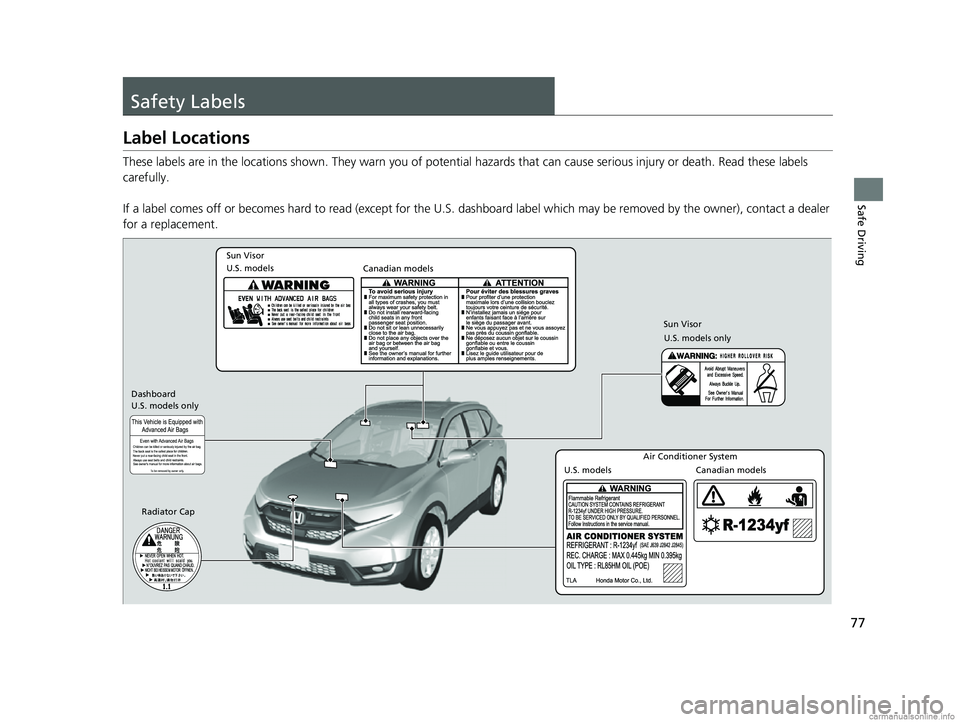
These labels are in the locations shown. They warn you of potential hazards that can cause serious injury or death. Read these labels
carefully.
If a label comes off or becomes hard to read (except for the U. S. dashboard label which may be removed by the owner), contact a dealer
for a replacement.
Sun Visor
U.S. models Canadian models
Radiator Cap
U.S. models only Dashboard
U.S. models only
Sun Visor
Air Conditioner System
U.S. models Canadian models
18 CR-V-31TLA6100.book 77 ページ 2017年9月7日 木曜日 午後3時56分
Page 137 of 679
135
uuLocking and Unlocking the Doors uKey Types and Functions
Controls
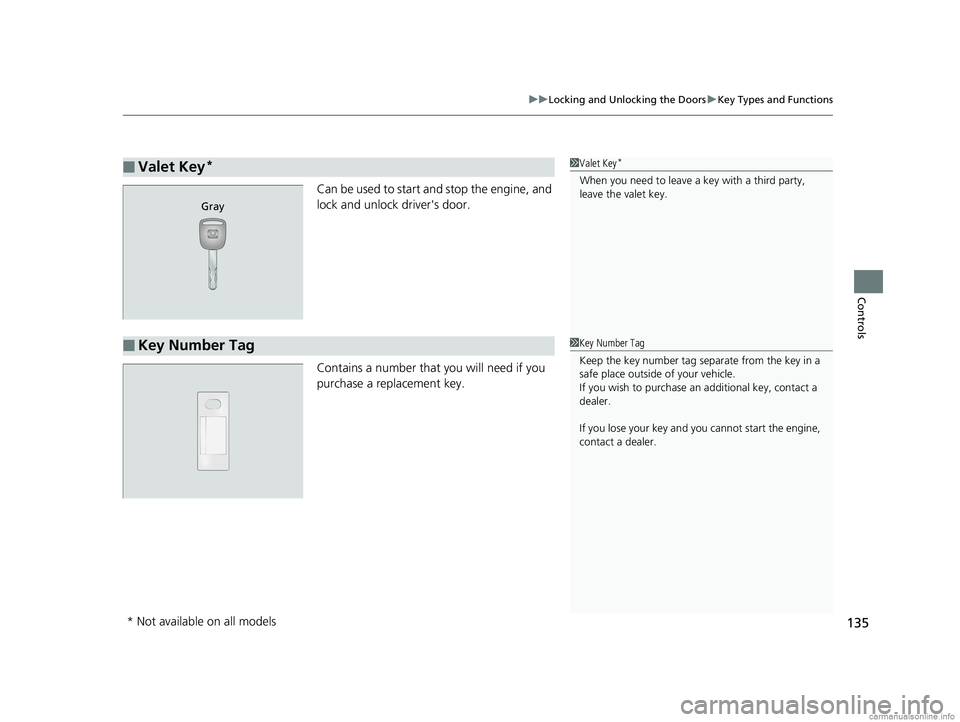
Can be used to start an d stop the engine, and
lock and unlock driver's door.
Contains a number that you will need if you
purchase a replacement key.
■Valet Key*1 Valet Key*
When you need to leave a key with a third party,
leave the valet key.
Gray
■Key Number Tag1Key Number Tag
Keep the key number tag separate from the key in a
safe place outside of your vehicle.
If you wish to purchase an additional key, contact a
dealer.
If you lose your key and you cannot start the engine,
contact a dealer.
* Not available on all models
18 CR-V-31TLA6100.book 135 ページ 2017年9月7日 木曜日 午後3時56分
Page 463 of 679
461
uuWhen Driving uStarting the Engine
Driving
1. Keeping your right foot on the br ake pedal, put the shift lever in (D. Select (R
when reversing.
2. With the parking brake applied, release the brake pedal and gently depress the
accelerator pedal.
u Make sure the parking brake indicator goes off.
2 Parking Brake P. 524
■Hill start assist system
Hill start assist keeps the brake engaged br iefly to help prevent the vehicle from
rolling on inclines as you move your foot from the brake pedal to the accelerator.
Move the shift lever to
(D, (S, or (L when facing uphill, or (R when facing
downhill, then release the brake pedal.
■Starting to Drive1 Starting the Engine
The immobilizer system pr otects your vehicle from
theft. If an improperly code d key (or other device) is
used, the engine's fuel system is disabled.
2 Immobilizer System P. 161
You can also release the parking brake by pressing
the electric parking brake sw itch while depressing the
brake pedal. When facing downhill, you can start
your vehicle more smoothly by manually releasing it
with the electric parki ng brake switch than by
releasing it with th e accelerator pedal.
1Hill start assist system
Hill start assist may not prevent the vehicle from
rolling downhill on a very steep or slippe ry slope, and
does not operate on small inclines.
Hill start assist is not a replacement for the parking
brake.
Hill start assist will operate even when VSA ® is
switched off.
18 CR-V-31TLA6100.book 461 ページ 2017年9月7日 木曜日 午後3時56分
Page 468 of 679

uuWhen Driving uStarting the Engine
466
Driving
1. Depress the brake pedal and press the ENGINE START/STOP button
simultaneously.
2. Put the shift lever in
(D. Select (R when reversing.
3. With the parking brake is applied, releas e the brake pedal and gently depress the
accelerator pedal.
u Make sure the parking brake indicator goes off.
4. Gradually release the brake pedal and gently depress the accelerator pedal to pull
away.
■Hill start assist system
Hill start assist keeps the brake engaged br iefly to help prevent the vehicle from
rolling on inclines as you move your fo ot from the brake pedal to the accelerator.
Move the shift lever to
(D, (S, or (L when facing uphill, or (R when facing
downhill, then release the brake pedal.
■Starting to Drive1 Starting to Drive
The engine stops when the sh ift lever is moved out of
(P before the ENGINE START/STOP button is
pressed. Follow step 1 when starting to drive.
You can also release the parking brake by pressing
the electric parking brake sw itch while depressing the
brake pedal. When facing downhill, you can start
your vehicle more smoothly by manually releasing it
with the electric parki ng brake switch than by
releasing it with th e accelerator pedal.
When the engine was started using the button*
on the smart entry remoteWhen the engine was started using the button* on the smart entry remote
When the engine was started in any case
1 Hill start assist system
Hill start assist may not prevent the vehicle from
rolling downhill on a very steep or slippe ry slope, and
does not operate on small inclines.
Hill start assist is not a replacement for the parking
brake.
Hill start assist will operate even when VSA ® is
switched off.
* Not available on all models
18 CR-V-31TLA6100.book 466 ページ 2017年9月7日 木曜日 午後3時56分
Page 481 of 679
479
uuWhen Driving uFront Sensor Camera*
Continued
Driving
Front Sensor Camera*
The camera, used in systems; such as RDM, LKAS, ACC with LSF and CMBSTM, is
designed to detect an object that trigge rs any of the systems to operate their
functions.
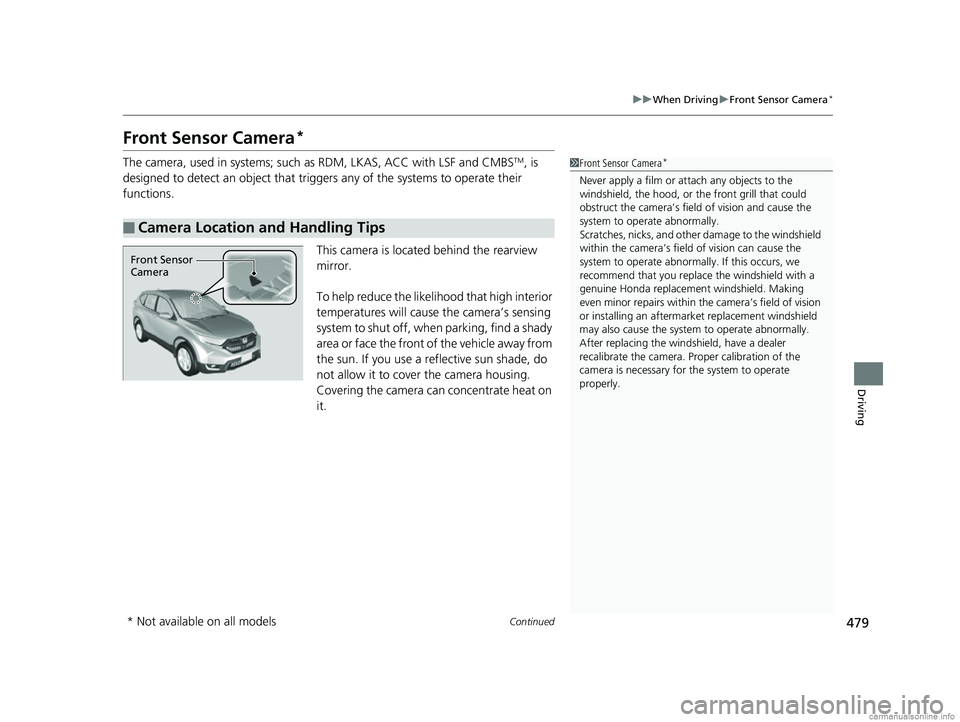
This camera is located behind the rearview
mirror.
To help reduce the likelihood that high interior
temperatures will cause the camera’s sensing
s y s t e m t o s h u t o f f , w h e n p a r k i n g , f i n d a s h a d y
area or face the front of the vehicle away from
the sun. If you use a reflective sun shade, do
not allow it to cover the camera housing.
Covering the camera can concentrate heat on
it.
■Camera Location and Handling Tips
1Front Sensor Camera*
Never apply a film or attach any objects to the
windshield, the hood, or th e front grill that could
obstruct the camera’s fiel d of vision and cause the
system to operate abnormally.
Scratches, nicks, and othe r damage to the windshield
within the camera’s fiel d of vision can cause the
system to operate abnormall y. If this occurs, we
recommend that you replac e the windshield with a
genuine Honda replacem ent windshield. Making
even minor repairs within th e camera’s field of vision
or installing an aftermarket replacement windshield
may also cause the system to operate abnormally.
After replacing the windshield, have a dealer
recalibrate the camera. Pr oper calibration of the
camera is necessary for the system to operate
properly.
Front Sensor
Camera
* Not available on all models
18 CR-V-31TLA6100.book 479 ページ 2017年9月7日 木曜日 午後3時56分
Page 519 of 679
517
uuWhen Driving uReal Time AWD with Intelligent Control SystemTM*
Driving
Real Time AWD with Intelligent Control SystemTM*
When the system senses a loss of front wh eel traction, it automatically transfers
some power to the rear wheels. This allows you to utilize all available traction and
may increase mobility.
You still need to exercise the same care when accelerating, steering, and braking
that you would in a two wheel drive vehicle.
If you excessively spin all four wheels and overheat the AWD system, only the front
wheels receive power. Stop until the system cools down.1 Real Time AWD with In telligent Control SystemTM*
NOTICE
Do not continuously spin the front tires of your
vehicle. Continuously spinning the front tires can
cause transmission or re ar differential damage.
The AWD system may not f unction properly if tire
type and size are mixed. Make sure to use the same
size and type of tire, and the air pressures as
specified.
2 Tire and Wheel Replacement P. 603
* Not available on all models
18 CR-V-31TLA6100.book 517 ページ 2017年9月7日 木曜日 午後3時56分
Page 525 of 679
523
uuWhen Driving uTire Pressure Monitoring System (TPMS) - Required Federal Explanation
Driving
Please note that the TPMS is not a substitute for proper tire
maintenance, and it is the driver ’s responsibility to maintain
correct tire pressure, even if un der-inflation has not reached the
level to trigger illumination of th e TPMS low tire pressure telltale.
Your vehicle has also been equi pped with a TPMS malfunction
indicator to indicate when the system is not operating properly.
The TPMS malfunction indicator is combined with the low tire
pressure telltale. When the syst em detects a malfunction, the
telltale will flash fo r approximately one minute and then remain
continuously illumina ted. This sequence will continue upon
subsequent vehicle start-ups as long as the malfunction exists.
When the malfunction indicator is illuminated, the system may
not be able to detect or signal low tire pressure as intended.
TPMS malfunctions may occur for a variety of reasons, including
the installation of replacement or alternate tires or wheels on the
vehicle that prevent the TPMS from functioning properly.
Always check the TPMS malfunction telltale after replacing one or
more tires or wheels on your vehicle to ensure that the
replacement or alternate tires and wheels allow the TPMS to
continue to function properly.
18 CR-V-31TLA6100.book 523 ページ 2017年9月7日 木曜日 午後3時56分
Page 557 of 679
555
Maintenance
This chapter discusses basic maintenance.
Before Performing MaintenanceInspection and Maintenance ............ 556
Safety When Performing Maintenance...557Parts and Fluids Used in Maintenance Service ........................................... 558
Maintenance Minder
TM..................... 559
Maintenance Under the Hood Maintenance Items Under the Hood .. 569
Opening the Hood ........................... 571
Recommended Engine Oil ................ 572
Oil Check ......................................... 573
Adding Engine Oil ............................ 575
Changing the Engine Oil and Oil Filter ...576
Engine Coolant ................................ 579
Transmission Fluid ............................ 583
Brake Fluid ....................................... 584
Refilling Window Washer Fluid......... 585
Replacing Light Bulbs ....................... 586
Checking and Maintaining Wiper Blades... 593Checking and Maintaining Tires
Checking Tires ................................. 597
Tire and Loading Information Label ...... 598Tire Labeling .................................... 598DOT Tire Quality Grading (U.S. Vehicles).. 600Wear Indicators................................ 602
Tire Service Life ................................ 602 Tire and Wheel Replacement ........... 603
Tire Rotation .................................... 604
Winter Tires ..................................... 605
Battery ............................................... 606
Remote Transmitter Care Replacing the Button Battery ........... 608
Climate Control System Maintenance .. 610Cleaning
Interior Care .................................... 611
Exterior Care.................................... 613
Accessories and Modifications .......... 616
18 CR-V-31TLA6100.book 555 ページ 2017年9月7日 木曜日 午後3時56分
Page 558 of 679
556
Maintenance
Before Performing Maintenance
Inspection and Maintenance
For your safety, perform all listed inspections and maintenance to keep your vehicle
in good condition. If you become aware of any abnormality (noise, smell, insufficient
brake fluid, oil residue on the ground, etc.), have your vehicle inspected by a dealer.
(Note, however, that service at a dealer is not mandatory to keep your warranties in
effect.)
■Daily inspections
Perform inspections before long distance trips, when washing the vehicle, or when
refueling.
■Periodic inspections
• Check the brake fluid level monthly.
2 Checking the Brake Fluid P. 584
•Check the tire pressure monthly. Examin e the tread for wear and foreign objects.
2Checking and Maintaining Tires P. 597
•Check the operation of the exterior lights monthly.
2 Replacing Light Bulbs P. 586
•Check the condition of the wiper bl ades at least every six months.
2Checking and Maintaining Wiper Blades P. 593
■Types of Inspection and Maintenance
1Inspection and Maintenance
Maintenance, replacement, or repair of
emissions control devices and systems may be
done by any automotive repair establishment or
individuals using parts that are “certified” to
EPA standards.
According to state and fede ral regulations, failure to
perform maintenance on the maintenance main
items marked with # will not void your emissions
warranties. However, all maintenance services should
be performed in accordan ce with the intervals
indicated by the information display
*/driver
information interface*.
2 Maintenance Service Items P. 561, 566
If you want to perform complex maintenance tasks
that require more skills a nd tools, you can purchase a
subscription to the Service Express website at
www.techinfo.honda.com .
2 Authorized Manuals P. 662
If you want to perform ma intenance yourself, make
sure that you have the necessary tools and skills first.
After performing ma intenance, update the records in
the separate maintenance booklet.
U.S. models
* Not available on all models
18 CR-V-31TLA6100.book 556 ページ 2017年9月7日 木曜日 午後3時56分
Page 581 of 679
579
uuMaintenance Under the Hood uEngine Coolant
Continued
Maintenance
Engine Coolant
This coolant is premixed with 50% an tifreeze and 50% water. Do not add any
straight antifreeze or water.
We recommend you check the engine coolant level every time you refuel. Check the
reserve tank. Add the engine coolant accordingly.
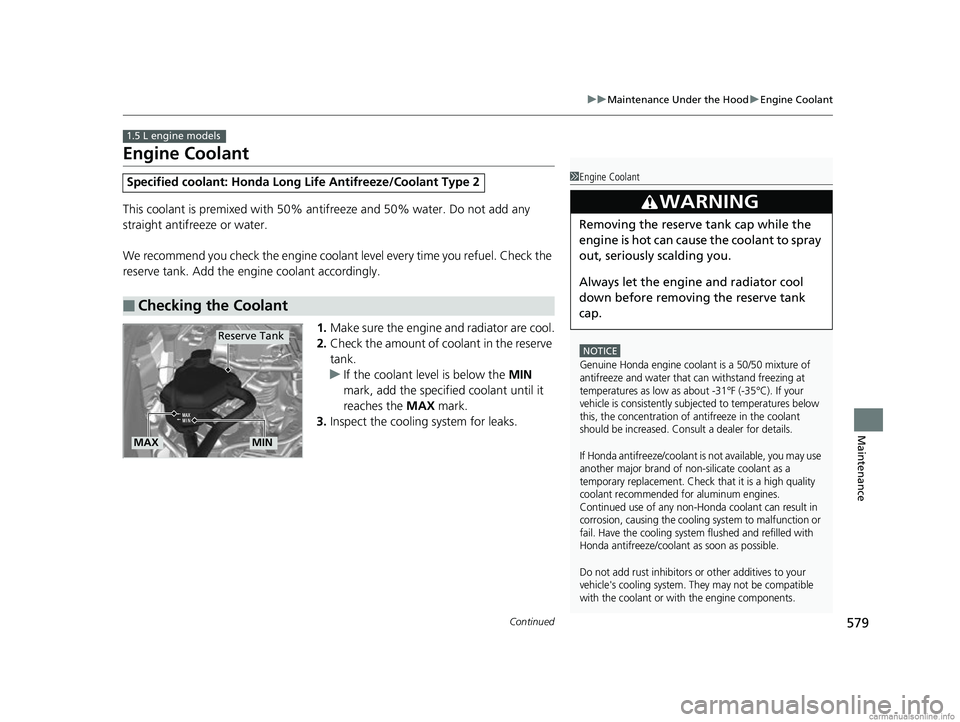
1.Make sure the engine and radiator are cool.
2. Check the amount of coolant in the reserve
tank.
u If the coolant level is below the MIN
mark, add the specified coolant until it
reaches the MAX mark.
3. Inspect the cooling system for leaks.
Specified coolant: Ho nda Long Life Antifreeze/Coolant Type 2
■Checking the Coolant
1.5 L engine models
1Engine Coolant
NOTICE
Genuine Honda engine coolant is a 50/50 mixture of
antifreeze and water that can withstand freezing at
temperatures as low as about -31°F (-35°C). If your
vehicle is consistently subjected to temperatures below
this, the concentration of antifreeze in the coolant
should be increased. Consult a dealer for details.
If Honda antifreeze/coolant is not available, you may use
another major brand of non-silicate coolant as a
temporary replacement. Check that it is a high quality
coolant recommended for aluminum engines.
Continued use of any non-Honda coolant can result in
corrosion, causing the cooling system to malfunction or
fail. Have the cooling system flushed and refilled with
Honda antifreeze/coolant as soon as possible.
Do not add rust inhibitors or other additives to your
vehicle's cooling system. They may not be compatible
with the coolant or with the engine components.
3WARNING
Removing the reserve tank cap while the
engine is hot can cause the coolant to spray
out, seriously scalding you.
Always let the engine and radiator cool
down before removing the reserve tank
cap.
Reserve Tank
MAXMIN
18 CR-V-31TLA6100.book 579 ページ 2017年9月7日 木曜日 午後3時56分