ECO mode HONDA CR-Z 2016 1.G Manual Online
[x] Cancel search | Manufacturer: HONDA, Model Year: 2016, Model line: CR-Z, Model: HONDA CR-Z 2016 1.GPages: 409, PDF Size: 19.68 MB
Page 281 of 409
280
uuWhen Driving uTire Pressure Monitoring System (TPMS)
Driving
Tire Pressure Monitoring System (TPMS)
Instead of directly measuring the pressu re in each tire, the TPMS on this vehicle
monitors and compares the rolling radius and rotational characteristics of each
wheel and tire while you are driving to determine if one or more tires are
significantly under-inflated. This will caus e the low tire pressure/TPMS indicator to
come on and a message to appear on the multi-information display.
You must start TPMS calibration every time you:
• Adjust the pressure in one or more tires.
• Rotate the tires.
• Replace one or more tires.
Before calibrating the TPMS:
• Set the cold tire pressu re in all four tires.
2Checking Tires P. 331
Make sure:
•The vehicle is at a complete stop.
• The shift lever is in
(N.
• The shift lever is in
(P.
• The power mode to ON.
■TPMS Calibration
U.S. models only
1Tire Pressure Monitoring System (TPMS)
The system does not monitor the tires when driving
at low speed.
Conditions such as low ambient temperature and
altitude change directly a ffect tire pressure and can
trigger the low tire pressure/TPMS indicator to come on.
Tire pressure checked and inflated in:
•Warm weather can beco me under-inflated in
colder weather.
•Cold weather can become over-inflated in warmer
weather.
The low tire pressure indica tor will not come on as a
result of over inflation.
The TPMS may not function pr operly if tire type and
size are mixed. Make sure to use the same size and
type of tire.
2 Checking and Maintaining Tires P. 331
The low tire pressure/TPMS indicator may come on
with a delay or may not come on at all when:
•You rapidly accelerate, decelerate, or turn the
steering wheel.
•You drive on snowy or slippery roads.•Snow chains are used.
The low tire pressure/TPMS indicator may come on
under the following conditions:
•A compact spare tire is used.•There is a heavier and une ven load on the tires,
such as when towing a trailer, than the condition at
calibration.
•Snow chains are used.
Manual transmission models
Continuously variable transmission models
All models
16 CR-Z-31SZT6500.book 280 ページ 2015年9月11日 金曜日 午前11時47分
Page 282 of 409
281
uuWhen Driving uTire Pressure Monitoring System (TPMS)
Driving
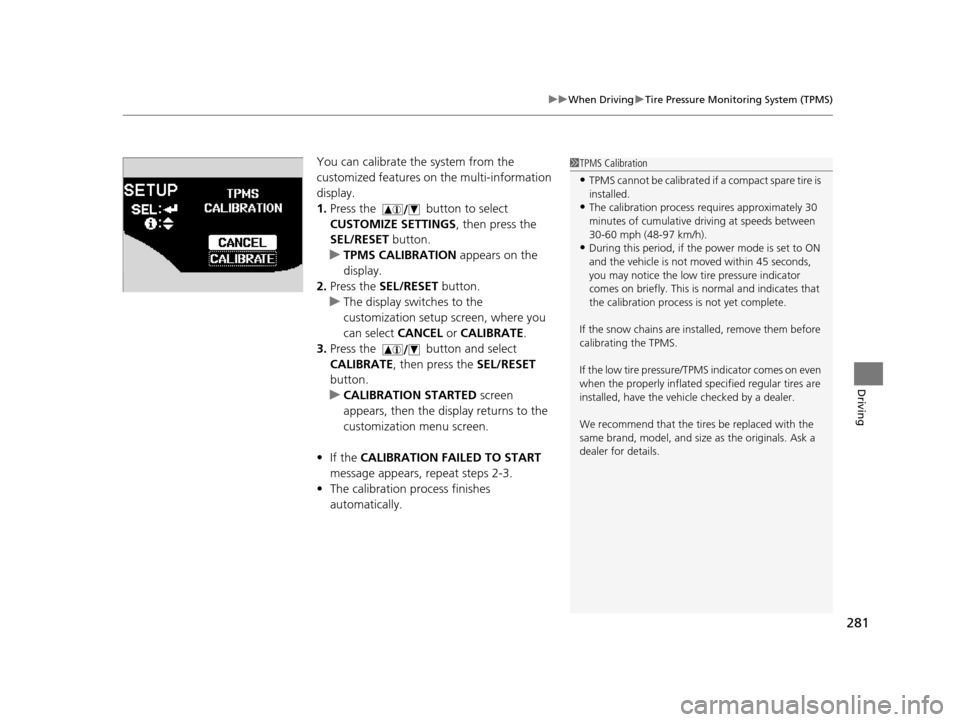
You can calibrate the system from the
customized features on the multi-information
display.
1. Press the button to select
CUSTOMIZE SETTINGS , then press the
SEL/RESET button.
u TPMS CALIBRATION appears on the
display.
2. Press the SEL/RESET button.
u The display swit ches to the
customization setup screen, where you
can select CANCEL or CALIBRATE .
3. Press the button and select
CALIBRATE , then press the SEL/RESET
button.
u CALIBRATION STARTED screen
appears, then the di splay returns to the
customization menu screen.
• If the CALIBRATION FAILED TO START
message appears, repeat steps 2-3.
• The calibration process finishes
automatically.1TPMS Calibration
•TPMS cannot be calibrated if a compact spare tire is
installed.
•The calibration process requires approximately 30
minutes of cumulative dr iving at speeds between
30-60 mph (48-97 km/h).
•During this period, if the power mode is set to ON
and the vehicle is not moved within 45 seconds,
you may notice the low ti re pressure indicator
comes on briefly. This is normal and indicates that
the calibration process is not yet complete.
If the snow chains are installed, remove them before
calibrating the TPMS.
If the low tire pressure/TPMS indicator comes on even
when the properly inflated specified regular tires are
installed, have the vehi cle checked by a dealer.
We recommend that the tires be replaced with the
same brand, model, and size as the originals. Ask a
dealer for details.
16 CR-Z-31SZT6500.book 281 ページ 2015年9月11日 金曜日 午前11時47分
Page 283 of 409
282
uuWhen Driving uTire Pressure Monitoring System (TPMS) - Required Federal Explanation
Driving
Tire Pressure Monitoring System (TPMS) - Required
Federal Explanation
Each tire, including the spare (i f provided), should be checked
monthly when cold and inflated to the inflation pressure
recommended by the vehicle manufacturer on the vehicle placard
or tire inflation pressure label.
(If your vehicle has tires of a different size than the size indicated
on the vehicle placard or tire infl ation pressure label, you should
determine the proper tire inflat ion pressure for those tires.)
As an added safety feature, your vehicle has been equipped with
a tire pressure monitoring system (TPMS) that illuminates a low
tire pressure telltale
when one or more of your tire s is significantly under-inflated.
Accordingly, when the low tire pr essure telltale illuminates, you
should stop and check your tires as soon as possible, and inflate
them to the proper pressure.
Driving on a significantly under-in flated tire causes the tire to
overheat and can lead to tire fail ure. Under-inflation also reduces
fuel efficiency and tire tread li fe, and may affect the vehicle's
handling and stopping ability.
U.S. models
16 CR-Z-31SZT6500.book 282 ページ 2015年9月11日 金曜日 午前11時47分
Page 285 of 409
284
Driving
Braking
Brake System
Use the parking brake to keep the vehicle stationary when parked. You can
manually apply and release, or automatically release it.
■Manual operations
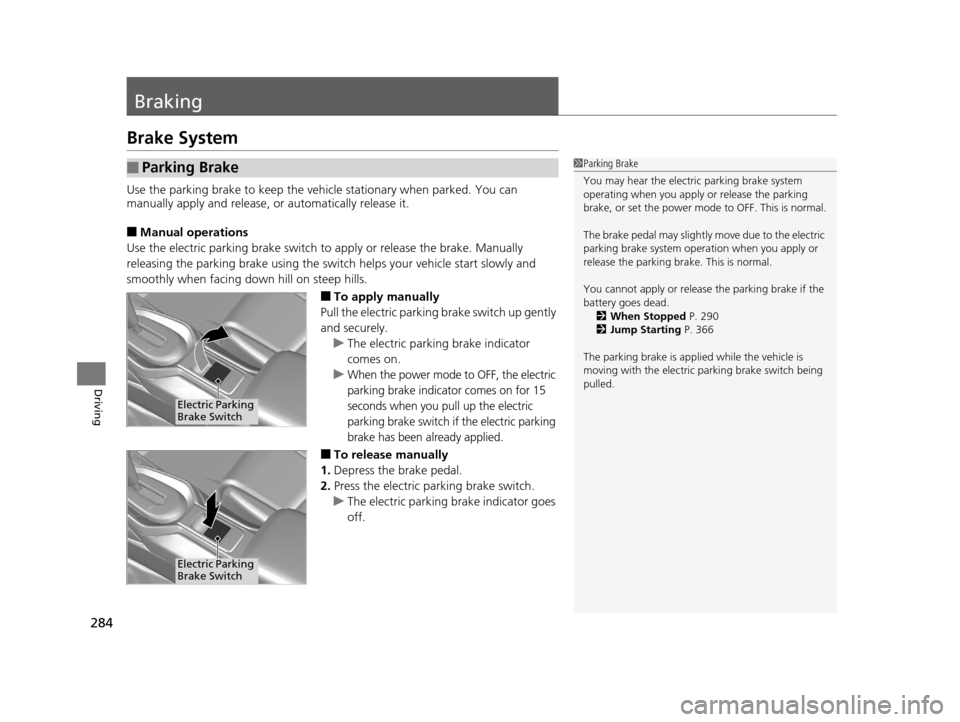
Use the electric parking brake switch to apply or release the brake. Manually
releasing the parking brake using the switch helps your vehicle start slowly and
smoothly when facing down hill on steep hills.
■To apply manually
Pull the electric parkin g brake switch up gently
and securely.
u The electric parking brake indicator
comes on.
u
When the power mode to OFF, the electric
parking brake indicator comes on for 15
seconds when you pull up the electric
parking brake switch if the electric parking
brake has been already applied.
■To release manually
1. Depress the brake pedal.
2. Press the electric parking brake switch.
u The electric parking brake indicator goes
off.
■Parking Brake1Parking Brake
You may hear the electric parking brake system
operating when you apply or release the parking
brake, or set the power mode to OFF. This is normal.
The brake pedal may slightly move due to the electric
parking brake system opera tion when you apply or
release the parking br ake. This is normal.
You cannot apply or release the parking brake if the
battery goes dead. 2 When Stopped P. 290
2 Jump Starting P. 366
The parking brake is appl ied while the vehicle is
moving with the electric pa rking brake switch being
pulled.
Electric Parking
Brake Switch
Electric Parking
Brake Switch
16 CR-Z-31SZT6500.book 284 ページ 2015年9月11日 金曜日 午前11時47分
Page 291 of 409
290
Driving
Parking Your Vehicle
When Stopped
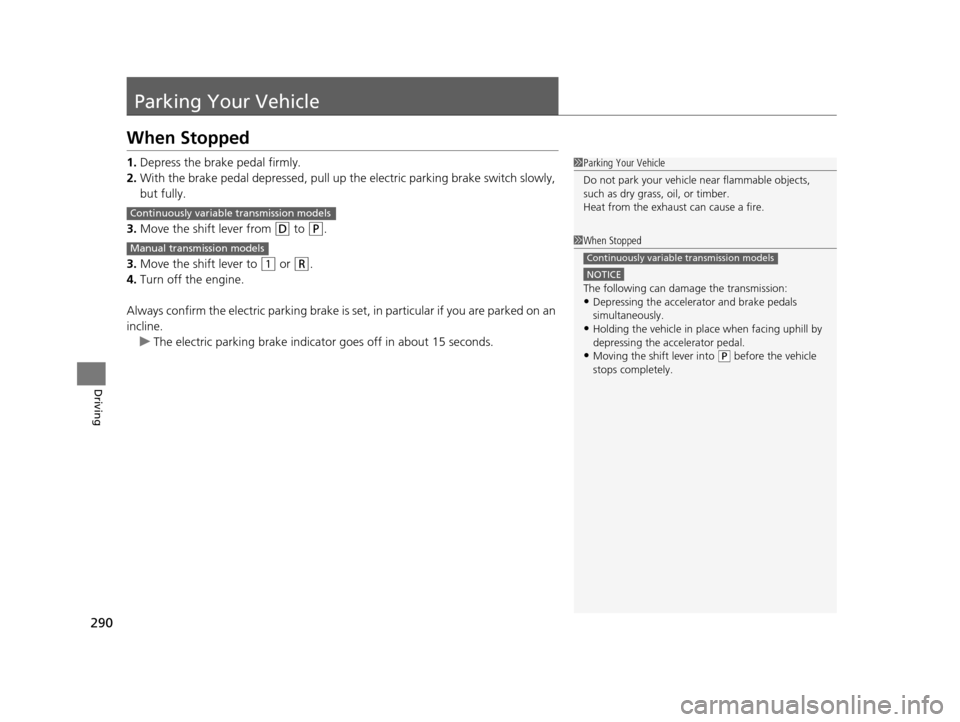
1.Depress the brake pedal firmly.
2. With the brake pedal depressed, pull up th e electric parking brake switch slowly,
but fully.
3. Move the shift lever from
(D to (P.
3. Move the shift lever to
(1 or (R.
4. Turn off the engine.
Always confirm the electric parking brake is se t, in particular if you are parked on an
incline. u The electric parking brake indicator goes off in about 15 seconds.
1Parking Your Vehicle
Do not park your vehicle near flammable objects,
such as dry grass, oil, or timber.
Heat from the exhaust can cause a fire.
1 When Stopped
NOTICE
The following can dama ge the transmission:
•Depressing the accelerator and brake pedals
simultaneously.
•Holding the vehicle in place when facing uphill by
depressing the accelerator pedal.
•Moving the shift lever into ( P before the vehicle
stops completely.
Continuously variable transmission models
Continuously variable transmission models
Manual transmission models
16 CR-Z-31SZT6500.book 290 ページ 2015年9月11日 金曜日 午前11時47分
Page 301 of 409
300
Maintenance
Before Performing Maintenance
Inspection and Maintenance
For your safety, perform all listed inspections and maintenance to keep your vehicle
in good condition. If you become aware of any abnormality (noise, smell, insufficient
brake fluid, oil residue on the ground, etc.), have your vehicle inspected by a dealer.
(Note, however, that service at a dealer is not mandatory to keep your warranties in
effect.)
■Daily inspections
Perform inspections before long distance trips, when washing the vehicle, or when
refueling.
■Periodic inspections
• Check the continuously variable transmission fluid level monthly.
2 Continuously Variable Transmission Fluid P. 316
•Check the brake fluid level monthly.
2 Brake/Clutch Fluid P. 318
•Check the tire pressure monthly. Examin e the tread for wear and foreign objects.
2Checking and Maintaining Tires P. 331
•Check the operation of the exterior lights monthly.
2 Replacing Light Bulbs P. 320
•Check the condition of the wiper bl ades at least every six months.
2Checking and Maintaining Wiper Blades P. 328
■Types of Inspection and Maintenance
1Inspection and Maintenance
Maintenance, replacement, or repair of
emissions control devices and systems may be
done by any automotive repair establishment or
individuals using parts that are “certified” to
EPA standards.
According to state and fede ral regulations, failure to
perform maintenance on the maintenance main
items marked with # will not void your emissions
warranties. However, all maintenance services should
be performed in accordan ce with the intervals
indicated by the mult i-information display.
2 Maintenance Service Items P. 305
If you want to perform complex maintenance tasks
that require more skills a nd tools, you can purchase a
subscription to the Service Express website at
www.techinfo.honda.com .
2 Authorized Manuals P. 397
If you want to perform ma intenance yourself, make
sure that you have the necessary tools and skills first.
After performing ma intenance, update the records in
the separate maintenance booklet.
U.S. models
16 CR-Z-31SZT6500.book 300 ページ 2015年9月11日 金曜日 午前11時47分
Page 307 of 409
uuMaintenance MinderTMuTo Use Maintenance MinderTM
306
Maintenance
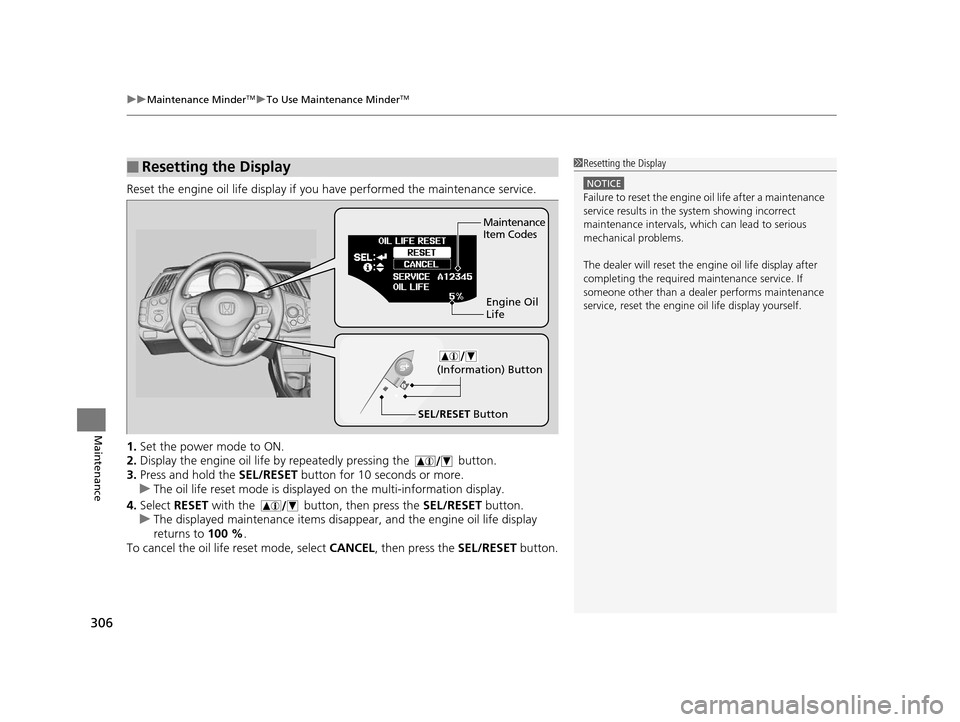
Reset the engine oil life display if you have performed the maintenance service.
1. Set the power mode to ON.
2. Display the engine oil life by repeatedly pressing the button.
3. Press and hold the SEL/RESET button for 10 seconds or more.
u The oil life reset mode is displayed on the multi-information display.
4. Select RESET with the button, then press the SEL/RESET button.
u The displayed maintenance items disappea r, and the engine oil life display
returns to 100 %.
To cancel the oil life reset mode, select CANCEL, then press the SEL/RESET button.
■Resetting the Display1Resetting the Display
NOTICE
Failure to reset the engine oil life after a maintenance
service results in the sy stem showing incorrect
maintenance intervals, which can lead to serious
mechanical problems.
The dealer will reset the en gine oil life display after
completing the required ma intenance service. If
someone other than a deal er performs maintenance
service, reset the engine oil life display yourself.
Engine Oil
Life
SEL/RESET Button Maintenance
Item Codes
(Information) Button
16 CR-Z-31SZT6500.book 306 ページ 2015年9月11日 金曜日 午前11時47分
Page 332 of 409
331
Maintenance
Checking and Maintaining Tires
Checking Tires
To safely operate your vehicle, your tires must be of the proper type and size, in
good condition with adequate tread, and properly inflated.
■Inflation guidelines
Properly inflated tires provid e the best combination of hand ling, tread life, and comfort.
Refer to the driver’s doorjamb label or spec ification’s page for the specified pressure.
Underinflated tires wear unev enly, adversely affect handling and fuel economy, and
are more likely to fail from overheating.
Overinflated tires make your vehicle ride ha rshly, are more prone to road hazards,
and wear unevenly.
Every day before you drive, look at each of the tires. If one looks lower than the
others, check the pressure with a tire gauge.
At least once a month or before long trips , use a gauge to measure the pressure in
all tires, including the spare
*. Even tires in good condition can lose 1 to 2 psi (10 to
20 kPa, 0.1 to 0.2 kgf/cm2) per month.
■Inspection guidelines
Every time you check inflation, also examine the tires and valve stems.
Look for:
• Bumps or bulges on the side or in the tr ead. Replace the tire if you find any cuts,
splits, or cracks in the side of the tire . Replace it if you see fabric or cord.
• Remove any foreign objects and inspect for air leaks.
• Uneven tread wear. Have a deal er check the wheel alignment.
• Excessive tread wear.
2 Wear Indicators P. 336
•Cracks or other damage around valve stem.
1Checking Tires
Measure the air pressure when tires are cold. This
means the vehicle has been parked for at least three
hours, or driven less than 1 mile (1.6 km). If
necessary, add or releas e air until the specified
pressure is reached.
If checked when hot, tire pressure can be as much as
4–6 psi (30–40 kPa, 0.3–0.4 kgf/cm
2) higher than if
checked when cold.
Have a dealer check the tires if you feel a consistent
vibration while driving. Ne w tires and any that have
been removed and reinst alled should be properly
balanced.
Whenever tire pressure is adjusted, you must
calibrate the TPMS.
2 Tire Pressure Monitoring System (TPMS)
P. 280
3WARNING
Using tires that are excessively worn or
improperly inflated can cause a crash in
which you can be seriously hurt or killed.
Follow all instruction s in this owner’s
manual regarding tire inflation and
maintenance.
U.S. models only
* Not available on all models
16 CR-Z-31SZT6500.book 331 ページ 2015年9月11日 金曜日 午前11時47分
Page 340 of 409
339
uuChecking and Maintaining Tires uWinter Tires
Maintenance
Winter Tires
If driving on snowy or frozen roads, mount all season marked M+S tires, snow tires,
or tire chains; reduce speed; and maintain sufficient distance between vehicles when
driving.
Be particularly careful wh en operating the steering wheel or brakes to prevent
skidding.
Use tire chains, snow tires, or all season tires when necessary or according to the
law.
When mounting, refer to the following points.
For winter tires:
• Select the size and load ranges that are the same as the original tires.
• Mount the tires to all four wheels.
For tire chains:
• Install them on the front tires only.
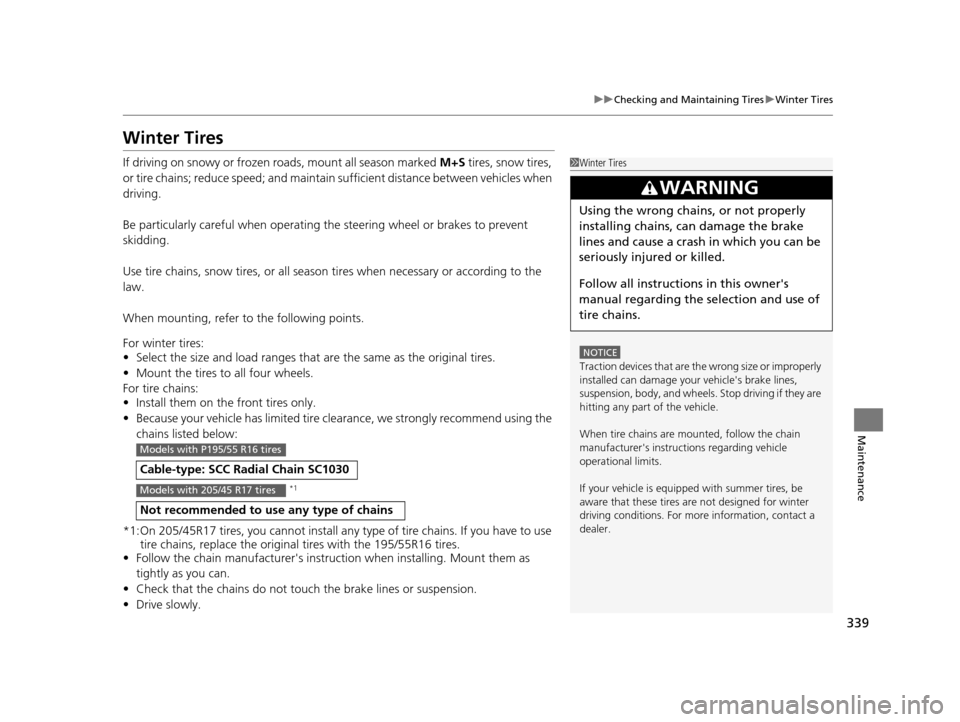
• Because your vehicle has limited tire clea rance, we strongly recommend using the
chains listed below:
*1
*1:On 205/45R17 tires, you cannot install any type of tire chains. If you have to use tire chains, replace the original tires with the 195/55R16 tires.
• Follow the chain manufactur er's instruction when installing. Mount them as
tightly as you can.
• Check that the chains do not touch the brake lines or suspension.
• Drive slowly.
Cable-type: SCC Ra dial Chain SC1030
Not recommended to use any type of chains
1Winter Tires
NOTICE
Traction devices that are th e wrong size or improperly
installed can damage your vehicle's brake lines,
suspension, body, and wheels. Stop driving if they are
hitting any part of the vehicle.
When tire chains are mounted, follow the chain
manufacturer's instructi ons regarding vehicle
operational limits.
If your vehicle is equipped with summer tires, be
aware that these tires are not designed for winter
driving conditions. For more information, contact a
dealer.
3WARNING
Using the wrong chains, or not properly
installing chains, can damage the brake
lines and cause a crash in which you can be
seriously injured or killed.
Follow all instruction s in this owner's
manual regarding the selection and use of
tire chains.
Models with P195/55 R16 tires
Models with 205/45 R17 tires
16 CR-Z-31SZT6500.book 339 ページ 2015年9月11日 金曜日 午前11時47分
Page 365 of 409
364
uuEngine Does Not Start uIf the Smart Entry Remote Battery is Weak
Handling the Unexpected
If the Smart Entry Remote Battery is Weak
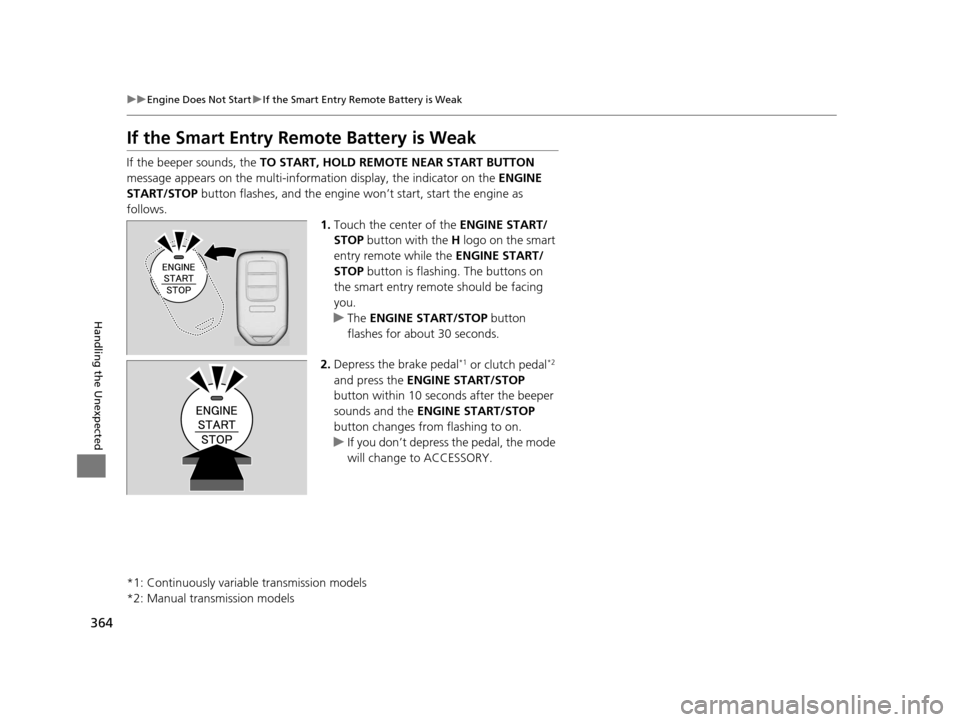
If the beeper sounds, the TO START, HOLD REMO TE NEAR START BUTTON
message appears on the multi-information display, the indicator on the ENGINE
START/STOP button flashes, and the engine wo n’t start, start the engine as
follows. 1.Touch the center of the ENGINE START/
STOP button with the H logo on the smart
entry remote while the ENGINE START/
STOP button is flashing. The buttons on
the smart entry remote should be facing
you.
u The ENGINE START/STOP button
flashes for about 30 seconds.
2. Depress the brake pedal
*1 or clutch pedal*2
and press the ENGINE START/STOP
button within 10 seconds after the beeper
sounds and the ENGINE START/STOP
button changes from flashing to on.
u If you don’t depress the pedal, the mode
will change to ACCESSORY.
*1: Continuously variable transmission models
*2: Manual transmission models
16 CR-Z-31SZT6500.book 364 ページ 2015年9月11日 金曜日 午前11時47分