change time HONDA ELEMENT 2010 1.G User Guide
[x] Cancel search | Manufacturer: HONDA, Model Year: 2010, Model line: ELEMENT, Model: HONDA ELEMENT 2010 1.GPages: 342, PDF Size: 5.76 MB
Page 149 of 342
Your vehicle is capable of receiving XM®Radio anywhere in the United
States, and Canada except Hawaii,
Alaska and Puerto Rico. XM is a
registered trademark of Sirius XM Radio
®, Inc. and XM CANADA®is a
registered business name of
Canadian Satellite Radio Inc.
XM Radio receives signals from two
satellites to produce clear, high-
quality digital reception. It offers
many channels in several categories.
Along with a large selection of
different types of music, XM Radio
allows you to view channel and
category selections in the display.
When you press and hold the
AUDIO button, the display also
shows all XM information. Operating the XM Radio
To listen to XM Radio, turn the
ignition switch to the ACCESSORY
(I) or the ON (II) position. Press the
CD/XM button to select XM Radio.
Adjust the volume by turning the
knob. The last channel you listened
to will show in the display.
You can also change to the XM Radio
while you are listening to an FM
station, AM station, disc, PC card,
etc., by touching the XM1 or XM2
icon on the audio display.
You can also operate the radio using
the control buttons on the left side of
the screen. The status bar appears on
the bottom of the screen each time
you press any of the control buttons.
On the navigation screen, you can
also see the audio information by
touching the AUDIO INFO icon on
the lower of the screen.MODE
-To switch between
channel mode and category mode,
touch the MODE icon. In channel
mode, you can select all of the
available channels. In category
mode, such as Jazz, Rock, Classical,
etc., you can select all of the
channels within that category. Each
time you touch and release the
MODE icon, the display changes
between the channel mode and the
category mode.
CONTINUED
Playing the XM®Radio (Models with navigation system)
133
Features
Table of Contents
Page 159 of 342
Push the AUDIO button beside the
screen to show the audio display and
operate the disc player.
You can also operate the audio
system without using the control
icons on the audio screen. Press the
CD/XM button. The status bar
appears on the bottom of the screen.
On the navigation screen, you can
see the audio information whenever
you touch the AUDIO INFO icon on
the lower portion of the screen.
When playing a CD recorded with
text data, the track, album, and artist
name are shown on the audio
display. When playing a disc in MP3
or WMA, the folder number and
name, the file number and name, the
artist name, and the elapsed time are
shown. The system will continuously
play a disc until you change modes.
If the disc was not recorded with text
data, it will not be displayed.To Change or Select Tracks/Files
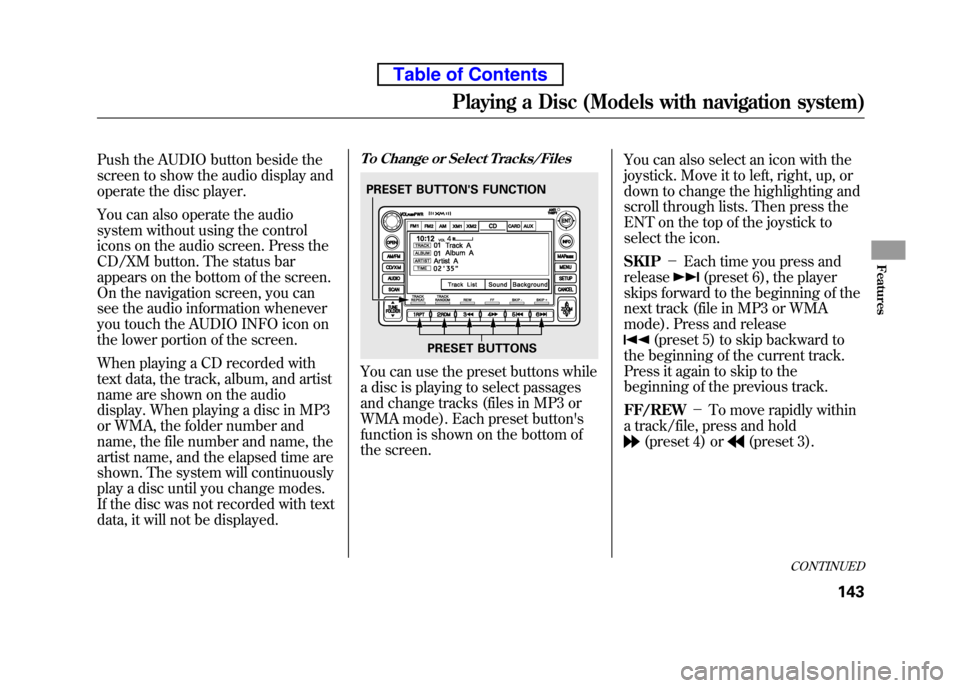
You can use the preset buttons while
a disc is playing to select passages
and change tracks (files in MP3 or
WMA mode). Each preset button's
function is shown on the bottom of
the screen.You can also select an icon with the
joystick. Move it to left, right, up, or
down to change the highlighting and
scroll through lists. Then press the
ENT on the top of the joystick to
select the icon. SKIP
-Each time you press and
release
(preset 6), the player
skips forward to the beginning of the
next track (file in MP3 or WMA
mode). Press and release
(preset 5) to skip backward to
the beginning of the current track.
Press it again to skip to the
beginning of the previous track. FF/REW -To move rapidly within
a track/file, press and hold
(preset 4) or(preset 3).
PRESET BUTTON'S FUNCTION
PRESET BUTTONS
CONTINUED
Playing a Disc (Models with navigation system)
143
Features
Table of Contents
Page 170 of 342
If you select‘‘Play a new track list, ’’
the system goes into the selected
play mode immediately and begins to
play the files in order to the new list.
To go back to the previous screen,
press the CANCEL button on the
right side of the screen. To exit the
play mode screens, press the AUDIObutton.To Change or Select Tracks/Files
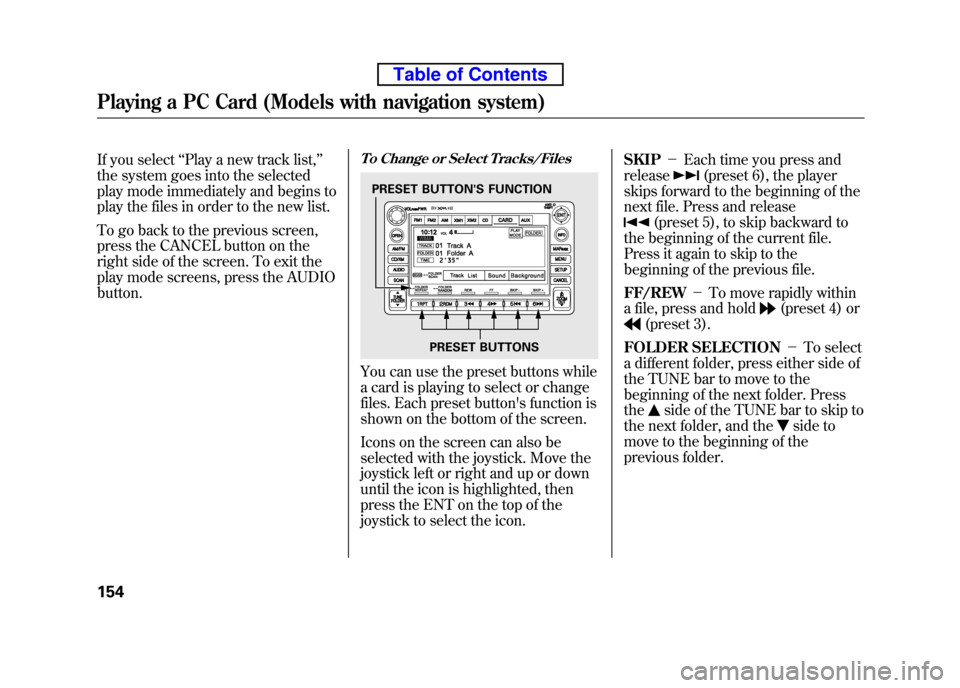
You can use the preset buttons while
a card is playing to select or change
files. Each preset button's function is
shown on the bottom of the screen.
Icons on the screen can also be
selected with the joystick. Move the
joystick left or right and up or down
until the icon is highlighted, then
press the ENT on the top of the
joystick to select the icon. SKIP
-Each time you press and
release
(preset 6), the player
skips forward to the beginning of the
next file. Press and release
(preset 5), to skip backward to
the beginning of the current file.
Press it again to skip to the
beginning of the previous file. FF/REW -To move rapidly within
a file, press and hold
(preset 4) or
(preset 3).
FOLDER SELECTION -To select
a different folder, press either side of
the TUNE bar to move to the
beginning of the next folder. Pressthe
side of the TUNE bar to skip to
the next folder, and the
side to
move to the beginning of the
previous folder.
PRESET BUTTON'S FUNCTION
PRESET BUTTONS
Playing a PC Card (Models with navigation system)
154
Table of Contents
Page 182 of 342
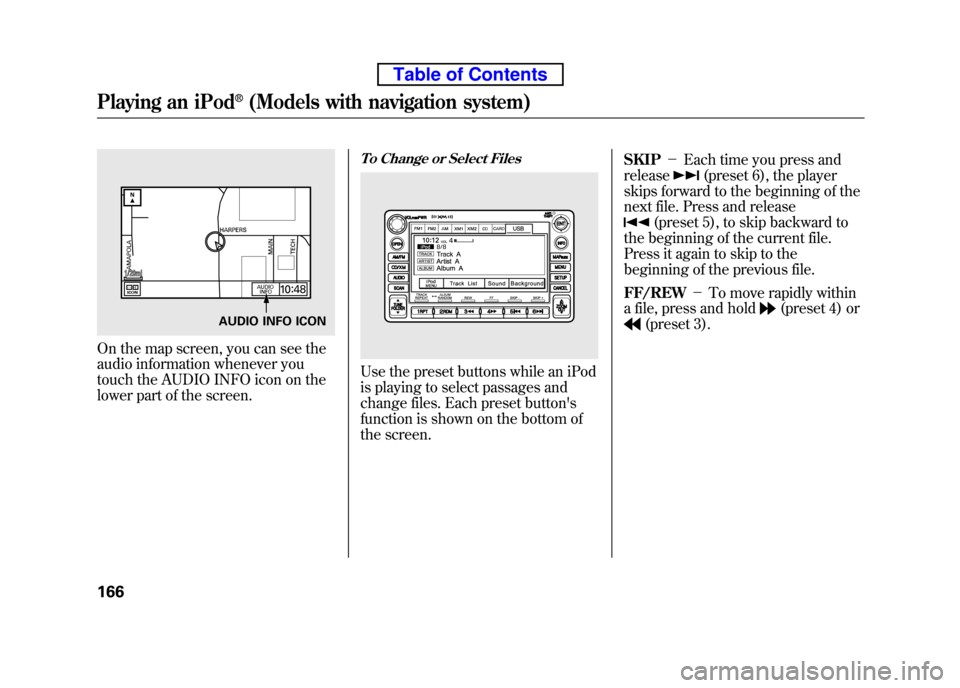
On the map screen, you can see the
audio information whenever you
touch the AUDIO INFO icon on the
lower part of the screen.
To Change or Select Files
Use the preset buttons while an iPod
is playing to select passages and
change files. Each preset button's
function is shown on the bottom of
the screen.SKIP
-Each time you press and
release
(preset 6), the player
skips forward to the beginning of the
next file. Press and release
(preset 5), to skip backward to
the beginning of the current file.
Press it again to skip to the
beginning of the previous file. FF/REW -To move rapidly within
a file, press and hold
(preset 4) or
(preset 3).AUDIO INFO ICON
Playing an iPod®(Models with navigation system)
166
Table of Contents
Page 185 of 342
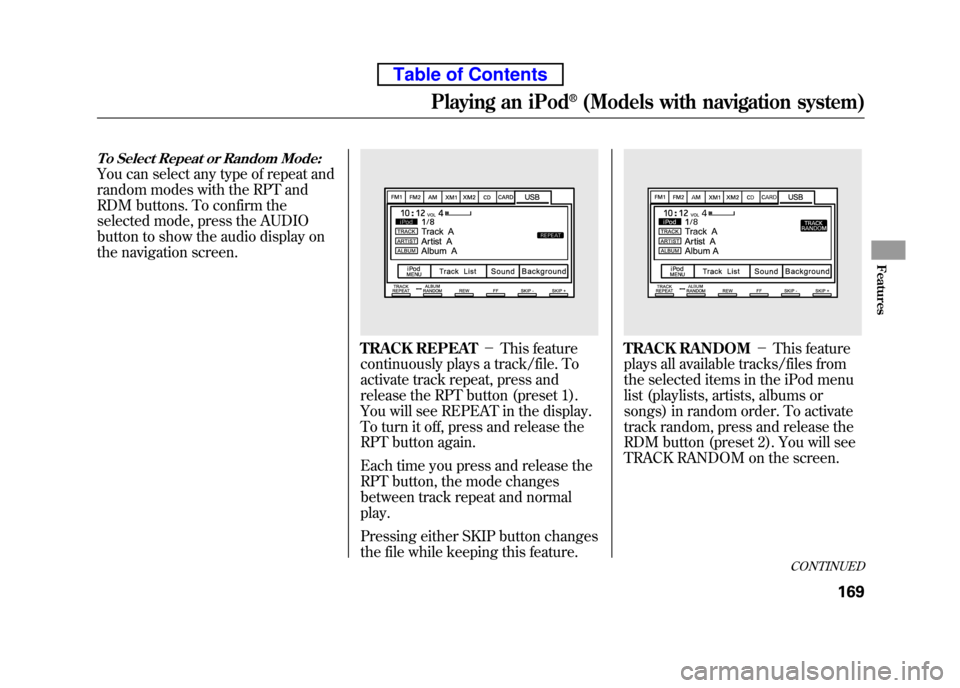
To Select Repeat or Random Mode:
You can select any type of repeat and
random modes with the RPT and
RDM buttons. To confirm the
selected mode, press the AUDIO
button to show the audio display on
the navigation screen.
TRACK REPEAT-This feature
continuously plays a track/file. To
activate track repeat, press and
release the RPT button (preset 1).
You will see REPEAT in the display.
To turn it off, press and release the
RPT button again.
Each time you press and release the
RPT button, the mode changes
between track repeat and normalplay.
Pressing either SKIP button changes
the file while keeping this feature.TRACK RANDOM -This feature
plays all available tracks/files from
the selected items in the iPod menu
list (playlists, artists, albums or
songs) in random order. To activate
track random, press and release the
RDM button (preset 2). You will see
TRACK RANDOM on the screen.
CONTINUED
Playing an iPod®(Models with navigation system)
169
Features
Table of Contents
Page 194 of 342
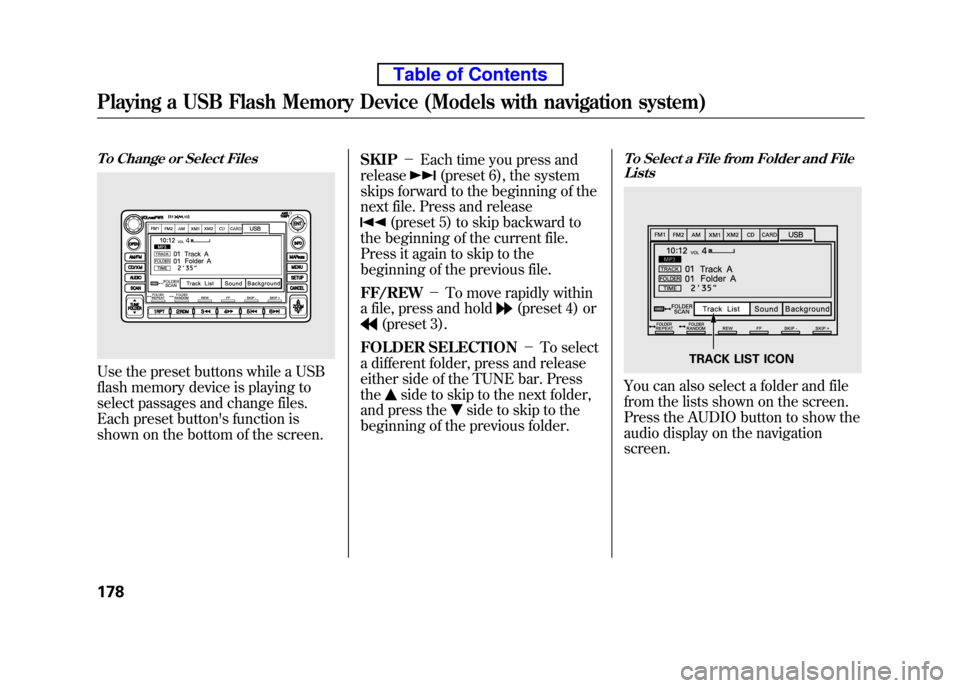
To Change or Select Files
Use the preset buttons while a USB
flash memory device is playing to
select passages and change files.
Each preset button's function is
shown on the bottom of the screen.SKIP
-Each time you press and
release
(preset 6), the system
skips forward to the beginning of the
next file. Press and release
(preset 5) to skip backward to
the beginning of the current file.
Press it again to skip to the
beginning of the previous file. FF/REW -To move rapidly within
a file, press and hold
(preset 4) or
(preset 3).
FOLDER SELECTION -To select
a different folder, press and release
either side of the TUNE bar. Pressthe
side to skip to the next folder,
and press the
side to skip to the
beginning of the previous folder.
To Select a File from Folder and File Lists
You can also select a folder and file
from the lists shown on the screen.
Press the AUDIO button to show the
audio display on the navigationscreen.
TRACK LIST ICON
Playing a USB Flash Memory Device (Models with navigation system)
178
Table of Contents
Page 205 of 342
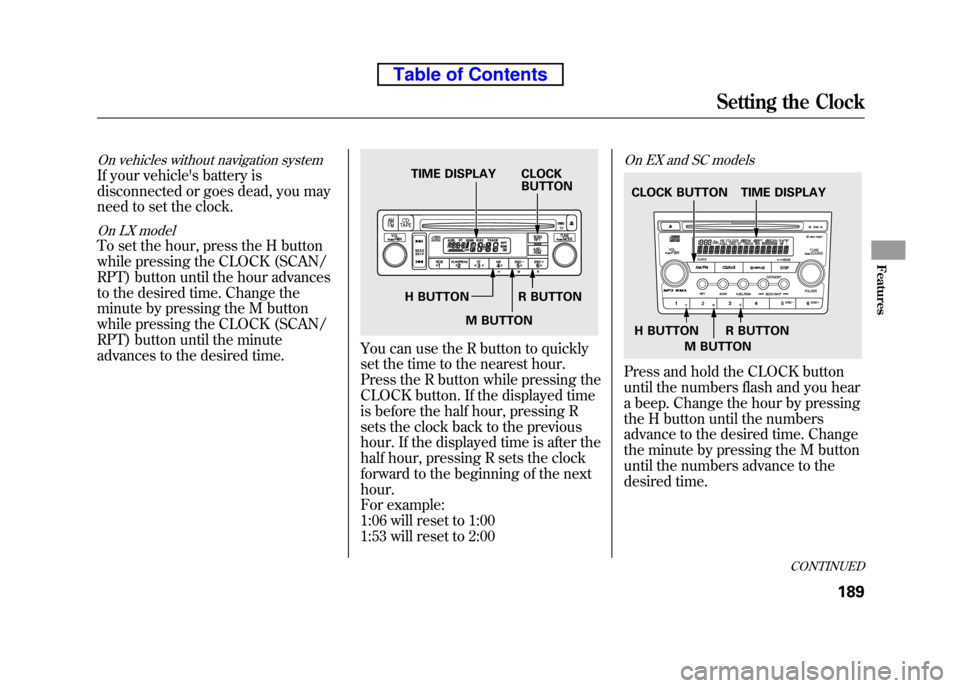
On vehicles without navigation system
If your vehicle's battery is
disconnected or goes dead, you may
need to set the clock.
On LX model
To set the hour, press the H button
while pressing the CLOCK (SCAN/
RPT) button until the hour advances
to the desired time. Change the
minute by pressing the M button
while pressing the CLOCK (SCAN/
RPT) button until the minute
advances to the desired time.
You can use the R button to quickly
set the time to the nearest hour.
Press the R button while pressing the
CLOCK button. If the displayed time
is before the half hour, pressing R
sets the clock back to the previous
hour. If the displayed time is after the
half hour, pressing R sets the clock
forward to the beginning of the nexthour.
For example:
1:06 will reset to 1:00
1:53 will reset to 2:00
On EX and SC models
Press and hold the CLOCK button
until the numbers flash and you hear
a beep. Change the hour by pressing
the H button until the numbers
advance to the desired time. Change
the minute by pressing the M button
until the numbers advance to the
desired time.
TIME DISPLAY CLOCKBUTTON
H BUTTON R BUTTON M BUTTON
TIME DISPLAY
CLOCK BUTTON
H BUTTON R BUTTON M BUTTON
CONTINUED
Setting the Clock
189
Features
Table of Contents
Page 207 of 342
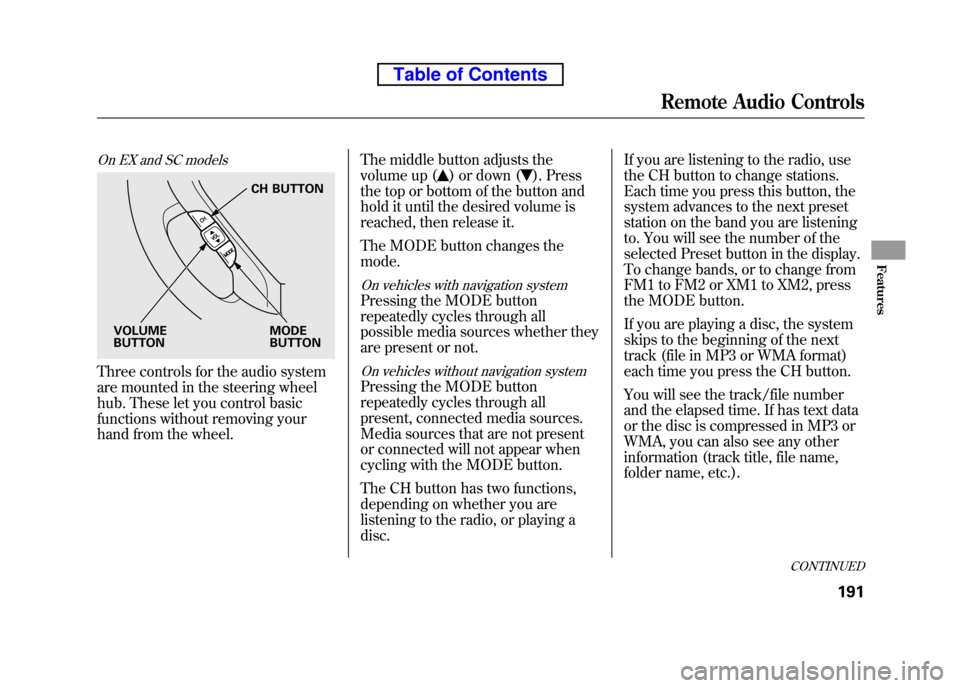
On EX and SC models
Three controls for the audio system
are mounted in the steering wheel
hub. These let you control basic
functions without removing your
hand from the wheel.The middle button adjusts the
volume up (
) or down (). Press
the top or bottom of the button and
hold it until the desired volume is
reached, then release it.
The MODE button changes the mode.
On vehicles with navigation system
Pressing the MODE button
repeatedly cycles through all
possible media sources whether they
are present or not.
On vehicles without navigation system
Pressing the MODE button
repeatedly cycles through all
present, connected media sources.
Media sources that are not present
or connected will not appear when
cycling with the MODE button.
The CH button has two functions,
depending on whether you are
listening to the radio, or playing adisc. If you are listening to the radio, use
the CH button to change stations.
Each time you press this button, the
system advances to the next preset
station on the band you are listening
to. You will see the number of the
selected Preset button in the display.
To change bands, or to change from
FM1 to FM2 or XM1 to XM2, press
the MODE button.
If you are playing a disc, the system
skips to the beginning of the next
track (file in MP3 or WMA format)
each time you press the CH button.
You will see the track/file number
and the elapsed time. If has text data
or the disc is compressed in MP3 or
WMA, you can also see any other
information (track title, file name,
folder name, etc.).
CH BUTTON
MODE BUTTON
VOLUMEBUTTON
CONTINUED
Remote Audio Controls
191
Features
Table of Contents
Page 214 of 342

Break-in Period
Help assure your vehicle's future
reliability and performance by paying
extra attention to how you drive
during the first 600 miles (1,000 km).
During this period:● Avoid full-throttle starts and rapidacceleration.
● Do not change the oil until the
scheduled maintenance time.
● Avoid hard braking for the first 200
miles (300 km).
● Do not tow a trailer.
You should also follow these
recommendations with an
overhauled or exchanged engine, or
when the brakes are replaced. Fuel Recommendation
Your vehicle is designed to operate
on unleaded gasoline with a pump
octane number of 87 or higher. Use
of a lower octane gasoline can cause
a persistent, heavy metallic rapping
noise that can lead to enginedamage.
On vehicles with manual transmission
You may hear a knocking noise from
the engine if you drive the vehicle at
low engine speed (below about 1,000
rpm) in a higher gear. To stop this,
raise the engine speed by shifting to
a lower gear.
We recommend using quality
gasoline containing detergent
additives that help prevent fuel
system and engine deposits.In addition, in order to maintain good
performance, fuel economy, and
emissions control, we strongly
recommend, in areas where it is
available, the use of gasoline that
does NOT contain manganese-based
fuel additives such as MMT.
Use of gasoline with these additives
may adversely affect performance,
and cause the malfunction indicator
lamp on your instrument panel to
come on. If this happens, contact
your authorized dealer for service.
Some gasoline today is blended with
oxygenates such as ethanol or
MTBE. Your vehicle is designed to
operate on oxygenated gasoline
containing up to 10% ethanol by
volume and up to 15% MTBE by
volume. Do not use gasoline
containing methanol.
Break-in Period, Fuel Recommendation
198
Table of Contents
Page 242 of 342
ABS Indicator
If this indicator comes on, the anti-
lock function of the braking system
has shut down. The brakes still work
like a conventional system, but
without anti-lock. You should have
your dealer inspect your vehicle as
soon as possible.
If the indicator comes on while
driving, test the brakes as instructed
on page 297.
If the ABS indicator and the brake
system indicator come on together,
and the parking brake is fully
released, the EBD system may also
be shut down. Test your brakes as instructed on
page 297. If the brakes feel normal,
drive slowly and have your vehicle
repaired by your dealer as soon as
possible. Avoid sudden hard braking
which could cause the rear wheels to
lock up and possibly lead to a loss ofcontrol.
The VSA indicator will come on
along with the ABS indicator.
Important Safety Reminders
ABS does not reduce the time or
distance it takes to stop thevehicle.
It only helps with steering
control during braking. ABS will not prevent a skid that
results from changing directionabruptly,
such as trying to take a
corner too fast or making a sudden
lane change. Always drive at a safe
speed for the road and weatherconditions.
ABS cannot prevent a loss of stability. Always steer moderately
when you are braking hard. Severe
or sharp steering wheel movement
can still cause your vehicle to veer
into oncoming traffic or off the road.
A vehicle with ABS may require a
longer distance to stop on loose or
uneven surfaces, such as gravel or
snow, than a vehicle without anti-lock.
Anti-lock Brakes (ABS)
226
Table of Contents