service HONDA ELEMENT 2010 1.G Owner's Manual
[x] Cancel search | Manufacturer: HONDA, Model Year: 2010, Model line: ELEMENT, Model: HONDA ELEMENT 2010 1.GPages: 342, PDF Size: 5.76 MB
Page 244 of 342

For example, if you check and fill
your tires in a warm area, then drive
in extremely cold weather, the tire
pressure will be lower than
measured and could be underinflated
and cause the low tire pressure
indicator to come on. Or, if you
check and adjust your tire pressure
in cooler conditions, and drive into
extremely hot conditions, the tire
may become overinflated. However,
the low tire pressure indicator will
not come on if the tires are overinflated.
Refer to page 271 for tire inflationguidelines.
Although your tire pressure is
monitored, you must manually check
the tire pressures monthly.
Each tire, including the spare, should
be checked monthly when cold and
set to the recommended inflation
pressure as specified in the vehicle
placard and this owner's manual (see
page 310).Tire Pressure Monitoring
System (TPMS) Indicator
This indicator comes on and stays on
if there is a problem with the tire
pressure monitoring system.
If this happens, the system will shut
off and no longer monitor tire
pressures. Have the system checked
by your dealer as soon as possible.
When you restart the vehicle with
the compact spare tire, the TPMS
indicator may also come on and stay
on after driving several miles (kilometers). Changing a Tire with TPMS
If you have a flat tire, the low tire
pressure indicator will come on.
Replace the flat tire with the compact
spare tire (see page 282).
Each wheel (except the compact
spare tire wheel) is equipped with a
tire pressure sensor mounted inside
the tire behind the valve stem. You
must use TPMS specific wheels. It is
recommended that you always have
your tires serviced by your dealer or
qualified technician.
After you replace the flat tire with the
compact spare tire, the low tire
pressure indicator stays on. This is
normal; the system is not monitoring
the spare tire pressure. Manually
check the spare tire pressure to be
sure it is correct. After several miles
(kilometers) driving with the
compact spare tire, the TPMS
indicator comes on and the low tire
pressure indicator goes off.
Tire Pressure Monitoring System (TPMS)
228
Table of Contents
Page 252 of 342

Pre-Tow Checklist
When preparing to tow, and before
driving away, be sure to check thefollowing:● The vehicle has been properly
serviced, and the tires, brakes,
suspension, cooling system, and
lights are in good operatingcondition.
● The trailer has been properly
serviced and is in good condition.
● All weights and loads are within
limits (see pages 232 and 233).
● The hitch, safety chains, and any
other attachments are secure.
● All items in or on the trailer are
properly secured and cannot shift
while you drive. ●
Your vehicle tires and spare are
properly inflated (see page 271),
and the trailer tires and spare are
inflated as recommended by the
trailer maker. Driving Safely With a Trailer
The added weight, length, and
height of a trailer will affect your
vehicle's handling and performance,
so driving with a trailer requires
some special driving skills andtechniques.
For your safety and the safety of
others, take time to practice driving
maneuvers before heading for the
open road, and follow the guidelinesbelow.
Towing Speeds and Gears
Drive slower than normal in all
driving situations, and obey posted
speed limits for vehicles with trailers.
If you have an automatic
transmission, use the D position
when towing a trailer on level roads.
D3 is the proper shift lever position
to use when towing a trailer in hilly
terrain. (See
‘‘
Driving on Hills’’on the
next page for additional gearinformation.)
Towing a Trailer
236
Table of Contents
Page 255 of 342

Check Out Your Vehicle
Before you leave the pavement, be
sure to do all scheduled maintenance
and service, and inspect your vehicle
for any problems. Pay special
attention to the condition of the tires,
and check the tire pressures.
After you return to the pavement,
carefully inspect your vehicle to
make sure there is no damage that
could make driving it unsafe.
Recheck the condition of the tires
and the tire pressures. Remember
The route presents limits (too steep
or bumpy roads). You have limits
(driving skill and comfort). And your
vehicle has limits (traction, stability,
and power).
Driving off-highway can be
hazardous if you fail to recognize
limits and take the properprecautions.Accelerating and Braking
For better traction on all surfaces,
accelerate slowly and gradually build
up speed. If you try to start too fast
on wet soil, mud, snow, or ice, you
might not have enough traction to
get underway, and you may dig
yourself a hole. Starting with the shift
lever in second (2) gear will help you
have a smoother start on snow or ice.
Keep in mind that you will usually
need more time and distance to
brake to a stop on unpaved surfaces.
Avoid hard braking. Do not
‘‘pump ’’
the brakes; let the anti-lock braking
system pump them for you. Avoiding Obstacles
Debris on the road can damage your
suspension or other components.
Because your vehicle has a high
center of gravity, driving over a large
obstacle, or allowing a wheel to drop
into a deep hole can cause your
vehicle to tip or roll over.
Driving on Slopes
If you can't clearly see all conditions
or obstacles on a slope, walk the
slope before you drive on it. If you
have any doubt whether or not you
can safely drive on the slope, don't
do it. Find another route.
If you are driving up a hill and find
that you cannot continue,
do not try to
turn around.
Your vehicle could roll
over. Slowly back down the hill,
following the same route you took up
the hill.
CONTINUED
Off-Highway Driving Guidelines
239
Driving
Table of Contents
Page 257 of 342
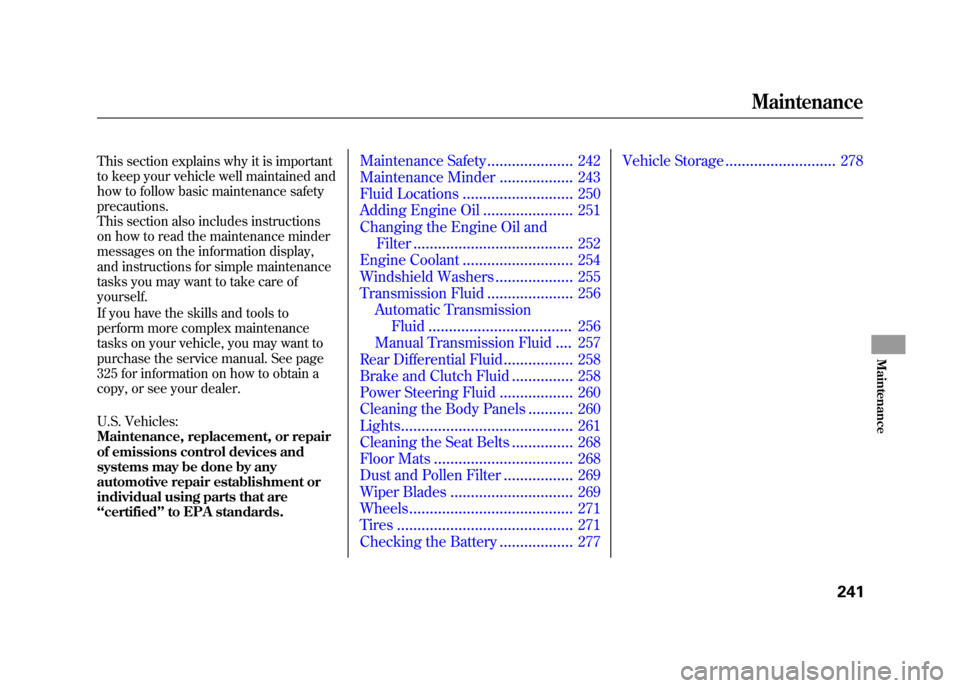
This section explains why it is important
to keep your vehicle well maintained and
how to follow basic maintenance safety
precautions.
This section also includes instructions
on how to read the maintenance minder
messages on the information display,
and instructions for simple maintenance
tasks you may want to take care of
yourself.
If you have the skills and tools to
perform more complex maintenance
tasks on your vehicle, you may want to
purchase the service manual. See page
325 for information on how to obtain a
copy, or see your dealer.
U.S. Vehicles:
Maintenance, replacement, or repair
of emissions control devices and
systems may be done by any
automotive repair establishment or
individual using parts that are‘‘certified ’’to EPA standards.Maintenance Safety .....................242
Maintenance Minder ..................
243
Fluid Locations ........................... 250
Adding Engine Oil ......................
251
Changing the Engine Oil and Filter ....................................... 252
Engine Coolant ........................... 254
Windshield Washers ...................255
Transmission Fluid .....................
256
Automatic Transmission Fluid ................................... 256
Manual Transmission Fluid ....257
Rear Differential Fluid .................
258
Brake and Clutch Fluid ...............258
Power Steering Fluid ..................
260
Cleaning the Body Panels ...........260
Lights .......................................... 261
Cleaning the Seat Belts ...............
268
Floor Mats .................................. 268
Dust and Pollen Filter .................
269
Wiper Blades .............................. 269
Wheels ........................................
271
Tires ........................................... 271
Checking the Battery ..................277Vehicle Storage
...........................
278
Maintenance
241
Maintenance
Page 258 of 342
All service items not detailed in this
section should be performed by a
certified technician or other qualifiedmechanic.
Important Safety Precautions
To eliminate potential hazards, read
the instructions before you begin,
and make sure you have the tools
and skills required.● Make sure your vehicle is parked
on level ground, the parking brake
is set, and the engine is off.
● To clean parts, use a commercially
available degreaser or parts
cleaner, not gasoline.
● To reduce the possibility of fire or
explosion, keep cigarettes, sparks,
and flames away from the battery
and all fuel-related parts. ●
Wear eye protection and protective
clothing when working with the
battery or compressed air.
Improperly maintaining this
vehicle, or failing to correct a
problem before driving can
cause a crash in which you can
be seriously hurt or killed.
Always follow the inspection
and maintenance
recommendations and
schedules in this owner'smanual.
Potential Vehicle Hazards ● Carbon Monoxide poison from
engine exhaust. Be sure there is
adequate ventilation whenever you
operate the engine. ●
Burns from hot parts. Let the
engine and exhaust system cool
down before touching any parts.
● Injury from moving parts. Do not
run the engine unless instructed to
do so.
Failure to properly follow
maintenance instructions and
precautions can cause you to be
seriously hurt or killed.
Always follow the procedures
and precautions in this owner's manual.
Some of the most important safety
precautions are given here. However,
we cannot warn you of every
conceivable hazard that can arise in
performing maintenance. Only you
can decide whether or not you should
perform a given task.
Maintenance Safety
242
Table of Contents
Page 259 of 342
Your vehicle displays engine oil life
and maintenance service items on
the information display to show you
when you should have your dealer
do engine oil replacement and
indicated maintenance service.
Based on the engine operating
conditions and accumulated engine
revolutions, the onboard computer in
your vehicle calculates the remaining
engine oil life and displays it as apercentage.Engine Oil Life Display
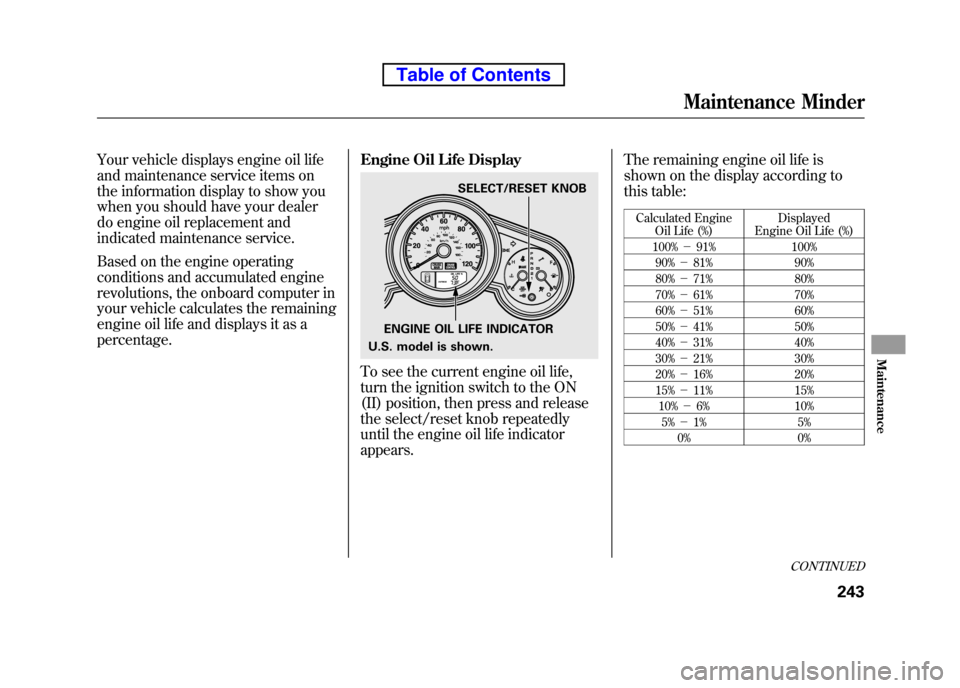
To see the current engine oil life,
turn the ignition switch to the ON
(II) position, then press and release
the select/reset knob repeatedly
until the engine oil life indicatorappears.The remaining engine oil life is
shown on the display according to
this table:
Calculated Engine Oil Life (%) Displayed
Engine Oil Life (%)
100% -91% 100%
90% -81% 90%
80% -71% 80%
70% -61% 70%
60% -51% 60%
50% -41% 50%
40% -31% 40%
30% -21% 30%
20% -16% 20%
15% -11% 15%
10% -6% 10%
5% -1% 5%
0% 0%
ENGINE OIL LIFE INDICATOR SELECT/RESET KNOB
U.S. model is shown.
CONTINUED
Maintenance Minder
243
Maintenance
Table of Contents
Page 260 of 342
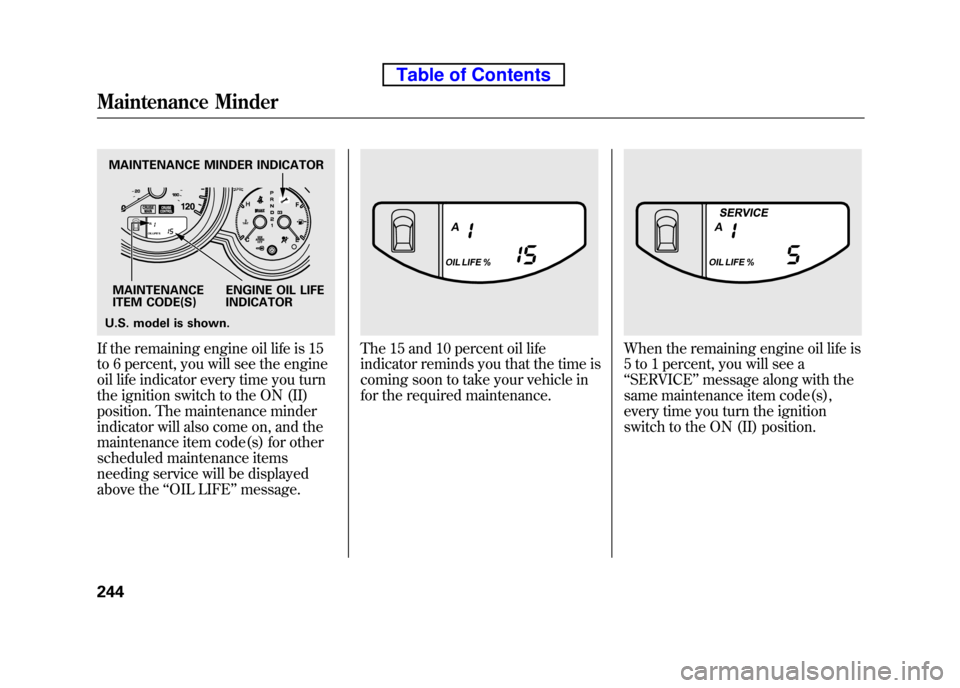
If the remaining engine oil life is 15
to 6 percent, you will see the engine
oil life indicator every time you turn
the ignition switch to the ON (II)
position. The maintenance minder
indicator will also come on, and the
maintenance item code(s) for other
scheduled maintenance items
needing service will be displayed
above the‘‘OIL LIFE ’’message.The 15 and 10 percent oil life
indicator reminds you that the time is
coming soon to take your vehicle in
for the required maintenance.When the remaining engine oil life is
5 to 1 percent, you will see a‘‘SERVICE ’’message along with the
same maintenance item code(s),
every time you turn the ignition
switch to the ON (II) position.
MAINTENANCE MINDER INDICATOR
MAINTENANCE
ITEM CODE(S) ENGINE OIL LIFE
INDICATOR
U.S. model is shown.
Maintenance Minder
244
Table of Contents
Page 262 of 342
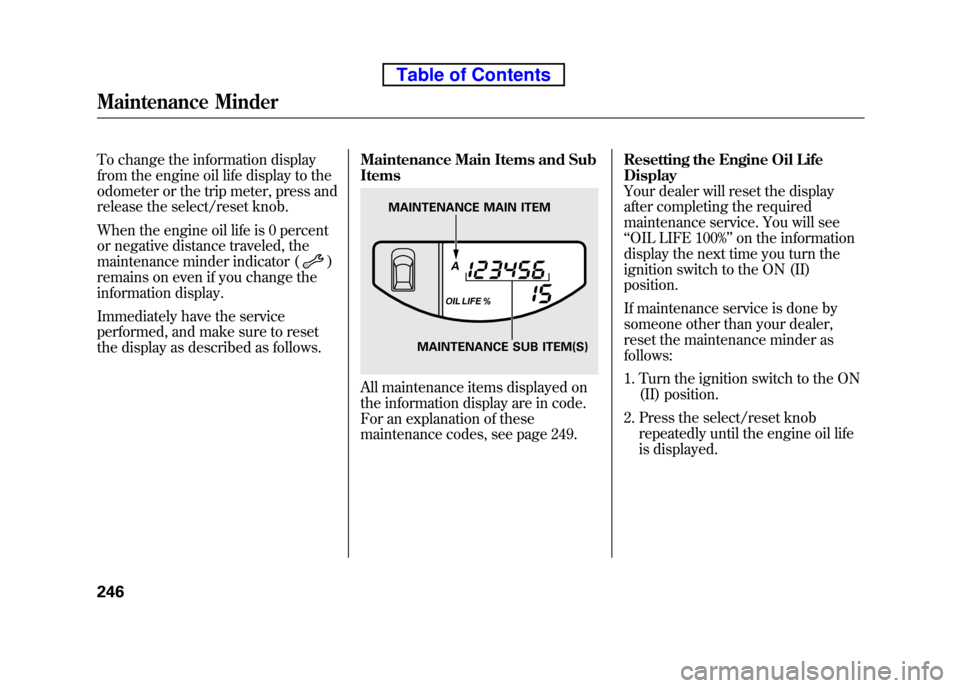
To change the information display
from the engine oil life display to the
odometer or the trip meter, press and
release the select/reset knob.
When the engine oil life is 0 percent
or negative distance traveled, the
maintenance minder indicator (
)
remains on even if you change the
information display.
Immediately have the service
performed, and make sure to reset
the display as described as follows. Maintenance Main Items and Sub Items
All maintenance items displayed on
the information display are in code.
For an explanation of these
maintenance codes, see page 249.Resetting the Engine Oil LifeDisplay
Your dealer will reset the display
after completing the required
maintenance service. You will see ‘‘
OIL LIFE 100% ’’on the information
display the next time you turn the
ignition switch to the ON (II)position.
If maintenance service is done by
someone other than your dealer,
reset the maintenance minder as follows:
1. Turn the ignition switch to the ON (II) position.
2. Press the select/reset knob repeatedly until the engine oil life
is displayed.
MAINTENANCE MAIN ITEM
MAINTENANCE SUB ITEM(S)
Maintenance Minder
246
Table of Contents
Page 263 of 342
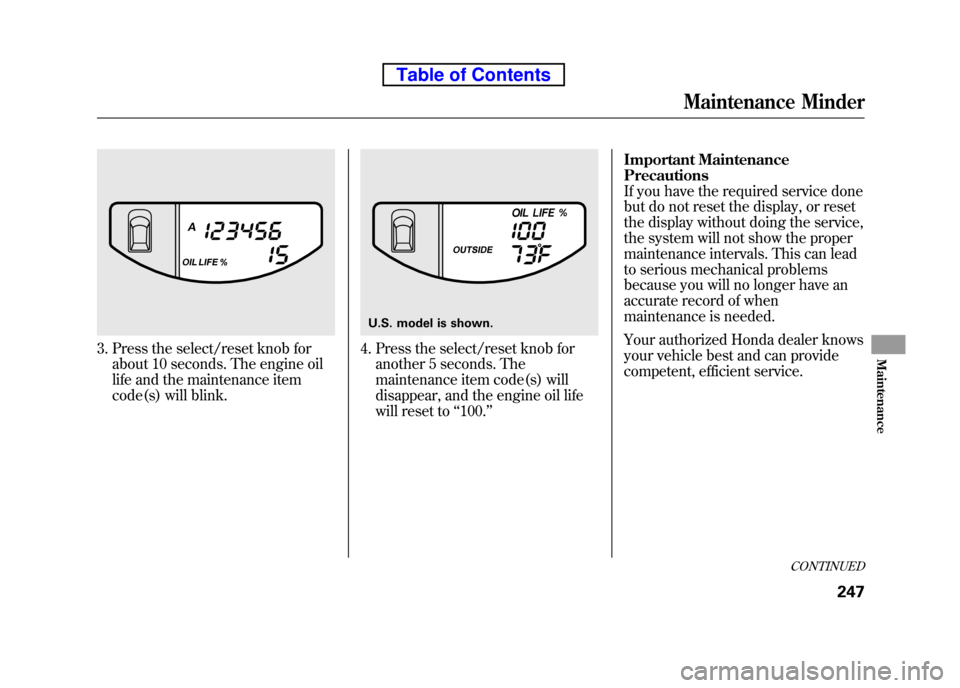
3. Press the select/reset knob forabout 10 seconds. The engine oil
life and the maintenance item
code(s) will blink.4. Press the select/reset knob foranother 5 seconds. The
maintenance item code(s) will
disappear, and the engine oil life
will reset to ‘‘100. ’’ Important MaintenancePrecautions
If you have the required service done
but do not reset the display, or reset
the display without doing the service,
the system will not show the proper
maintenance intervals. This can lead
to serious mechanical problems
because you will no longer have an
accurate record of when
maintenance is needed.
Your authorized Honda dealer knows
your vehicle best and can provide
competent, efficient service.
U.S. model is shown.
CONTINUED
Maintenance Minder
247
Maintenance
Table of Contents
Page 264 of 342

However, service at a dealer is not
mandatory to keep your warranties in
effect. Maintenance may be done by
any qualified service facility or
person who is skilled in this type of
automotive service. Make sure to
have the service facility or person
reset the display as previously
described. Keep all receipts as proof
of completion, and have the person
who does the work fill out your
Honda Service History or Canadian
Maintenance Log. Check your
warranty booklet for moreinformation.
We recommend using Honda parts
and fluids whenever you have
maintenance done. These are
manufactured to the same high
quality standards as the original
components, so you can be confident
of their performance and durability.U.S. Vehicles:
According to state and federal
regulations, failure to perform
maintenance on the items marked with
#will not void your emissions
warranties. However, all
maintenance services should be
performed in accordance with the
intervals indicated by the informationdisplay.
Owner's Maintenance Checks
You should check the following
items at the specified intervals. If you
are unsure of how to perform any
check, turn to the appropriate pagelisted.
● Engine oil level -Check every
time you fill the fuel tank. See page201.
● Engine coolant level -Check the
radiator reserve tank every time
you fill the fuel tank. See page 201. ●
Automatic transmission -Check
the fluid level monthly. See page256.
● Brakes -Check the fluid level
monthly. See page 258.
● Tires -Check the tire pressure
monthly. Examine the tread for
wear and foreign objects. See page271.
● Lights -Check the operation of
the headlights, parking lights,
taillights, high-mount brake light,
and license plate lights monthly.
See page 261.
Maintenance Minder
248
Table of Contents