ECO mode HONDA ELEMENT 2010 1.G Owner's Guide
[x] Cancel search | Manufacturer: HONDA, Model Year: 2010, Model line: ELEMENT, Model: HONDA ELEMENT 2010 1.GPages: 342, PDF Size: 5.76 MB
Page 190 of 342

To Play a USB Flash Memory Device
This audio system can select and
play the audio files from a USB flash
memory device with the same
controls used for the in-dash disc
player. To play a USB flash memory
device, connect it to the USB adapter
cable in the glove box. The ignition
switch must be in the ACCESSORY
(I) or ON (II) position. Press the
AUDIO button beside the screen to
show the audio display and touch the
AUX icon.
You can also select an icon by
moving the joystick. Move it to left,
right, up, or down to change the
highlighting and scroll through lists,
then press ENT on the top of the
joystick to set your selection.To select the USB mode without
using the icon, press the CD/XM
button repeatedly. The status bar
appears on the bottom of the screen.
The audio system reads and plays
the audio files on the USB flash
memory device in MP3, WMA orAAC
ꭧformats. Depending on the
format, the display shows MP3,
WMA or AAC when a USB flash
memory device is playing. The USB
flash memory device limit is up to
700 folders or up to 65535 files. ꭧ : Only AAC format files recorded
with iTunes are playable on this
audio unit. The recommended USB flash
memory devices are 256 MB or
higher and formatted with the FAT
file system. Some digital audio
players may be compatible as well.
Some USB flash memory devices
(such as devices with security lock-
out features, etc.) will not work in
this audio unit.
Playing a USB Flash Memory Device (Models with navigation system)
174
Table of Contents
Page 191 of 342

NOTE:● Do not use a device such as a card
reader or hard drive as the device
or your files may be damaged.
● Do not connect your USB flash
memory device using a HUB.
● Do not use an extension cable to
the USB adapter cable equipped
with your vehicle.
● Do not keep the USB flash
memory device in the vehicle.
Direct sunlight and high heat will
damage it.
● We recommend backing up your
data before playing a USB flash
memory device.
● Some devices cannot be powered
or charged via the USB adapter. If
this is the case, use the accessory
adapter to supply power to yourdevice. ●
Depending on the type and
number of files, it may take some
time before they begin to play.
● Depending on the software the
files were made with, it may not be
possible to play some files, or
display some text data.
Voice Control System
You can select the AUX mode by
using the navigation system voice
control buttons, but cannot operate
the play mode functions. The specifications for compatible
MP3 files are:
– Sampling frequency:
32/44.1/48 kHz (MPEG1)
16/22.05/24 kHz (MPEG2)
– Bitrate:
32/40/48/56/64/80/96/112/128/
160/192/224/256/320/VBR kbps(MPEG1)
– Supported standards:
MPEG1 Audio Layer3
MPEG2 Audio Layer3
– Partition: Top partition only
– Maximum layers: 8
CONTINUED
Playing a USB Flash Memory Device (Models with navigation system)
175
Features
Table of Contents
Page 192 of 342

The specifications for compatible
WMA files are:– Sampling frequency:
32/44.1/48 kHz
– Bitrate: 48 -320/VBR kbps (Max 384)
– Supported standards:
WMA version 7/8/9
– Partition: Top partition only
– Maximum layers: 8 The specifications for compatible
AAC files are:
– Sampling frequency:
8/11.025/12/16/22.05/24/32/
44.1/48 kHz
– Bitrate:48 -320 kbps
– Supported standards:
MPEG4/AAC LC
MPEG2/AAC LC
– Partition: Top partition only
– Maximum layers: 8 Even if recorded in MP3, WMA or
AAC format, a file with an
unsupported version cannot be
played. If the system finds an
unsupported file, the screen displays
UNSUPPORTED, and then skips to
the next file.
In WMA or AAC format, DRM
(digital rights management) files
cannot be played. If the system finds
a DRM file, the screen displays
UNPLAYABLE FILE, and then skips
to the next file.
Playing a USB Flash Memory Device (Models with navigation system)
176
Table of Contents
Page 197 of 342

TRACK SCAN-This feature
samples all tracks/files in the
selected folder in the order they are
stored. To activate track scan, press
and release the SCAN button. You
will see TRACK SCAN in the display.
You will get a 10 second sampling of
each track/file in the folder. FOLDER-SCAN -This feature
samples the first track/file in each
folder in the order they are stored.
To activate folder scan, press and
hold the SCAN button. You will see
FOLDER SCAN in the display. You
will get a 10 second sampling of each
first track/file in the folder(s).
Press and release the button to turn
off either scan mode. Pressing either
SKIP button also turns off thisfeature. To Stop Playing a USB Flash
Memory Device
To play the radio when an USB flash
memory device is playing, press the
AM/FM button or touch the FM1,
FM2, AM, XM1, or XM2 icon. If a
disc is in the audio unit, press the
CD/XM button or touch the CD icon
to play the disc. If a PC card is in the
audio unit, Press the CD/XM button
or touch the CARD icon to play a PCcard.
Press the CD/XM button again or
touch the AUX icon to switch back to
the USB flash memory device.Disconnecting a USB Flash Memory
Device
You can disconnect the USB flash
memory device at any time even if
the USB mode is selected on the
audio system. Make sure to follow
the USB flash memory device's
instructions when you remove it.
When you disconnect the USB flash
memory device while it is playing,
the audio display (if selected) shows
NO DATA.
If you reconnect the same USB flash
memory device, the system will
begin playing where it left off.
USB Flash Memory Device Error Messages
If you see an error message in the
screen, see page 182.
Playing a USB Flash Memory Device (Models with navigation system)
181
Features
Table of Contents
Page 219 of 342

Fuel Economy Factors
The following factors can lower your
vehicle's fuel economy:● Aggressive driving (hard
acceleration and braking)
● Excessive idling, accelerating and
braking in stop-and-go traffic
● Cold engine operation (engines are
more efficient when warmed up)
● Driving with a heavy load or the air
conditioner running
● Improperly inflated tires
Improving Fuel Economy
Vehicle MaintenanceA properly maintained vehicle
maximizes fuel economy. Poor
maintenance can significantly reduce
fuel economy. Always maintain your
vehicle according to the maintenance
messages displayed on the
information display (see Owner's
Maintenance Checks on page 248).
For example: ●
Use the recommended viscosity
motor oil, displaying the API
Certification Seal (see page 251).
● Maintain proper tire inflation -
An underinflated tire increases ‘‘ rolling resistance, ’’which reduces
fuel economy.
● Avoid carrying excess weight in
your vehicle -It puts a heavier
load on the engine, increasing fuel consumption.
● Keep your vehicle clean -In
particular, a build-up of snow or
mud on your vehicle's underside
adds weight and rolling resistance.
Frequent cleaning helps your fuel economy.
Drive Efficiently● Drive moderately -Rapid
acceleration, abrupt cornering, and
hard braking increase fuelconsumption.
● Observe the speed limit -
Aerodynamic drag has a big effect
on fuel economy at speeds above
45 mph (75 km/h). Reduce your
speed and you reduce the drag.
Trailers, car top carriers, roof
racks and bike racks are also big
contributors to increased drag.
● Always drive in the highest gearpossible -If your vehicle has a
manual transmission, you can
boost your fuel economy by up
shifting as early as possible.
● Avoid excessive idling -Idling
results in 0 miles per gallon (0 kms
per liter).
CONTINUED
Fuel Economy
203
Before Driving
Table of Contents
Page 233 of 342

U.S. models Only
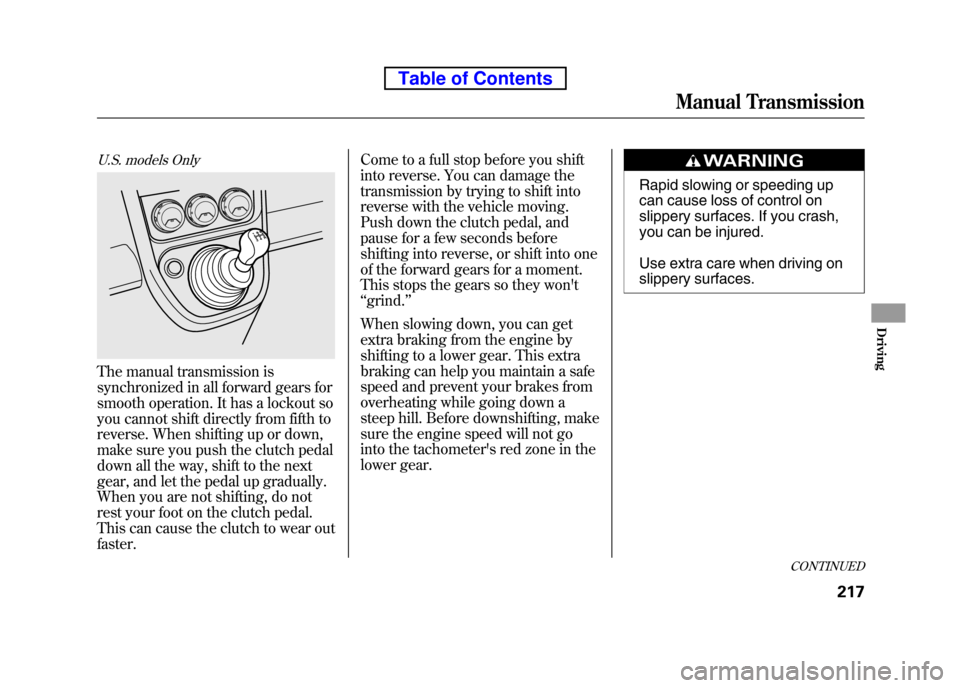
The manual transmission is
synchronized in all forward gears for
smooth operation. It has a lockout so
you cannot shift directly from fifth to
reverse. When shifting up or down,
make sure you push the clutch pedal
down all the way, shift to the next
gear, and let the pedal up gradually.
When you are not shifting, do not
rest your foot on the clutch pedal.
This can cause the clutch to wear out faster.Come to a full stop before you shift
into reverse. You can damage the
transmission by trying to shift into
reverse with the vehicle moving.
Push down the clutch pedal, and
pause for a few seconds before
shifting into reverse, or shift into one
of the forward gears for a moment.
This stops the gears so they won't‘‘
grind. ’’
When slowing down, you can get
extra braking from the engine by
shifting to a lower gear. This extra
braking can help you maintain a safe
speed and prevent your brakes from
overheating while going down a
steep hill. Before downshifting, make
sure the engine speed will not go
into the tachometer's red zone in the
lower gear.
Rapid slowing or speeding up
can cause loss of control on
slippery surfaces. If you crash,
you can be injured.
Use extra care when driving on
slippery surfaces.
CONTINUED
Manual Transmission
217
Driving
Table of Contents
Page 240 of 342

Your vehicle is equipped with disc
brakes at all four wheels. A power
assist helps reduce the effort needed
on the brake pedal. The emergency
brake assist system increases the
stopping force when you depress the
brake pedal hard in an emergency
situation. The anti-lock brake system
(ABS) helps you retain steering
control when braking very hard.
Resting your foot on the pedal keeps
the brakes applied lightly, builds up
heat, reduces their effectiveness and
reduces brake pad life. In addition,
fuel economy can be reduced. It also
keeps your brake lights on all the
time, confusing drivers behind you.Constant application of the brakes
when going down a long hill builds
up heat and reduces their
effectiveness. Use the engine to
assist the brakes by taking your foot
off the accelerator and downshifting
to a lower gear.
Check your brakes after driving
through deep water. Apply the
brakes moderately to see if they feel
normal. If not, apply them gently and
frequently until they do. Be extra
cautious and alert in your driving.
Braking System Design
The hydraulic system that operates
the brakes has two separate circuits.
Each circuit works diagonally across
the vehicle (the left-front brake is
connected with the right-rear brake,
etc.). If one circuit should develop a
problem, you will still have braking
at two wheels.
Braking System
224
Table of Contents
Page 263 of 342

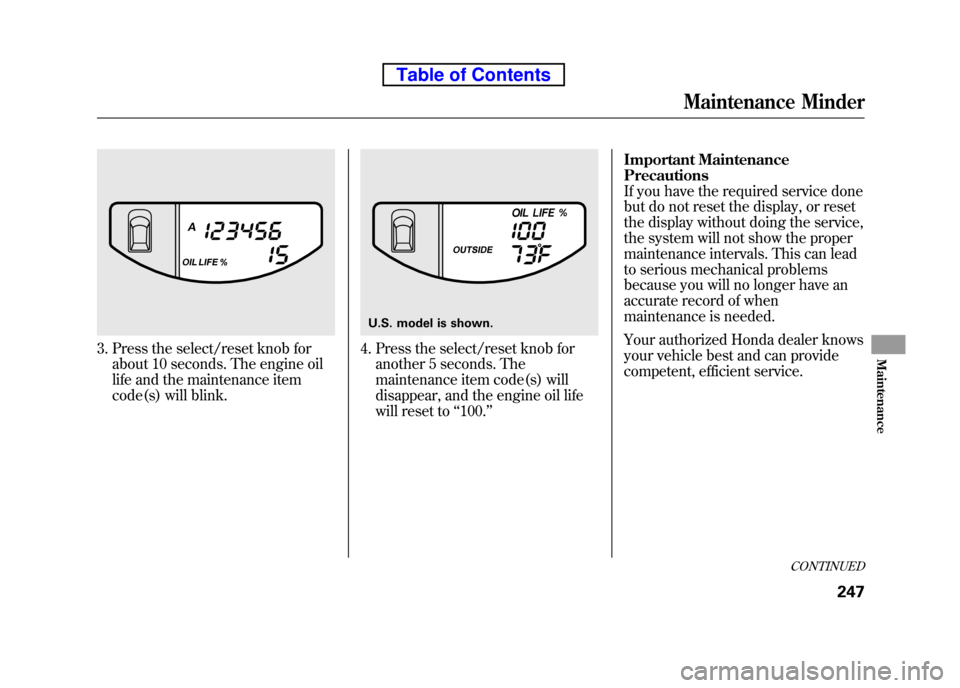
3. Press the select/reset knob forabout 10 seconds. The engine oil
life and the maintenance item
code(s) will blink.4. Press the select/reset knob foranother 5 seconds. The
maintenance item code(s) will
disappear, and the engine oil life
will reset to ‘‘100. ’’ Important MaintenancePrecautions
If you have the required service done
but do not reset the display, or reset
the display without doing the service,
the system will not show the proper
maintenance intervals. This can lead
to serious mechanical problems
because you will no longer have an
accurate record of when
maintenance is needed.
Your authorized Honda dealer knows
your vehicle best and can provide
competent, efficient service.
U.S. model is shown.
CONTINUED
Maintenance Minder
247
Maintenance
Table of Contents
Page 265 of 342

Symbol Maintenance Main ItemsA ●
Replace engine oilꭧ1
B ●
Replace engine oilꭧ1and oil filter
● Inspect front and rear brakes
● Check parking brake adjustment
● Inspect these items:
● Tie rod ends, steering gear box, and boots
● Suspension components
● Driveshaft boots
● Brake hoses and lines (including ABS/VSA)
● All fluid levels and condition of fluids
● Exhaust system
#
●Fuel lines and connections#
ꭧ1: If the message ‘‘SERVICE ’’does not appear more than 12 months after the
display is reset, change the engine oil every year.
# : See information on maintenance and emissions warranty on page 248.
NOTE: ●
Independent of the maintenance message in the information display,
replace the brake fluid every 3 years.
● Inspect idle speed every 160,000 miles (256,000 km).
● Adjust the valves during services A, B, 1, 2, or 3 if they are noisy. Symbol Maintenance Sub Items
1 ●
Rotate tires
2 ●
Replace air cleaner element
If you drive in dusty conditions, replace
every 15,000 miles (24,000 km).
● Replace dust and pollen filter
If you drive primarily in urban areas that have high
concentrations of soot in the air from industry and
from diesel-powered vehicles, replace every
15,000 miles (24,000 km).
● Inspect drive belt
3 ●
Replace transmission fluid
Driving in mountainous areas at very low vehicle
speeds or trailer towing results in higher transmission
and transfer temperatures. This requires transmission
and transfer fluid changes more frequently than
recommended by the maintenance minder. If you
regularly drive your vehicle under these conditions,
have the transmission and transfer fluid changed at
60,000 miles (100,000 km), then every 30,000 miles
(48,000 km) (For A/T only).
4 ●
Replace spark plugs
● Inspect valve clearance
5 ●
Replace engine coolant
6 ●
Replace rear differential fluid (4WD model only)
Maintenance Minder
Maintenance Minder
249
Table of Contents
Page 272 of 342

On Canadian models:The low washer
level indicator comes on when the
level is low (see page 61).
Fill the reservoir with a good-quality
windshield washer fluid. This
increases the cleaning capability and
prevents freezing in cold weather.
When you refill the reservoir, clean
the edges of the windshield wiper
blades with windshield washer fluid
on a clean cloth. This will help to
condition them.
Do not use engine antifreeze or a
vinegar/water solution in the
windshield washer reservoir. Antifreeze
can damage your vehicle's paint, while
a vinegar/water solution can damage
the windshield washer pump. Use only
commercially-available windshield
washer fluid. Automatic Transmission Fluid
Check the fluid level with the engine
at normal operating temperature.
1. Park the vehicle on level ground.
Start the engine, let it run until the
radiator fan comes on, then shut
off the engine. For accurate
results, wait about 60 seconds (but
no longer than 90 seconds) before
doing step 2.
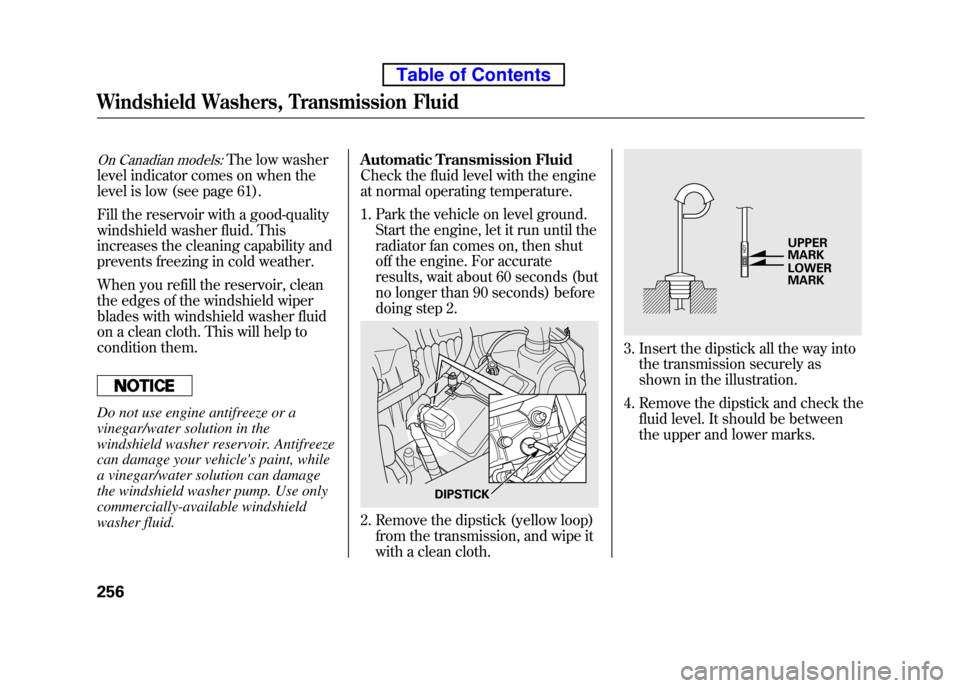
2. Remove the dipstick (yellow loop)
from the transmission, and wipe it
with a clean cloth.
3. Insert the dipstick all the way intothe transmission securely as
shown in the illustration.
4. Remove the dipstick and check the fluid level. It should be between
the upper and lower marks.
DIPSTICK
UPPER MARK LOWER MARK
Windshield Washers, Transmission Fluid
256
Table of Contents