ignition HONDA ELEMENT 2010 1.G Workshop Manual
[x] Cancel search | Manufacturer: HONDA, Model Year: 2010, Model line: ELEMENT, Model: HONDA ELEMENT 2010 1.GPages: 342, PDF Size: 5.76 MB
Page 212 of 342
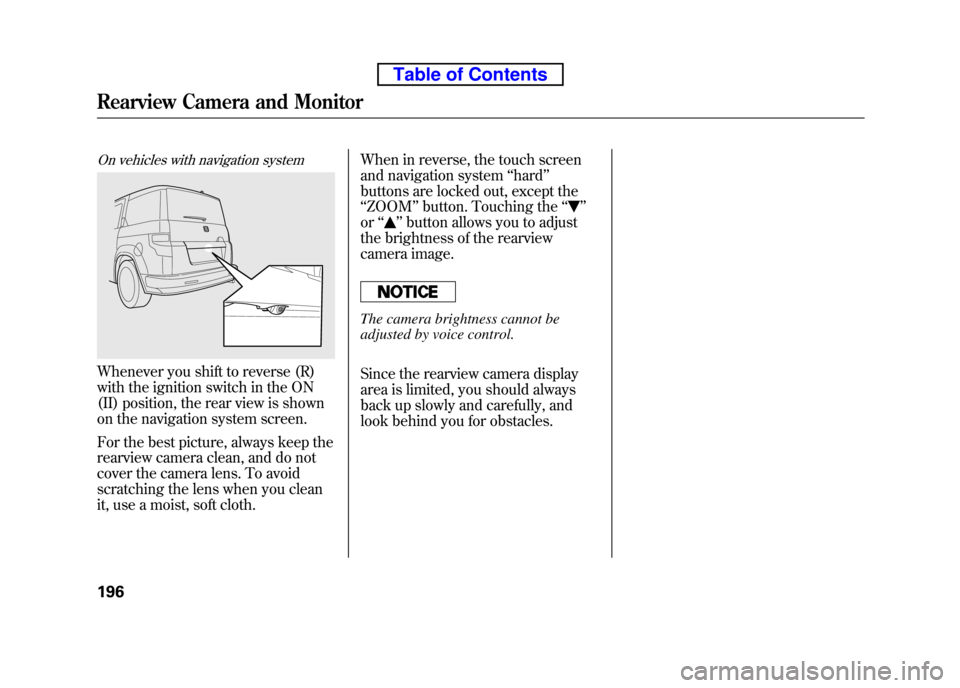
On vehicles with navigation system
Whenever you shift to reverse (R)
with the ignition switch in the ON
(II) position, the rear view is shown
on the navigation system screen.
For the best picture, always keep the
rearview camera clean, and do not
cover the camera lens. To avoid
scratching the lens when you clean
it, use a moist, soft cloth.When in reverse, the touch screen
and navigation system
‘‘hard ’’
buttons are locked out, except the‘‘ ZOOM ’’button. Touching the ‘‘
’’
or ‘‘
’’button allows you to adjust
the brightness of the rearview
camera image.
The camera brightness cannot be
adjusted by voice control.
Since the rearview camera display
area is limited, you should always
back up slowly and carefully, and
look behind you for obstacles.
Rearview Camera and Monitor
196
Table of Contents
Page 232 of 342
1. Apply the parking brake.
2. In cold weather, turn off allelectrical accessories to reduce the
drain on the battery.
3.
Manual transmission:
Press the clutch pedal down all the
way. The START (III) position
does not function unless the clutch
pedal is pressed.
Automatic transmission:
Make sure the shift lever is in
Park. Press on the brake pedal. 4. Without touching the accelerator
pedal, turn the ignition key to the
START (III) position. Do not hold
the key in the START (III) position
for more than 15 seconds at a time.
If the engine does not start right
away, pause for at least 10 seconds
before trying again.
The immobilizer system protects your
vehicle from theft. If an improperly
coded key (or other device) is used, the
engine's fuel system is disabled. For
more information, see page 76.
The engine is harder to start in cold
weather. Also, the thinner air found at
altitudes above 8,000 feet (2,400
meters) adds to this problem.
Starting the Engine
216
Table of Contents
Page 235 of 342
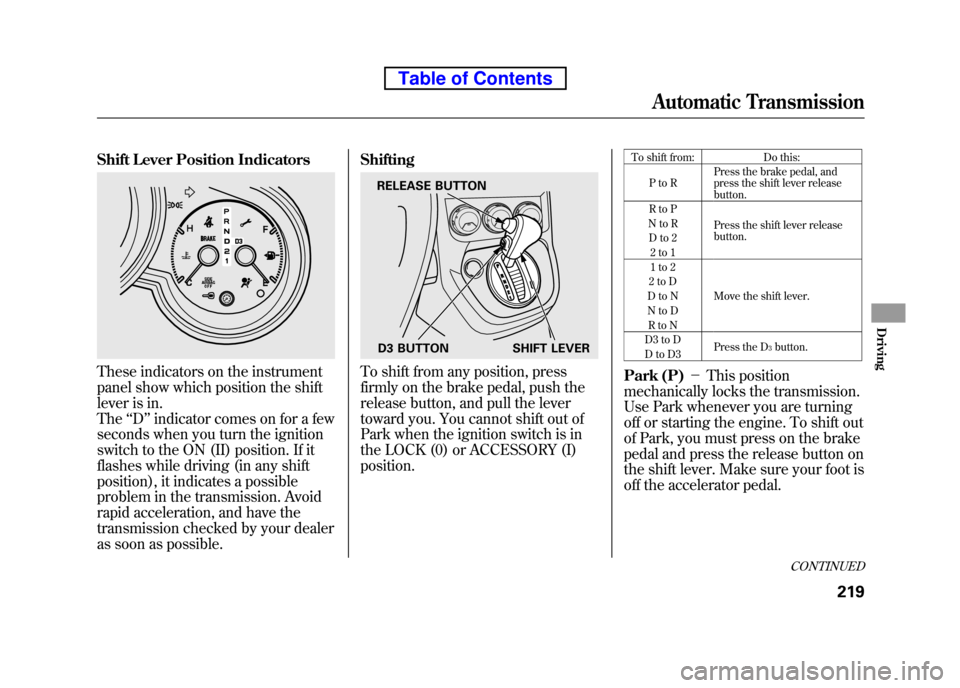
Shift Lever Position Indicators
These indicators on the instrument
panel show which position the shift
lever is in. The‘‘D ’’indicator comes on for a few
seconds when you turn the ignition
switch to the ON (II) position. If it
flashes while driving (in any shift
position), it indicates a possible
problem in the transmission. Avoid
rapid acceleration, and have the
transmission checked by your dealer
as soon as possible. ShiftingTo shift from any position, press
firmly on the brake pedal, push the
release button, and pull the lever
toward you. You cannot shift out of
Park when the ignition switch is in
the LOCK (0) or ACCESSORY (I)position.
To shift from: Do this:
PtoR Press the brake pedal, and
press the shift lever releasebutton.
RtoP
Press the shift lever releasebutton.
NtoR
Dto2 2to1
1to2
Move the shift lever.
2toD
DtoN
NtoD RtoN
D3 to D Press the D3
button.
DtoD3
Park (P) -This position
mechanically locks the transmission.
Use Park whenever you are turning
off or starting the engine. To shift out
of Park, you must press on the brake
pedal and press the release button on
the shift lever. Make sure your foot is
off the accelerator pedal.
RELEASE BUTTON
D3 BUTTON SHIFT LEVER
CONTINUED
Automatic Transmission
219
Driving
Table of Contents
Page 236 of 342

If you have done all of the above and
still cannot move the lever out of
Park, seeShift Lock Release on
page 221.
To avoid transmission damage, come
to a complete stop before shifting
into Park. You must also press the
release button to shift into Park. The
shift lever must be in Park before
you can remove the key from the
ignition switch.
Reverse (R) -Press the brake
pedal and press the release button to
shift from Park to reverse. To shift
from reverse to neutral, come to a
complete stop, and then shift. Neutral (N)
-Use neutral if you
need to restart a stalled engine, or if
it is necessary to stop briefly with the
engine idling. Shift to the Park
position if you need to leave your
vehicle for any reason. Press on the
brake pedal when you are moving
the shift lever from neutral to
another gear. Drive (D)
-Use this position for
your normal driving. The
transmission automatically selects a
suitable gear (1 through 5) for your
speed and acceleration. You may
notice the transmission shifting up at
higher engine speeds when the
engine is cold. This helps the engine
warm up faster.
Drive (D3) -To use D3, press the
D3 button when the shift lever is in the ‘‘D ’’position. This position is
similar to D, except only the first
three gears are selected instead of all
five. Use D3 when towing a trailer in
hilly terrain, or to provide engine
braking when going down a steep
hill. D3 can also keep the
transmission from cycling between
third and fourth gears in stop-and-godriving.
Automatic Transmission
220
Table of Contents
Page 237 of 342

Second (2)-This position locks
the transmission in second gear. It
does not downshift to first gear when
you come to a stop.
Use second gear:
● For more power when climbing.
● To increase engine braking when
going down steep hills.
● For starting out on a slippery
surface or in deep snow.
● To help reduce wheel spin.
● When driving downhill with a trailer. First (1)
-This position locks the
transmission in first gear. By
upshifting and downshifting through
1, 2, D3, and D, you can operate the
transmission much like a manual
transmission without a clutch pedal.
Engine Speed Limiter
If you exceed the maximum speed
for the gear you are in, the engine
speed will enter into the
tachometer's red zone. If this occurs,
you may feel the engine cut in and
out. This is caused by a limiter in the
engine's computer controls. The
engine will run normally when you
reduce the rpm below the red zone. Shift Lock Release
This allows you to move the shift
lever out of Park if the normal
method of pushing on the brake
pedal and pressing the release button
does not work.
1. Set the parking brake.
2. Remove the key from the ignition
switch.
CONTINUED
Automatic Transmission
221
Driving
Table of Contents
Page 246 of 342
The vehicle stability assist (VSA)
system helps to stabilize the vehicle
during cornering if the vehicle turns
more or less than desired. It also
assists you in maintaining traction
while accelerating on loose or
slippery road surfaces. It does this by
regulating the engine's output and by
selectively applying the brakes.
When VSA activates, you may notice
that the engine does not respond to
the accelerator in the same way it
does at other times. You will also see
the VSA system indicator blink.
The VSA system cannot enhance the
vehicle's driving stability in all
situations and does not control your
vehicle's entire braking system. It is
still your responsibility to drive and
corner at reasonable speeds and to
leave a sufficient margin of safety.VSA OFF Indicator
When VSA is off, the VSA OFF
indicator comes on as a reminder.
Vehicle Stability Assist
(VSA) System Indicator
When VSA activates, you will see the
VSA system indicator blink.
If this indicator comes on while
driving, pull to the side of the road
when it is safe, and turn off the
engine. Reset the system by
restarting the engine. If the VSA
system indicator stays on or comes
back on while driving, have the VSA
system inspected by your dealer. NOTE: The main function of the VSA
system is generally known as
Electronic Stability Control (ESC).
The system also includes a traction
control function. If the indicator does not come on
when the ignition switch is turned to
the ON (II) position, there may be a
problem with the VSA system. Have
your dealer inspect your vehicle as
soon as possible.
Without VSA, your vehicle will have
normal braking and cornering ability,
but it will not have VSA traction and
stability enhancement.
Vehicle Stability Assist (VSA®), aka Electronic Stability Control (ESC), System
230
Table of Contents
Page 259 of 342
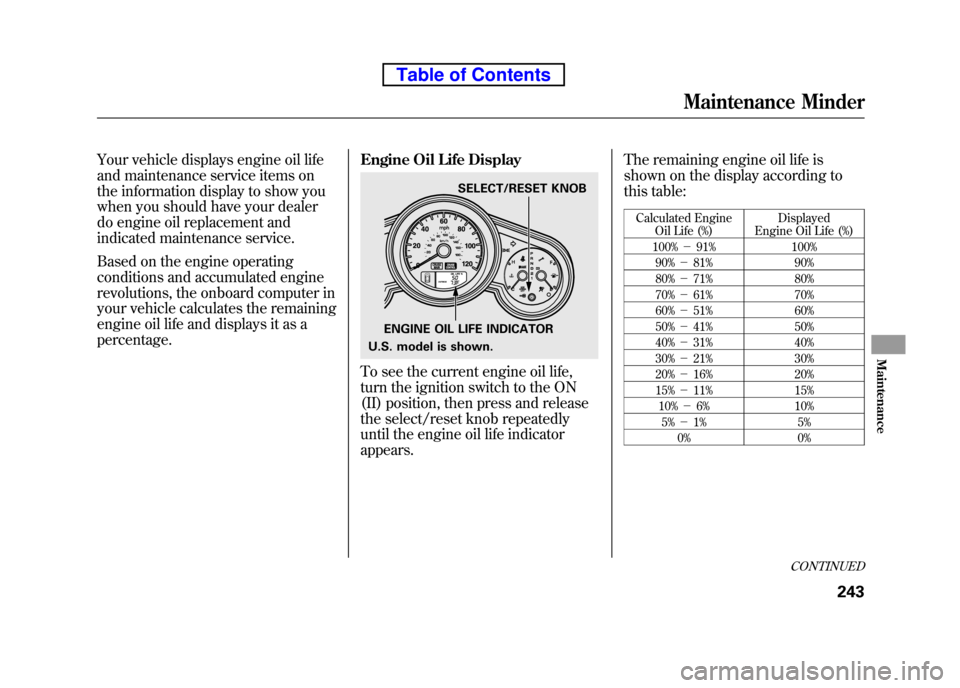
Your vehicle displays engine oil life
and maintenance service items on
the information display to show you
when you should have your dealer
do engine oil replacement and
indicated maintenance service.
Based on the engine operating
conditions and accumulated engine
revolutions, the onboard computer in
your vehicle calculates the remaining
engine oil life and displays it as apercentage.Engine Oil Life Display
To see the current engine oil life,
turn the ignition switch to the ON
(II) position, then press and release
the select/reset knob repeatedly
until the engine oil life indicatorappears.The remaining engine oil life is
shown on the display according to
this table:
Calculated Engine Oil Life (%) Displayed
Engine Oil Life (%)
100% -91% 100%
90% -81% 90%
80% -71% 80%
70% -61% 70%
60% -51% 60%
50% -41% 50%
40% -31% 40%
30% -21% 30%
20% -16% 20%
15% -11% 15%
10% -6% 10%
5% -1% 5%
0% 0%
ENGINE OIL LIFE INDICATOR SELECT/RESET KNOB
U.S. model is shown.
CONTINUED
Maintenance Minder
243
Maintenance
Table of Contents
Page 260 of 342
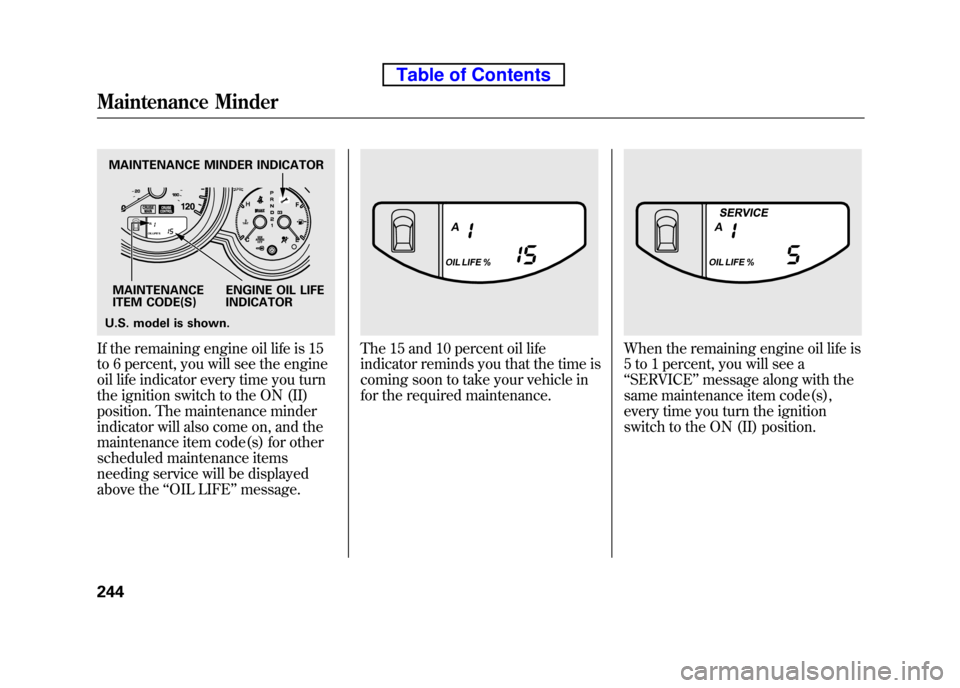
If the remaining engine oil life is 15
to 6 percent, you will see the engine
oil life indicator every time you turn
the ignition switch to the ON (II)
position. The maintenance minder
indicator will also come on, and the
maintenance item code(s) for other
scheduled maintenance items
needing service will be displayed
above the‘‘OIL LIFE ’’message.The 15 and 10 percent oil life
indicator reminds you that the time is
coming soon to take your vehicle in
for the required maintenance.When the remaining engine oil life is
5 to 1 percent, you will see a‘‘SERVICE ’’message along with the
same maintenance item code(s),
every time you turn the ignition
switch to the ON (II) position.
MAINTENANCE MINDER INDICATOR
MAINTENANCE
ITEM CODE(S) ENGINE OIL LIFE
INDICATOR
U.S. model is shown.
Maintenance Minder
244
Table of Contents
Page 261 of 342
The maintenance item code or codes
indicate the main and sub items
required at the time of the oil change
(see page 246).
You can switch the information
display from the engine oil life
display to the odometer or the trip
meter. Press and release the select/
reset knob on the instrument panel.
When the engine oil life is 15 to 1
percent, the maintenance minder
indicator (
) comes on every time
you turn the ignition switch to the
ON (II) position, then it goes out if
you switch the information display.
When you see this message, have
the indicated maintenance performed
by your dealer as soon as possible.When the remaining engine oil life is
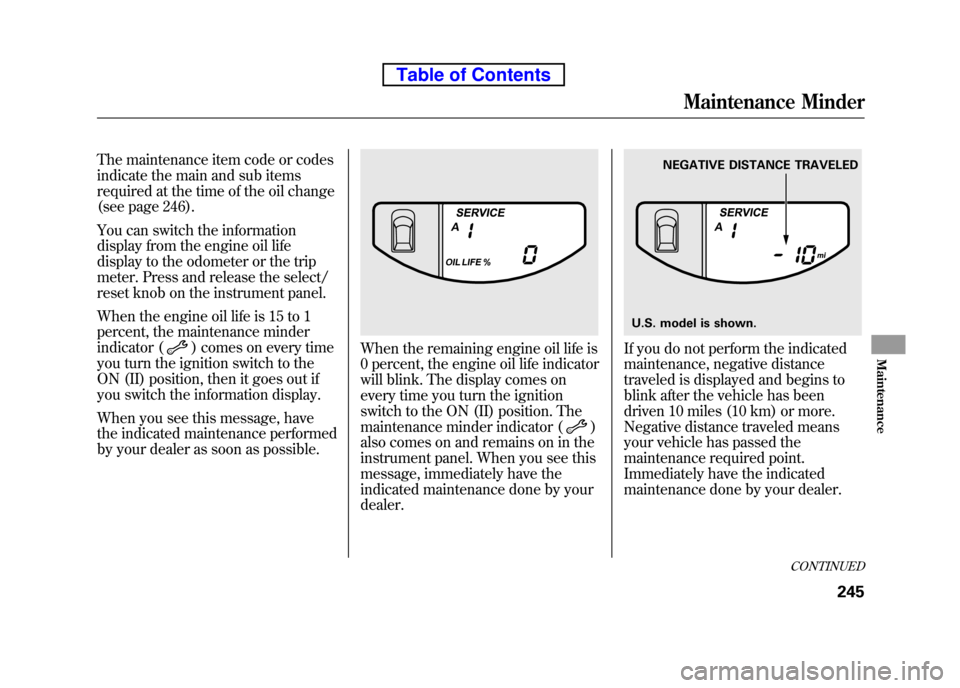
0 percent, the engine oil life indicator
will blink. The display comes on
every time you turn the ignition
switch to the ON (II) position. The
maintenance minder indicator (
)
also comes on and remains on in the
instrument panel. When you see this
message, immediately have the
indicated maintenance done by yourdealer.
If you do not perform the indicated
maintenance, negative distance
traveled is displayed and begins to
blink after the vehicle has been
driven 10 miles (10 km) or more.
Negative distance traveled means
your vehicle has passed the
maintenance required point.
Immediately have the indicated
maintenance done by your dealer.
NEGATIVE DISTANCE TRAVELED
U.S. model is shown.
CONTINUED
Maintenance Minder
245
Maintenance
Table of Contents
Page 262 of 342
To change the information display
from the engine oil life display to the
odometer or the trip meter, press and
release the select/reset knob.
When the engine oil life is 0 percent
or negative distance traveled, the
maintenance minder indicator (
)
remains on even if you change the
information display.
Immediately have the service
performed, and make sure to reset
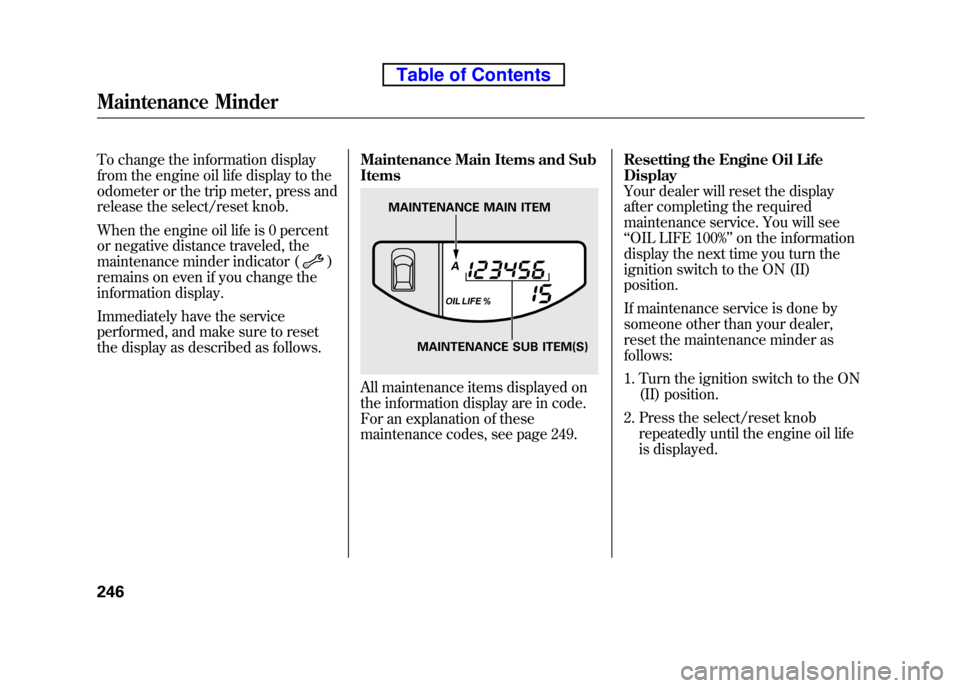
the display as described as follows. Maintenance Main Items and Sub Items
All maintenance items displayed on
the information display are in code.
For an explanation of these
maintenance codes, see page 249.Resetting the Engine Oil LifeDisplay
Your dealer will reset the display
after completing the required
maintenance service. You will see ‘‘
OIL LIFE 100% ’’on the information
display the next time you turn the
ignition switch to the ON (II)position.
If maintenance service is done by
someone other than your dealer,
reset the maintenance minder as follows:
1. Turn the ignition switch to the ON (II) position.
2. Press the select/reset knob repeatedly until the engine oil life
is displayed.
MAINTENANCE MAIN ITEM
MAINTENANCE SUB ITEM(S)
Maintenance Minder
246
Table of Contents