set clock HONDA FIT 2011 2.G Navigation Manual
[x] Cancel search | Manufacturer: HONDA, Model Year: 2011, Model line: FIT, Model: HONDA FIT 2011 2.GPages: 152, PDF Size: 6.63 MB
Page 3 of 152
2Navigation System
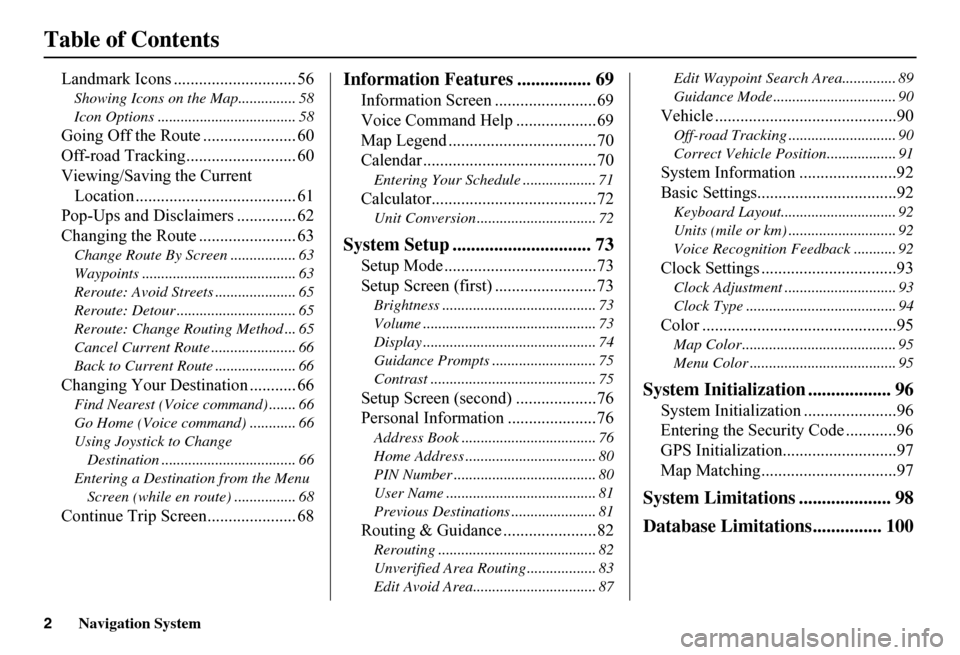
Table of Contents
Landmark Icons ............................. 56
Showing Icons on the Map............... 58
Icon Options .................................... 58
Going Off the Route ...................... 60
Off-road Tracking.......................... 60
Viewing/Saving the Current
Location ...................................... 61
Pop-Ups and Disclaimers .............. 62
Changing the Route ....................... 63
Change Route By Screen ................. 63
Waypoints ........................................ 63
Reroute: Avoid Streets ..................... 65
Reroute: Detour ............................... 65
Reroute: Change Routing Method ... 65
Cancel Current Route ...................... 66
Back to Current Route ..................... 66
Changing Your Destination ........... 66
Find Nearest (Voice command) ....... 66
Go Home (Voice command) ............ 66
Using Joystick to Change
Destination ................................... 66
Entering a Destination from the Menu
Screen (while en route) ................ 68
Continue Trip Screen..................... 68
Information Features ................ 69
Information Screen ........................69
Voice Command Help ...................69
Map Legend ...................................70
Calendar .........................................70
Entering Your Schedule ................... 71
Calculator.......................................72
Unit Conversion ............................... 72
System Setup .............................. 73
Setup Mode ....................................73
Setup Screen (first) ........................73
Brightness ........................................ 73
Volume ............................................. 73
Display ............................................. 74
Guidance Prompts ....... .................... 75
Contrast ........................................... 75
Setup Screen (second) ...................76
Personal Information .....................76
Address Book ................................... 76
Home Address .................................. 80
PIN Number ..................................... 80
User Name ....................................... 81
Previous Destinations ...................... 81
Routing & Guidance ......................82
Rerouting ......................................... 82
Unverified Area Routing .................. 83
Edit Avoid Area................................ 87
Edit Waypoint Search Area.............. 89
Guidance Mode .... ............................ 90
Vehicle ...........................................90
Off-road Tracking............................ 90
Correct Vehicle Position.................. 91
System Information .......................92
Basic Settings.................................92
Keyboard Layout.. ............................ 92
Units (mile or km) ............................ 92
Voice Recognition Fe edback ........... 92
Clock Settings ................................93
Clock Adjustment ............................. 93
Clock Type ....................................... 94
Color ..............................................95
Map Color ........................................ 95
Menu Color ...................................... 95
System Initialization .................. 96
System Initializat ion ......................96
Entering the Security Code ............96
GPS Initialization ...........................97
Map Matching................................97
System Limitations .................... 98
Database Limitations............... 100
Page 18 of 152
Navigation System17
Getting Started
Read this disclaimer carefully so you understand it before continuing. Push in on the joystick, or touch OK, and the map screen will appear on the display. The “OK” cannot be activated by voice.
NOTE:
If you do not select OK, and then enter the Setup or Information screens, some items are not available and will show up as darkened buttons (grayed out). See System Function Diagram on page 20.
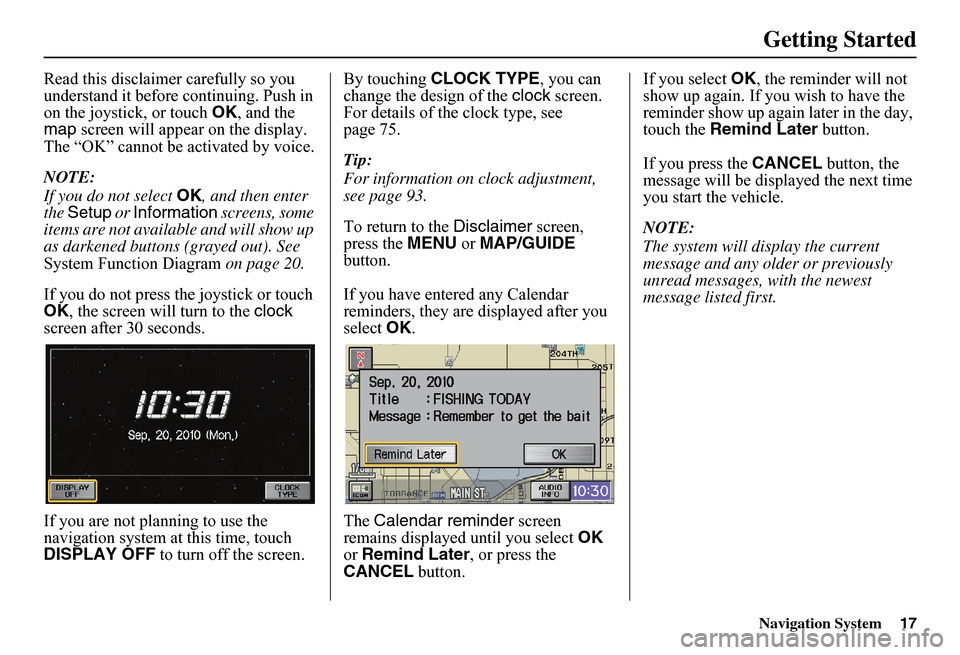
If you do not press the joystick or touch OK , the screen will turn to the clock screen after 30 seconds.
If you are not planning to use the navigation system at this time, touch DISPLAY OFF to turn off the screen.
By touching CLOCK TYPE, you can change the design of the clock screen. For details of the clock type, see page 75.
Tip:
For information on clock adjustment, see page 93.
To return to the Disclaimer screen, press the MENU or MAP/GUIDE button.
If you have entered any Calendar reminders, they are displayed after you select OK.
The Calendar reminder screen remains displayed until you select OK or Remind Later, or press the CANCEL button.
If you select OK, the reminder will not show up again. If you wish to have the reminder show up agai n later in the day, touch the Remind Later button.
If you press the CANCEL button, the message will be displayed the next time you start the vehicle.
NOTE:
The system will display the current message and any older or previously unread messages, with the newest message listed first.
Page 21 of 152
20Navigation System
Getting Started
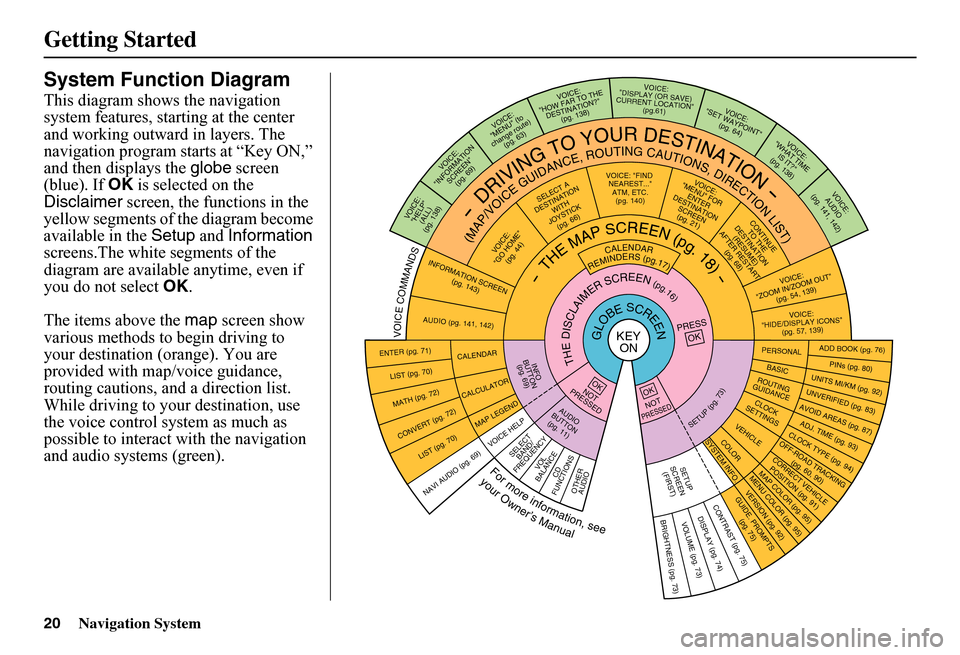
System Function Diagram
This diagram shows the navigation system features, starting at the center and working outward in layers. The navigation program starts at “Key ON,” and then displays the globe screen (blue). If OK is selected on the Disclaimer screen, the functions in the yellow segments of the diagram become available in the Setup and Information screens.The white segments of the diagram are available anytime, even if you do not select OK.
The items above the map screen show various methods to begin driving to your destination (orange). You are provided with map/voice guidance, routing cautions, and a direction list. While driving to your destination, use the voice control system as much as possible to interact with the navigation and audio syst ems (green).
KEY ONGLOBESCREENPRESS OK
OKNOT PRESSED
THEDISCLAIMERSCREEN(pg.16)
CALENDAR
REMINDERS(pg.17)-THEMAPSCREEN(pg.18)-
AUDIO BUTTO N (pg. 11)
INFO BUTTON (pg. 6
9 )
Formoreinformation,see
yourOwner’sManual
VOICECOMMANDS
NAVI AUDI
O (pg. 6 9 )
ENTER (pg. 71)
LIST (pg. 70)
MATH (pg. 72)
CONVERT (pg. 72)
LIST (pg. 70)
CALENDAR
CALCULATOR
MAP LEGEND
VOICE: "FIND NEARE ST..." ATM, ETC. (pg. 140)SELECT A DESTINATION WITHJOYSTICK (pg. 66)
VOICE: "GO HOME" (pg. 44)
VOICE: "MENU" FOR ENTERDESTINATIONSCREEN(pg. 21)CONTIN
UE TO THE DESTINATION (RESUME) AFTER RESTART
(pg. 68)
VOICE HELPSELECT BAND/ FREQUENCYVOL BALANCECD
FUNCTIONSOTHER AUDIO
VOICE: "ZOOM IN/ZOO M OUT"
(pg. 54, 13 9 )
VOICE: "HIDE/DISP LAY ICONS" (pg. 57, 13 9 )
INFORMATION
SCREEN (pg. 143)
AUDIO (pg. 141, 142)
-DRIVINGTOYOURDESTINATION-
(MAP/VOICEGUIDANCE,ROUTINGCAUTIONS,DIRECTIONLIST)
VOICE: "HELP"(ALL)(pg. 138)
VOICE: "INFORM
ATION
SCREEN" (pg. 6 9 )
VOICE: "MENU" (to change route)(pg. 63)
VOICE: "HOW FAR TO THEDESTINATION?"(pg. 138)
VOICE: "DISPLAY (OR SAVE) CURRENT LOCATION"(pg.61)VOICE:"SET WAYPOINT" (pg. 64)
VOICE: "WHAT TIME IS IT?" (pg. 138)
VOICE: AUDIO (pg. 141
, 142)
ADD BOOK (pg. 76)PINs (pg. 80)UNITS MI/KM (pg. 9 2)
PERSONALBASIC
UNVERIFIED (pg. 83)AVOID AREAS (pg. 87)ADJ. TIME (pg.
9 3)CLOCK TYPE
(pg. 94)
ROUTING GUIDANCECLOC K SETT INGS
OFF-ROAD TRA
CKING (pg. 60, 9 0)
CORRECT VEHICL
E
POSITION (p
g. 91)
MAP COLOR
(pg. 95)
MENU COLOR (pg.
95)
VEHICLECOLOR
GUIDE. PRO
MPTS (pg. 75)
SETUPSCREE
N
(FIRST)
OKNOTPRESSED
VERSION (
pg. 92)
SYSTEM INF
O.
BRIGHTNESS
(pg. 73)
VOLUME (pg. 73)DISPL
AY (pg
. 74)
CONTRAST
(pg. 75)
SETUP(pg.73)
BRIGHTNESS ZOOM IN/OUT
REAR CAMERA (REVERSE)
Page 75 of 152
74Navigation System
System Setup
Display
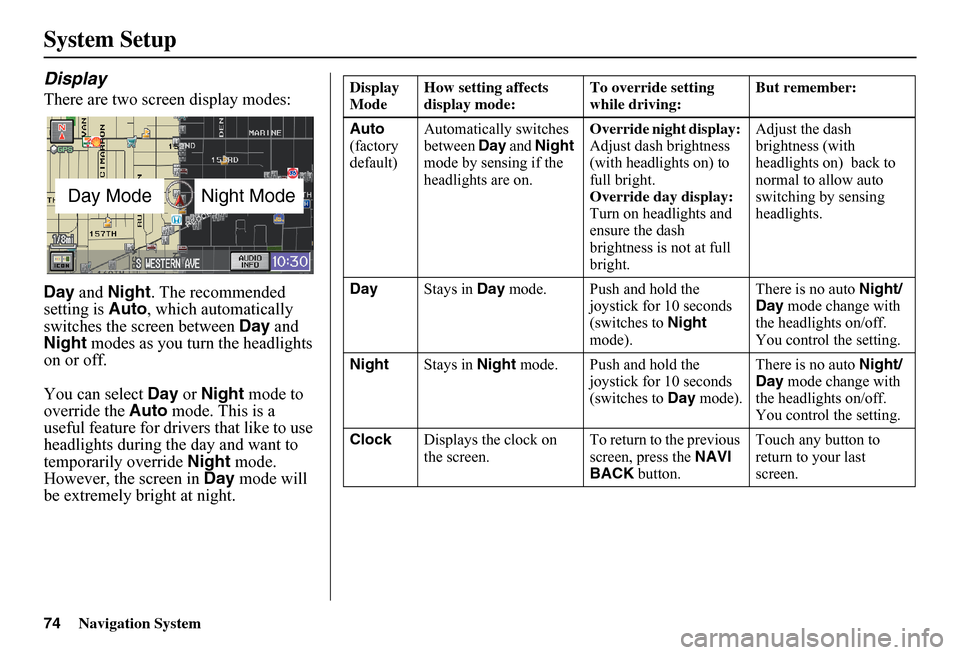
There are two screen display modes:
Day and Night. The recommended setting is Auto, which automatically switches the screen between Day and Night modes as you turn the headlights on or off.
You can select Day or Night mode to override the Auto mode. This is a useful feature for drivers that like to use headlights during the day and want to temporarily override Night mode. However, the screen in Day mode will be extremely bright at night.
Day ModeNight Mode
Display Mode How setting affects display mode: To override setting while driving: But remember:
Auto (factory default)
Automatically switches between Day and Night mode by sensing if the headlights are on.
Override night display: Adjust dash brightness (with headlights on) to full bright.Override day display:Turn on headlights and ensure the dash brightness is not at full bright.
Adjust the dash brightness (with headlights on) back to normal to allow auto switching by sensing headlights.
Day Stays in Day mode. Push and hold the joystick for 10 seconds (switches to Night mode).
There is no auto Night/ Day mode change with the headlights on/off. You control the setting.
Night Stays in Night mode. Push and hold the joystick for 10 seconds (switches to Day mode).
There is no auto Night/ Day mode change with the headlights on/off. You control the setting.
Clock Displays the clock on the screen. To return to the previous screen, press the NAVI BACK button.
Touch any button to return to your last screen.
Page 76 of 152
Navigation System75
System Setup
When you select Clock in Setup or the Disclaimer screen times out, the clock screen is displayed (see page 17).
DISPLAY OFF
When you touch the DISPLAY OFF button, the screen is turned off. Voice guidance will continue to work in this mode. To turn on the screen, press any navigation or voice control button.
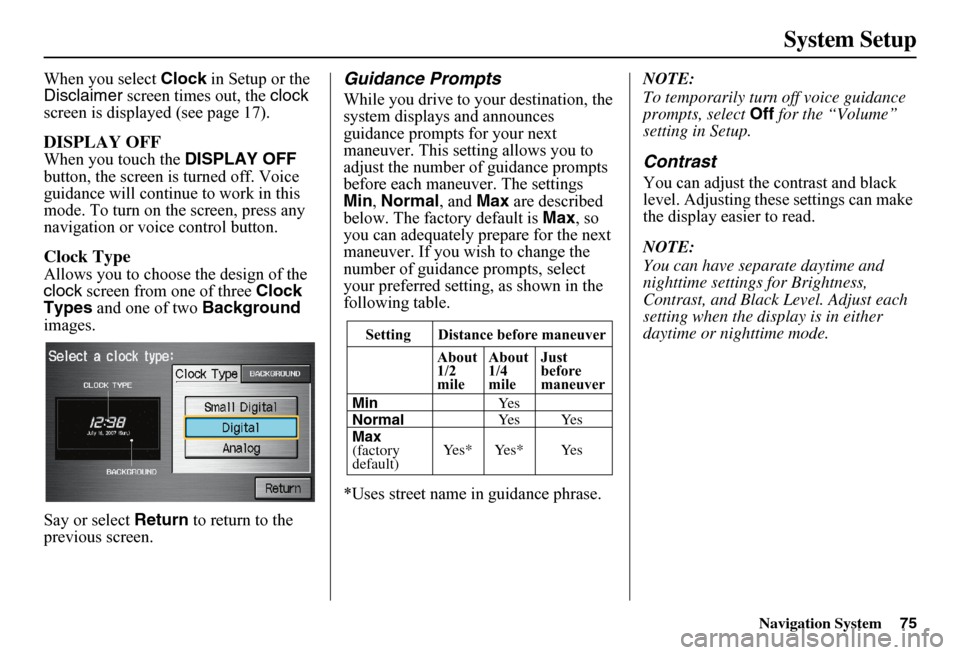
Clock Type
Allows you to choose the design of the clock screen from one of three Clock Types and one of two Background images.
Say or select Return to return to the previous screen.
Guidance Prompts
While you drive to your destination, the system displays and announces guidance prompts for your next maneuver. This setting allows you to adjust the number of guidance prompts before each maneuver. The settings Min , Normal, and Max are described below. The factory default is Max, so you can adequately prepare for the next maneuver. If you wish to change the number of guidance prompts, select your preferred setting, as shown in the following table.
*Uses street name in guidance phrase.
NOTE:
To temporarily turn off voice guidance prompts, select Off for the “Volume” setting in Setup.
Contrast
You can adjust the contrast and black level. Adjusting thes e settings can make the display easier to read.
NOTE:
You can have separate daytime and nighttime settings for Brightness, Contrast, and Black Level. Adjust each setting when the display is in either daytime or nighttime mode.Setting Distance before maneuver
About 1/2mile
Max (factorydefault)
Normal Min
About 1/4mile
Just beforemaneuver
Ye s * Ye s * Ye s
Ye s Ye s Ye s
Page 94 of 152
Navigation System
System Setup
Clock Settings
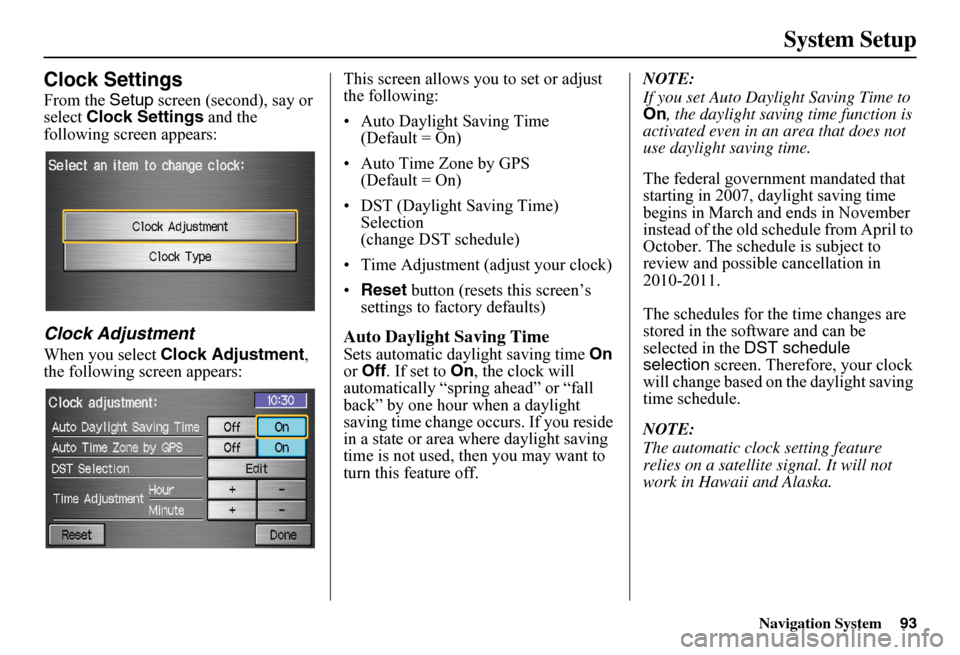
From the Setup screen (second), say or
select Clock Settings and the
following screen appears:
Clock Adjustment
When you select Clock Adjustment ,
the following screen appears: This screen allows you to set or adjust
the following:
• Auto Daylight Saving Time
(Default = On)
• Auto Time Zone by GPS (Default = On)
• DST (Daylight Saving Time) Selection
(change DST schedule)
• Time Adjustment (adjust your clock)
• Reset button (resets this screen’s
settings to factory defaults)
Auto Daylight Saving Time
Sets automatic daylight saving time On
or Off . If set to On , the clock will
automatically “spring ahead” or “fall
back” by one hour when a daylight
saving time change occurs. If you reside
in a state or area wh ere daylight saving
time is not used, then you may want to
turn this feature off. NOTE:
If you set Auto Daylight Saving Time to
On
, the daylight saving time function is
activated even in an area that does not
use daylight saving time.
The federal government mandated that
starting in 2007, daylight saving time
begins in March and ends in November
instead of the old schedule from April to
October. The schedule is subject to
review and possible cancellation in
2010-2011.
The schedules for the time changes are
stored in the software and can be
selected in the DST schedule
selection screen. Therefore, your clock
will change based on the daylight saving
time schedule.
NOTE:
The automatic clock setting feature
relies on a satellite signal. It will not
work in Hawaii and Alaska.
93
Page 95 of 152
Navigation System
System Setup
Auto Time Zone by GPS
Sets automatic time zone selection by
GPS to On or Off . If you are driving
across the country and passing through
time zones, then this feature will
automatically set the time to the time
zone you are traveling through.
However, if you live and work in two
different time zones, you may want to
turn this feature off.
NOTE:
When driving near a time zone
boundary, the displayed time zone may
fluctuate between the two zone times.
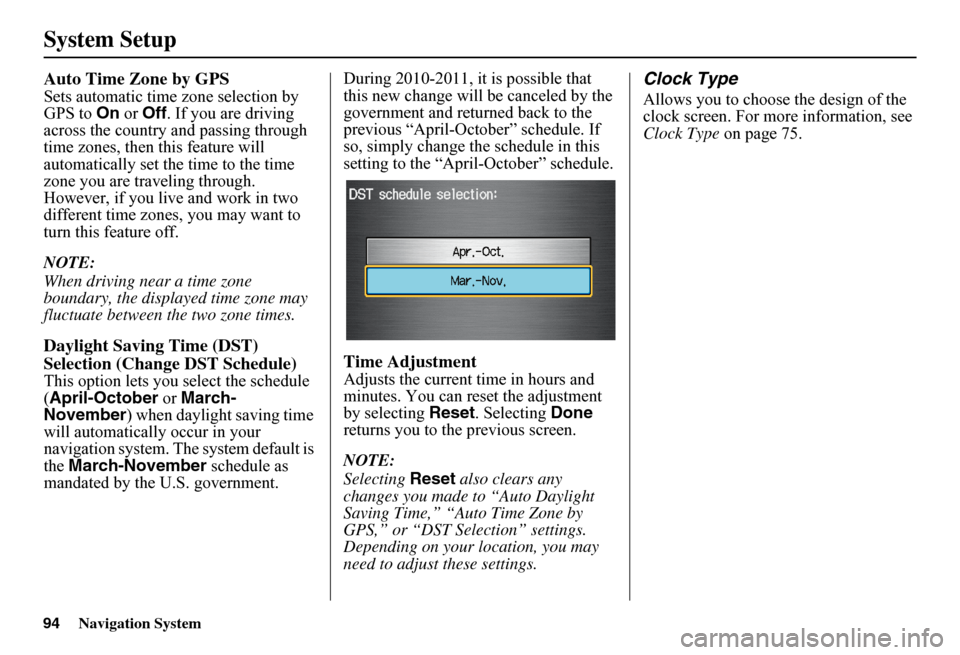
Daylight Saving Time (DST)
Selection (Change DST Schedule)
This option lets you select the schedule
(April-October or March-
November ) when daylight saving time
will automatically occur in your
navigation system. The system default is
the March-November schedule as
mandated by the U.S. government. During 2010-2011, it is possible that
this new change will
be canceled by the
government and returned back to the
previous “April-October” schedule. If
so, simply change th e schedule in this
setting to the “Apr il-October” schedule.
Time Adjustment
Adjusts the current time in hours and
minutes. You can reset the adjustment
by selecting Reset. Selecting Done
returns you to the previous screen.
NOTE:
Selecting Reset also clears any
changes you made to “Auto Daylight
Saving Time,” “Auto Time Zone by
GPS,” or “DST Selection” settings.
Depending on your location, you may
need to adjust these settings.
Clock Type
Allows you to choose the design of the
clock screen. For more information, see
Clock Type on page 75.
94
Page 122 of 152
Navigation System121
Operation in Alaska and
Hawaii
Certain functions that rely on a satellite signal will not work in Alaska and Hawaii. These functions include but are not limited to XM radio, automatic clock updates, and time zone adjustments.
Alaska
If the vehicle was purchased in the lower 48 states and driven to Alaska, the system cannot display maps. The message “Vehicle is out of the database...” will be displayed.
Hawaii
This section describes the differences in navigation system operation for vehicles delivered in Hawaii.
Map Coverage
All roads displayed on the Hawaii map screens are detailed coverage roads. Text related to “unverified” roads or areas are not applicable. The following topics do not apply in Hawaii:
• Unverified road descriptions (see page 6 and 83).
• Cautions and pop-up windows related to unverified roads (see page 62).
• Setup entries that re late to turning on or off unverified routing (see page 84).
• When zooming in and out, there is no 350-mile scale for Hawaii.
Other Map Issues
• See the coverage section for a list of islands with coverage (see page 107).
• Freeway Exit information does not exist in Hawaii, so the “Freeway Exit Info” icon is not shown on the icon bar.
Address and POI Entry Screens
When in Hawaii, the following differences occur for map, address, and POI selection:
• It is not possible to enter U.S. mainland addresses or scroll the map east to the U.S. mainland.
• Selection of the “State” is confined to the state of Hawaii only.
• Entry of a destination address or POI on an island other than your current island may result in a screen caution message. This is normal because there are no “ferry” routes between islands available in the database.
• If the “Guidance Prompts” setting on the Setup screen is set to normal or maximum, street names will not be spoken in voice guidance commands.
Coverage Areas
Page 123 of 152
122Navigation System
Setup Screen Differences
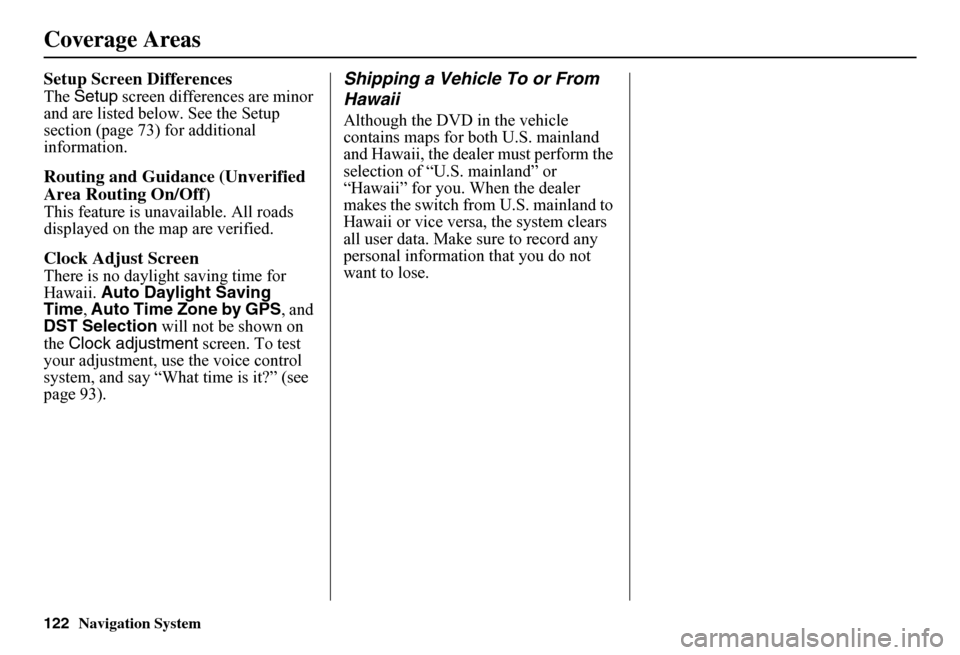
The Setup screen differences are minor and are listed belo w. See the Setup section (page 73) for additional information.
Routing and Guidan ce (Unverified
Area Routing On/Off)
This feature is unavailable. All roads displayed on the map are verified.
Clock Adjust Screen
There is no daylight saving time for Hawaii. Auto Daylight Saving Time , Auto Time Zone by GPS, and DST Selection will not be shown on the Clock adjustment screen. To test your adjustment, use the voice control system, and say “What time is it?” (see page 93).
Shipping a Vehicle To or From
Hawaii
Although the DVD in the vehicle contains maps for both U.S. mainland and Hawaii, the dealer must perform the selection of “U.S. mainland” or “Hawaii” for you. When the dealer makes the switch from U.S. mainland to Hawaii or vice versa, the system clears all user data. Make sure to record any personal information that you do not want to lose.
Coverage Areas
Page 132 of 152
Navigation System131
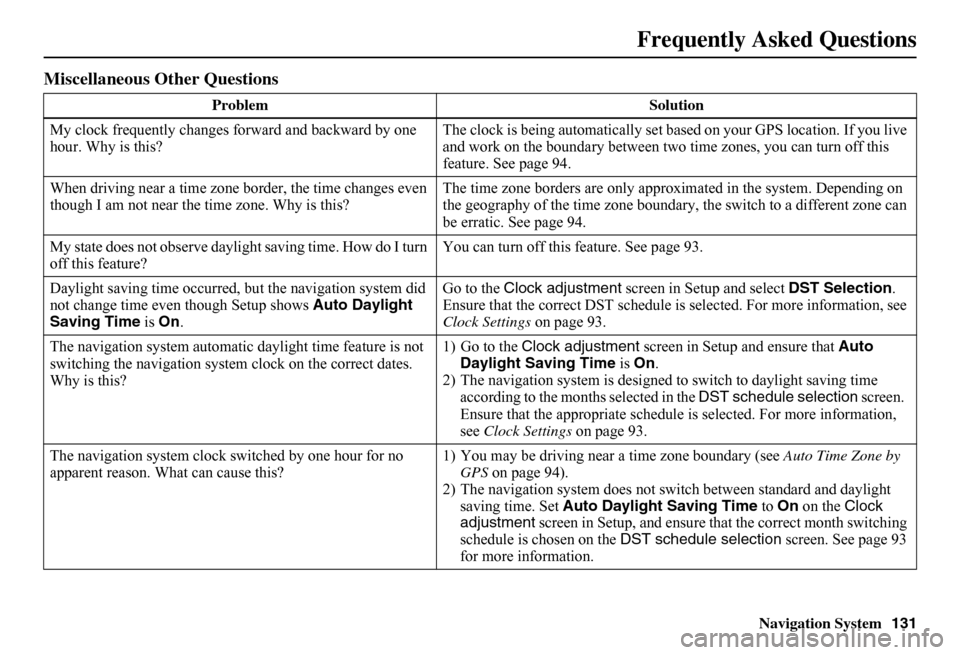
Miscellaneous Other Questions
Problem Solution
My clock frequently changes forward and backward by one hour. Why is this? The clock is being auto matically set based on your GPS location. If you live and work on the boundary between two time zones, you can turn off this feature. See page 94.
When driving near a time zone border, the time changes even though I am not near the time zone. Why is this? The time zone borders are only appr oximated in the system. Depending on the geography of the time zone boundary, the switch to a different zone can be erratic. See page 94.
My state does not observe dayli ght saving time. How do I turn off this feature? You can turn off this feature. See page 93.
Daylight saving time occurred, but the navigation system did not change time even though Setup shows Auto Daylight Saving Time is On.
Go to the Clock adjustment screen in Setup and select DST Selection. Ensure that the correct DST schedule is selected. For more information, see Clock Settings on page 93.
The navigation system automatic daylight time feature is not switching the navigation system clock on the correct dates. Why is this?
1) Go to the Clock adjustment screen in Setup and ensure that Auto Daylight Saving Time is On. 2) The navigation system is designed to switch to daylight saving time according to the months selected in the DST schedule selection screen. Ensure that the appropriate schedule is selected. For more information, see Clock Settings on page 93.
The navigation system clock switched by one hour for no apparent reason. Wh at can cause this? 1) You may be driving near a time zone boundary (see Auto Time Zone by GPS on page 94). 2) The navigation system does not switc h between standard and daylight saving time. Set Auto Daylight Saving Time to On on the Clock adjustment screen in Setup, and ensure that the correct month switching schedule is chosen on the DST schedule selection screen. See page 93 for more information.
Frequently Asked Questions