park assist HONDA FIT 2016 3.G Quick Guide
[x] Cancel search | Manufacturer: HONDA, Model Year: 2016, Model line: FIT, Model: HONDA FIT 2016 3.GPages: 75, PDF Size: 5.39 MB
Page 49 of 75
90 || 91
DRIVING
DRIVING
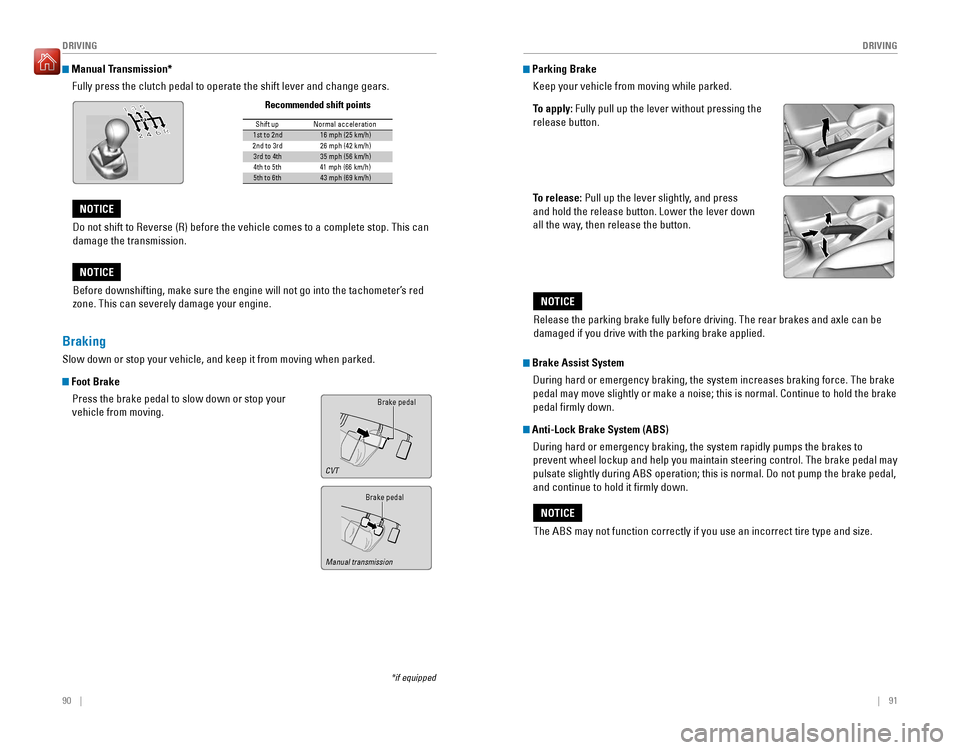
Manual Transmission*
Fully press the clutch pedal to operate the shift lever and change gears.
Do not shift to Reverse (R) before the vehicle comes to a complete stop. This can damage the transmission.
NOTICE
Before downshifting, make sure the engine will not go into the tachometer’s red
zone. This can severely damage your engine.
NOTICE
Shift up Normal acceleratio n1st to 2n d16 mph (25 km/h)
2nd to 3rd 26 mph (42 km/h)
3rd to 4th35 mph (56 km/h)
4th to 5th 41 mph (66 km/h)
5th to 6th43 mph (69 km/h)
Recommended shift points
*if equipped
Braking
Slow down or stop your vehicle, and keep it from moving when parked.
Foot Brake
Press the brake pedal to slow down or stop your vehicle from moving.Brake pedal
Brake pedal
CVT
Manual transmission
Parking Brake
Keep your vehicle from moving while parked.
To apply: Fully pull up the lever without pressing the
release button.
To release: Pull up the lever slightly, and press
and hold the release button. Lower the lever down
all the way, then release the button.
The ABS may not function correctly if you use an incorrect tire type and size.
NOTICE
Brake Assist System
During hard or emergency braking, the system increases braking force. The brake
pedal may move slightly or make a noise; this is normal. Continue to hold the brake pedal �rmly down.
Anti-Lock Brake System (ABS)
During hard or emergency braking, the system rapidly pumps the brakes to
prevent wheel lockup and help you maintain steering control. The brake pedal may
pulsate slightly during ABS operation; this is normal. Do not pump the brake pedal, and continue to hold it �rmly down.
Release the parking brake fully before driving. The rear brakes and axle can be damaged if you drive with the parking brake applied.
NOTICE
Page 51 of 75
94 || 95
DRIVING
DRIVING
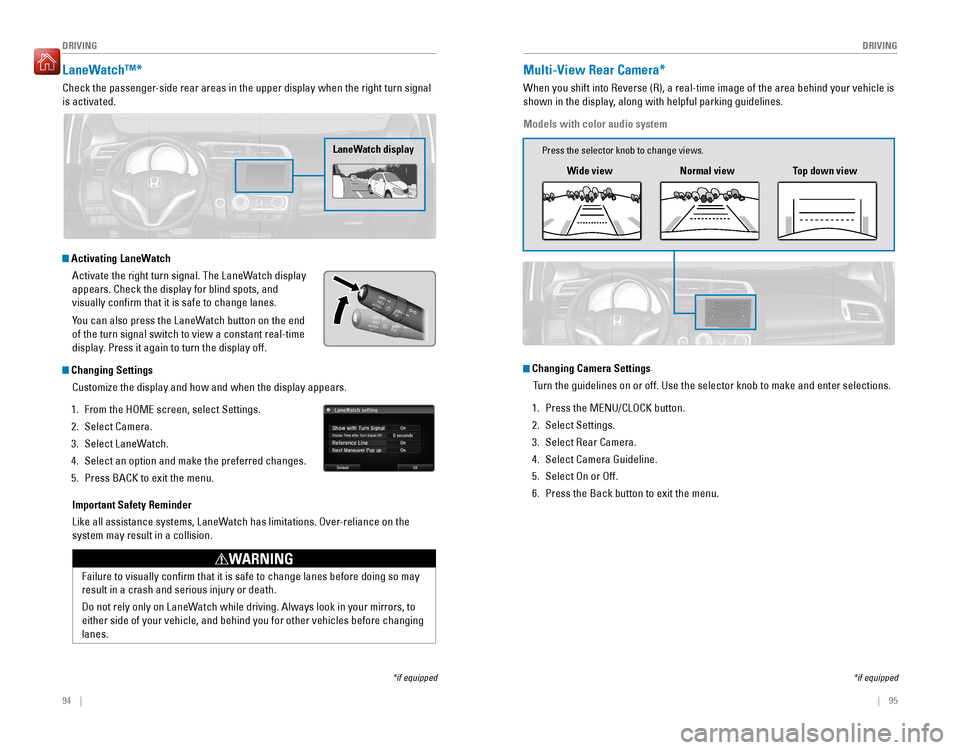
LaneWatch™*
Check the passenger-side rear areas in the upper display when the right turn signal is activated.
LaneWatch display
Activating LaneWatch
Activate the right turn signal. The LaneWatch display
appears. Check the display for blind spots, and visually con�rm that it is safe to change lanes.
You can also press the LaneWatch button on the end of the turn signal switch to view a constant real-time
display. Press it again to turn the display off.
Changing Settings
Customize the display and how and when the display appears.
1. From the HOME screen, select Settings.
2. Select Camera.
3. Select LaneWatch.
4. Select an option and make the preferred changes.
5. Press BACK to exit the menu.
Important Safety Reminder
Like all assistance systems, LaneWatch has limitations. Over-reliance on the system may result in a collision.
Failure to visually conirm that it is safe to change lanes before doing so may result in a crash and serious injury or death.
Do not rely only on LaneWatch while driving. Always look in your mirrors, to either side of your vehicle, and behind you for other vehicles before changing lanes.
WARNING
*if equipped
Multi-View Rear Camera*
When you shift into Reverse (R), a real-time image of the area behind your vehicle is
shown in the display, along with helpful parking guidelines.
Models with color audio system
Wide view Normal view Top down view
*if equipped
Changing Camera Settings
Turn the guidelines on or off. Use the selector knob to make and enter selections.
1. Press the MENU/CLOCK button.
2. Select Settings.
3. Select Rear Camera.
4. Select Camera Guideline.
5. Select On or Off.6. Press the Back button to exit the menu.
Press the selector knob to change views.
Page 53 of 75
98 || 99
HANDLING THE UNEXPECTED
HANDLING THE UNEXPECTED
Learn about what to do in critical or emergency situations.
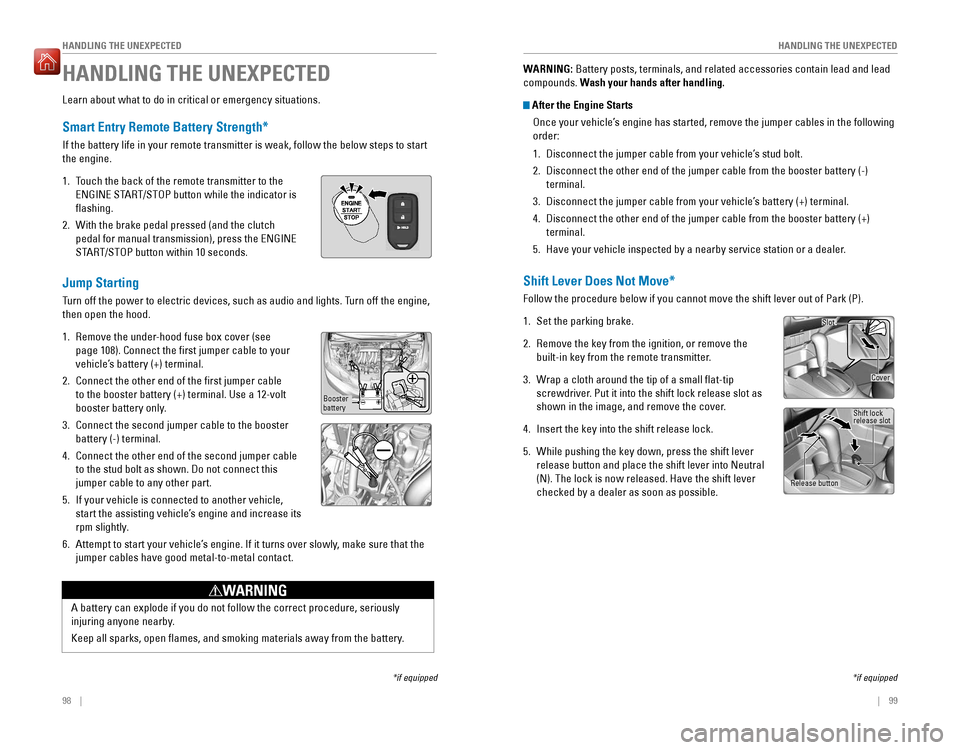
Smart Entry Remote Battery Strength*
If the battery life in your remote transmitter is weak, follow the below steps to start the engine. 1. Touch the back of the remote transmitter to the
ENGINE START/STOP button while the indicator is �ashing.
2. With the brake pedal pressed (and the clutch pedal for manual transmission), press the ENGINE
START/STOP button within 10 seconds.
Jump Starting
Turn off the power to electric devices, such as audio and lights. Turn off the engine, then open the hood. 1. Remove the under-hood fuse box cover (see page 108). Connect the irst jumper cable to your
vehicle’s battery (+) terminal.
2. Connect the other end of the irst jumper cable to the booster battery (+) terminal. Use a 12-volt
booster battery only.
3. Connect the second jumper cable to the booster battery (-) terminal.
4. Connect the other end of the second jumper cable to the stud bolt as shown. Do not connect this jumper cable to any other part.
5. If your vehicle is connected to another vehicle,
start the assisting vehicle’s engine and increase its
rpm slightly.
6. Attempt to start your vehicle’s engine. If it turns over slowly, make sure that the jumper cables have good metal-to-metal contact.
HANDLING THE UNEXPECTED
*if equipped
A battery can explode if you do not follow the correct procedure, seriously
injuring anyone nearby.
Keep all sparks, open lames, and smoking materials away from the battery.
WARNING
Booster battery WARNING:
Battery posts, terminals, and related accessories contain lead and lead
compounds. Wash your hands after handling.
After the Engine Starts
Once your vehicle’s engine has started, remove the jumper cables in the following order: 1. Disconnect the jumper cable from your vehicle’s stud bolt.
2. Disconnect the other end of the jumper cable from the booster battery (-) terminal.
3. Disconnect the jumper cable from your vehicle’s battery (+) terminal.
4. Disconnect the other end of the jumper cable from the booster battery (+) terminal.
5. Have your vehicle inspected by a nearby service station or a dealer.
Shift Lever Does Not Move*
Follow the procedure below if you cannot move the shift lever out of Park (P). 1. Set the parking brake.
2. Remove the key from the ignition, or remove the built-in key from the remote transmitter.
3. Wrap a cloth around the tip of a small �at-tip screwdriver. Put it into the shift lock release slot as
shown in the image, and remove the cover.
4. Insert the key into the shift release lock.
5. While pushing the key down, press the shift lever release button and place the shift lever into Neutral (N). The lock is now released. Have the shift lever checked by a dealer as soon as possible.
*if equipped
Slot
Release button Shift lock release slot
Cover
Page 54 of 75
100 || 101
HANDLING THE UNEXPECTED
HANDLING THE UNEXPECTED
Overheating
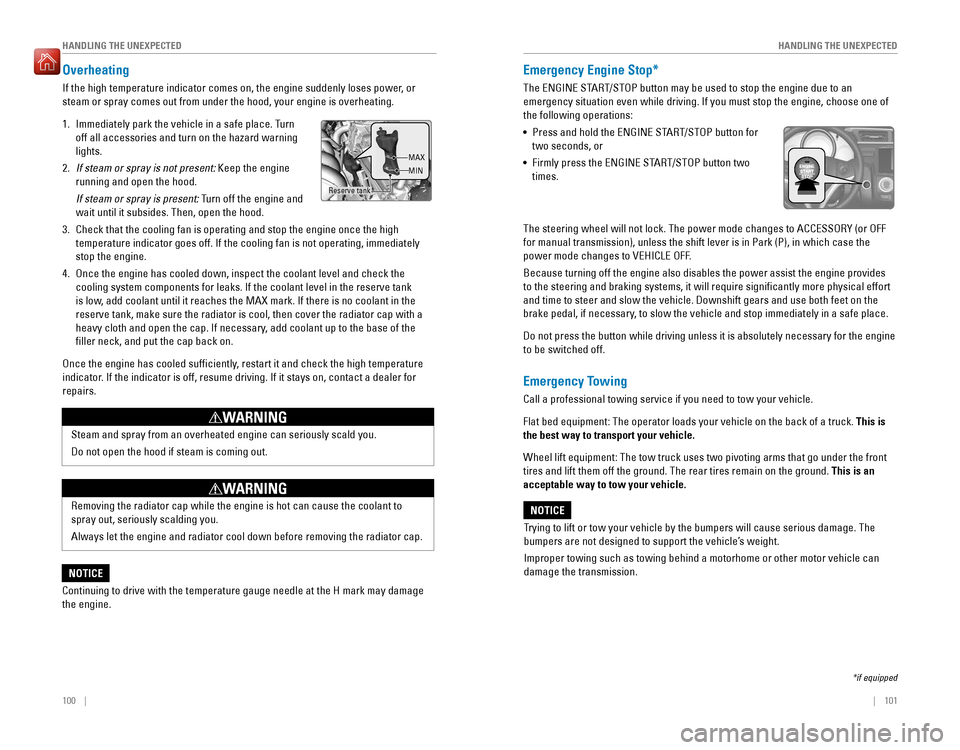
If the high temperature indicator comes on, the engine suddenly loses power, or steam or spray comes out from under the hood, your engine is overheating. 1. Immediately park the vehicle in a safe place. Turn off all accessories and turn on the hazard warning lights.
2. If steam or spray is not present: Keep the engine
running and open the hood.
If steam or spray is present: Turn off the engine and
wait until it subsides. Then, open the hood.
3. Check that the cooling fan is operating and stop the engine once the high temperature indicator goes off. If the cooling fan is not operating, immediately stop the engine.
4. Once the engine has cooled down, inspect the coolant level and check the cooling system components for leaks. If the coolant level in the reserve tank
is low, add coolant until it reaches the MAX mark. If there is no coolant in the
reserve tank, make sure the radiator is cool, then cover the radiator cap with a
heavy cloth and open the cap. If necessary, add coolant up to the base of the iller neck, and put the cap back on.
Once the engine has cooled suf�ciently, restart it and check the high temperature
indicator. If the indicator is off, resume driving. If it stays on, contact a dealer for repairs.
Steam and spray from an overheated engine can seriously scald you. Do not open the hood if steam is coming out.
WARNING
Removing the radiator cap while the engine is hot can cause the coolant to spray out, seriously scalding you. Always let the engine and radiator cool down before removing the radiator cap.
WARNING
Continuing to drive with the temperature gauge needle at the H mark may damage the engine.
NOTICE
Emergency Engine Stop*
The ENGINE START/STOP button may be used to stop the engine due to an
emergency situation even while driving. If you must stop the engine, choose one of the following operations: • Press and hold the ENGINE START/STOP button for
two seconds, or
• Firmly press the ENGINE START/STOP button two
times.
The steering wheel will not lock. The power mode changes to ACCESSORY (or OFF
for manual transmission), unless the shift lever is in Park (P), in which case the
power mode changes to VEHICLE OFF. Because turning off the engine also disables the power assist the engine provides
to the steering and braking systems, it will require signiicantly more physical effort and time to steer and slow the vehicle. Downshift gears and use both feet on the
brake pedal, if necessary, to slow the vehicle and stop immediately in a safe place.
Do not press the button while driving unless it is absolutely necessary for the engine to be switched off.
Emergency Towing
Call a professional towing service if you need to tow your vehicle. Flat bed equipment: The operator loads your vehicle on the back of a truck. This is
the best way to transport your vehicle.
Wheel lift equipment: The tow truck uses two pivoting arms that go under the front tires and lift them off the ground. The rear tires remain on the ground. This is an
acceptable way to tow your vehicle.
Trying to lift or tow your vehicle by the bumpers will cause serious damage. The
bumpers are not designed to support the vehicle’s weight.
Improper towing such as towing behind a motorhome or other motor vehicle can damage the transmission.
NOTICE
*if equipped
Reserve tank MAX MIN
Page 71 of 75
134 || 135
VOICE COMMAND INDEX
CUSTOMER INFORMATION
Honda Roadside Assistance
24-hour emergency road service is available to you in the United States and Canada
throughout your 3-year/36,000-mile warranty term. Services include jump starting, �at tire and lockout assistance, towing, and more (limitations apply). Call (866) 864-5211 (U.S.) or (800) 465-7587 (Canada).
Warranty Coverages
Below is a brief summary of the warranties covering your new vehicle.
New Vehicle Limited Warranty: Covers your new vehicle, except for the emissions
control system and accessories, against defects in materials and workmanship.
Emissions Control Systems Defects Warranty and Emissions Performance
Warranty: Covers your vehicle’s emissions control systems. Time, mileage, and
coverage are conditional.
Seat Belt Limited Warranty: Covers seat belts that fail to function properly.
Rust Perforation Limited Warranty: Covers all exterior body panels that rust through
from the inside.
Accessory Limited Warranty: Covers Honda accessories.
Replacement Parts Limited Warranty: Covers all Honda replacement parts against
defects in materials and workmanship.
Replacement Battery Limited Warranty: Provides prorated coverage for a
replacement battery purchased from a Honda dealer.
Replacement Muf�er Lifetime Limited Warranty: Covers a replacement muf�er for
the duration of the ownership.
Restrictions and exclusions apply to all these warranties. See the Warranty Manual on the Owner Information CD or at owners.honda.com (U.S.) or myhonda.ca
(Canada) for complete descriptions of each warranty, including time, mileage, and other conditional limitations.
Your vehicle’s original tires are covered by their manufacturer. Tire warranty information can be found on the Owner Information CD or at owners.honda.com
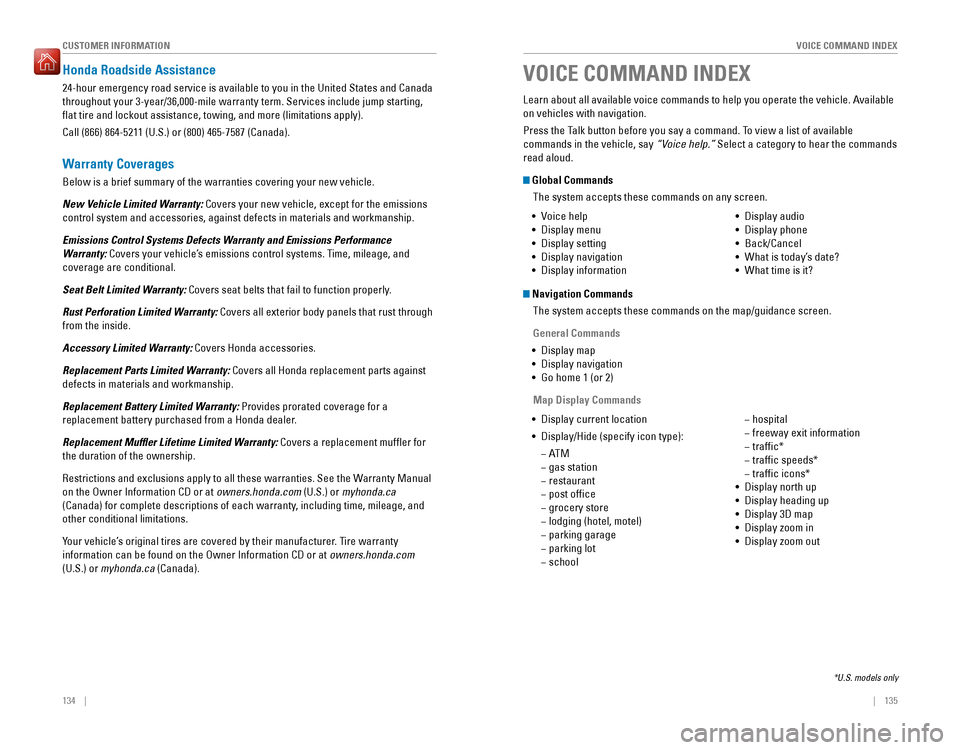
(U.S.) or myhonda.ca (Canada). Learn about all available voice commands to help you operate the vehicle. Available on vehicles with navigation.
Press the Talk button before you say a command. To view a list of available commands in the vehicle, say
“Voice help.” Select a category to hear the commands
read aloud. Global Commands
The system accepts these commands on any screen.
Navigation Commands
The system accepts these commands on the map/guidance screen.
General Commands
• Display map
• Display navigation • Go home 1 (or 2)
Map Display Commands
• Voice help
• Display menu
• Display setting
• Display navigation
• Display information • Display audio
• Display phone
• Back/Cancel•
What is today’s date?
• What time is it?
• Display current location
• Display/Hide (specify icon type): �AT M
� gas station
� restaurant
� post of�ce
� grocery store
� lodging (hotel, motel)
� parking garage
� parking lot
� school � hospital
� freeway exit information
�
trafic*
� trafic speeds*
� trafic icons*
• Display north up
• Display heading up
• Display 3D map
• Display zoom in
• Display zoom out
VOICE COMMAND INDEX
*U.S. models only
Page 72 of 75
136 || 137
VOICE COMMAND INDEX
VOICE COMMAND INDEX
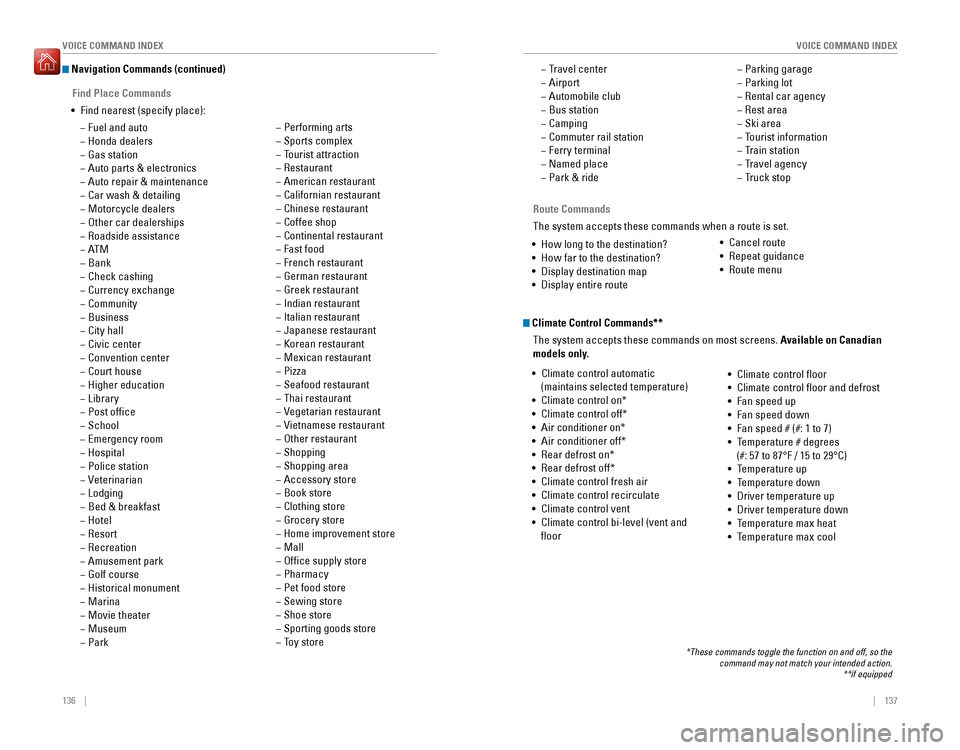
Navigation Commands (continued)
Find Place Commands
• Find nearest (specify place):
� Fuel and auto
� Honda dealers
� Gas station
� Auto parts & electronics
� Auto repair & maintenance
� Car wash & detailing
� Motorcycle dealers
� Other car dealerships
� Roadside assistance
�AT M
� Bank
� Check cashing
� Currency exchange
� Community
� Business
� City hall
� Civic center
� Convention center
� Court house
� Higher education
� Library
� Post of�ce
� School
� Emergency room
� Hospital
� Police station
� Veterinarian
� Lodging
� Bed & breakfast
� Hotel
� Resort
� Recreation
� Amusement park
� Golf course
� Historical monument
� Marina
� Movie theater
� Museum
� Park � Performing arts
� Sports complex
� Tourist attraction
� Restaurant
� American restaurant
� Californian restaurant
� Chinese restaurant
� Coffee shop
� Continental restaurant
� Fast food
� French restaurant
� German restaurant
� Greek restaurant
�
Indian restaurant
� Italian restaurant
� Japanese restaurant
� Korean restaurant
� Mexican restaurant
� Pizza
� Seafood restaurant
� Thai restaurant
� Vegetarian restaurant
� Vietnamese restaurant
� Other restaurant
� Shopping
� Shopping area
� Accessory store
� Book store
� Clothing store
� Grocery store
� Home improvement store
� Mall
� Of�ce supply store
� Pharmacy
� Pet food store
� Sewing store
� Shoe store
� Sporting goods store
� Toy store
Route Commands
The system accepts these commands when a route is set.
• How long to the destination?
• How far to the destination?
• Display destination map
• Display entire route � Travel center
� Airport
�
Automobile club
� Bus station
� Camping
� Commuter rail station
� Ferry terminal
� Named place
� Park & ride � Parking garage
� Parking lot
� Rental car agency
� Rest area
� Ski area
� Tourist information
� Train station
� Travel agency
� Truck stop
Climate Control Commands**
The system accepts these commands on most screens.
Available on Canadian
models only.
• Climate control automatic
(maintains selected temperature)
• Climate control on*
• Climate control off*
• Air conditioner on*
• Air conditioner off*
• Rear defrost on*
• Rear defrost off*• Climate control fresh air
• Climate control recirculate
• Climate control vent
• Climate control bi-level (vent and
�oor •
Climate control �oor
• Climate control �oor and defrost
• Fan speed up
• Fan speed down
• Fan speed # (#: 1 to 7)
• Temperature # degrees
(#: 57 to 87°F / 15 to 29°C)
• Temperature up
• Temperature down
• Driver temperature up
• Driver temperature down• Temperature max heat
• Temperature max cool
*These commands toggle the function on and off, so the command may not match your intended action. **if equipped
•
Cancel route
• Repeat guidance
• Route menu
Page 75 of 75
142 || 143
INDEX
INDEX
Emergency Towing ........................................ 101
Engine and Fuel .............................................. 130
Engine Coolant ................................................118
Engine Oil .........................................................116
ENGINE START/STOP button .........................88
Exterior lights .............................................. 27, 36
Fastening a Seat Belt ........................................ 7
Find Nearest Place .......................................... 80
Find Place Commands ...................................136
Flat Tire ........................................................... 104
Floor Mats ......................................................... 39
Fluids ........................................................... 131
FM/AM Radio .............................................. 51, 58
FM/AM Radio Commands .............................138
Fog lights ..................................................... 27, 36
Foot Brake ......................................................... 90
Frequently Asked Questions ........................132
Front Airbags (SRS) ........................................... 9
Front Door Inner Handle .................................31
Front Seats ........................................................ 38
Front Wipers ..................................................... 37
Fuel Information ............................................... 97
Fuse Locations................................................108 Hang-Up/Back button ..........................66, 69, 76
Hazards ............................................................. 27
HDMI Port ..........................................................47
HDMI Video ....................................................... 65
Headlight-Wiper Integration ..........................37
Head Restraints ................................................ 40
HFL Controls ................................................ 66, 69
High beams ....................................................... 27
High temperature ............................................. 25
Home Address .................................................. 79
HondaLink™ ...................................................... 57
HondaLink™ Assist .......................................... 73
Honda Roadside Assistance ........................134
Hood ........................................................... 115
Ignition ............................................................. 87
Immobilizer ........................................................ 27
Info Commands ...............................................140
Information Display ..........................................28
Instrument Panel .............................................. 24
Condition Indicators .................................... 26
Malfunction Indicators ................................24
On/Off Indicators .......................................... 27
Interior Lights ....................................................35
iPod ®
....................................................... 53, 61
iPod ®
Commands ........................................... 139
Jump Starting ................................................... 98
Key ............................................................. 29
LaneWatch™ .................................................... 94
Lap/Shoulder Seat Belts ...................................5
LATCH-Compatible Child Seat ........................18
Light Bulbs .......................................................130
Lights ............................................................. 35Lock Tab
............................................................. 31
Low fuel ............................................................. 26
Low oil pressure ............................................... 24
Low temperature .............................................. 25
Low tire pressure ............................................. 26
Maintenance...................................................112 Battery ......................................................... 120
Brake Fluid .................................................. 119
Engine Coolant ............................................ 118
Engine Oil ..................................................... 116
Maintenance Minder™ .......................26, 113
Safety Precautions .................................... 112
Service Codes ............................................. 114
Under the Hood .......................................... 115
Window Washer Fluid ...............................119
Wiper Blades .............................................. 121
Making a Call .............................................. 68, 72
Malfunction indicator lamp ............................25
Manual Transmission ...................................... 90
Map Display Commands ...............................135
Map Legend ...................................................... 81
Map Lights.........................................................35Master Door Lock Switch ...............................31
Maximum Load Limit........................................85Mirrors ............................................................. 42
Moonroof ........................................................... 34
Multi-View Rear Camera ................................95
Navigation ......................................................... 76
Detour ............................................................ 82
Display and Controls ....................................77
Entering a Destination .................................79
Find Nearest Place ...................................... 80
Home Address .............................................. 79
Map Legend .................................................. 81
Place Category ............................................. 80
Routing ........................................................... 81
Steering Wheel Controls .............................76
Street Address .............................................. 79
Talk Button Tips ............................................ 78
Traf�c ............................................................. 82
Voice Prompt.................................................78
Navigation Commands ..................................135
One-Touch Turn Signal ....................................36
On-screen Commands...................................140Opening the Hood .......................................... 115
Overheating.....................................................100Paddle Shifters ................................................. 89
Pairing a Phone .......................................... 67, 71
Pandora® .......................................................... 64
Pandora® Commands ...................................139
Parking brake ..............................................26, 91
Passenger Airbag Off Indicator .....................12
Phone ....................................................... 67, 71
Phonebook .................................................. 68, 72
PHONE button ................................................... 66Phone Commands
.......................................... 140
Pick-Up button ............................................ 66, 69
Place Category ................................................. 80
Power Door Mirrors .........................................42
Power Mode ..................................................... 88
Power Moonroof .............................................. 34
Power Windows ............................................... 33
Radio ....................................................... 51, 58
Readiness Codes............................................129 Rear Camera ..................................................... 95
Rear Seats ......................................................... 41
Rearview Mirror ............................................... 42
Rear Wiper ........................................................ 37
Refueling............................................................97Remote Battery Strength ................................98
Remote Transmitter ......................................... 29
Reporting Safety Defects ................................23
Roadside Assistance .....................................134
Route Commands ........................................... 137
Routing ............................................................. 81
Safety Information ............................................. 3
Carbon Monoxide Gas ...................................4
Childproof Door Locks .................................31
Child Safety ................................................... 15
Reporting Safety Defects ............................23
Safety Label Locations ................................22
Safety Messages ........................................... 3
Seat Belts ............................................................ 5
Fastening a Seat Belt ....................................7
Lap/Shoulder Seat Belts ...............................5
Seat Belt Inspection ...................................... 6
Seat belt reminder ....................................... 26
Seat Belt with Detachable Anchor .............8
Shoulder Anchor ............................................ 7
Seat Heaters ..................................................... 44
Seats ............................................................. 38
Front Seats .................................................... 38
Rear Seats ..................................................... 41
Selector knob ....................................................66
Select/reset knob ............................................. 28
Service Codes.................................................114Settings ............................................................. 46
Setting the Clock .............................................. 45
Shifting ............................................................. 88
Shift Lever Does Not Move ............................99
Shoulder Anchor ................................................ 7
Side Airbags ......................................................10
Side Curtain Airbags ........................................10
Siri Eyes Free .................................................... 75
SiriusXM ®
Radio ............................................... 59
SiriusXM ®
Radio Commands ........................138
Smart Entry system .................................... 25, 30
SMS Text Messaging ...................................... 74
Song By Voice™ Commands ........................138
Sound ............................................................. 49Speci�cations
................................................. 130
Speed Dial ................................................... 68, 73
Starter system .................................................. 25
Steering Wheel.................................................43Steering Wheel and Nearby Controls ............1
Steering Wheel Controls...........................48, 76
Street Address..................................................79Supplemental Restraint System (SRS) ...11, 24
Tailgate ....................................................... 30, 32
Talk button ............................................. 66, 69, 76
Talk Button Tips .......................................... 70, 78
Text Messaging ................................................ 74
Tire Information .............................................. 123
DOT Tire Quality Grading ..........................127
Inlation Guidelines .................................... 123
Tire and Loading Information Label ........124
Tire and Wheel Replacement ...................124
Tire Chains ................................................... 125
Tire Identiication Number (TIN) ..............126
Tire Labeling ................................................ 126
Tire Service Life .......................................... 125
Tire Terminology ......................................... 126
Wear Indicators ......................................... 123
Winter Tires ................................................. 125
Tire Pressure Monitoring System (TPMS) ....................................... 25, 102
Tires ........................................................... 130
Touchscreen Operation ..................................56
Towing ........................................................... 101
Traf�c ............................................................. 82
Troubleshooting .............................................. 132
Turn Signal .................................................. 27, 36
Under the Hood .............................................. 115
USB Commands..............................................139USB Flash Drive ..........................................54, 62
USB Port ............................................................ 47
Vehicle ........................................................... 130
Vehicle Controls ............................................... 29
Vehicle Stability Assist (VSA ®
) .......... 25, 27, 92
Visual Index .........................................................1
Voice Command Index ..................................135
Voice Prompt .................................................... 78
Warranty Coverages ..................................... 134
Washer �uid level ............................................ 26
Wear Indicators ............................................. 123
Window Washer Fluid ...................................119
Windows............................................................33
Winter Tires ..................................................... 125
Wiper Blades .................................................. 121
Wiper Operation ............................................... 37