display HONDA HR-V 2018 Navigation Manual (in English)
[x] Cancel search | Manufacturer: HONDA, Model Year: 2018, Model line: HR-V, Model: HONDA HR-V 2018Pages: 263, PDF Size: 56.63 MB
Page 60 of 263
uuMapuMap Legend
58
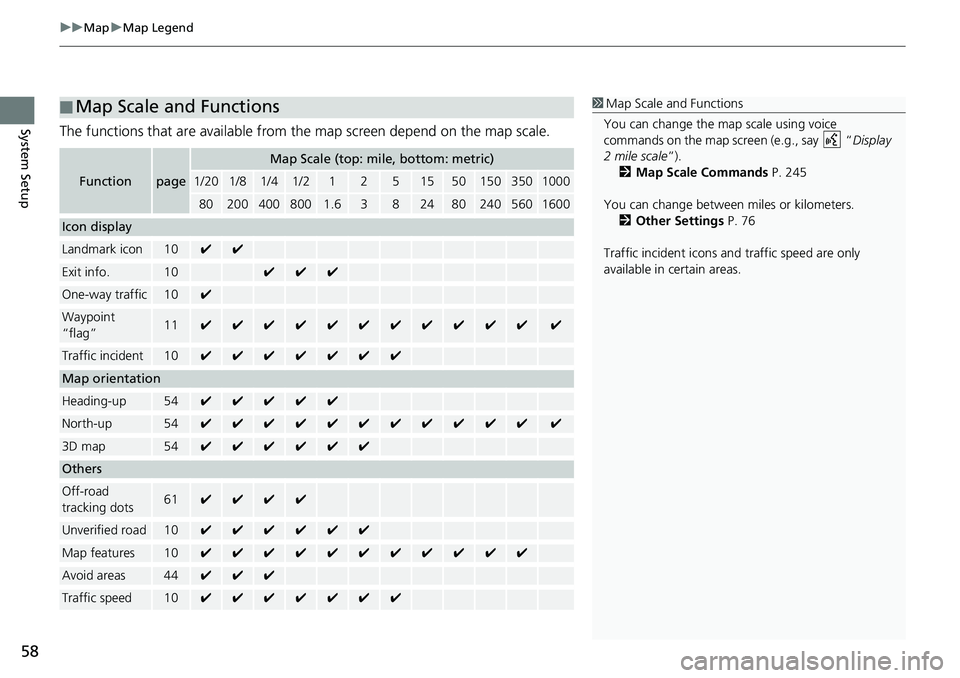
System SetupThe functions that are available from the map screen depend on the map scale.
■Map Scale and Functions
Functionpage
Map Scale (top: mile, bottom: metric)
1/201/81/41/212515501503501000
802004008001.63824802405601600
Icon display
Landmark icon10✔✔
Exit info.10✔✔✔
One-way traffic10✔
Waypoint
“flag”11✔✔✔✔✔✔✔✔✔✔✔✔
Traffic incident10✔✔✔✔✔✔✔
Map orientation
Heading-up54✔✔✔✔✔
North-up54✔✔✔✔✔✔✔✔✔✔✔✔
3D map54✔✔✔✔✔✔
Others
Off-road
tracking dots61✔✔✔✔
Unverified road10✔✔✔✔✔✔
Map features10✔✔✔✔✔✔✔✔✔✔✔
Avoid areas44✔✔✔
Traffic speed10✔✔✔✔✔✔✔
1Map Scale and Functions
You can change the map scale using voice
commands on the map screen (e.g., say “Display
2 mile scale”).
2Map Scale Commands P. 245
You can change between miles or kilometers.
2Other Settings P. 76
Traffic incident icons and traffic speed are only
available in certain areas.
Page 61 of 263
Continued59
uuMapuMap Legend
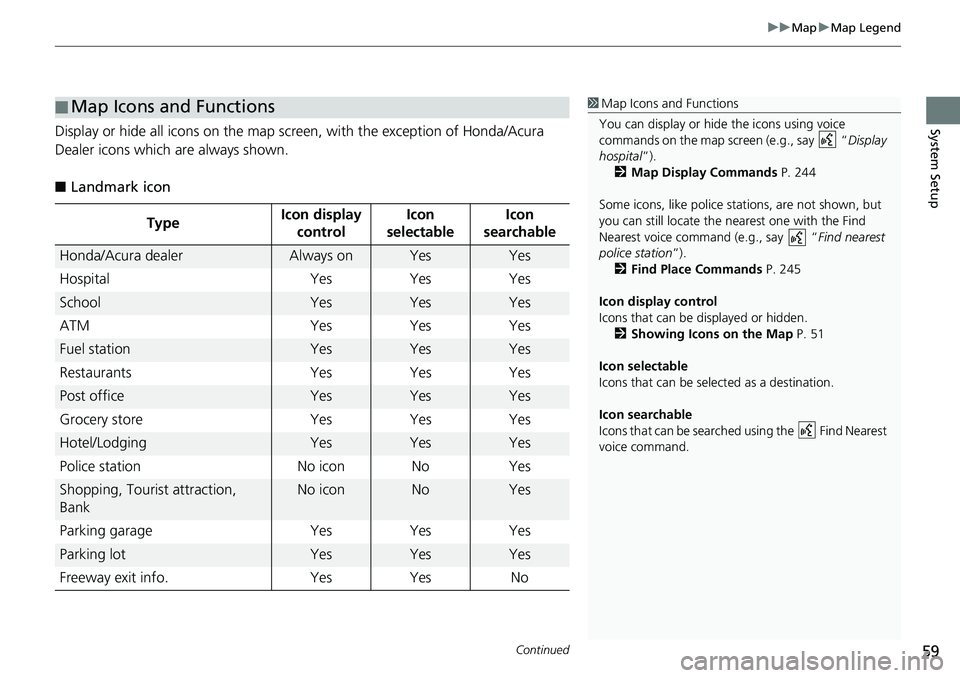
System SetupDisplay or hide all icons on the map screen, with the exception of Honda/Acura
Dealer icons which are always shown.
■Landmark icon
■Map Icons and Functions
TypeIcon display
controlIcon
selectableIcon
searchable
Honda/Acura dealerAlways onYesYes
Hospital Yes Yes Yes
SchoolYesYesYes
ATM Yes Yes Yes
Fuel stationYesYesYes
Restaurants Yes Yes Yes
Post officeYesYesYes
Grocery store Yes Yes Yes
Hotel/LodgingYesYesYes
Police station No icon No Yes
Shopping, Tourist attraction,
BankNo iconNoYes
Parking garage Yes Yes Yes
Parking lotYesYesYes
Freeway exit info. Yes Yes No
1Map Icons and Functions
You can display or hide the icons using voice
commands on the map screen (e.g., say “Display
hospital”).
2Map Display Commands P. 244
Some icons, like police stations, are not shown, but
you can still locate the nearest one with the Find
Nearest voice command (e.g., say “Find nearest
police station”).
2Find Place Commands P. 245
Icon display control
Icons that can be displayed or hidden.
2Showing Icons on the Map P. 51
Icon selectable
Icons that can be selected as a destination.
Icon searchable
Icons that can be searched using the Find Nearest
voice command.
Page 62 of 263
uuMapuMap Legend
60
System Setup
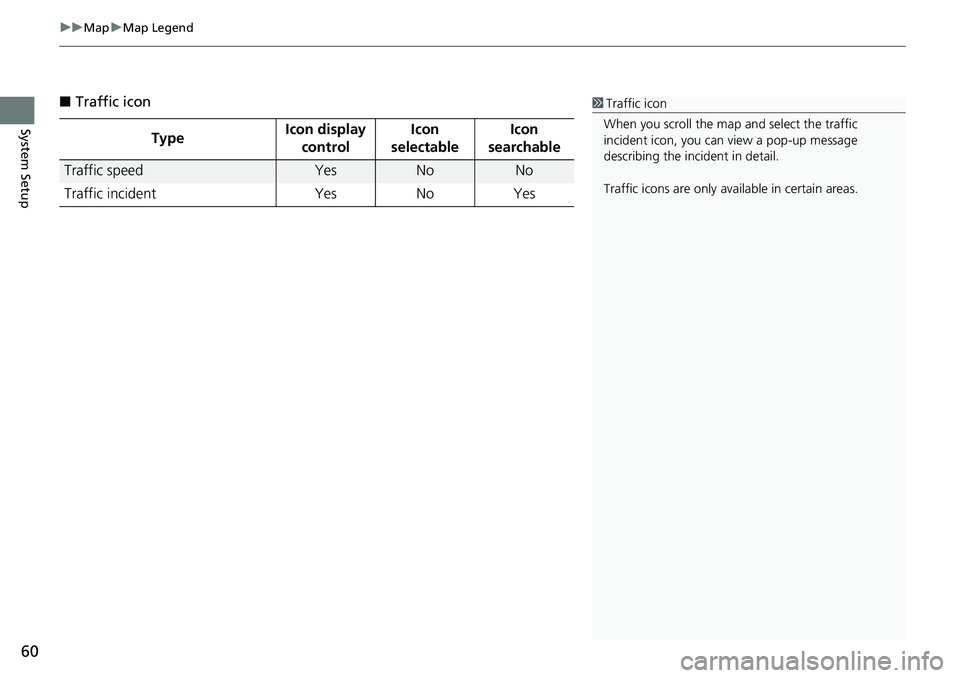
■Traffic icon
TypeIcon display
controlIcon
selectableIcon
searchable
Traffic speedYesNoNo
Traffic incident Yes No Yes
1Traffic icon
When you scroll the map and select the traffic
incident icon, you can view a pop-up message
describing the incident in detail.
Traffic icons are only available in certain areas.
Page 63 of 263
61
uuMapuOff-road Tracking
System Setup
Off-road Tracking
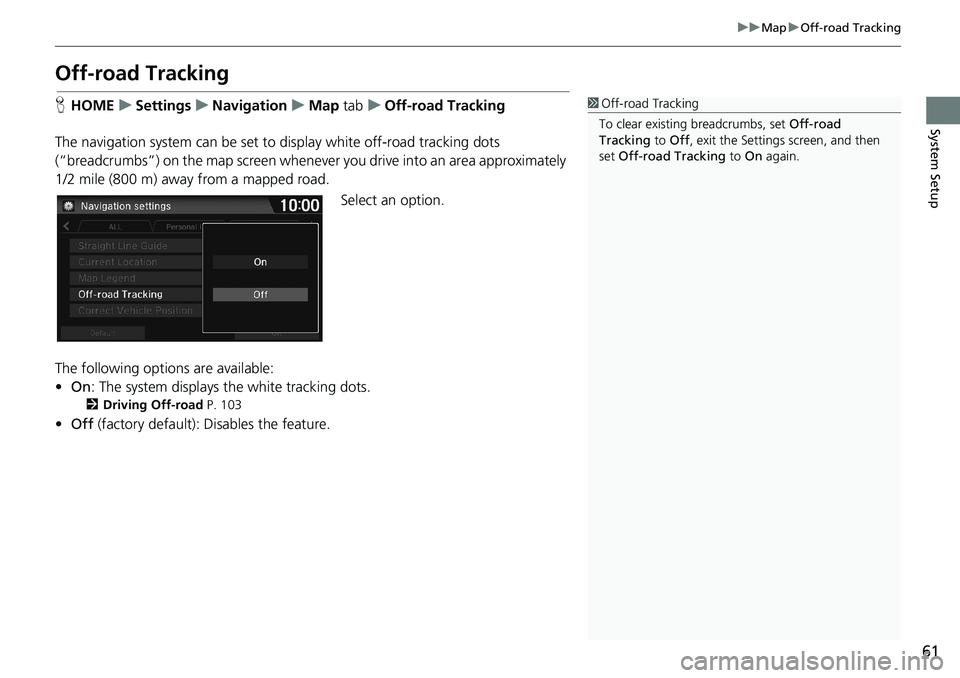
HHOMEuSettingsuNavigationuMap tabuOff-road Tracking
The navigation system can be set to display white off-road tracking dots
(“breadcrumbs”) on the map screen whenever you drive into an area approximately
1/2 mile (800 m) away from a mapped road.
Select an option.
The following options are available:
•On: The system displays the white tracking dots.
2Driving Off-road P. 103
•Off (factory default): Disables the feature.
1Off-road Tracking
To clear existing breadcrumbs, set Off-road
Tracking to Off, exit the Settings screen, and then
set Off-road Tracking to On again.
Page 64 of 263
62
uuMapuCorrect Vehicle Position
System Setup
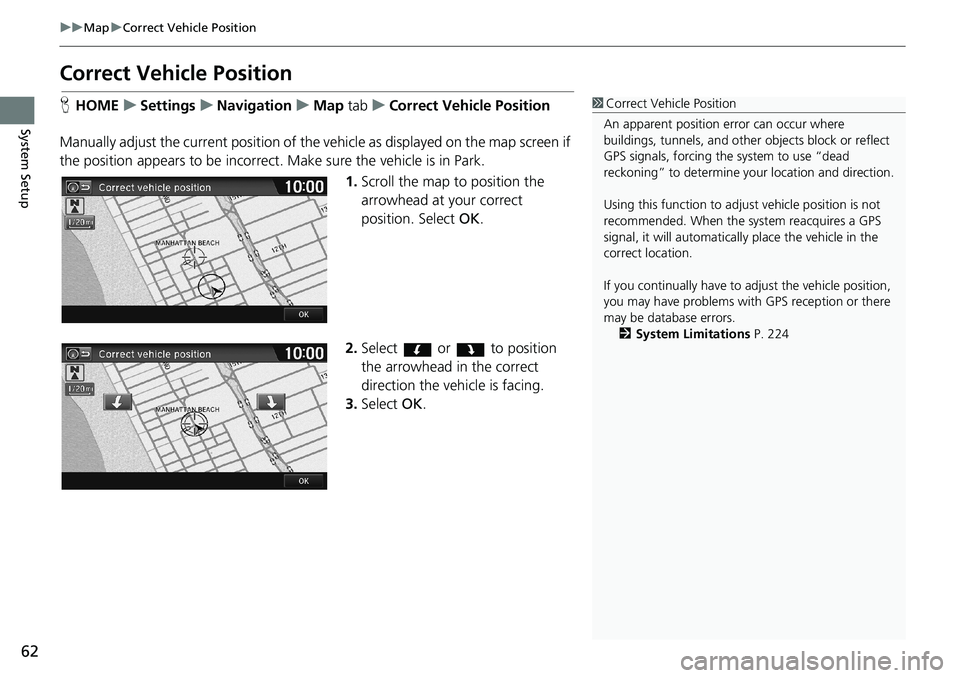
Correct Vehicle Position
HHOMEuSettingsuNavigationuMap tabuCorrect Vehicle Position
Manually adjust the current position of the vehicle as displayed on the map screen if
the position appears to be incorrect. Make sure the vehicle is in Park.
1.Scroll the map to position the
arrowhead at your correct
position. Select OK.
2.Select or to position
the arrowhead in the correct
direction the vehicle is facing.
3.Select OK.1Correct Vehicle Position
An apparent position error can occur where
buildings, tunnels, and other objects block or reflect
GPS signals, forcing the system to use “dead
reckoning” to determine your location and direction.
Using this function to adjust vehicle position is not
recommended. When the system reacquires a GPS
signal, it will automatically place the vehicle in the
correct location.
If you continually have to adjust the vehicle position,
you may have problems with GPS reception or there
may be database errors.
2System Limitations P. 224
Page 65 of 263
63
System Setup
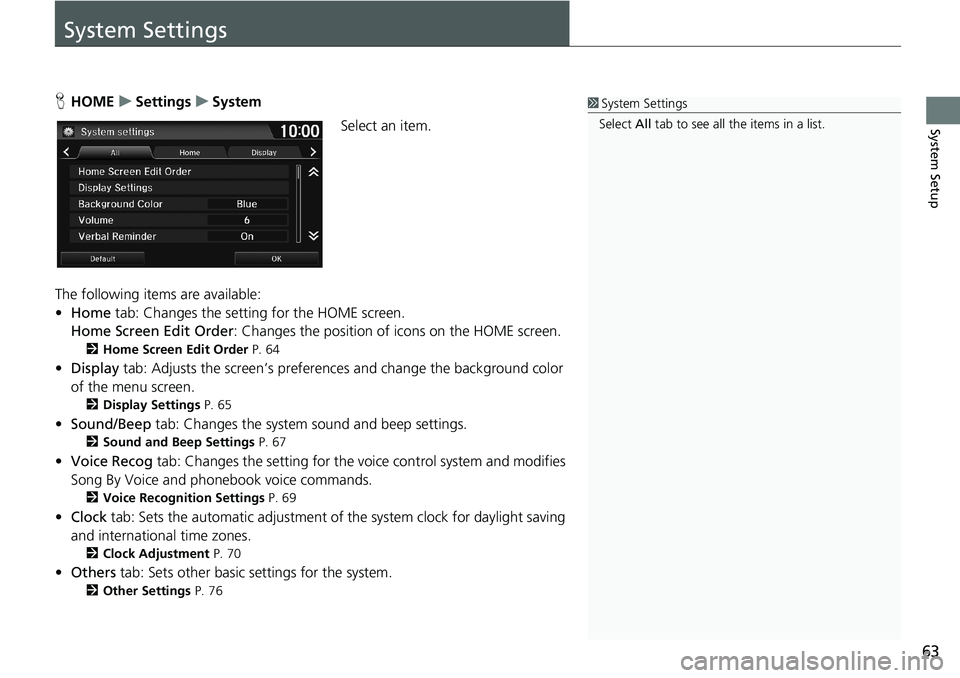
System Settings
HHOMEuSettingsuSystem
Select an item.
The following items are available:
•Home tab: Changes the setting for the HOME screen.
Home Screen Edit Order: Changes the position of icons on the HOME screen.
2Home Screen Edit Order P. 64
•Display tab: Adjusts the screen’s preferences and change the background color
of the menu screen.
2Display Settings P. 65
•Sound/Beep tab: Changes the system sound and beep settings.
2Sound and Beep Settings P. 67
•Voice Recog tab: Changes the setting for the voice control system and modifies
Song By Voice and phonebook voice commands.
2Voice Recognition Settings P. 69
•Clock tab: Sets the automatic adjustment of the system clock for daylight saving
and international time zones.
2Clock Adjustment P. 70
•Others tab: Sets other basic settings for the system.
2Other Settings P. 76
1System Settings
Select All tab to see all the items in a list.
Page 67 of 263
65
System Setup
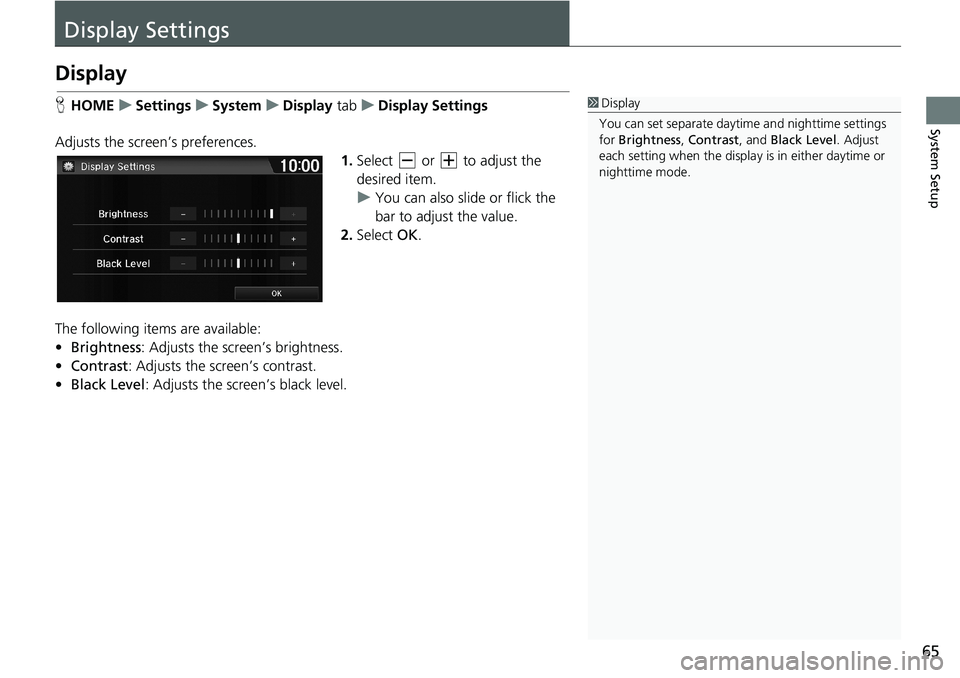
Display Settings
Display
HHOMEuSettingsuSystemuDisplay tabuDisplay Settings
Adjusts the screen’s preferences.
1.Select or to adjust the
desired item.
uYou can also slide or flick the
bar to adjust the value.
2.Select OK.
The following items are available:
•Brightness: Adjusts the screen’s brightness.
•Contrast: Adjusts the screen’s contrast.
•Black Level: Adjusts the screen’s black level.1Display
You can set separate daytime and nighttime settings
for Brightness, Contrast, and Black Level. Adjust
each setting when the display is in either daytime or
nighttime mode.
Page 68 of 263
66
uuDisplay SettingsuBackground Color
System Setup
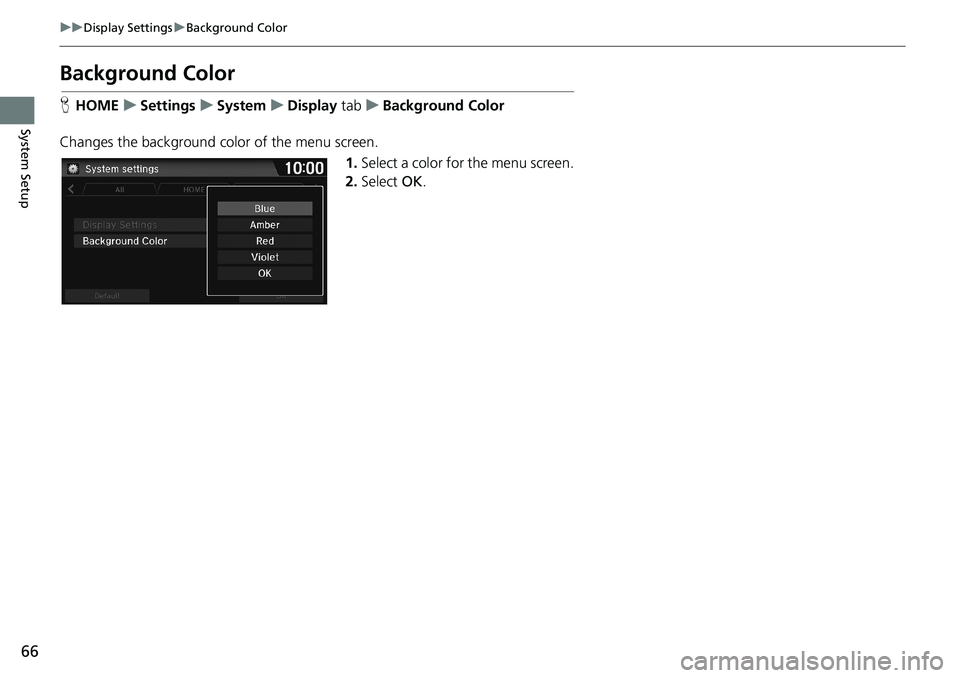
Background Color
HHOMEuSettingsuSystemuDisplay tabuBackground Color
Changes the background color of the menu screen.
1.Select a color for the menu screen.
2.Select OK.
Page 72 of 263
70
System Setup
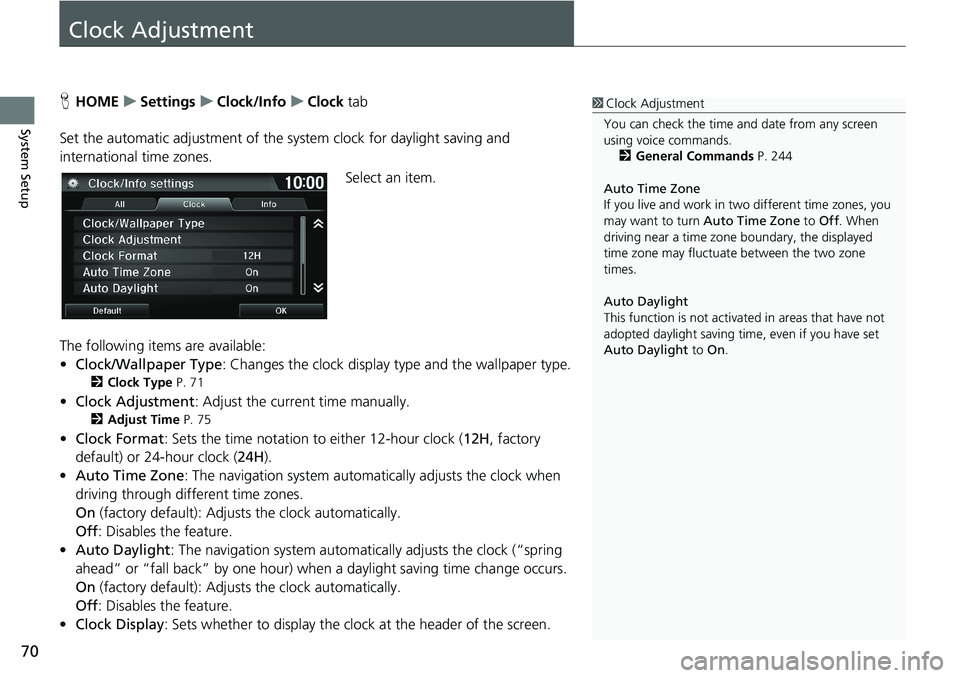
Clock Adjustment
HHOMEuSettingsuClock/InfouClock tab
Set the automatic adjustment of the system clock for daylight saving and
international time zones.
Select an item.
The following items are available:
•Clock/Wallpaper Type: Changes the clock display type and the wallpaper type.
2Clock Type P. 71
•Clock Adjustment: Adjust the current time manually.
2Adjust Time P. 75
•Clock Format: Sets the time notation to either 12-hour clock (12H, factory
default) or 24-hour clock (24H).
•Auto Time Zone: The navigation system automatically adjusts the clock when
driving through different time zones.
On (factory default): Adjusts the clock automatically.
Off: Disables the feature.
•Auto Daylight: The navigation system automatically adjusts the clock (“spring
ahead” or “fall back” by one hour) when a daylight saving time change occurs.
On (factory default): Adjusts the clock automatically.
Off: Disables the feature.
•Clock Display: Sets whether to display the clock at the header of the screen.
1Clock Adjustment
You can check the time and date from any screen
using voice commands.
2General Commands P. 244
Auto Time Zone
If you live and work in two different time zones, you
may want to turn Auto Time Zone to Off. When
driving near a time zone boundary, the displayed
time zone may fluctuate between the two zone
times.
Auto Daylight
This function is not activated in areas that have not
adopted daylight saving time, even if you have set
Auto Daylight to On.
Page 74 of 263
72
uuClock AdjustmentuWallpaper Settings
System Setup
Wallpaper Settings
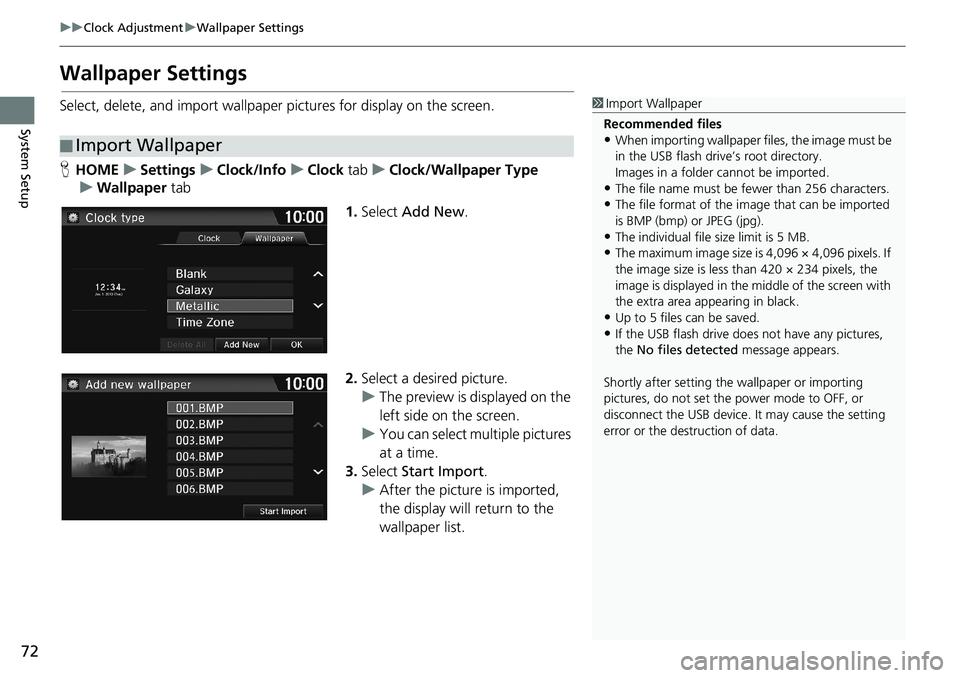
Select, delete, and import wallpaper pictures for display on the screen.
HHOMEuSettingsuClock/InfouClock tabuClock/Wallpaper Type
uWallpaper tab
1.Select Add New.
2.Select a desired picture.
uThe preview is displayed on the
left side on the screen.
uYou can select multiple pictures
at a time.
3.Select Start Import.
uAfter the picture is imported,
the display will return to the
wallpaper list.
■Import Wallpaper
1Import Wallpaper
Recommended files
•When importing wallpaper files, the image must be
in the USB flash drive’s root directory.
Images in a folder cannot be imported.
•The file name must be fewer than 256 characters.•The file format of the image that can be imported
is BMP (bmp) or JPEG (jpg).
•The individual file size limit is 5 MB.•The maximum image size is 4,096 × 4,096 pixels. If
the image size is less than 420 × 234 pixels, the
image is displayed in the middle of the screen with
the extra area appearing in black.
•Up to 5 files can be saved.
•If the USB flash drive does not have any pictures,
the No files detected message appears.
Shortly after setting the wallpaper or importing
pictures, do not set the power mode to OFF, or
disconnect the USB device. It may cause the setting
error or the destruction of data.