buttons HONDA INSIGHT 2010 2.G Navigation Manual
[x] Cancel search | Manufacturer: HONDA, Model Year: 2010, Model line: INSIGHT, Model: HONDA INSIGHT 2010 2.GPages: 153, PDF Size: 5.9 MB
Page 48 of 153
Navigation System47
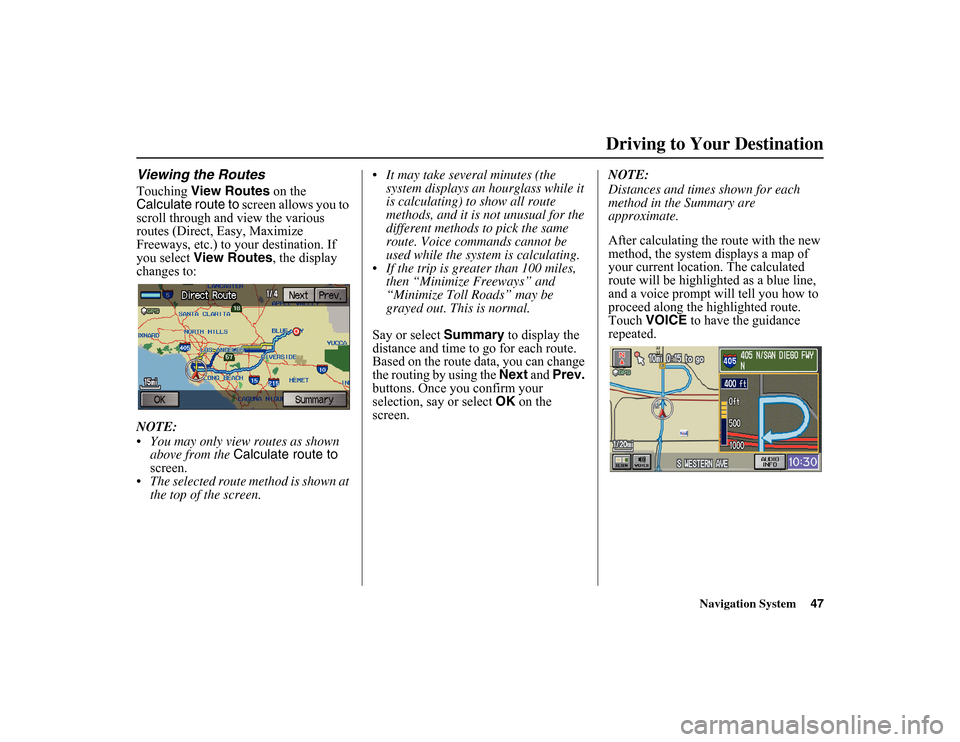
Viewing the RoutesTouching View Routes on the
Calculate route to screen allows you to
scroll through and view the various
routes (Direct, Easy, Maximize
Freeways, etc.) to your destination. If
you select View Routes , the display
changes to:
NOTE:
You may only view routes as shown above from the Calculate route to
screen.
The selected route method is shown at the top of the screen. It may take several minutes (the
system displays an hourglass while it
is calculating) to show all route
methods, and it is not unusual for the
different methods to pick the same
route. Voice commands cannot be
used while the system is calculating.
If the trip is greater than 100 miles, then “Minimize Freeways” and
“Minimize Toll Roads” may be
grayed out. This is normal.
Say or select Summary
to display the
distance and time to go for each route.
Based on the route data, you can change
the routing by using the Next and
Prev.
buttons. Once you confirm your
selection, say or select OK on the
screen. NOTE:
Distances and times shown for each
method in the Summary are
approximate.
After calculating the route with the new
method, the system displays a map of
your current location. The calculated
route will be highlighted as a blue line,
and a voice prompt will tell you how to
proceed along the highlighted route.
Touch
VOICE
to have the guidance
repeated.
Driving to Your Destination
Page 55 of 153
54
Navigation System
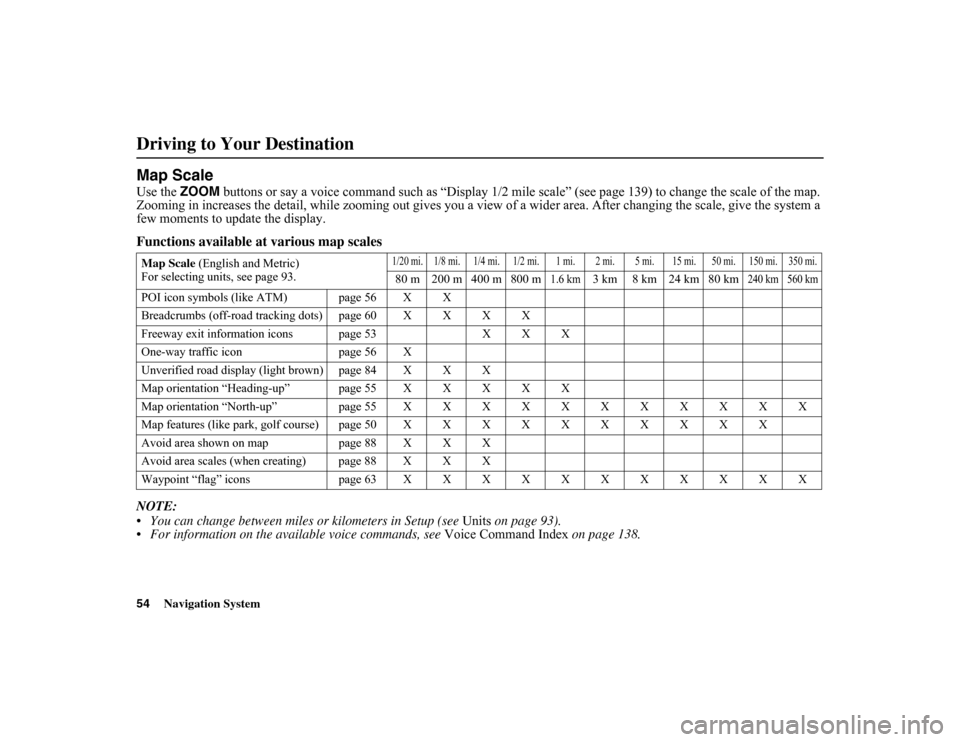
Driving to Your DestinationMap ScaleUse the ZOOM buttons or say a voice command such as “Display 1/2 mile scale” (see pa ge 139) to change the scale of the map.
Zooming in increases the de tail, while zooming out gives you a view of a wide r area. After changing the scale, give the system a
few moments to update the display.Functions available at various map scalesNOTE:
You can change between miles or kilometers in Setup (see Units
on page 93).
For information on the available voice commands, see Voice Command Index
on page 138.Map Scale (English and Metric)
For selecting units, see page 93.
1/20 mi. 1/8 mi. 1/4 mi. 1/2 mi. 1 mi. 2 mi. 5 mi. 15 mi. 50 mi. 150 mi. 350 mi.80 m 200 m 400 m 800 m
1.6 km
3 km 8 km 24 km 80 km
240 km 560 km
POI icon symbols (like ATM) page 56 X X
Breadcrumbs (off-road
tracking dots) page 60 X X X X
Freeway exit information icons page 53 X X X
One-way traffic icon page 56 X
Unverified road display (light brown) page 84 X X X
Map orientation “Heading-up” page 55 X X X X X
Map orientation “North-up” page 55 X X X X X X X X X X X
Map features (like park, golf course)page50XXXX XXXXXX
Avoid area shown on map page 88 X X X
Avoid area scales (when creating) page 88 X X X
Waypoint “flag” icons page63XXXX XXXXXXX
Page 61 of 153
60
Navigation System
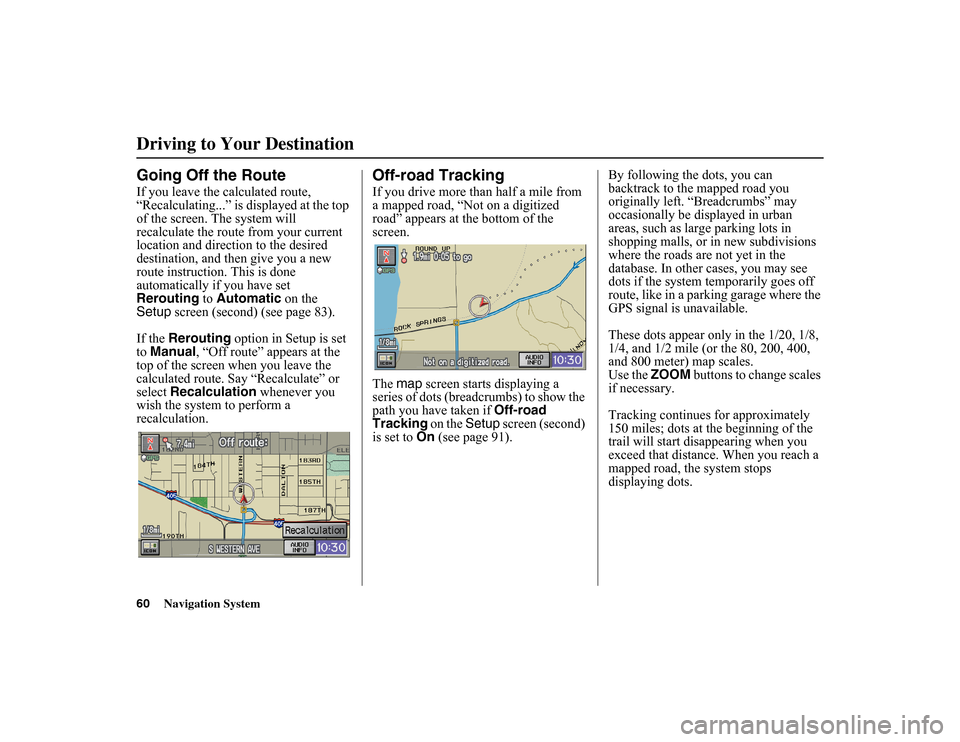
Driving to Your DestinationGoing Off the RouteIf you leave the calculated route,
“Recalculating...” is displayed at the top
of the screen. The system will
recalculate the route from your current
location and direction to the desired
destination, and then give you a new
route instruction. This is done
automatically if you have set
Rerouting to Automatic on the
Setup screen (second) (see page 83).
If the Rerouting option in Setup is set
to Manual , “Off route” appears at the
top of the screen when you leave the
calculated route. Say “Recalculate” or
select Recalculation whenever you
wish the system to perform a
recalculation.
Off-road TrackingIf you drive more than half a mile from
a mapped road, “Not on a digitized
road” appears at the bottom of the
screen.
The map screen starts displaying a
series of dots (breadcrumbs) to show the
path you have taken if Off-road
Tracking on the Setup
screen (second)
is set to On (see page 91). By following the dots, you can
backtrack to the mapped road you
originally left. “Breadcrumbs” may
occasionally be displayed in urban
areas, such as larg
e parking lots in
shopping malls, or in new subdivisions
where the roads are not yet in the
database. In other cases, you may see
dots if the system temporarily goes off
route, like in a parking garage where the
GPS signal is unavailable.
These dots appear only in the 1/20, 1/8,
1/4, and 1/2 mile (or the 80, 200, 400,
and 800 meter) map scales.
Use the ZOOM
buttons to change scales
if necessary.
Tracking continues for approximately
150 miles; dots at the beginning of the
trail will start disappearing when you
exceed that distance. When you reach a
mapped road, the system stops
displaying dots.
Page 72 of 153
Navigation System71
Information Features
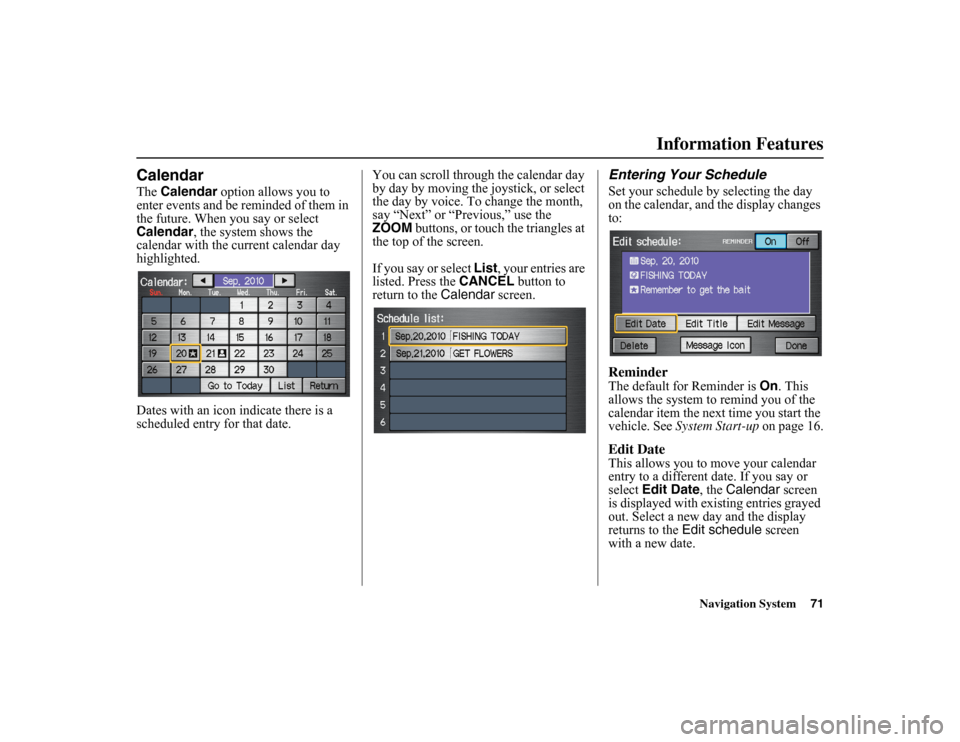
CalendarThe
Calendar option allows you to
enter events and be reminded of them in
the future. When you say or select
Calendar , the system shows the
calendar with the current calendar day
highlighted.
Dates with an icon indicate there is a
scheduled entry for that date. You can scroll through the calendar day
by day by moving the joystick, or select
the day by voice. To change the month,
say “Next” or “Previous,” use the
ZOOM buttons, or touch the triangles at
the top of the screen.
If you say or select
List
, your entries are
listed. Press the CANCEL
button to
return to the Calendar screen.
Entering Your ScheduleSet your schedule by selecting the day
on the calendar, and the display changes
to:ReminderThe default for Reminder is On
. This
allows the system to remind you of the
calendar item the next time you start the
vehicle. See System Start-up on page 16.Edit DateThis allows you to move your calendar
entry to a different date. If you say or
select
Edit Date , the Calendar screen
is displayed with existing entries grayed
out. Select a new day and the display
returns to the Edit schedule screen
with a new date.
Page 89 of 153
88
Navigation System
System SetupEdit Avoid AreaThis function allows you to select areas
you wish to avoid when calculating a
route to your destination. You can select
up to five areas to avoid. You may wish
to set up an “avoid area” to route around
long-term road construction, closures,
or any area you wish to avoid. If you
enter a route that takes you through or
into an “avoid area,” a pop-up box will
warn you that your route takes you into
one of these areas. However, you can
still choose destinations in an avoided
area.
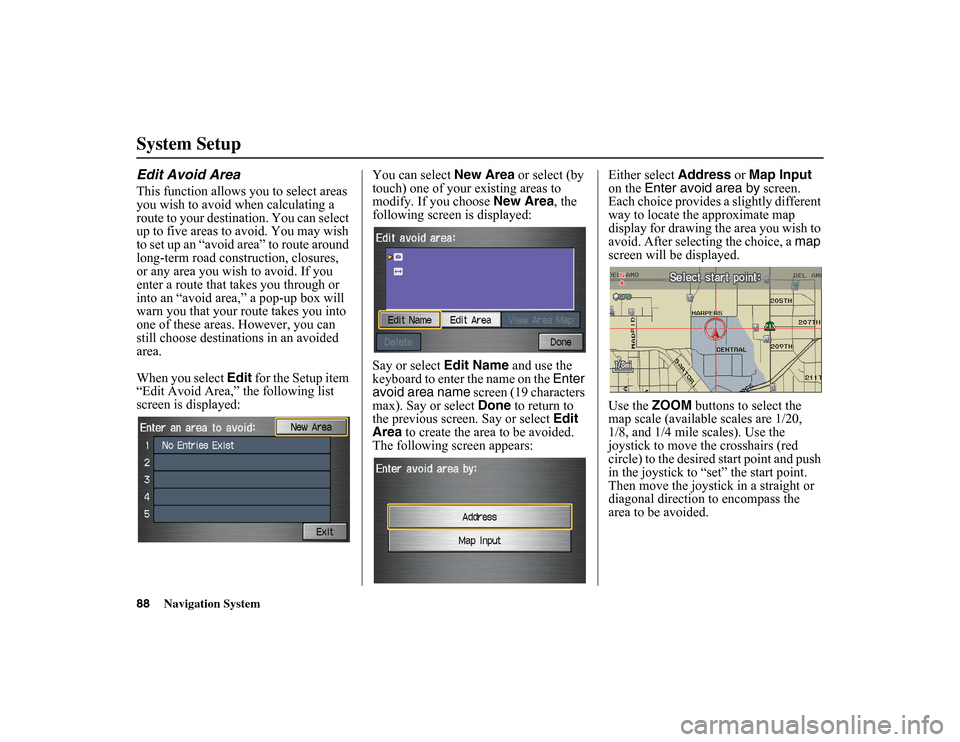
When you select Edit for the Setup item
“Edit Avoid Area,” the following list
screen is displayed: You can select
New Area or select (by
touch) one of your existing areas to
modify. If you choose New Area, the
following screen is displayed:
Say or select Edit Name and use the
keyboard to enter the name on the Enter
avoid area name screen (19 characters
max). Say or select Done to return to
the previous screen. Say or select Edit
Area to create the area to be avoided.
The following screen appears: Either select
Address or Map Input
on the Enter avoid area by screen.
Each choice provides a slightly different
way to locate th e approximate map
display for drawing the area you wish to
avoid. After selecting the choice, a map
screen will be displayed.
Use the ZOOM
buttons to select the
map scale (available scales are 1/20,
1/8, and 1/4 mile scales). Use the
joystick to move the crosshairs (red
circle) to the desired start point and push
in the joystick to “set” the start point.
Then move the joystick in a straight or
diagonal direction to encompass the
area to be avoided.
Page 92 of 153
Navigation System91
System Setup
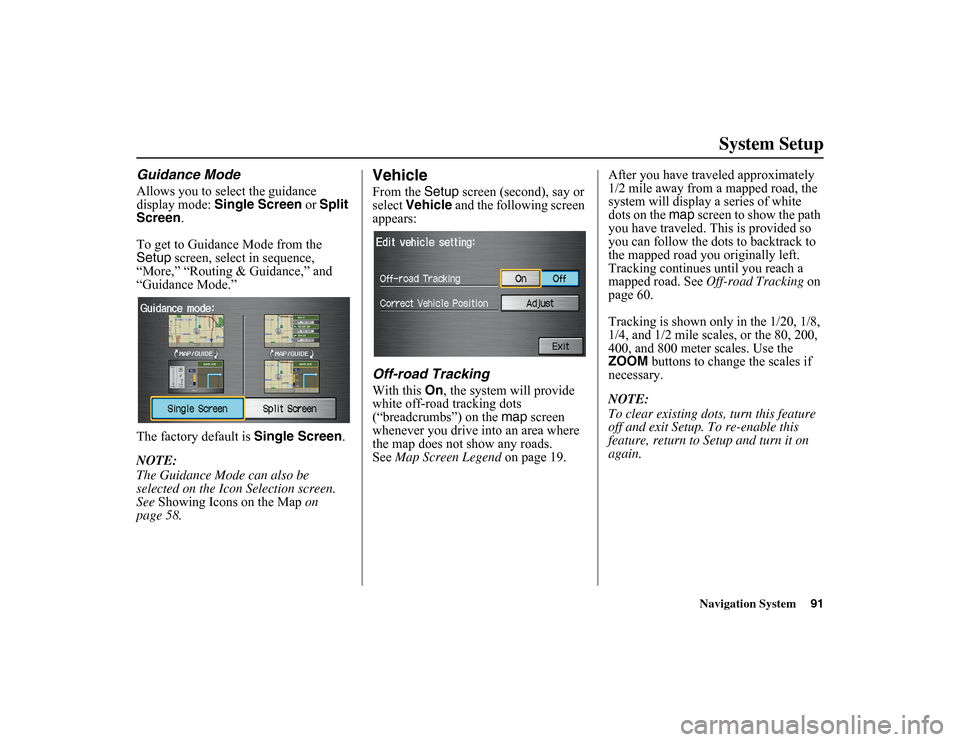
Guidance ModeAllows you to select the guidance
display mode: Single Screen or Split
Screen.
To get to Guidan ce Mode from the
Setup screen, select in sequence,
“More,” “Routing & Guidance,” and
“Guidance Mode.”
The factory default is Single Screen.
NOTE:
The Guidance Mode can also be
selected on the Icon Selection screen.
See Showing Icons on the Map on
page 58.
VehicleFrom the Setup
screen (second), say or
select Vehicle and the following screen
appears:Off-road TrackingWith this On
, the system will provide
white off-road tracking dots
(“breadcrumbs”) on the map screen
whenever you drive into an area where
the map does not show any roads.
See Map Screen Legend on page 19. After you have traveled approximately
1/2 mile away from a mapped road, the
system will display a series of white
dots on the
map
screen to show the path
you have traveled. This is provided so
you can follow the dots to backtrack to
the mapped road y ou originally left.
Tracking continues until you reach a
mapped road. See Off-road Tracking on
page 60.
Tracking is shown only in the 1/20, 1/8,
1/4, and 1/2 mile scales, or the 80, 200,
400, and 800 meter scales. Use the
ZOOM buttons to change the scales if
necessary.
NOTE:
To clear existing dots, turn this feature
off and exit Setup. To re-enable this
feature, return to Setup and turn it on
again.
Page 93 of 153
92
Navigation System
System SetupCorrect Vehicle PositionThe system relies on satellites for
positioning information. Buildings,
tunnels, and other objects can block or
reflect these signals, requiring the
system to use “dead reckoning” to
determine your location and direction.
This can sometimes lead to small errors
in positioning, such as showing you on
an adjacent street.
NOTE:
Using this function to adjust vehicle
position is not recommended. When the
system acquires a GPS signal, it will
automatically place the vehicle in the
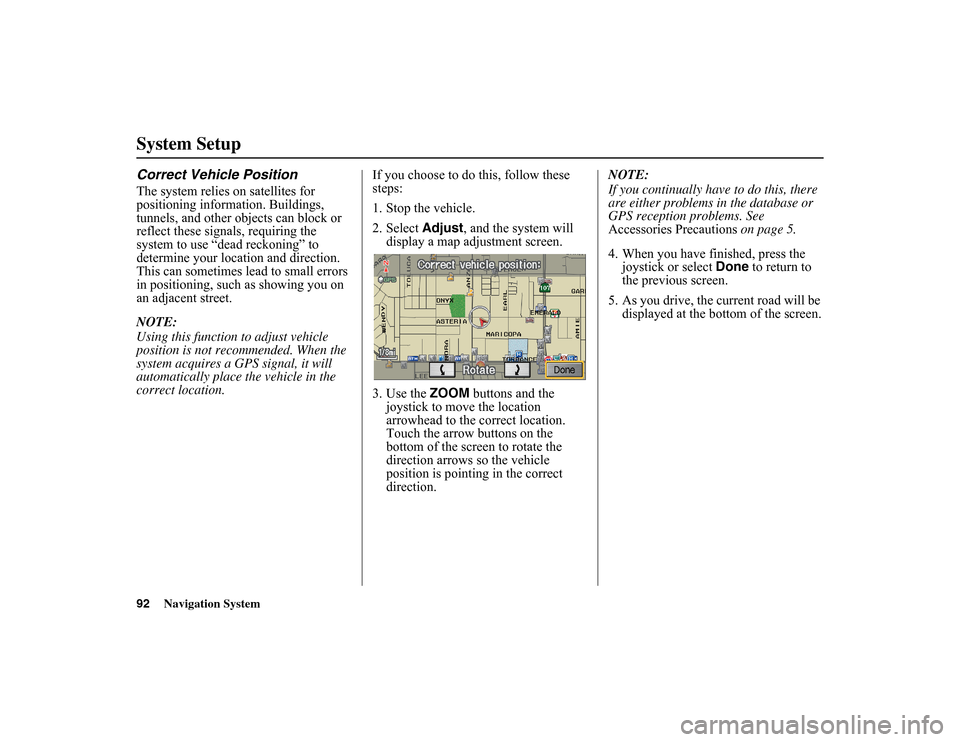
correct location. If you choose to do this, follow these
steps:
1. Stop the vehicle.
2. Select
Adjust
, and the system will
display a map adjustment screen.
3. Use the ZOOM buttons and the
joystick to move the location
arrowhead to the correct location.
Touch the arrow buttons on the
bottom of the screen to rotate the
direction arrows so the vehicle
position is pointing in the correct
direction. NOTE:
If you continually have
to do this, there
are either problems in the database or
GPS reception problems. See
Accessories Precautions on page 5.
4. When you have finished, press the joystick or select Done to return to
the previous screen.
5. As you drive, the current road will be displayed at the bottom of the screen.
Page 107 of 153
106
Navigation System
Customer AssistancePC Card OperationA PC card with WMA or MP3 audio
files can be played through the audio
system and controlled using the
navigation voice control system. PC
card (PCMCIA) adaptors and various
media chips can be purchased at any
computer store. Tested media chips
include Compact Flash and SD media,
up to 2GB. Other media types and
storage capacities may work, but have
not been tested. Hard disc drive type
media are not recommended because
they can fail in a hot vehicle. See the
FAQs section for additional
information.
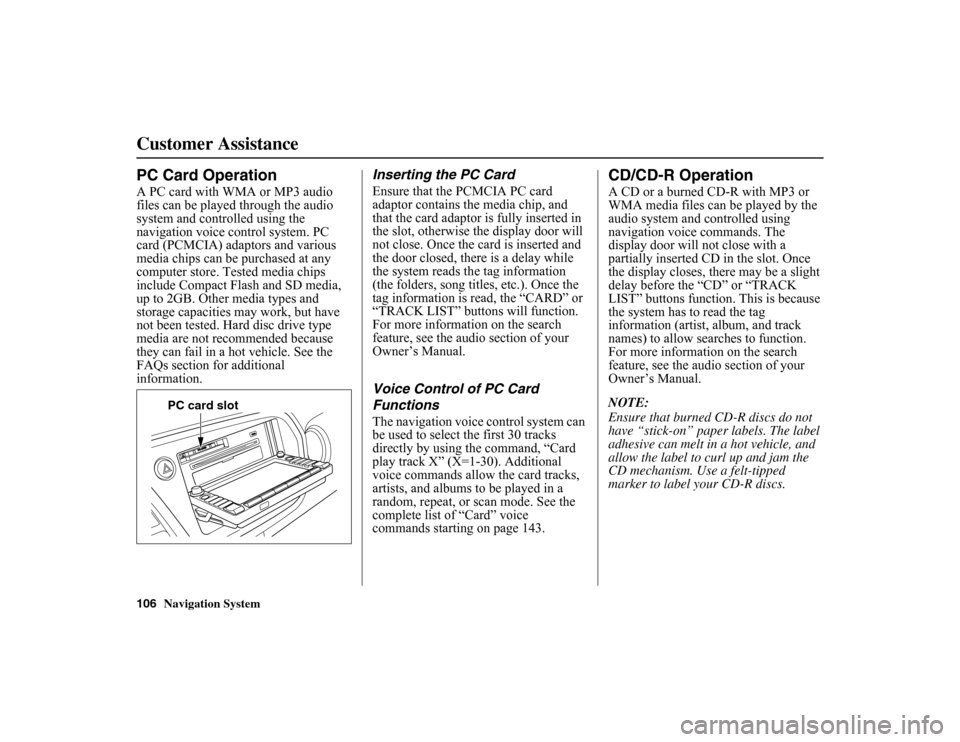
Inserting the PC CardEnsure that the PCMCIA PC card
adaptor contains the media chip, and
that the card adaptor is fully inserted in
the slot, otherwise the display door will
not close. Once the card is inserted and
the door closed, there is a delay while
the system reads the tag information
(the folders, song titles, etc.). Once the
tag information is read, the “CARD” or
“TRACK LIST” buttons will function.
For more information on the search
feature, see the audio section of your
Owner’s Manual.Voice Control of PC Card
FunctionsThe navigation voice control system can
be used to select the first 30 tracks
directly by using the command, “Card
play track X” (X=1-30). Additional
voice commands allow the card tracks,
artists, and albums to be played in a
random, repeat, or scan mode. See the
complete list of “Card” voice
commands starting on page 143.
CD/CD-R OperationA CD or a burned CD-R with MP3 or
WMA media files can be played by the
audio system and controlled using
navigation voice commands. The
display door will not close with a
partially inserted CD in the slot. Once
the display closes, there may be a slight
delay before the “CD” or “TRACK
LIST” buttons function. This is because
the system has to read the tag
information (artist, album, and track
names) to allow se arches to function.
For more information on the search
feature, see the audio section of your
Owner’s Manual.
NOTE:
Ensure that burned CD-R discs do not
have “stick-on” paper labels. The label
adhesive can melt in a hot vehicle, and
allow the label to cu rl up and jam the
CD mechanism. Use a felt-tipped
marker to label your CD-R discs.
PC card slot
Page 134 of 153
Navigation System133Troubleshooting
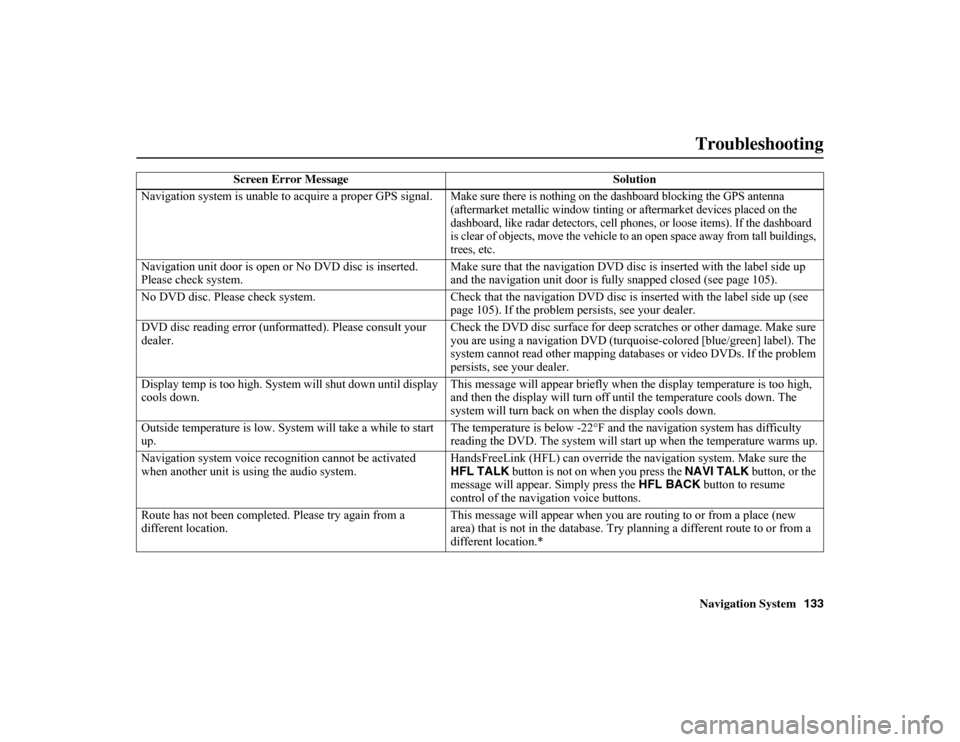
Screen Error Message Solution
Navigation system is unable to acquire a proper GPS signal.
Make sure there is nothing on the dashboard blocking the GPS antenna
(aftermarket metallic window tinting or aftermarket devices placed on the
dashboard, like radar detectors, cell phones, or loose items). If the dashboa rd
is clear of objects, move the vehicle to an open space away from tall buildings,
trees, etc.
Navigation unit door is open or No DVD disc is inserted.
Please check system. Make sure that the navigation DVD disc is inserted with the label side up
and the navigation unit door is fully snapped closed (see page 105).
No DVD disc. Please check system. Check that the naviga
tion DVD disc is inserted with the label side up (see
page 105). If the problem persists, see your dealer.
DVD disc reading error (unformatted). Please consult your
dealer. Check the DVD disc surface for deep scratches or other damage. Make sure
you are using a navigation DVD (turquoise-colored [blue/green] label). The
system cannot read other mapping databases or video DVDs. If the
problem
persists, see your dealer.
Display temp is too high. System will shut down until display
cools down. This message will appear briefly when the display temperature is too
high,
and then the display will turn off until the temperature cools down. The
system will turn back on when the display cools down.
Outside temperature is low. Syst em will take a while to start
up. The temperature is below -22°F and the navigation system has diffi
culty
reading the DVD. The system will st art up when the temperature warms up.
Navigation system voice recognition cannot be activated
when another unit is using the audio system. HandsFreeLink (HFL) can override th
e navigation system. Make sure the
HFL TALK button is not on when you press the NAVI TALK button, or the
message will appear. Simply press the HFL BACK button to resume
control of the navigation voice buttons.
Route has not been completed. Please try again from a
different location. This message will appear when you ar
e routing to or from a place (new
area) that is not in the database. Try pl anning a different route to or from a
different location.*
Page 138 of 153
Navigation System137
Glossary
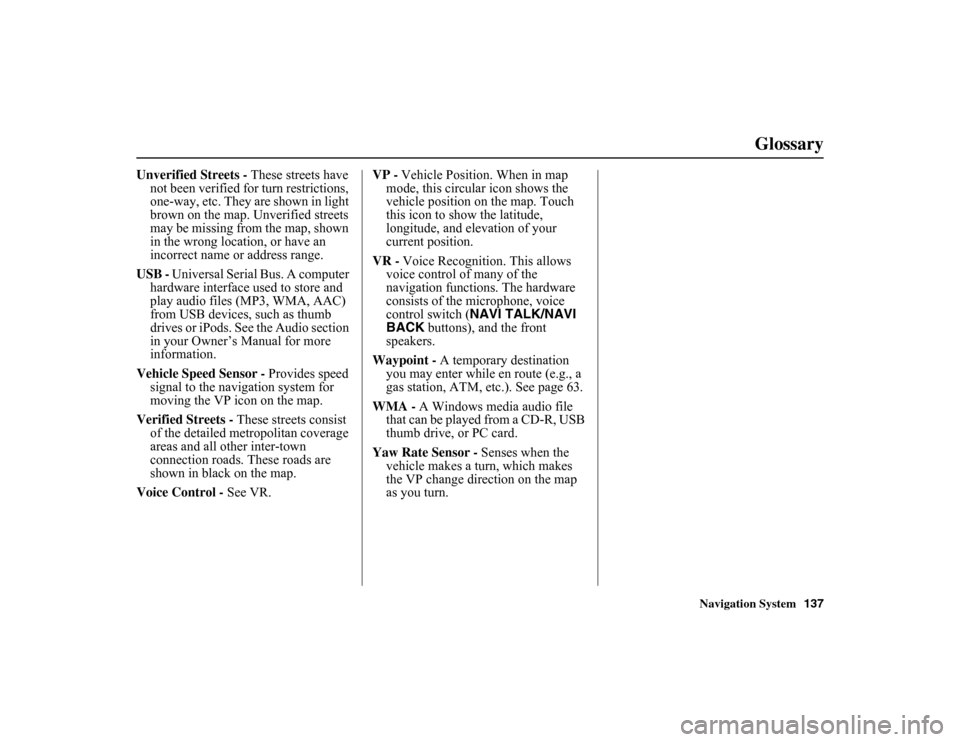
Unverified Streets - These streets have
not been verified fo r turn restrictions,
one-way, etc. They are shown in light
brown on the map. Unverified streets
may be missing from the map, shown
in the wrong location, or have an
incorrect name or address range.
USB - Universal Serial Bus. A computer
hardware interface used to store and
play audio files (MP3, WMA, AAC)
from USB devices, such as thumb
drives or iPods. See the Audio section
in your Owner’s Manual for more
information.
Vehicle Speed Sensor - Provides speed
signal to the navigation system for
moving the VP icon on the map.
Verified Streets - These streets consist
of the detailed metr opolitan coverage
areas and all other inter-town
connection roads. These roads are
shown in black on the map.
Voice Control - See VR. VP -
Vehicle Position. When in map
mode, this circul ar icon shows the
vehicle position on the map. Touch
this icon to show the latitude,
longitude, and elevation of your
current position.
VR - Voice Recognition. This allows
voice control of many of the
navigation functions. The hardware
consists of the microphone, voice
control switch ( NAVI TALK/NAVI
BACK buttons), and the front
speakers.
Waypoint - A temporary destination
you may enter while en route (e.g., a
gas station, ATM, etc.). See page 63.
WMA - A Windows media audio file that can be played from a CD-R, USB
thumb drive, or PC card.
Yaw Rate Sensor - Senses when the
vehicle makes a turn, which makes
the VP change direction on the map
as you turn.