light HONDA INSIGHT 2010 2.G Navigation Manual
[x] Cancel search | Manufacturer: HONDA, Model Year: 2010, Model line: INSIGHT, Model: HONDA INSIGHT 2010 2.GPages: 153, PDF Size: 5.9 MB
Page 7 of 153
6
Navigation System
While driving, do not look at the screen
or operate the system controls for more
than a second or so at a time, and only
after deciding you can do so safely. Pull
to the side of the road if you need more
time to look at the screen or operate the
controls. The navigation system is designed to
provide route information to help you
reach your destinatio
n. However, this
route guidance may sometimes conflict
with current road conditions such as
street closures, road construction,
detours, and out-of-date map data.
Additionally, the system itself has
certain limitations (see page 99).
Therefore, you must verify the audio
and visual route information provided
by the system by carefully observing the
roadway, signs and signals, etc. If you
are unsure, proceed with caution.
Always use your own good judgment,
and obey traffic laws while driving.
Map OverviewCurrent StreetThe current street on which your vehicle
is appears at the bottom of the map
screen (see page 19). A message saying “Not on a digitized road” may appear
instead when you driv e half a mile away
from a mapped road. For more details,
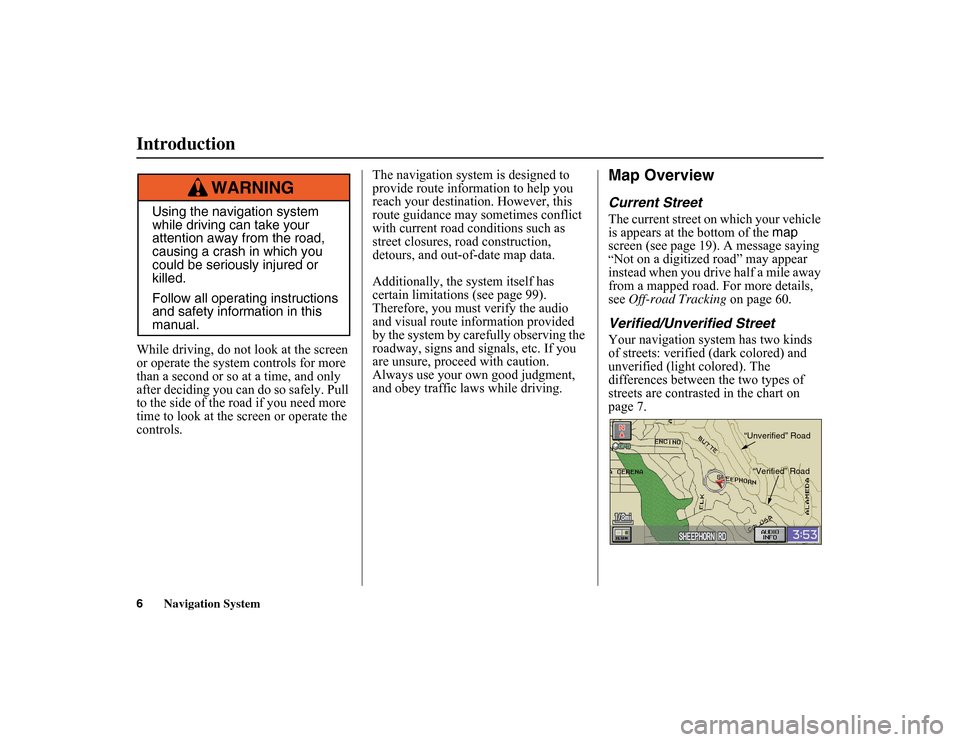
see Off-road Tracking on page 60.Verified/Unverified StreetYour navigation system has two kinds
of streets: verified (dark colored) and
unverified (light colored). The
differences between the two types of
streets are contrasted in the chart on
page 7.
Using the navigation system
while driving can take your
attention away from the road,
causing a crash in which you
could be seriously injured or
killed.
Follow all operating instructions
and safety information in this
manual.
WARNING
“Unverified” Road
“Verified” Road
Introduction
Page 8 of 153
Navigation System7
Introduction
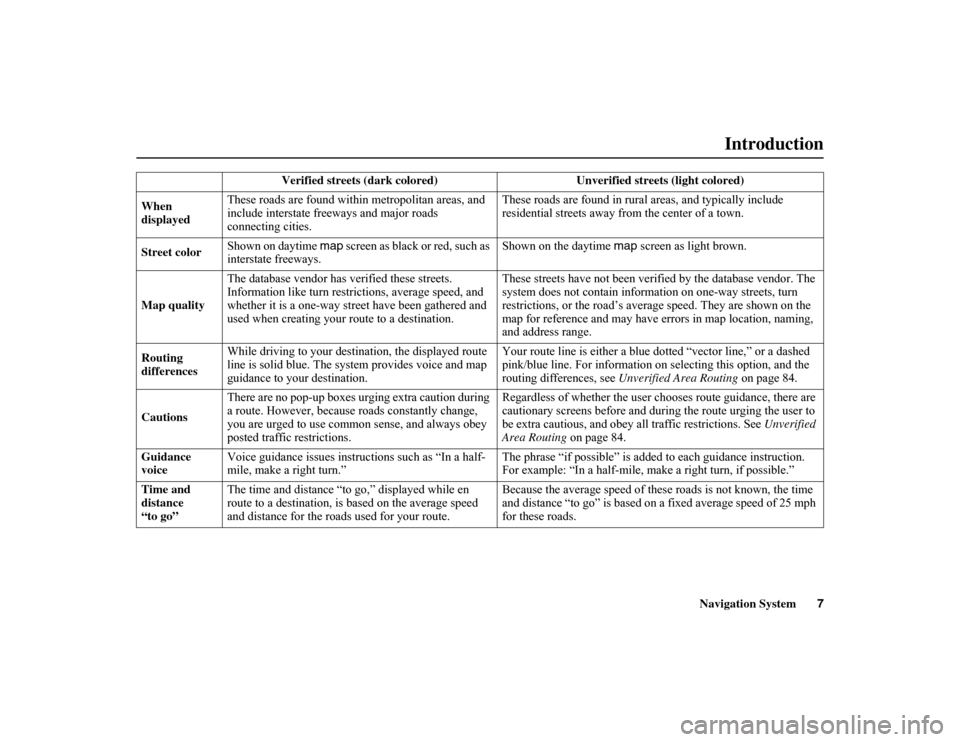
Verified streets (dark colored) Un
verified streets (light colored)
When
displayed These roads are found within
metropolitan areas, and
include interstate fr eeways and major roads
connecting cities. These roads are found in rura
l areas, and typically include
residential streets away fr om the center of a town.
Street color Shown on daytime map
screen as black or red, such as
interstate freeways. Shown on the daytime
map screen as light brown.
Map quality The database vendor has verified these streets.
Information like turn restrictions, average speed, and
whether it is a one-way str
eet have been gathered and
used when creating your route to a destination. These streets have not been verifi
ed by the database vendor. The
system does not contain information on one-way streets, turn
restrictions, or the road’s aver age speed. They are shown on the
map for reference and may have errors in map location, naming,
and address range.
Routing
differences While driving to your destination, the displayed route
line is solid blue. The system provides voice and map
guidance to your destination. Your route line is either a blue
dotted “vector line,” or a dashed
pink/blue line. For information on selecting this option, and the
routing differences, see Unverified Area Routing on page 84.
Cautions There are no pop-up boxes urging extra caution during
a route. However, because
roads constantly change,
you are urged to use common sense, and always obey
posted traffic restrictions. Regardless of whether the user ch
ooses route guidance, there are
cautionary screens before and durin g the route urging the user to
be extra cautious, and obey a ll traffic restrictions. See Unverified
Area Routing on page 84.
Guidance
voice Voice guidance issues instruc
tions such as “In a half-
mile, make a right turn.” The phrase “if possible” is adde
d to each guidance instruction.
For example: “In a half-mile, ma ke a right turn, if possible.”
Time and
distance
“to go” The time and distance “to go,” displayed while en
route to a destination, is
based on the average speed
and distance for the road s used for your route. Because the average speed of thes
e roads is not known, the time
and distance “to go” is based on a fixed average speed of 25 mph
for these roads.
Page 12 of 153
Navigation System11Getting Started
Joystick/ENT button
Moves left, right, up, and down to move
the highlighting around the display, to
scroll through lists, or to look around a
displayed map. After making a selection
in a menu or list, push in on the joystick
to enter the selection into the system.
In almost all cases, you can enter a
selection into the sy stem by using the
voice control system, highlighting the
item and pushing in on the joystick, or
by touching the appropriate item you
wish to select.
INFO
button
Displays the scre en for selecting
Cellular Phonebook , Voice
Command Help , Map Legend,
Calendar , and
Calculator . See
page 69.
MAP/GUIDE
button
Displays the map. When en route,
switches between the map
, guidance ,
and Direction list screens. See page 19
or 50.
MENU button
Displays the Enter destination by
screen. When en route, displays the
Change route by screen. See page 22. SETUP
button
Displays the Setup
screens where you
can customize information in the
system. See page 74.
CANCEL button
Cancels the current screen and returns to
the previous screen display.
NOTE:
The NAVI BACK button on the steering
wheel performs the same basic function.
ZOOM (IN)/ (OUT) buttons
Press ZOOM to zoom in (to show
more detail), or ZOOM to zoom out
(to show more area and less detail)
while a map screen is displayed.
ZOOM IN reduces the scale (showing
less area with greater detail). ZOOM
OUT increases the scale (showing more
area with less detail).
AUDIO
button
Press to display the audio screen.
For information on audio system
features, see the Audio
section of your
Owner’s Manual. Other buttons
See the
Audio
section of your Owner’s
Manual.
Screen
All selections and instructions are
displayed on the screen. In addition, the
display is a “touch screen” – you can
enter information in to the system by
touching the images (icons) on the
screen with your finger.
For example, if you need to enter a
street name, a keyboard will be
displayed. You can type in the street
name by saying or selecting the
individual characters on the screen.
Clean the screen with a soft damp cloth.
You may use a mild cleaner intended for
use on liquid crystal displays (LCDs).
Harsher chemicals may damage the
screen.
Page 13 of 153
12
Navigation System
Getting StartedVoice Control BasicsYour vehicle has a voice control system
that allows hands-free operation of most
of the navigation system functions. You
can also control the audio and climate
control system. The voice control
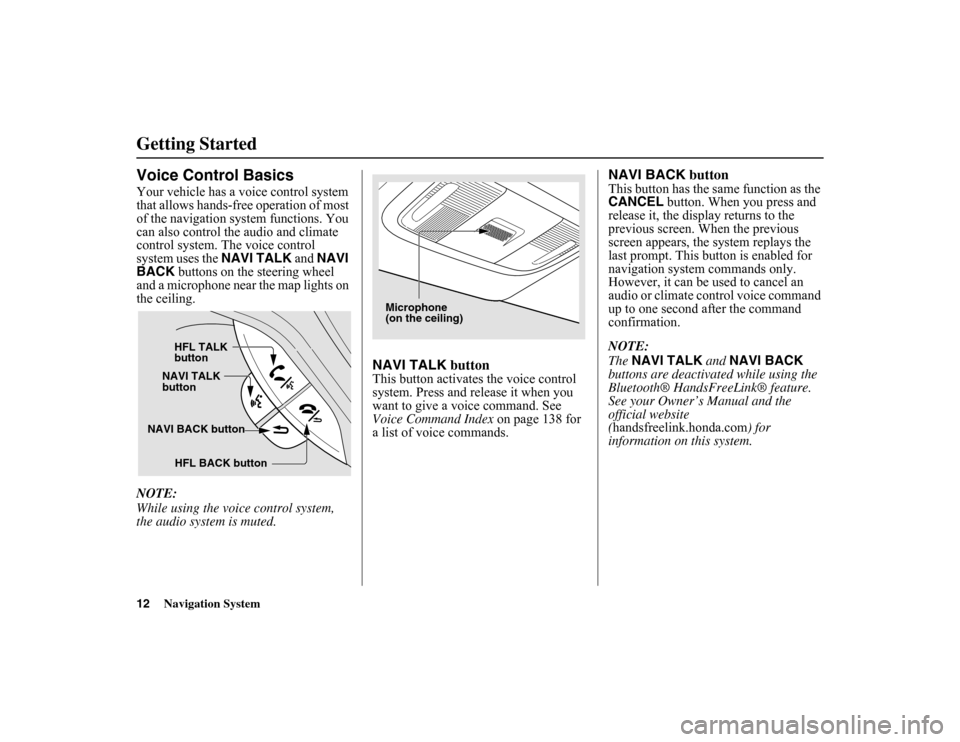
system uses the NAVI TALK
and NAVI
BACK buttons on the steering wheel
and a microphone near the map lights on
the ceiling.
NOTE:
While using the voic e control system,
the audio system is muted.
NAVI TALK buttonThis button activates the voice control
system. Press and release it when you
want to give a vo ice command. See
Voice Command Index on page 138 for
a list of voice commands.
NAVI BACK buttonThis button has the same function as the
CANCEL button. When you press and
release it, the display returns to the
previous screen. When the previous
screen appears, the system replays the
last prompt. This button is enabled for
navigation system commands only.
However, it can be used to cancel an
audio or climate control voice command
up to one second after the command
confirmation.
NOTE:
The NAVI TALK and
NAVI BACK
buttons are deactivat ed while using the
Bluetooth® HandsFreeLink® feature.
See your Owner’s Manual and the
official website
(handsfreelink.honda.com ) for
information on this system.
NAVI BACK button HFL TALK
button
NAVI TALK
button
HFL BACK button
Microphone
(on the ceiling)
Page 15 of 153
14
Navigation System
Getting Started• If more than one person is speaking at the same time, the system may
misinterpret your command.
• After pressing and releasing the NAVI TALK button, wait for the
beep, then give a voice command.
• Give a voice command in a clear, natural speaking voice without
pausing between words.
• If the system cannot recognize your command because of background
noise, speak louder.
• If you are still having trouble with the voice control system, refer to Voice
Command Help on the
Information screen.
Selecting an Item (Button)
on the ScreenOn most screens, there are items that
can be selected (like buttons with titles
such as OK or Return ). To select an
item on any screen, do one of the
following:
• Use the voice control system and say
the name of the desired item. Almost
all selectable items on the screen,
including some listed items, are
recognized by the voice control
system.
• Touch the desired item on the screen.
• Move the highlighting to the desired item with the joystic k, then push in
on the joystick.
Tip:
If items are grayed out, this means that
they cannot be selected.
Selecting an Item in a ListTo scroll through a list, do one of the
following:
• Use the joystick to scroll through the list item by item.
• Use the voice control system and say “Next” or “Previous” or use the “on-
screen” scroll up or down buttons, or
the ZOOM buttons to scroll through
the list page by page.
If you cannot find the desired name, or
have made an error, return to the
previous screen by pressing the
CANCEL or the
NAVI BACK button.
To select the desired item in the list, do
one of the following:
• Use the voice control system, and say the item number of the desired item.
• Touch the item on the screen.
• Use the joystick to move the highlighting to the it em, then push in
on the joystick.
Page 16 of 153
Navigation System15Getting Started
Using the On-screen
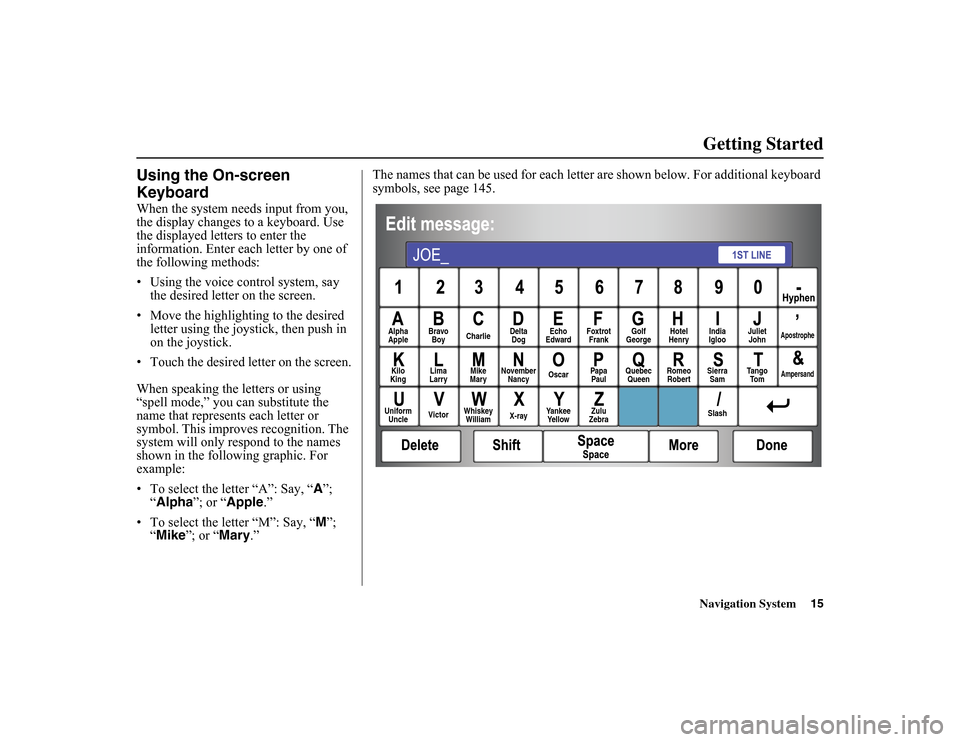
KeyboardWhen the system needs input from you,
the display changes to a keyboard. Use
the displayed letters to enter the
information. Enter each letter by one of
the following methods:
• Using the voice control system, say
the desired letter on the screen.
• Move the highlighting to the desired letter using the joysti ck, then push in
on the joystick.
• Touch the desired letter on the screen.
When speaking the letters or using
“spell mode,” you can substitute the
name that represents each letter or
symbol. This improv es recognition. The
system will only r espond to the names
shown in the following graphic. For
example:
• To select the letter “A”: Say, “ A
”;
“ Alpha ”; or “Apple
.”
• To select the letter “M”: Say, “ M
”;
“ Mike ”; or “ Mary
.” The names that can be used for each letter
are shown below. For additional keyboard
symbols, see page 145.
Alpha
Apple Bravo
Boy Charlie Delta
Dog Echo
Edward Foxtrot
Frank Golf
George Hotel
Henry Juliet
John
Apostrophe
Kilo
King Lima
Larry Mike
Mary November
Nancy Oscar
Papa
Paul Quebec
Queen Romeo
Robert Sierra
Sam Ta n g o
To m
Ampersand
Uniform Uncle Victor
Whiskey
William X-rayYankee
Ye l l o w Zulu
Zebra SlashIndia
Igloo
Page 48 of 153
Navigation System47
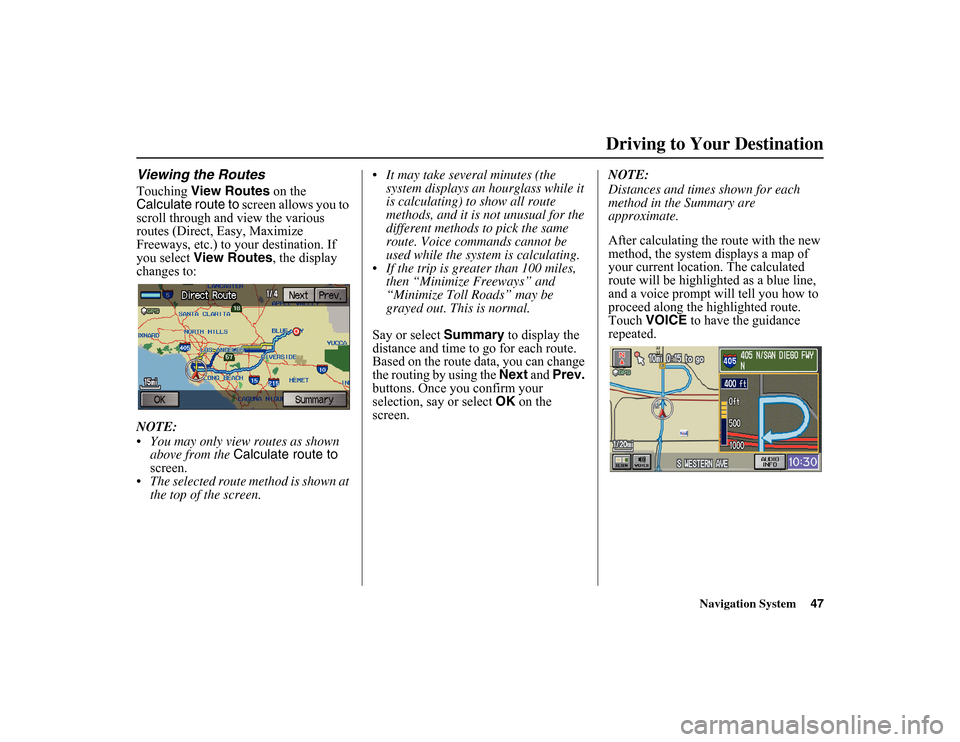
Viewing the RoutesTouching View Routes on the
Calculate route to screen allows you to
scroll through and view the various
routes (Direct, Easy, Maximize
Freeways, etc.) to your destination. If
you select View Routes , the display
changes to:
NOTE:
You may only view routes as shown above from the Calculate route to
screen.
The selected route method is shown at the top of the screen. It may take several minutes (the
system displays an hourglass while it
is calculating) to show all route
methods, and it is not unusual for the
different methods to pick the same
route. Voice commands cannot be
used while the system is calculating.
If the trip is greater than 100 miles, then “Minimize Freeways” and
“Minimize Toll Roads” may be
grayed out. This is normal.
Say or select Summary
to display the
distance and time to go for each route.
Based on the route data, you can change
the routing by using the Next and
Prev.
buttons. Once you confirm your
selection, say or select OK on the
screen. NOTE:
Distances and times shown for each
method in the Summary are
approximate.
After calculating the route with the new
method, the system displays a map of
your current location. The calculated
route will be highlighted as a blue line,
and a voice prompt will tell you how to
proceed along the highlighted route.
Touch
VOICE
to have the guidance
repeated.
Driving to Your Destination
Page 49 of 153
48
Navigation System
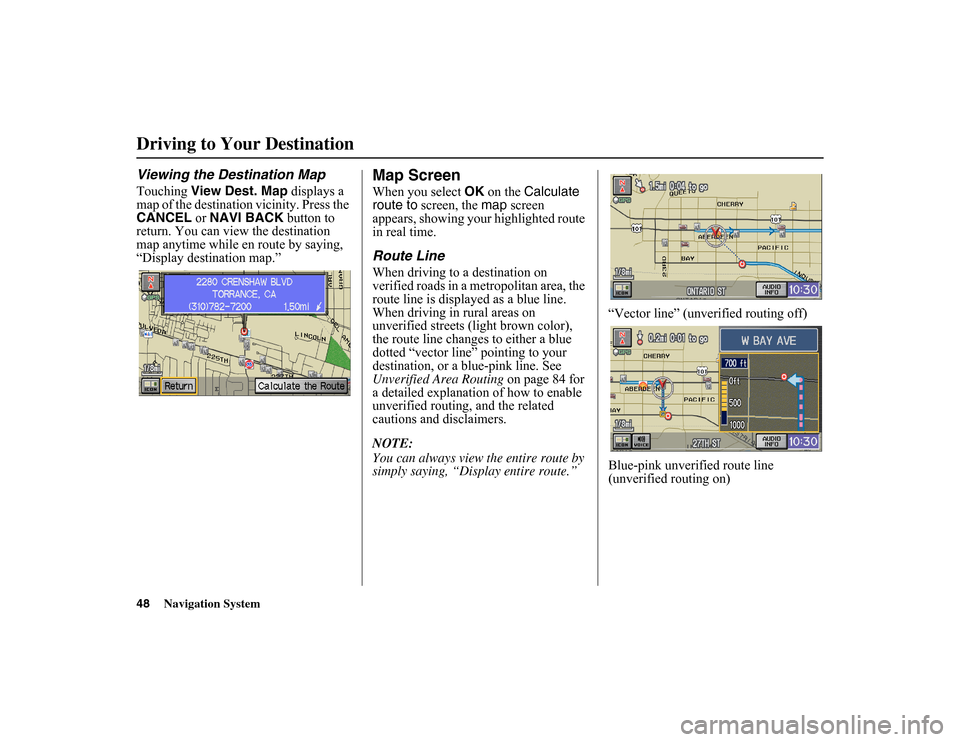
Driving to Your DestinationViewing the Destination MapTouching View Dest. Map displays a
map of the destination vicinity. Press the
CANCEL or NAVI BACK button to
return. You can view the destination
map anytime while en route by saying,
“Display destination map.”
Map ScreenWhen you select OK
on the Calculate
route to screen, the map
screen
appears, showing your highlighted route
in real time.Route LineWhen driving to a destination on
verified roads in a metropolitan area, the
route line is displayed as a blue line.
When driving in rural areas on
unverified streets (light brown color),
the route line changes to either a blue
dotted “vector line” pointing to your
destination, or a blue-pink line. See
Unverified Area Routing on page 84 for
a detailed explanation of how to enable
unverified routing, and the related
cautions and disclaimers.
NOTE:
You can always view the entire route by
simply saying, “Dis play entire route.” “Vector line” (unverified routing off)
Blue-pink unverified route line
(unverified routing on)
Page 55 of 153
54
Navigation System
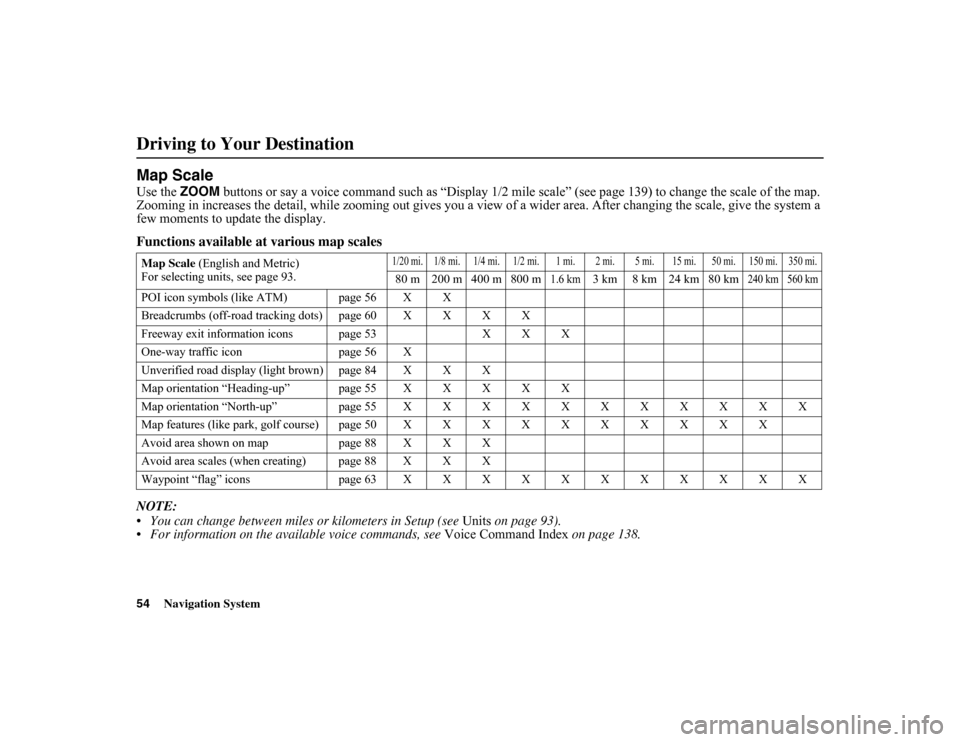
Driving to Your DestinationMap ScaleUse the ZOOM buttons or say a voice command such as “Display 1/2 mile scale” (see pa ge 139) to change the scale of the map.
Zooming in increases the de tail, while zooming out gives you a view of a wide r area. After changing the scale, give the system a
few moments to update the display.Functions available at various map scalesNOTE:
You can change between miles or kilometers in Setup (see Units
on page 93).
For information on the available voice commands, see Voice Command Index
on page 138.Map Scale (English and Metric)
For selecting units, see page 93.
1/20 mi. 1/8 mi. 1/4 mi. 1/2 mi. 1 mi. 2 mi. 5 mi. 15 mi. 50 mi. 150 mi. 350 mi.80 m 200 m 400 m 800 m
1.6 km
3 km 8 km 24 km 80 km
240 km 560 km
POI icon symbols (like ATM) page 56 X X
Breadcrumbs (off-road
tracking dots) page 60 X X X X
Freeway exit information icons page 53 X X X
One-way traffic icon page 56 X
Unverified road display (light brown) page 84 X X X
Map orientation “Heading-up” page 55 X X X X X
Map orientation “North-up” page 55 X X X X X X X X X X X
Map features (like park, golf course)page50XXXX XXXXXX
Avoid area shown on map page 88 X X X
Avoid area scales (when creating) page 88 X X X
Waypoint “flag” icons page63XXXX XXXXXXX
Page 62 of 153
Navigation System61
Viewing/Saving the Current
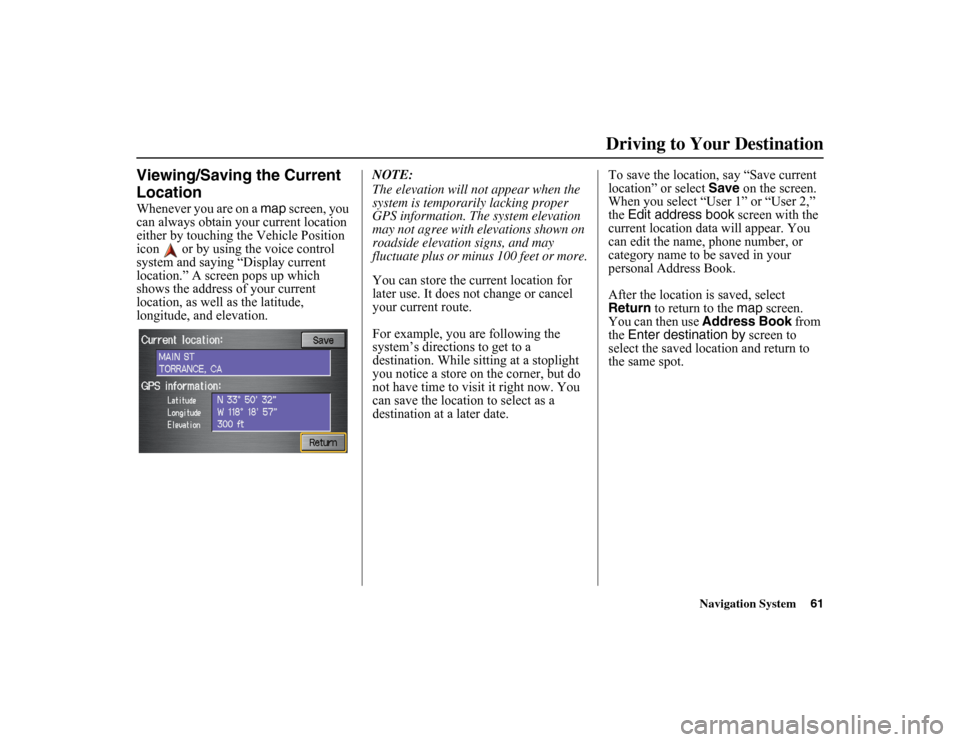
LocationWhenever you are on a map screen, you
can always obtain your current location
either by touching the Vehicle Position
icon or by using the voice control
system and saying “Display current
location.” A screen pops up which
shows the address of your current
location, as well as the latitude,
longitude, and elevation. NOTE:
The elevation will not appear when the
system is temporarily lacking proper
GPS information. The system elevation
may not agree with elevations shown on
roadside elevation signs, and may
fluctuate plus or minus 100 feet or more.
You can store the current location for
later use. It does not change or cancel
your current route.
For example, you are following the
system’s directions to get to a
destination. While sitting at a stoplight
you notice a store on the corner, but do
not have time to visit it right now. You
can save the location to select as a
destination at a later date.To save the location, say “Save current
location” or select
Save on the screen.
When you select “User 1” or “User 2,”
the Edit address book screen with the
current location data will appear. You
can edit the name, phone number, or
category name to be saved in your
personal Address Book.
After the location is saved, select
Return to return to the map
screen.
You can then use Address Book from
the Enter destination by screen to
select the saved location and return to
the same spot.
Driving to Your Destination