phone HONDA INSIGHT 2011 2.G Navigation Manual
[x] Cancel search | Manufacturer: HONDA, Model Year: 2011, Model line: INSIGHT, Model: HONDA INSIGHT 2011 2.GPages: 153, PDF Size: 4 MB
Page 33 of 153
32Navigation System
By Places
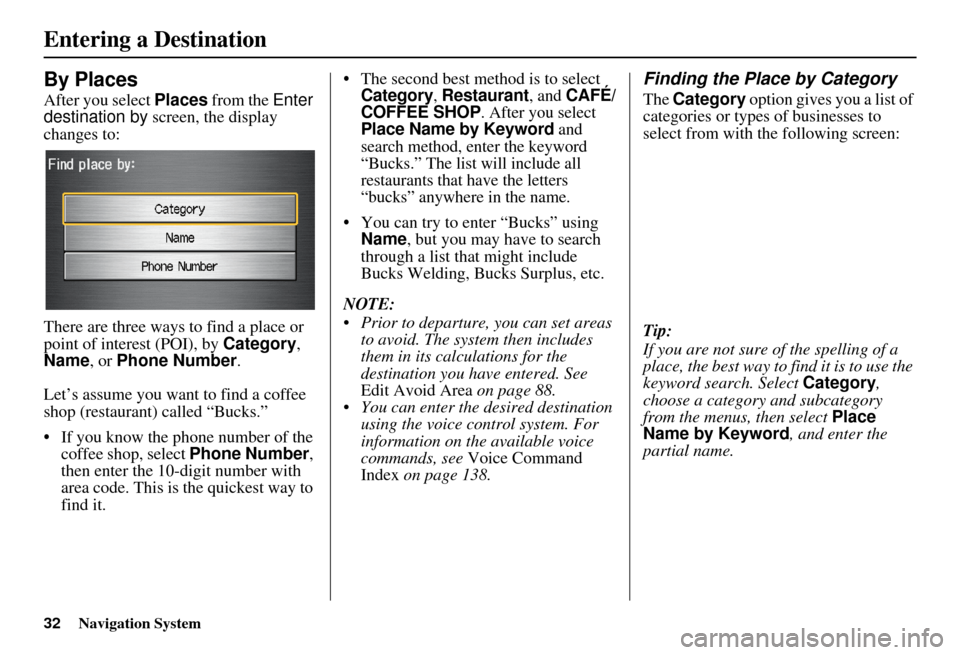
After you select Places from the Enter
destination by screen, the display
changes to:
There are three ways to find a place or
point of interest (POI), by Category ,
Name , or Phone Number .
Let’s assume you want to find a coffee
shop (restaurant) called “Bucks.”
• If you know the phone number of the coffee shop, select Phone Number,
then enter the 10-d igit number with
area code. This is the quickest way to
find it. • The second best me
thod is to select Category, Restaurant, and CAFÉ/
COFFEE SHOP. After you select Place Name by Keyword and
search method, enter the keyword
“Bucks.” The list will include all
restaurants that have the letters
“bucks” anywhere in the name
.
• You can try to enter “Bucks” using Name, but you may have to search
through a list that might include
Bucks Welding, Bucks Surplus, etc.
NOTE:
Prior to departure, you can set areas to avoid. The system then includes
them in its calculations for the
destination you have entered. See
Edit Avoid Area on page 88.
You can enter the desired destination using the voice control system. For
information on the available voice
commands, see Voice Command
Index on page 138.
Finding the Place by Category
The Category option gives you a list of
categories or types of businesses to
select from with the following screen:
Tip:
If you are not sure of the spelling of a
place, the best way to find it is to use the
keyword search. Select Category,
choose a category and subcategory
from the menus, then select Place
Name by Keyword , and enter the
partial name.
Entering a Destination
Page 37 of 153
36Navigation System
Place Name
When you select this option, the display
changes to the Enter a place name
screen. Enter your se lection, using the
on-screen keyboard.
Once you select a place, the system then
displays the Calculate route to screen
(see Driving to Your Destination on
page 45).
Finding the Place by Name
The Name option allows you to enter
the name of a business, and then shows
you a list of businesses with the same or
similar names to select from. Use the
name option only if you know the exact
spelling of the place. If unsure, use the
Category option.
Finding the Place by Phone
Number
The Phone Number option allows
you to select a destination by its
telephone number. Only telephone
numbers stored in the system under the
Places (of business) option are
recognized. The system does not contain
residential telephone numbers, or
numbers you may have entered in your
personal Address Book.
Tip:
If you know the phone number of a point
of interest (POI), its uniqueness makes it
the fastest entry method. When using the
voice control system, the entry should be
spoken as a continuous string of
numbers. For example, the telephone
number (310) 555-4000 should be
spoken as “Three, one, zero, five, five,
five, four, zero, zero, zero.”
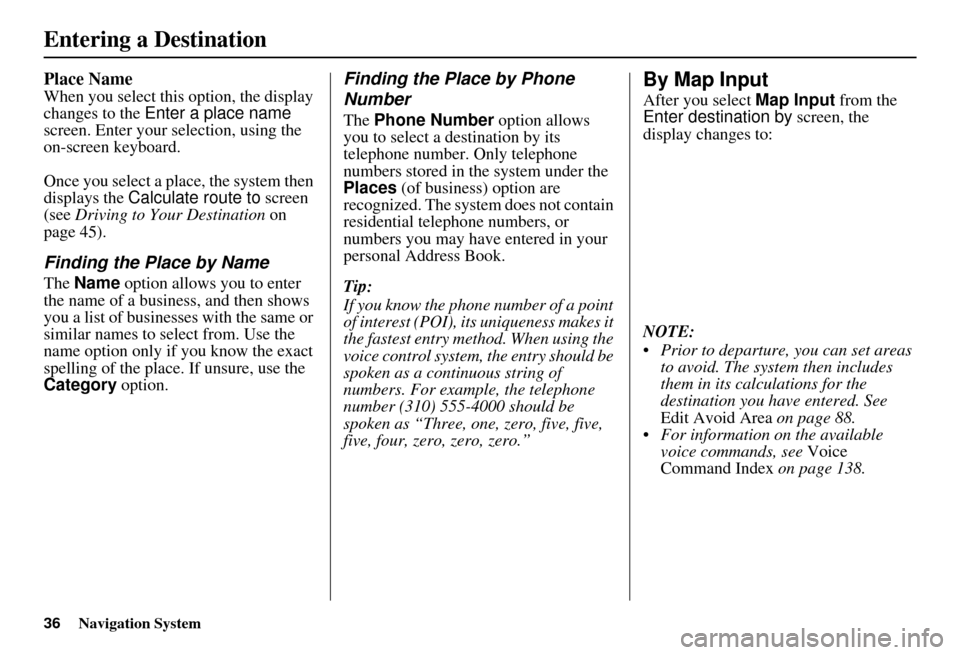
By Map Input
After you select Map Input from the
Enter destination by screen, the
display changes to:
NOTE:
Prior to departure, you can set areas to avoid. The system then includes
them in its calculations for the
destination you have entered. See
Edit Avoid Area on page 88.
For information on the available voice commands, see Voice
Command Index on page 138.
Entering a Destination
Page 62 of 153
Navigation System61
Viewing/Saving the Current
Location
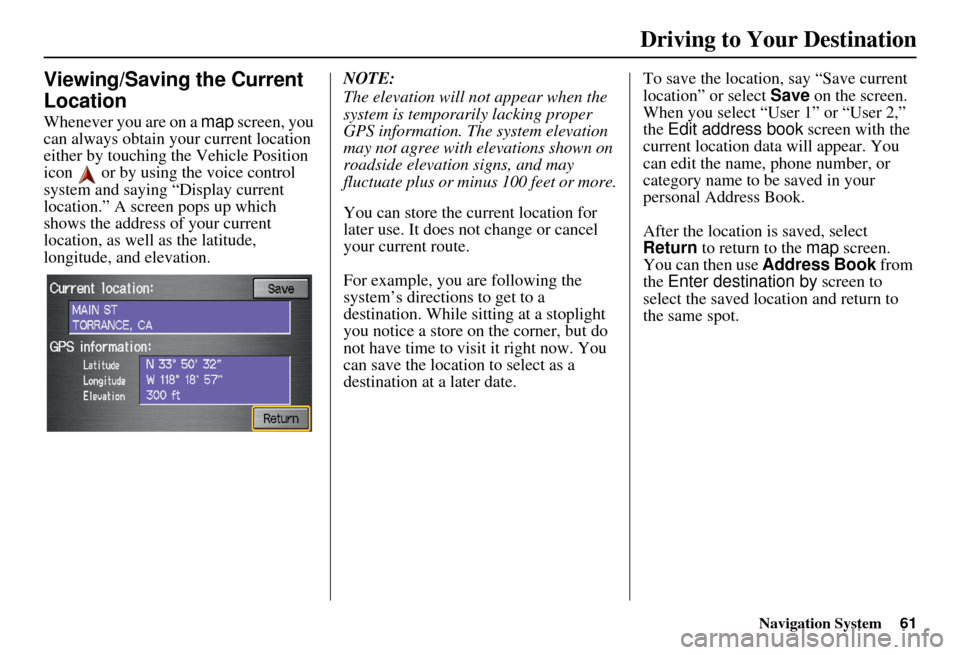
Whenever you are on a map screen, you
can always obtain your current location
either by touching the Vehicle Position
icon or by using the voice control
system and saying “Display current
location.” A screen pops up which
shows the address of your current
location, as well as the latitude,
longitude, and elevation. NOTE:
The elevation will not appear when the
system is temporarily lacking proper
GPS information. The system elevation
may not agree with elevations shown on
roadside elevation signs, and may
fluctuate plus or minus 100 feet or more.
You can store the current location for
later use. It does not change or cancel
your current route.
For example, you are following the
system’s directions to get to a
destination. While sitting at a stoplight
you notice a store on the corner, but do
not have time to visit it right now. You
can save the location to select as a
destination at a later date.To save the location, say “Save current
location” or select
Save on the screen.
When you select “User 1” or “User 2,”
the Edit address book screen with the
current location data will appear. You
can edit the name, phone number, or
category name to be saved in your
personal Address Book.
After the location is saved, select
Return to return to the map screen.
You can then use Address Book from
the Enter destination by screen to
select the saved location and return to
the same spot.
Driving to Your Destination
Page 70 of 153
Navigation System69
Information Features
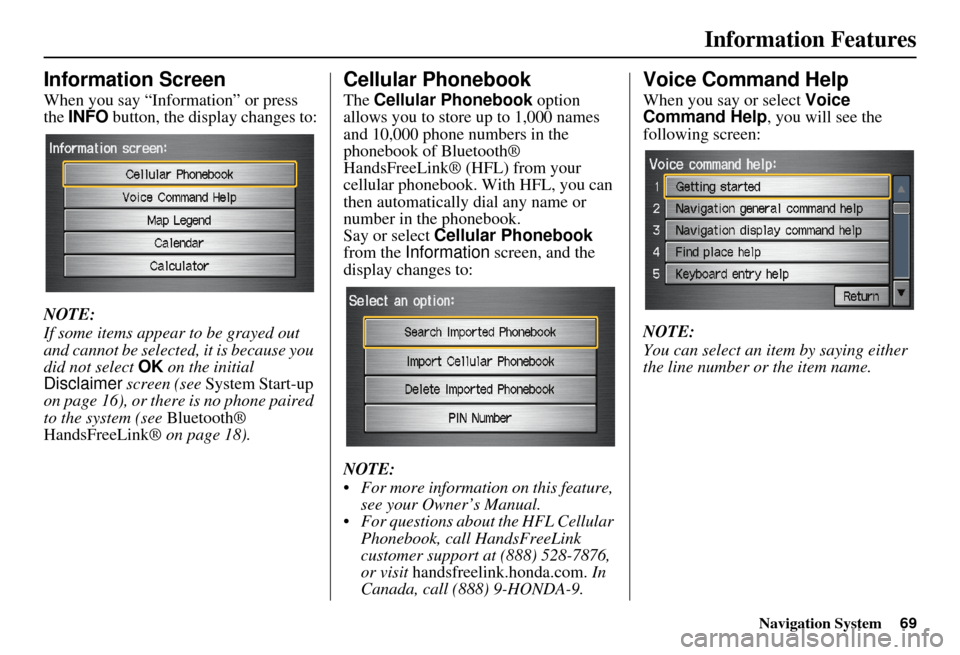
Information Screen
When you say “Information” or press
the INFO button, the display changes to:
NOTE:
If some items appear to be grayed out
and cannot be selected, it is because you
did not select OK on the initial
Disclaimer screen (see System Start-up
on page 16), or there is no phone paired
to the system (see Bluetooth®
HandsFreeLink® on page 18).
Cellular Phonebook
The Cellular Phonebook option
allows you to store up to 1,000 names
and 10,000 phone numbers in the
phonebook of Bluetooth®
HandsFreeLink® (HFL) from your
cellular phonebook. With HFL, you can
then automatically dial any name or
number in the phonebook.
Say or select Cellular Phonebook
from the Information screen, and the
display changes to:
NOTE:
For more information on this feature, see your Owner’s Manual.
For questions about the HFL Cellular Phonebook, call HandsFreeLink
customer support at (888) 528-7876,
or visit handsfreelink.honda.com. In
Canada, call (888) 9-HONDA-9.
Voice Command Help
When you say or select Voice
Command Help , you will see the
following screen:
NOTE:
You can select an item by saying either
the line number or the item name.
Page 80 of 153
Navigation System79
System Setup
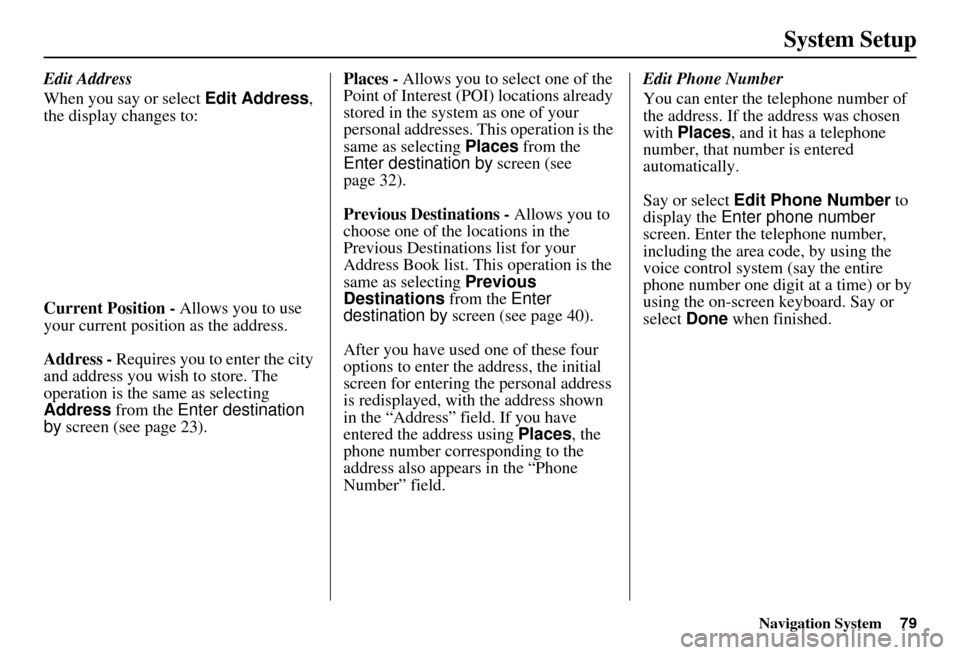
Edit Address
When you say or select Edit Address,
the display changes to:
Current Position - Allows you to use
your current position as the address.
Address - Requires you to enter the city
and address you wish to store. The
operation is the same as selecting
Address from the Enter destination
by screen (see page 23). Places -
Allows you to select one of the
Point of Interest (POI) locations already
stored in the system as one of your
personal addresses. This operation is the
same as selecting Places from the
Enter destination by screen (see
page 32).
Previous Destinations - Allows you to
choose one of the locations in the
Previous Destinations list for your
Address Book list. Th is operation is the
same as selecting Previous
Destinations from the Enter
destination by screen (see page 40).
After you have used one of these four
options to enter the address, the initial
screen for entering the personal address
is redisplayed, with the address shown
in the “Address” field. If you have
entered the address using Places, the
phone number corresponding to the
address also appears in the “Phone
Number” field. Edit Phone Number
You can enter the telephone number of
the address. If the
address was chosen
with Places , and it has a telephone
number, that number is entered
automatically.
Say or select Edit Phone Number to
display the Enter phone number
screen. Enter the telephone number,
including the area code, by using the
voice control system (say the entire
phone number one digit at a time) or by
using the on-screen keyboard. Say or
select Done when finished.
Page 82 of 153
Navigation System81
System Setup
Home Address
This feature lets you return “Home”
from any location simply by saying “Go
home” at the map screen. Alternatively,
you can select Go Home on the Enter
destination by screen (see By Go Home
on page 44).
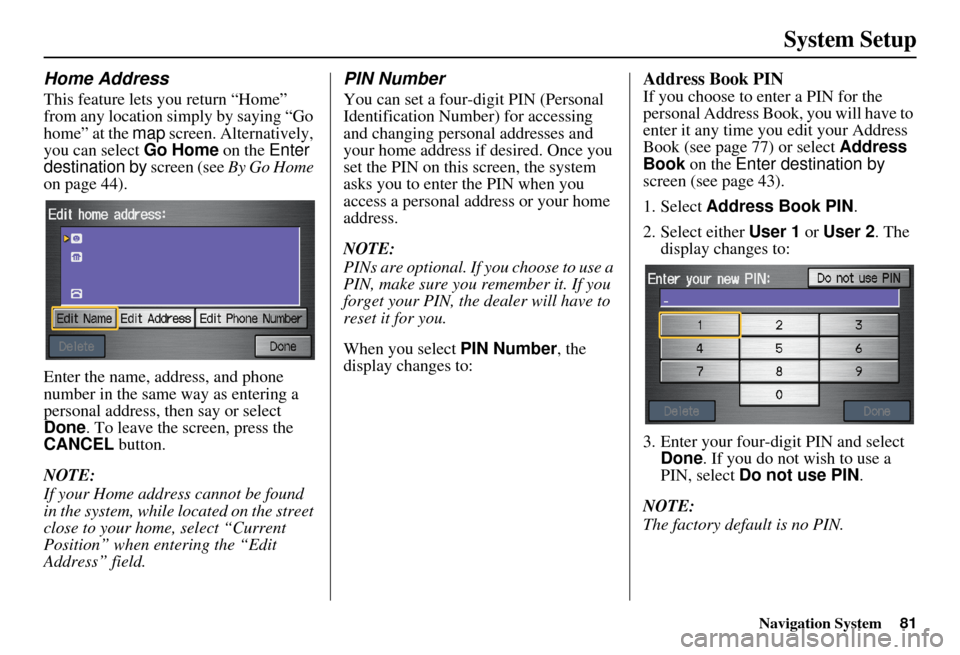
Enter the name, address, and phone
number in the same way as entering a
personal address, then say or select
Done . To leave the screen, press the
CANCEL button.
NOTE:
If your Home address cannot be found
in the system, while lo cated on the street
close to your home, select “Current
Position” when entering the “Edit
Address” field.
PIN Number
You can set a four-digit PIN (Personal
Identification Number) for accessing
and changing personal addresses and
your home address if desired. Once you
set the PIN on this screen, the system
asks you to enter the PIN when you
access a personal address or your home
address.
NOTE:
PINs are optional. If you choose to use a
PIN, make sure you remember it. If you
forget your PIN, the dealer will have to
reset it for you.
When you select PIN Number, the
display changes to:
Address Book PIN
If you choose to enter a PIN for the
personal Address Book, you will have to
enter it any time you edit your Address
Book (see page 77) or select Address
Book on the Enter destination by
screen (see page 43).
1. Select Address Book PIN .
2. Select either User 1 or User 2 . The
display changes to:
3. Enter your four-digit PIN and select Done . If you do not wish to use a
PIN, select Do not use PIN .
NOTE:
The factory default is no PIN.
Page 99 of 153
98Navigation System
System Initialization
GPS Initialization
Depending on the length of time the
battery was disconnected, your system
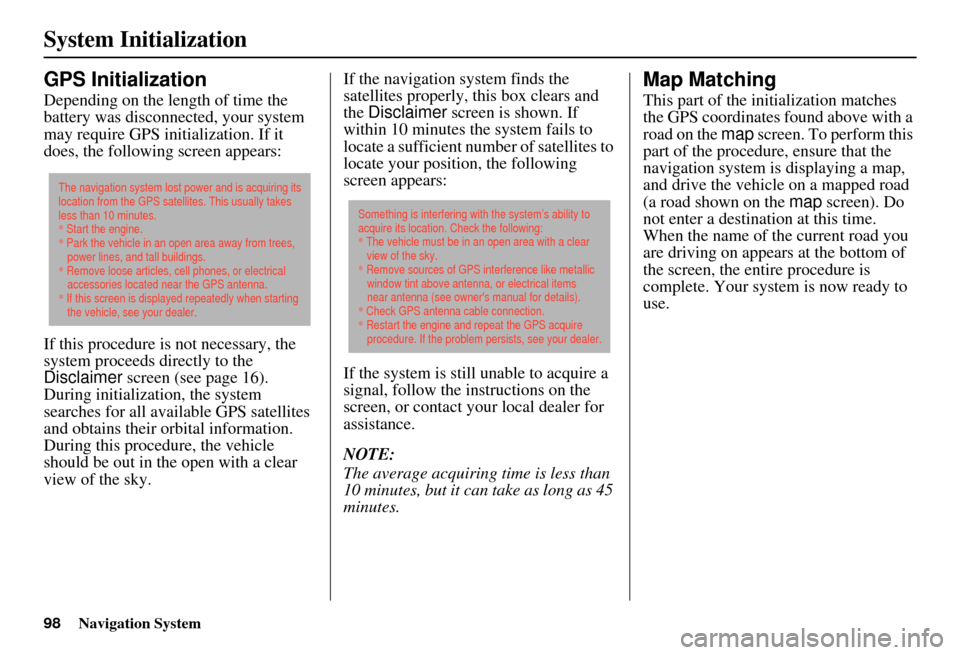
may require GPS initialization. If it
does, the following screen appears:
If this procedure is not necessary, the
system proceeds directly to the
Disclaimer screen (see page 16).
During initialization, the system
searches for all available GPS satellites
and obtains their orbital information.
During this procedure, the vehicle
should be out in th e open with a clear
view of the sky. If the navigation system finds the
satellites properly, this box clears and
the
Disclaimer screen is shown. If
within 10 minutes the system fails to
locate a sufficient number of satellites to
locate your position, the following
screen appears:
If the system is still unable to acquire a
signal, follow the instructions on the
screen, or contact you r local dealer for
assistance.
NOTE:
The average acquiring time is less than
10 minutes, but it can take as long as 45
minutes.
Map Matching
This part of the initialization matches
the GPS coordinates found above with a
road on the map screen. To perform this
part of the procedure, ensure that the
navigation system is displaying a map,
and drive the vehicle on a mapped road
(a road shown on the map screen). Do
not enter a destina tion at this time.
When the name of the current road you
are driving on appears at the bottom of
the screen, the entire procedure is
complete. Your system is now ready to
use.
The navigation system lost power and is acquiring its
location from the GPS satellites. This usually takes
less than 10 minutes.
* Start the engine.
* Park the vehicle in an open area away from trees,
power lines, and tall buildings.
* Remove loose articles, cell phones, or electrical
accessories located near the GPS antenna.
* If this screen is displayed repeatedly when starting
the vehicle, see your dealer.
Something is interfering with the system’s ability to
acquire its location. Check the following:
* The vehicle must be in an open area with a clear
view of the sky.
* Remove sources of GPS interference like metallic
window tint above antenna, or electrical items
near antenna (see owner's manual for details).
* Check GPS antenna cable connection.
* Restart the engine and repeat the GPS acquire
procedure. If the problem persists, see your dealer.
Page 100 of 153
Navigation System99
System Limitations
Although your navigation system is one
of the most highly sophisticated pieces
of equipment you will find in a modern
automobile, you may find during its use
that it has certain limitations.
The system uses GPS signals to aid in
determining its current location. The
GPS is operated by the U.S.
Department of Defense. For security
reasons, there are certain inaccuracies
built into the GPS that the navigation
system must constantly compensate for.
This can cause occasional positioning
errors of up to several hundred feet.
For example, in urban areas where
streets are close together, this could
cause the system to show that you are
traveling on a street that parallels the
street you are actually on. The system
will, under most circumstances, correct
itself while you drive. Depending on your current view of the
sky and the position of the satellites, the
elevation may be shown incorrectly.
You may also notice some delay of the
vehicle position icon at intersections;
this is normal.
GPS Reception Issues
The signals received from the GPS
satellites are extremely weak (less than
a millionth of the strength of a local FM
station) and requir
e an unobstructed
view of the sky. The signal can easily be
interrupted or interfered with by the
following:
• Aftermarket metallic window tint above or to the sides of the GPS
antenna (located under the
dashboard)
• Cell phones, PDAs, or other electronic devices docked in a cradle
or lying loose on the dashboard
• Radar detectors mounted on the dashboard
• Remote starters, or “hidden” vehicle tracking systems mounted near the
navigation unit • Other aftermarket audio electronic
devices mounted near the navigation
unit
• Trees, tall buildings, freeway overpasses, tunnels, or overhead
electrical power wires
Although the system will direct you to
your desired destination, it may not
always generate what you consider to be
the most direct rout e. Try changing the
method of routing. See Changing the
Routing Method on page 46. You may
also have Unverified Area Routing set
to OFF. See Unverified Area Routing on
page 84.
Additionally, the mapping database
contains verified and unverified maps.
See Map Overview on page 6. A
Disclaimer screen will warn you if your
route includes unverified streets.
Unverified streets may be missing from
the map, in the wrong location, or have
an incorrect name or address range.
Exercise addition al caution when
driving in these unverified areas.
Page 104 of 153
Navigation System103
Customer Assistance
Reporting Errors
Occasionally, you may encounter
database errors.
• If the error pertains to freeways and
main “verified” roads shown in black
on the map, then report it either
online at
http://update.navteq.com/ , or to
Honda Customer Service.
• If the error involves a light brown “unverified” road, then do not report
it. These areas have not been verified,
and are provided for reference only
(see Map Overview on page 6).
• For errors in points of interest (POI), like a business that has changed its
name, do not report them. Keep in
mind that depending on when the data
was collected and when your DVD
was purchased, the database can be
out of date. The business may have
not reported the change(s), or not be
in the database at all. Update
Navigation DVDs are available for
purchase, usually in the fall of each
year. • If the error does not involve the
database, such as vehicle position
icon errors, screen error messages, or
other GPS-related errors, see
Frequently Asked Questions on
page 123, System Limitations on
page 99, or Troubleshooting on
page 133.
Honda Automobile
Customer Service
Telephone: (800) 999-1009
Fax: (310) 783-3273
Mail:
Honda Navi
America Honda Motor Co., Inc.
Honda Customer Service
MS 500-2N-7A
1919 Torrance Blvd.
Torrance, CA 90501-2746
Page 123 of 153
122Navigation System
Coverage Areas
Setup Screen Differences
The Setup screen differences are minor
and are listed belo w. See the Setup
section (page 74) for additional
information.
Routing and Guidan ce (Unverified
Area Routing On/Off)
This feature is unavailable. All roads
displayed on the map are verified.
Clock Adjust Screen
There is no daylight saving time for
Hawaii. Auto Daylight Saving
Time, Auto Time Zone by GPS , and
DST Selection will not be shown on
the Clock adjustment screen. To test
your adjustment, use the voice control
system, and say “What time is it?” (see
page 94).
Bluetooth® HandsFreeLink®
Operation
When pairing a cell phone to use the
Bluetooth® HandsFreeLink® feature,
you may see a “Phone-Data
Connection” screen. If so, do not
complete this portion of the process.
Shipping a Vehicle To or From
Hawaii
Although the DVD in the vehicle
contains maps for both U.S. mainland
and Hawaii, the dealer must perform the
selection of “U.S. mainland” or
“Hawaii” for you. When the dealer
makes the switch from U.S. mainland to
Hawaii or vice versa, the system clears
all user data. Make sure to record any
personal information that you do not
want to lose.