air condition HONDA INSIGHT 2019 (in English) Owner's Guide
[x] Cancel search | Manufacturer: HONDA, Model Year: 2019, Model line: INSIGHT, Model: HONDA INSIGHT 2019Pages: 675, PDF Size: 36.97 MB
Page 524 of 675

522
uuHonda Sensing ®u Traffic Sign Recognition System
Driving
Traffic Sign Recognition System
Reminds you of road sign in formation, such as the current speed limit, your vehicle
has just passed through, showing it on the driver information interface.
When the camera located behind the rear view mirror captures traffic signs while
driving, the system displays the ones that are recognized as designated for your
vehicle. The sign icon will be displayed until the vehicle reaches a predetermined
time and distance.
The sign icon also may switch to another one or disappear when:
• The other designated limit is detected.
• You make a turn with a turn signal at an intersection.
■How the System Works
1Traffic Sign Recognition System
Not all signs may be displa yed, but any signs posted
on roadsides should not be ignored. The system does
not work on the designated traffic signs of all the
countries you travel, no r in all situations.
Do not rely too much on the system. Always drive at
speeds appropriate fo r the road conditions.
Never apply a film or attach any objects to the
windshield that could obstruc t the camera’s field of
vision and cause the system to operate abnormally.
Scratches, nicks, and othe r damage to the windshield
within the camera’s fiel d of vision can cause the
system to operate abnormall y. If this occurs, we
recommend that you replac e the windshield with a
genuine Honda replacem ent windshield. Making
even minor repairs within th e camera’s field of vision
or installing an aftermarket replacement windshield
may also cause the system to operate abnormally.
After replacing the winds hield, have a dealer
recalibrate the camera. Pr oper calibration of the
camera is necessary for the system to operate
properly.
19 INSIGHT HMIN-31TXM6000.book 522 ページ 2018年4月20日 金曜日 午後4時22分
Page 554 of 675
552
Maintenance
Before Performing Maintenance
Inspection and Maintenance
For your safety, perform all listed inspections and maintenance to keep your vehicle
in good condition. If you become aware of any abnormality (noise, smell, insufficient
brake fluid, oil residue on the ground, etc.), have your vehicle inspected by a dealer.
(Note, however, that service at a dealer is not mandatory to keep your warranties in
effect.)
■Daily inspections
Perform inspections before long distance tri ps, when washing the vehicle, or when
refueling.
■Periodic inspections
• Check the brake fluid level monthly.
2 Brake Fluid P. 573
•Check the tire pressure monthly. Examin e the tread for wear and foreign objects.
2Checking and Maintaining Tires P. 582
•Check the operation of the exterior lights monthly.
2 Replacing Light Bulbs P. 575
•Check the condition of the wiper bl ades at least every six months.
2Checking and Maintaining Wiper Blades P. 579
■Types of Inspection and Maintenance
1Inspection and Maintenance
Maintenance, replacement, or repair of
emissions control devices and systems may be
done by any automotive repair establishment or
individuals using parts that are “certified” to
EPA standards.
According to state and fede ral regulations, failure to
perform maintenance on the maintenance main
items marked with # will not void your emissions
warranties. However, all ma intenance services should
be performed in accordan ce with the intervals
indicated by the driver information interface.
2 Maintenance Service Items P. 559
If you want to perform complex maintenance tasks
that require more skills a nd tools, you can purchase a
subscription to the Service Express website at
www.techinfo.honda.com .
2 Authorized Manuals P. 661
If you want to perform ma intenance yourself, make
sure that you have the necessary tools and skills first.
After performing ma intenance, update the records in
the separate maintenance booklet.
U.S. models
19 INSIGHT HMIN-31TXM6000.book 552 ページ 2018年4月20日 金曜日 午後4時22分
Page 561 of 675

559
uuMaintenance MinderTMuTo Use Maintenance MinderTM
Continued
Maintenance
■Maintenance Service Items1Maintenance Service Items
•Adjust the valves during services A, B, 1, 2, or 3 if
they are noisy.
Maintenance Minder Message
System Message
Indicator
Sub Items
Main Item
U.S. models
*1: If a Maintenance Minder message does not appear more than 12 months after the display is reset,
change the engine oil every year.
# : See information on maintenance and emissions warranty in the first column on page 659.
*2: If you drive in dusty conditions, replace the air cleaner element every 15,000 miles (24,000 km).
*3: If you drive primarily in urban areas that have high concentrations of soot in the air from industry and from diesel-powered vehicles, replace the dust and pollen filter every 15,000 miles (24,000 km).
CODEMaintenance Main Items
A
●Replace engine oil*1
B●Replace engine oil*1 and oil filter●Inspect front and rear brakes●Inspect tie rod ends, steering gearbox, and boots●Inspect suspension components●Inspect driveshaft boots●Inspect brake hoses and li nes (Including ABS/VSA®)●Inspect all fluid levels and condition of fluids●Inspect exhaust system#
●Inspect fuel lines and connections#*4: Driving in mountainous areas at very low vehicle speeds results in higher transmission temperatures.
This requires transmission fluid changes more frequently than recommended by the Maintenance
Minder. If you regularly drive your vehicle under these conditions, have the transmission fluid changed
every 47,500 miles or 3 years (76,000 km or 3 years).
*5: If a Maintenance Minder message does not appear more than 36 months after the display for item 7 is reset, change the brake fluid every 3 years.
CODEMaintenance Sub Items
1
●Rotate tires
2●Replace air cleaner element*2
●Replace dust and pollen filter*3
3●Replace transmission fluid*4
4●Replace spark plugs●Inspect valve clearance
5
●Replace engine coolant
7●Replace brake fluid*5
19 INSIGHT HMIN-31TXM6000.book 559 ページ 2018年4月20日 金曜日 午後4時22分
Page 562 of 675

560
uuMaintenance MinderTMuTo Use Maintenance MinderTM
Maintenance
1Maintenance Service Items
•Adjust the valves during services A, 0, 9, 1, 2, or 3
if they are noisy.
Canadian models
*1: If a Maintenance Minder Message does not appear more than 12 months after the display is reset,
change the engine oil every year.
*2: If you drive in dusty conditions, replace the air cleaner element every 15,000 miles (24,000 km).
*3: If you drive primarily in urban areas that have high concentrations of soot in the air from industry and from diesel-powered vehicles, replace the dust and pollen filter every 15,000 miles (24,000 km).
*4: Driving in mountainous areas at very low vehicle speeds results in higher transmission temperatures. This requires transmission fluid changes more frequently than recommended by the Maintenance
Minder. If you regularly drive your vehicle under these conditions, have the transmission fluid changed
every 47,500 miles or 3 years (76,000 km or 3 years).
*5: If a Maintenance Minder Message does not appear more than 36 months after the display for item 7 is reset, change the brake fluid every 3 years.
# : See information on maintenance and emissions warranty in the first column on page 659.
CODEMaintenance Main Items
A
●Replace engine oil*1
0●Replace engine oil*1 and oil filter
CODEMaintenance Sub Items
1
●Rotate tires
2●Replace air cleaner element*2
●Replace dust and pollen filter*3
3●Replace transmission fluid*4
4●Replace spark plugs●Inspect valve clearance
5
●Replace engine coolant
7●Replace brake fluid*5
9●Service front and rear brakes●Inspect tie rod ends, steering gear box, and boots●Inspect suspension components●Inspect driveshaft boots●Inspect brake hoses and li nes (including ABS/VSA®)●Inspect all fluid levels and condition of fluids●Inspect exhaust system #
●Inspect fuel lines and connections #
19 INSIGHT HMIN-31TXM6000.book 560 ページ 2018年4月20日 金曜日 午後4時22分
Page 584 of 675
582
Maintenance
Checking and Maintaining Tires
Checking Tires
To safely operate your vehicle, your tires must be of the proper type and size, in
good condition with adequate tread, and properly inflated.
■Inflation guidelines
Properly inflated tires provide the best combination of handling, tread life, and comfort.
Refer to the driver’s doorjamb label or spec ifications page for the specified pressure.
Underinflated tires wear unevenly, adversely affect handling and fuel economy, and
are more likely to fail from overheating.
Overinflated tires make your vehicle ride harshly, are more prone to road hazards,
and wear unevenly.
Every day before you drive, look at each of the tires. If one looks lower than the
others, check the pressure with a tire gauge.
At least once a month or before long trips, use a gauge to measure the pressure in all
tires, including the spare
*. Even tires in good condition can lose 1–2 psi (10–20 kPa,
0.1–0.2 kgf/cm2) per month.
■Inspection guidelines
Every time you check inflation, also examine the tires and valve stems.
Look for:
• Bumps or bulges on the side or in the tread. Replace the tire if you find any cuts,
splits, or cracks in the si de of the tire. Replace it if you see fabric or cord.
• Remove any foreign objects and inspect for air leaks.
• Uneven tread wear. Have a deal er check the wheel alignment.
• Excessive tread wear.
2 Wear Indicators P. 587
•Cracks or other damage around valve stem.
1Checking Tires
Measure the air pressure when tires are cold. This
means the vehicle has been parked for at least three
hours, or driven less than 1 mile (1.6 km). If
necessary, add or releas e air until the specified
pressure is reached.
If checked when hot, tire pressure can be as much as
4–6 psi (30–40 kPa, 0.3–0.4 kgf/cm
2) higher than if
checked when cold.
Whenever tire pressure is adjusted, you must
calibrate the TPMS. 2 TPMS Calibration P. 472
Have a dealer check the tires if you feel a consistent
vibration while driving. Ne w tires and any that have
been removed and reinst alled should be properly
balanced.
Check the spare tire pressu re once a month or before
long trips.
3WARNING
Using tires that are excessively worn or
improperly inflated can cause a crash in
which you can be seriously hurt or killed.
Follow all instruction s in this owner’s
manual regarding ti re inflation and
maintenance.
Vehicles with optional spare tire
* Not available on all models
19 INSIGHT HMIN-31TXM6000.book 582 ページ 2018年4月20日 金曜日 午後4時22分
Page 596 of 675
594
Maintenance
Climate Control System Maintenance
Air Conditioning
To ensure proper and safe operation, th e Society of Automotive Engineers (SAE
J2845) recommends that the refrigerant system only be serviced by trained and
certified technicians.
Never repair or replace the air conditioning evaporator (cooling coil) with one
removed from a used or salvaged vehicle.
New replacement mobile air conditioning evaporators must be certified (and
labeled) as meeting SAE Standard J2842.
Dust and Pollen Filter
The climate control system is equipped with a dust and pollen filter that collects
pollen, dust, and other debris in the air. The Maintenance MinderTM messages will let
you know when to replace the filter.
We recommend that you replace the dust a nd pollen filter sooner when using your
vehicle in areas with high concentrations of dust.
1 Air Conditioning
NOTICE
Vented refrigerant is harmful to the environment.
To avoid refrigerant from venting, never replace the
evaporator with one re moved from a used or
salvaged vehicle.
Refrigerant in your vehicle’s air conditioning system is
flammable and can be igni ted during servicing if
proper procedures are not followed.
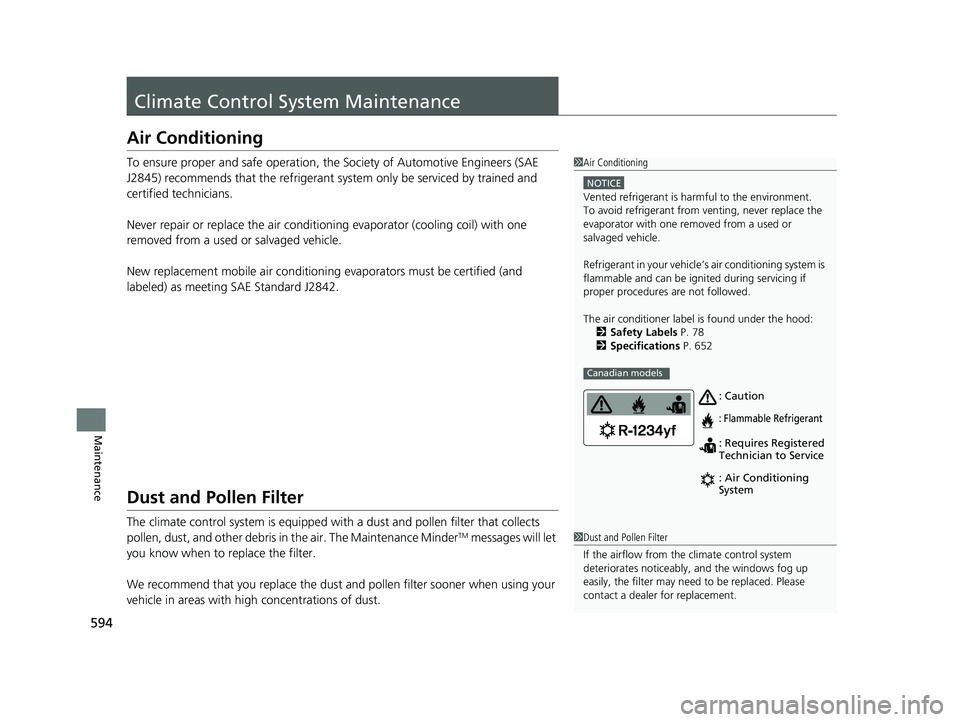
The air conditioner labe l is found under the hood:
2 Safety Labels P. 78
2 Specifications P. 652
Canadian models
: Caution
: Flammable Refrigerant
: Requires Registered
Technician to Service
: Air Conditioning
System
1Dust and Pollen Filter
If the airflow from the climate control system
deteriorates noticeably, and the windows fog up
easily, the filter may need to be replaced. Please
contact a dealer for replacement.
19 INSIGHT HMIN-31TXM6000.book 594 ページ 2018年4月20日 金曜日 午後4時22分
Page 599 of 675
597
uuCleaning uExterior Care
Continued
Maintenance
Exterior Care
Dust off the vehicle body afte r you drive. Regularly inspect your vehicle for scratches
on painted surfaces. A scratch on a painted surface can result in body rust. If you
find a scratch, promptly repair it.
Wash the vehicle regularly. Wash more fr equently when driving in the following
conditions:
• If driving on roads with road salt.
• If driving in coastal areas.
• If tar, soot, bird droppings, insects, or tree sap are stuck to painted surfaces.
• Make sure to follow the instructions indicated on the automated car wash.
• Fold in the door mirrors.
• For models equipped with automatic intermittent wipers, turn the wipers off.
• Keep sufficient distance between the cleaning nozzle and the vehicle body.
• Take particular care around the windows. Standing too close may cause water to
enter the vehicle interior.
• Do not spray high pressure water direct ly into the engine compartment. Instead,
use low pressure water and a mild detergent.
■Washing the Vehicle
■Using an Automated Car Wash
■Using High Pressure Cleaners
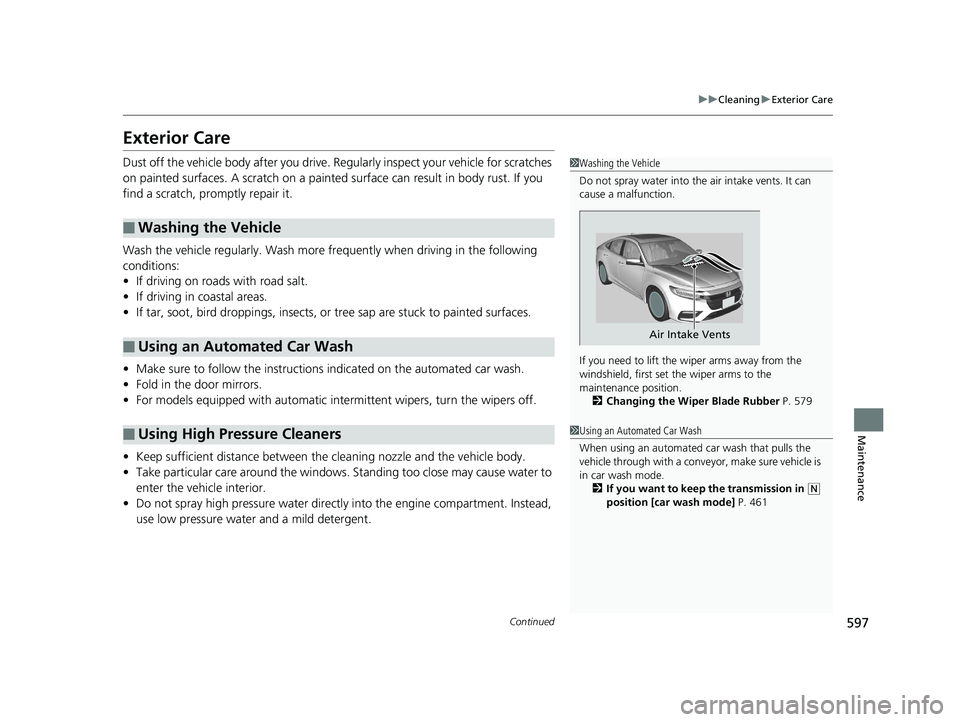
1 Washing the Vehicle
Do not spray water into the air intake vents. It can
cause a malfunction.
If you need to lift the wiper arms away from the
windshield, first set the wiper arms to the
maintenance position. 2 Changing the Wiper Blade Rubber P. 579
Air Intake Vents
1Using an Automated Car Wash
When using an automated car wash that pulls the
vehicle through with a convey or, make sure vehicle is
in car wash mode. 2 If you want to keep the transmission in
(N
position [car wash mode] P. 461
19 INSIGHT HMIN-31TXM6000.book 597 ページ 2018年4月20日 金曜日 午後4時22分
Page 603 of 675
601
Maintenance
Accessories and Modifications
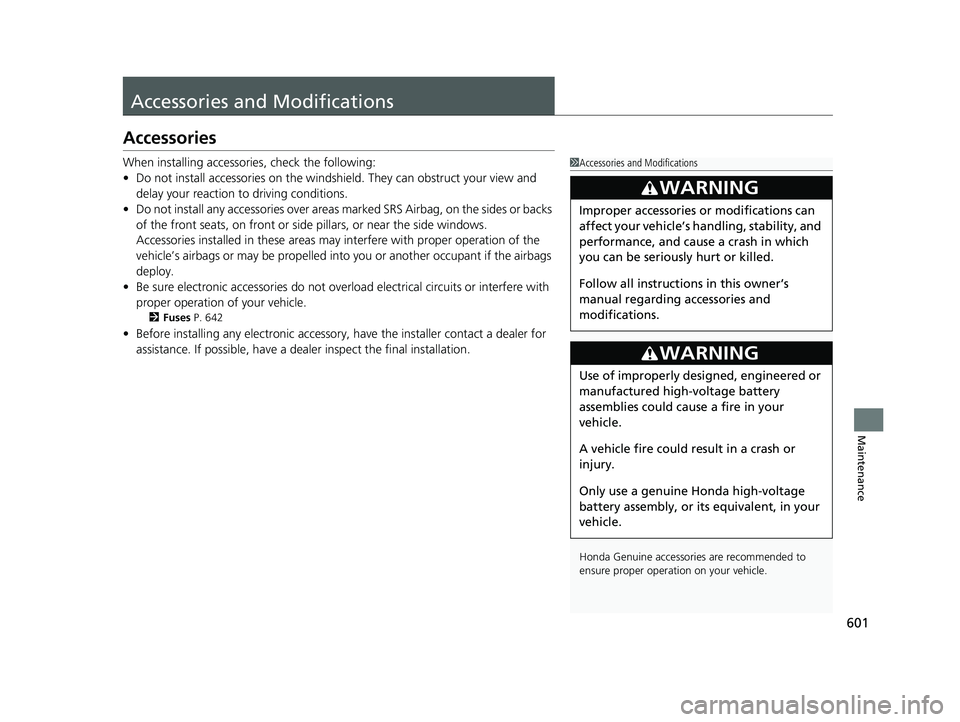
Accessories
When installing accessories, check the following:
• Do not install accessories on the windsh ield. They can obstruct your view and
delay your reaction to driving conditions.
• Do not install any accessories over areas marked SRS Airbag, on the sides or backs
of the front seats, on front or side pillars, or near the side windows.
Accessories installed in these areas may interfere with proper operation of the
vehicle’s airbags or may be propelled into you or another occupant if the airbags
deploy.
• Be sure electronic accessories do not overload electrical circuits or interfere with
proper operation of your vehicle.
2 Fuses P. 642
•Before installing any electro nic accessory, have the installer contact a dealer for
assistance. If possible, have a deal er inspect the final installation.
1Accessories and Modifications
Honda Genuine accessor ies are recommended to
ensure proper operati on on your vehicle.
3WARNING
Improper accessories or modifications can
affect your vehicle’s handling, stability, and
performance, and cause a crash in which
you can be seriously hurt or killed.
Follow all instruction s in this owner’s
manual regarding accessories and
modifications.
3WARNING
Use of improperly desi gned, engineered or
manufactured high-voltage battery
assemblies could cause a fire in your
vehicle.
A vehicle fire could result in a crash or
injury.
Only use a genuine Honda high-voltage
battery assembly, or its equivalent, in your
vehicle.
19 INSIGHT HMIN-31TXM6000.book 601 ページ 2018年4月20日 金曜日 午後4時22分
Page 604 of 675
602
uuAccessories and Modifications uModifications
Maintenance
Modifications
Do not modify your vehicle in a manner that may affect its handling, stability, or
reliability, or install non-genuine Honda parts or accessories that may have a similar
effect.
Even minor modifications to vehicle system s can affect overall vehicle performance.
Always make sure all equipment is prop erly installed and maintained, and do not
make any modification to your vehicle or its systems that might cause your vehicle
to no longer meet federal, state, province, territory, and local regulations.
The on-board diagnostic port (OBD-II/SAE J1962 connector) installed on this vehicle
is intended to be used with automobile system diagnostic devices or with other
devices that Honda has approved. Use of any other type of device may adversely
affect the vehicle’s electronic systems or allow them to be compromised, possibly
resulting in a system malfunction, draine d battery, or other unexpected problems.
Do not modify or attempt to repair your vehicle's high-voltage hybrid power system
or otherwise modify vehicle electrical systems. Disassemb ling or modifying electrical
equipment can result in a crash or a fire.
If you ever need to replace your vehicle’s high-voltage battery assembly outside of
warranty coverage, we highly recommend that you only use a genuine Honda
highvoltage battery assembly. Genuine Honda high-voltage battery assemblies are
designed to work with your vehicle’s hybr id power system and have been designed,
engineered and manufactured to avoid overcharging situations. Non-genuine high-
voltage battery assemblies may not have be en similarly designed, engineered and
manufactured, and installation of such assemb lies could result in overcharging, fires,
loss of power, or other conditions that may increase the likelihood of a crash or
injury.
19 INSIGHT HMIN-31TXM6000.book 602 ページ 2018年4月20日 金曜日 午後4時22分
Page 654 of 675

652
Information
Specifications
■Vehicle Specifications
*1: Models with 16 inch wheel
*2: Models with 17 inch wheel
■Air Conditioning
ModelINSIGHT
No. of Passengers:
Front 2
Rear 3
Total 5
Weights:Gross Vehicle Weight
Rating U.S.: 3,968 lbs (1,800 kg)*1
4,034 lbs (1,830 kg)*2
Canada: 1,800 kg*1
1,830 kg*2
Gross Axle Weight
Rating (Front)U.S.: 2,116 lbs (960 kg)*1
2,160 lbs (980 kg)*2
Canada: 960 kg*1
980 kg*2
Gross Axle Weight
Rating (Rear)U.S.: 1,851 lbs (840 kg)*1
1,895 lbs (860 kg)*2
Canada:840 kg*1
860 kg*2
Refrigerant TypeHFO-1234yf (R-1234yf)
Charge Quantity 13.9 – 15.7 oz (395 – 445 g)
Lubricant TypeND-OIL11 (POE)
Quantity 7.3 – 8.2 cu-in (120 – 135 cm3)
■ Engine Specifications
■ Fuel
■ Washer Fluid
Displacement91.38 cu-in (1,498 cm3)
Spark Plugs NGK DILZKAR7C11H
TypeUnleaded gasoline, Pump octane number
of 87 or higher
Fuel Tank Capacity 10.6 US gal (40 L)
Tank CapacityU.S.: 2.6 US qt (2.5 L)
Canada: 4.8 US qt (4.5 L)
■ Light Bulbs
Headlights (Low Beam)LED
Headlights (High Beam) LED
Fog Lights*LED
Parking/Daytime Running Lights LED
Front Turn Signal LightsLED
Front Side Marker Lights LED
Side Turn Signal Lights
(on Door Mirrors)*LED
Brake Lights LED
Rear Turn Signal Lights21 W (Amber)
Taillights/Rear Side Marker Lights LED
TaillightsLED
Back-Up Lights 16 W
High-Mount Brake LightLED
Rear License Plate Light LED
Interior LightsMap Lights8 WCeiling Light8 WAmbient LightsLEDVanity Mirror Lights2.3 WTrunk Light5 W
* Not available on all models
19 INSIGHT HMIN-31TXM6000.book 652 ページ 2018年4月20日 金曜日 午後4時22分