engine HONDA ODYSSEY 1995 Owners Manual
[x] Cancel search | Manufacturer: HONDA, Model Year: 1995, Model line: ODYSSEY, Model: HONDA ODYSSEY 1995Pages: 240, PDF Size: 2.44 MB
Page 1 of 240

Odyssey 1995 Online Reference Owner's Manual
Use these links (and links throughout this manual) to navigate through\
this reference.
For a printed owner's manual, click on authorized manuals or go to www.h\
elminc.com.
Contents
Introduction ........................................................................\
............................................................... i
A Few Words About Safety........................................................................\
....................................... ii
Driver and Passenger Safety ........................................................................\
.................................... 3
Proper use and care of your vehicle's seat belts, and Supplemental Restr\
aint System.
Instruments and Control s........................................................................\
........................................ . 33
Instrume nt panel indicator and gauge, and how to use dashboard and steering colu\
mn controls.
Comfort and Convenience Features ........................................................................\
..................... . 75
How to operate the climate control system, the audio system, and other c\
onvenience features.
Before Driving........................................................................\
..........................................................107
What gasoline to use, how to break -in your new vehicle, and how to load luggage and other cargo.
Driving ........................................................................\
......................................................................117
The proper way to start the engine, shift the transmission, and park, pl\
us towing a trailer.
Maintenance........................................................................\
.............................................................135
The Maintenance Schedule shows you when you need to take you r vehicle to the dealer.
Appearance Car e........................................................................\
..................................................... .183
Tips on cleaning and protecting your vehicle. Things to look for if your\
vehicle ever needs body repairs.
Taking Care of the Unexpecte d........................................................................\
..............................191
This section covers several problems motorists sometimes experience, an d how to handle them.
Technical Informatio n........................................................................\
.............................................215
ID numbers, dimensions, capacities, and technical information.
Warranty and Customer Relations (U.S. and Canada)................................................................227
A summary of the warranties covering your new Acura, and how to contact \
us.
Authorized Manu als (U.S. only)
........................................................................\
............................. .
233
How to order manuals and other technical literature.
Index ........................................................................\
........................ ...................................................... I
Service Information Summary
A summary of information you need when you pull up to the fuel pump.
Owner's Identification Form
ProCarManuals.com
Page 17 of 240
Supplemental Restraint System
The passenger's airbag is stored near the top of the dashboard, under
a lid marked SRS. Do not place any
objects on top of this lid. If the airbag
inflates, those objects can be
propelled inside the car and possibly
hurt someone.
How the SRS Indicator
Light Works
The purpose of the SRS light on your instrument panel is to alert you of a
potential problem with your supple- mental restraint system.
Have the system checked if: The light does not come on when
you turn the ignition ON (II).
The light stays on after the engine
starts.
The light comes on or flashes while you are driving.
System Service
Your supplemental restraint system is virtually maintenance-free. Thereare no parts you can safely service.
You must have the system serviced by an authorized Honda dealer:
If your airbags ever inflate, the
airbags and control unit must be
replaced. Do not try to remove or discard the airbags by yourself.
This must be done by a Honda
dealer.
If the SRS indicator light alerts
you of a problem. Have the supplemental restraint system
checked as soon as possible.Otherwise, your airbags might not
inflate when you need them.
When the car is ten years old. Have the dealer inspect thesystem. The production date is on
the driver's doorjamb for your
convenience.
Driver and Passenger Safety
SRS
ProCarManuals.comMain Menu Table of Contents s t
Page 30 of 240
Carbon Monoxide Hazard
Your car's exhaust contains carbon monoxide gas. You should have no
problem with carbon monoxide
entering the car in normal driving if
you maintain your car properly. Have the exhaust system inspected
for leaks whenever:
The car is raised for an oil change.
You notice a change in the soundof the exhaust.
The car was in an accident that may have damaged the underside.
Carbon monoxide gas is toxic.Breathing it can cause
unconsciousness and can even
kill you.
Avoid any enclosed areas or activities that expose you to
carbon monoxide. High levels of carbon monoxide can
collect rapidly in enclosed areas,
such as a garage. Do not run the
engine with the garage door closed.
Even with the door open, run the
engine only long enough to move thecar out of the garage.
With the tailgate open, air flow can pull exhaust gas into your car's
interior and create a hazardous
condition. If you must drive with the
tailgate open, open all the windowsand set the heating and cooling
system as follows. If you must sit in your parked car,
even in an unconfined area, with the
engine running, adjust the heating
and cooling system as follows: 1. Push the button.
2. Select the mode.
3. Turn the fan on high speed.
4. Set the temperature control to a
comfortable setting.
Driver and Passenger SafetyProCarManuals.comMain Menu Table of Contents s t
Page 35 of 240
Indicator Lights
The instrument panel has many indicators to give you important
information about your car.
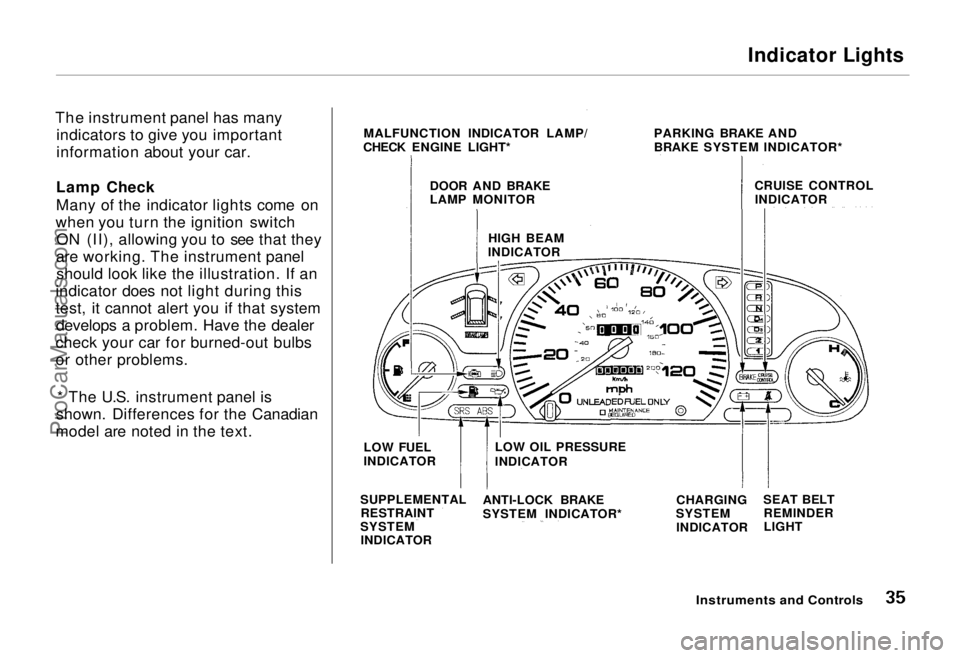
Lamp Check
Many of the indicator lights come on
when you turn the ignition switch ON (II), allowing you to see that they
are working. The instrument panel should look like the illustration. If an
indicator does not light during this
test, it cannot alert you if that system develops a problem. Have the dealer
check your car for burned-out bulbs
or other problems.
* The U.S. instrument panel is
shown. Differences for the Canadian
model are noted in the text.
Instruments and Controls
MALFUNCTION INDICATOR LAMP/
CHECK ENGINE LIGHT* PARKING BRAKE AND
BRAKE SYSTEM INDICATOR*
CRUISE CONTROLINDICATOR
DOOR AND BRAKE
LAMP MONITOR
HIGH BEAM
INDICATOR
LOW FUEL
INDICATOR
SUPPLEMENTAL RESTRAINT
SYSTEM INDICATOR LOW OIL PRESSURE
INDICATOR
ANTI-LOCK BRAKE
SYSTEM INDICATOR* CHARGING
SYSTEM
INDICATOR SEAT BELT
REMINDER
LIGHTProCarManuals.comMain Menu Table of Contents s t
Page 36 of 240
Indicator Lights
Seat Belt Reminder Light
This indicator lights when you turn the ignition ON (II). It is a reminder
to you and your passengers to
protect yourselves by fastening theseat belts. A beeper also sounds if
you have not fastened your seat belt.
If you do not fasten your seat belt,
the beeper will stop after a few seconds but the light stays on until
you do. Both the light and the beeper stay off if you fasten your seat belt
before turning on the ignition. Low Oil Pressure
Indicator
This indicator lights when the oil pressure in the engine drops lowenough to cause damage. It should
light when the ignition is ON (II) and
go out after the engine starts. If this
light flashes or stays on when the engine is running, there is a possi-
bility of serious engine damage. Safely pull to the side of the road andshut off the engine as soon as you
can. Turn to page 204 for in- structions and precautions on
checking the engine.
Charging System
Indicator
This light indicates the battery is not being charged. It should come on
when the ignition is ON (II), and goout after the engine starts. If this
light comes on while driving, the
battery is not being charged. Turn to
page 205 for information about what
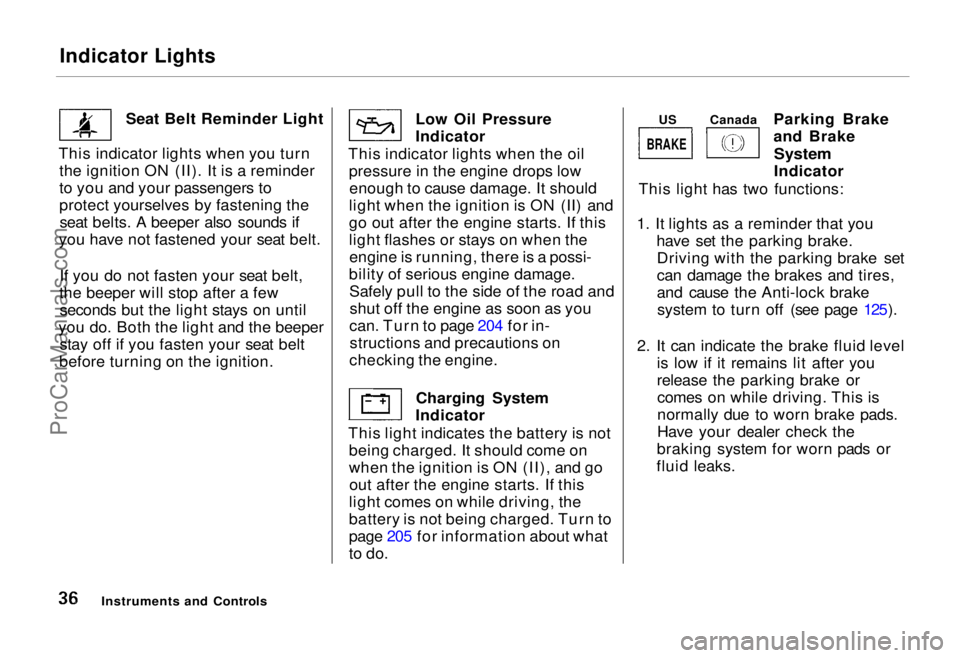
to do. Parking Brake
and Brake
System
Indicator
This light has two functions:
1. It lights as a reminder that you have set the parking brake.Driving with the parking brake set
can damage the brakes and tires,
and cause the Anti-lock brakesystem to turn off (see page 125).
2. It can indicate the brake fluid level is low if it remains lit after you
release the parking brake orcomes on while driving. This is
normally due to worn brake pads.
Have your dealer check the
braking system for worn pads or
fluid leaks.
Instruments and Controls
BRAKE
US
CanadaProCarManuals.comMain Menu Table of Contents s t
Page 37 of 240
Indicator Lights
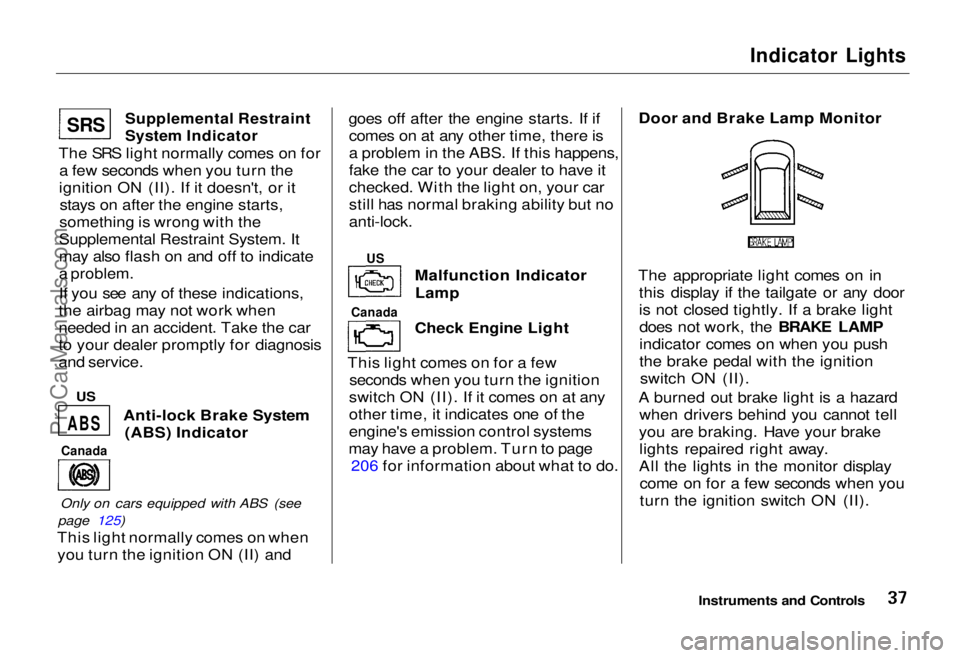
Supplemental Restraint
System Indicator
The SRS light normally comes on for a few seconds when you turn the
ignition ON (II). If it doesn't, or it stays on after the engine starts,
something is wrong with the
Supplemental Restraint System. It
may also flash on and off to indicate
a problem.
If you see any of these indications,
the airbag may not work when
needed in an accident. Take the car
to your dealer promptly for diagnosis
and service.
Anti-lock Brake System(ABS) Indicator
Only on cars equipped with ABS (see
page 125)
This light normally comes on when you turn the ignition ON (II) and goes off after the engine starts. If if
comes on at any other time, there is
a problem in the ABS. If this happens,
fake the car to your dealer to have it
checked. With the light on, your car
still has normal braking ability but no
anti-lock.
Malfunction IndicatorLamp
Check Engine Light
This light comes on for a few seconds when you turn the ignition
switch ON (II). If it comes on at any
other time, it indicates one of the
engine's emission control systems
may have a problem. Turn to page 206 for information about what to do. Door and Brake Lamp Monitor
The appropriate light comes on in this display if the tailgate or any door
is not closed tightly. If a brake lightdoes not work, the BRAKE LAMP
indicator comes on when you push
the brake pedal with the ignition switch ON (II).
A burned out brake light is a hazard when drivers behind you cannot tell
you are braking. Have your brake lights repaired right away.
All the lights in the monitor display come on for a few seconds when you
turn the ignition switch ON (II).
Instruments and Controls
Canada
ABS
Canada
US
SR
S
US
ProCarManuals.comMain Menu Table of Contents s t
Page 40 of 240
Gauges
Temperature Gauge This shows the temperature of the engine's coolant. During normal
operation, the pointer should rise
from the bottom white mark to about
the middle of the gauge. In severe driving conditions, such as very hot
weather or a long period of uphill driving, the pointer may rise to the
upper white mark. If it reaches the
red "H" (Hot) mark, pull safely to
the side of the road. Turn to page
202 for instructions and precautions on checking the engine's cooling
system.
Fuel Gauge
This shows how much fuel you have. It is most accurate when the car is on
level ground. It may show slightly more or less than the actual amount
when you are driving on curvy or hilly roads.
The gauge stays at the same fuel level reading after you turn off the
ignition. When you add fuel, the
gauge slowly changes to the new
reading after you turn the ignition
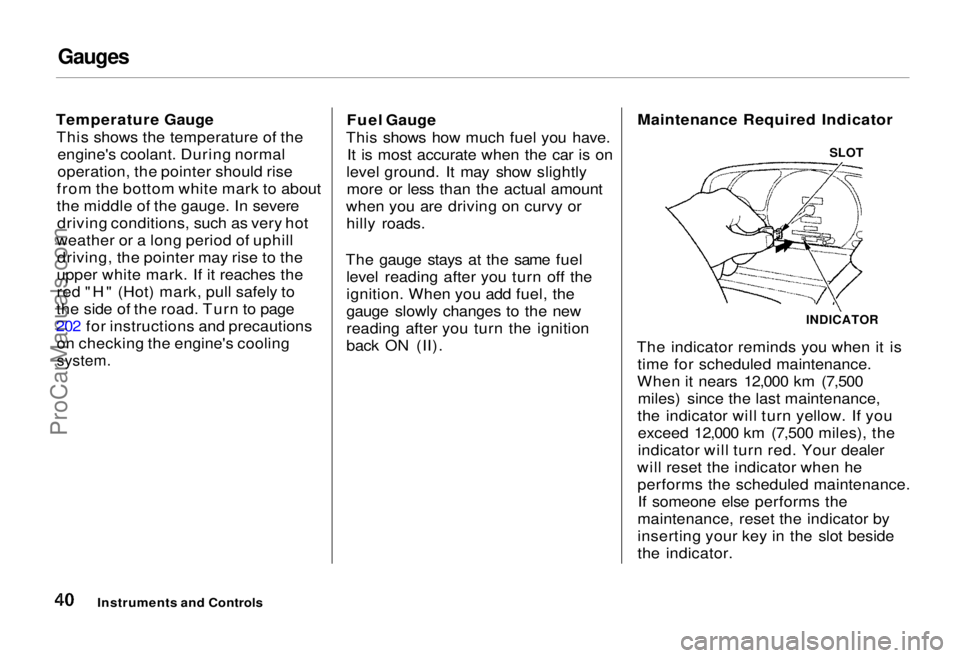
back ON (II). Maintenance Required Indicator
The indicator reminds you when it is time for scheduled maintenance.
When it nears 12,000 km (7,500 miles) since the last maintenance,
the indicator will turn yellow. If you exceed 12,000 km (7,500 miles), the
indicator will turn red. Your dealer
will reset the indicator when he performs the scheduled maintenance.If someone else performs the
maintenance, reset the indicator by
inserting your key in the slot beside
the indicator.
Instruments and Controls
INDICATOR
SLOTProCarManuals.comMain Menu Table of Contents s t
Page 52 of 240
Keys and Locks
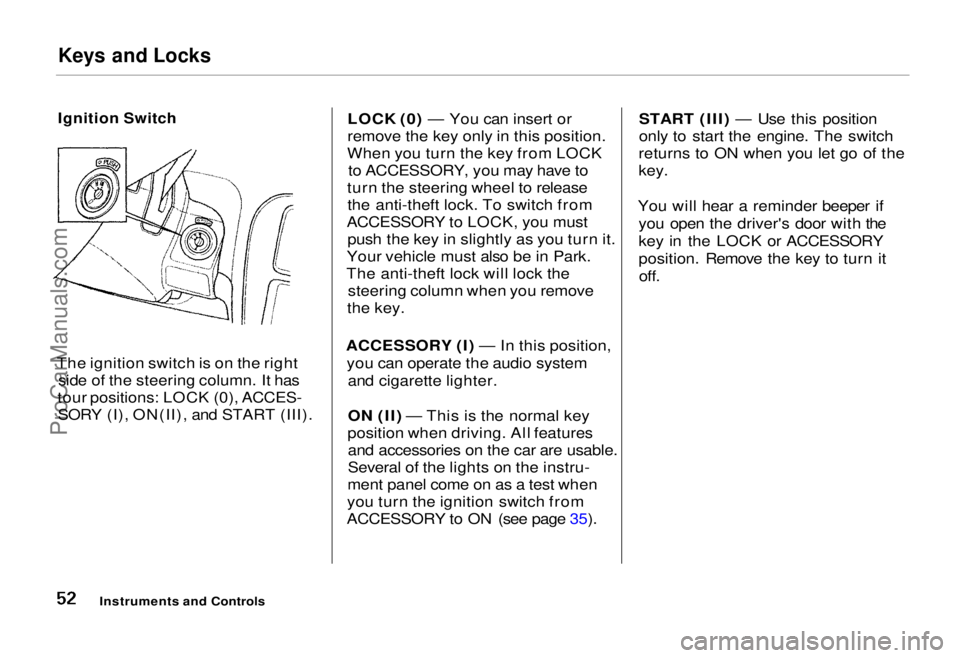
Ignition Switch
The ignition switch is on the right side of the steering column. It has
tour positions: LOCK (0), ACCES- SORY (I), ON(II), and START (III). LOCK (0) — You can insert or
remove the key only in this position.
When you turn the key from LOCK to ACCESSORY, you may have to
turn the steering wheel to release the anti-theft lock. To switch from
ACCESSORY to LOCK, you must push the key in slightly as you turn it.
Your vehicle must also be in Park.
The anti-theft lock will lock the steering column when you remove
the key.
ACCESSORY (I) — In this position, you can operate the audio system and cigarette lighter.
ON (II) — This is the normal key
position when driving. All features and accessories on the car are usable.
Several of the lights on the instru-
ment panel come on as a test when
you turn the ignition switch from
ACCESSORY to ON (see page 35). START (III) — Use this position
only to start the engine. The switch
returns to ON when you let go of the
key.
You will hear a reminder beeper if you open the driver's door with the
key in the LOCK or ACCESSORY
position. Remove the key to turn itoff.
Instruments and ControlsProCarManuals.comMain Menu Table of Contents s t
Page 79 of 240
Heating and Cooling
How to Use the System
This section covers the best way to use the system for ventilation,cooling, dehumidifying, defrosting
and heating. In most cases, the mode
and air source selections are only
recommendations. You may prefer different settings. Use mode to heat or cool the
interior more quickly, or to keep out
smoke and dust. Leaving the system
in the recirculation mode with the
A/C off can cause the windows to fog up. Switch to
mode as
soon as the interior reaches a
comfortable temperature or the
outside smoky, dusty condition
clears.
The engine must be running for the
heater and air conditioning to pro-
vide hot and cold air. The heater uses engine coolant to warm the air.If the engine is cold, it will be several
minutes before you feel warm air
circulating.
The air conditioning system does not depend on engine temperature. It
can produce cold air almost immedi-
ately.
Controlling Air Flow Direction
Air flows into the interior at three
levels: Toward the floor
through the dash vents and
toward the windshield and side
windows You select the air
flow level or combination of levels
with the five mode buttons.
Ventilation
Your car has a flow-through venti- lation system. Air enters the car
through vents in front of the wind-shield. It circulates through the
interior then exits through the rear side panels. This system provides
fresh air even when the car is standing still. To bring in outside air, press the button. Set the fan
at a comfortable speed.
CONTINUED
Comfort and Convenience FeaturesProCarManuals.comMain Menu Table of Contents s t
Page 80 of 240
Heating and Cooling
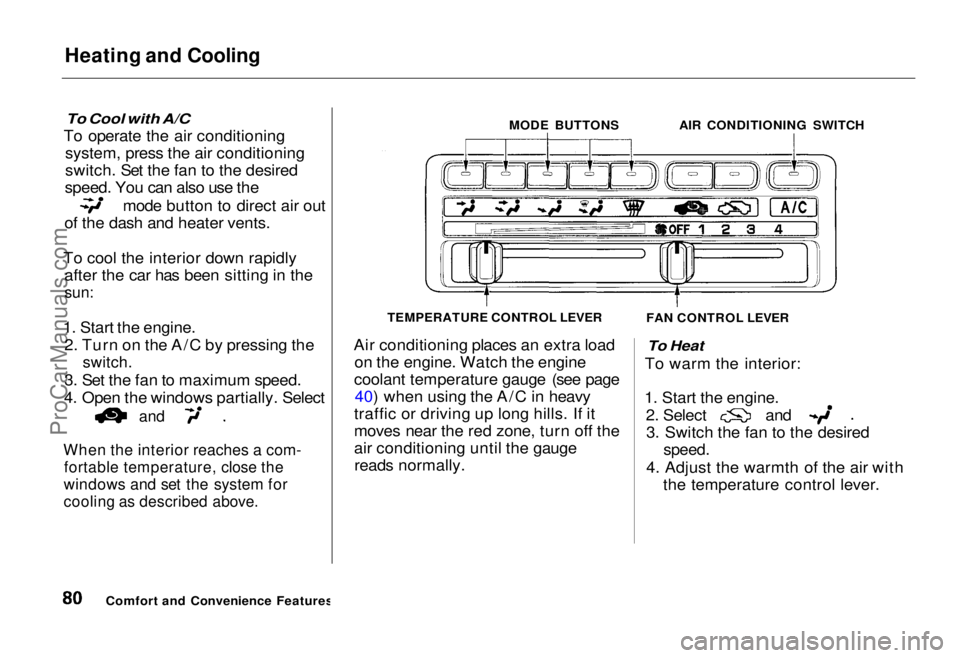
To Cool with A/C
To operate the air conditioning system, press the air conditioning
switch. Set the fan to the desired
speed. You can also use the mode button to direct air out
of the dash and heater vents.
To cool the interior down rapidly after the car has been sitting in the
sun:
1. Start the engine. 2. Turn on the A/C by pressing the
switch.
3. Set the fan to maximum speed.
4. Open the windows partially. Select
and
When the interior reaches a com-
fortable temperature, close the
windows and set the system for
cooling as described above.
Air conditioning places an extra load
on the engine. Watch the engine
coolant temperature gauge (see page 40) when using the A/C in heavy
traffic or driving up long hills. If it
moves near the red zone, turn off the
air conditioning until the gauge reads normally.
To Heat
To warm the interior:
1. Start the engine. 2. Select and
3. Switch the fan to the desired
speed.
4. Adjust the warmth of the air with the temperature control lever.
Comfort and Convenience Features MODE BUTTONS
AIR CONDITIONING SWITCH
FAN CONTROL LEVER
TEMPERATURE CONTROL LEVERProCarManuals.comMain Menu Table of Contents s t