HONDA ODYSSEY 2000 RA6-RA9 / 2.G Owners Manual
Manufacturer: HONDA, Model Year: 2000, Model line: ODYSSEY, Model: HONDA ODYSSEY 2000 RA6-RA9 / 2.GPages: 352, PDF Size: 4.43 MB
Page 91 of 352
Manual Slidin g Door s (L X Model )
Your Honda is equipped with dual
sliding doors. Be sure all passengers
are clear of the sliding doors before
closing them.
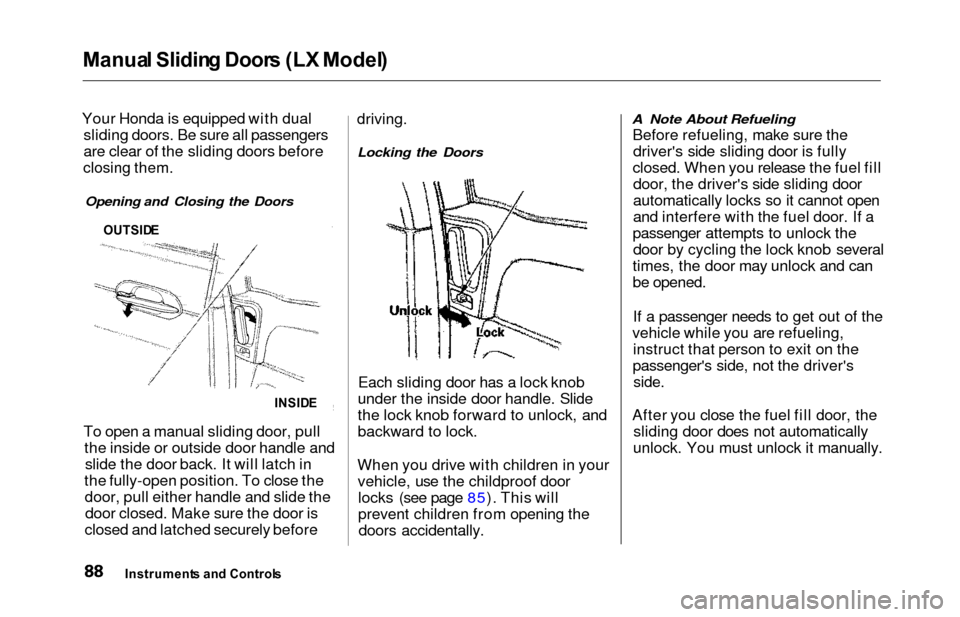
Opening and Closing the Doors
INSID E
To open a manual sliding door, pull
the inside or outside door handle andslide the door back. It will latch in
the fully-open position. To close the door, pull either handle and slide thedoor closed. Make sure the door is
closed and latched securely before driving.
Locking the Doors
Each sliding door has a lock knob
under the inside door handle. Slide
the lock knob forward to unlock, and
backward to lock.
When you drive with children in your vehicle, use the childproof doorlocks (see page 85). This will
prevent children from opening thedoors accidentally.
A Note About Refueling
Before refueling, make sure thedriver's side sliding door is fully
closed. When you release the fuel fill door, the driver's side sliding door
automatically locks so it cannot open
and interfere with the fuel door. If a
passenger attempts to unlock the door by cycling the lock knob several
times, the door may unlock and can
be opened.
If a passenger needs to get out of the
vehicle while you are refueling, instruct that person to exit on the
passenger's side, not the driver's
side.
After you close the fuel fill door, the sliding door does not automatically
unlock. You must unlock it manually.
Instrument s an d Control s
OUTSIDE
Page 92 of 352
Manual Slidin g Door s (L X Model) , Powe r Slidin g Door s (E X Model )
Parking Facing Downhill
When parking facing downhill, make
sure the manual doors are latched in
the fully-open position, then hold the door open while allowing your
passengers to enter or exit the
vehicle. Do not pull the inside or outside door handle, or the latch will
release and the door will slam shut. Powe
r Slidin g Door s
Your Honda is equipped with dual power sliding doors. The doors onthe EX model are electrically
powered and can be operated with
the remote transmitter, the door
handles, or the switches on thedashboard.
Be sure all passengers are clear of
the sliding doors before closing them. The power sliding doors operate
with the ignition switch in any
position. In addition: The shift lever must be in Park.
The MAIN switch on thedashboard must be in the ON
position.
The sliding door you want to operate must be unlocked.
To open the door with the inside handle, the childproof door lockon the door you want to operate
must be unlocked (see page 85).
Make sure both sliding doors are
closed before you start driving.
If you shift out of Park while a door
is closing, you will hear a beep until
the power sliding door closes
completely.
CONTINUED
Instrument s an d Control s
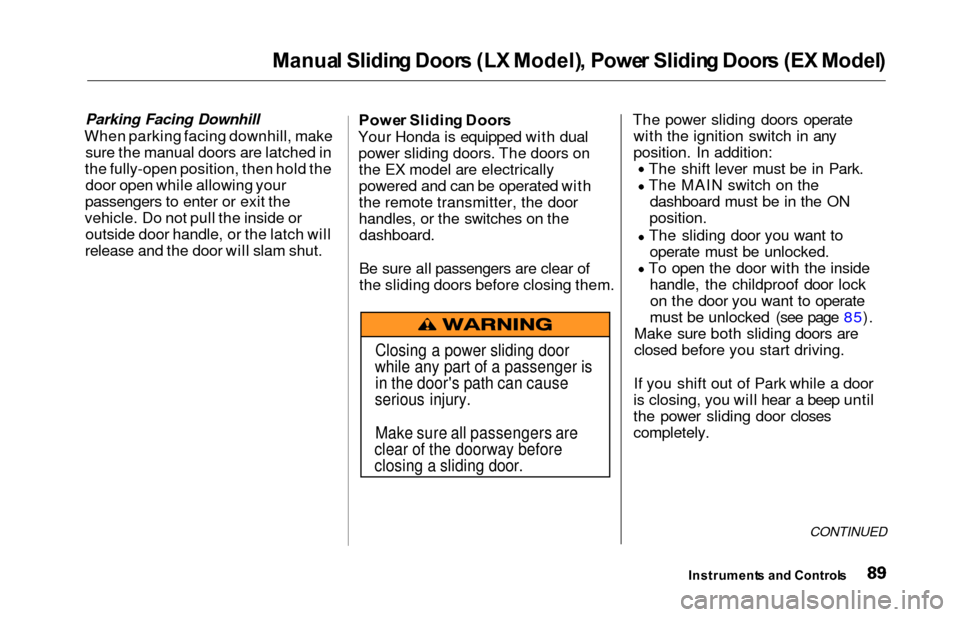
Closing a power sliding door
while any part of a passenger is in the door's path can cause
serious injury.
Make sure all passengers are
clear of the doorway before
closing a sliding door.
Page 93 of 352
Power Slidin g Door s (E X Model )
If you shift out of Park while a door
is opening, you will hear a
continuous tone and the door willstop moving. If you keep driving with
the door open, the tone continues until you stop and close the door.
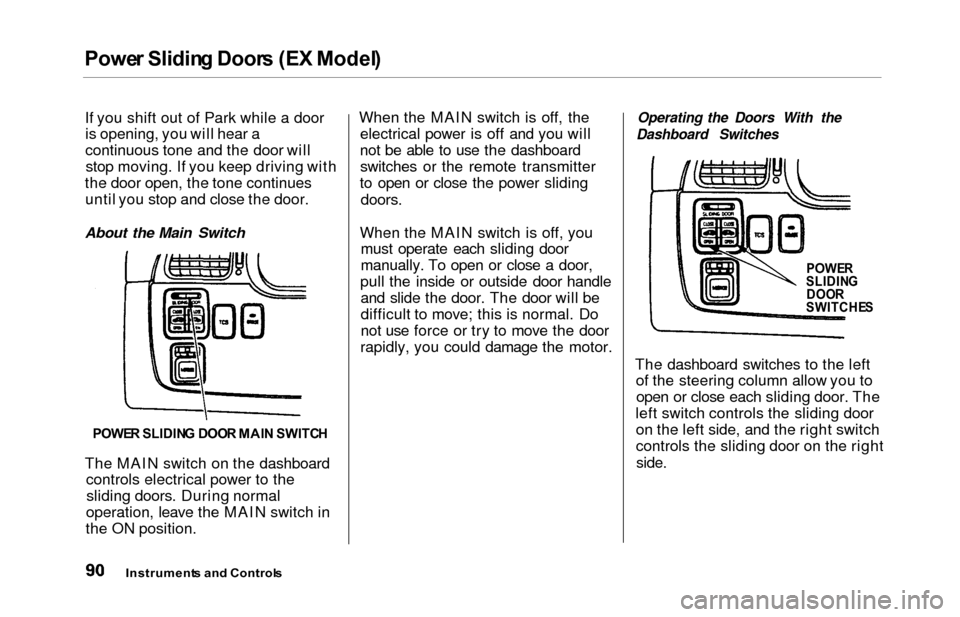
About the Main Switch
The MAIN switch on the dashboard controls electrical power to thesliding doors. During normal
operation, leave the MAIN switch in
the ON position. When the MAIN switch is off, the
electrical power is off and you will
not be able to use the dashboard switches or the remote transmitter
to open or close the power sliding
doors.
When the MAIN switch is off, you must operate each sliding door
manually. To open or close a door,
pull the inside or outside door handle and slide the door. The door will be
difficult to move; this is normal. Do
not use force or try to move the door
rapidly, you could damage the motor.
Operating the Doors With the
Dashboard Switches
The dashboard switches to the left of the steering column allow you toopen or close each sliding door. The
left switch controls the sliding door on the left side, and the right switch
controls the sliding door on the right
side.
Instrument s an d Control s
POWER SLIDIN G DOO R MAI N SWITC H
POWERSLIDIN G
DOO R
SWITCHE S
Page 94 of 352
Power Slidin g Door s (E X Model )
To open a door, make sure the door
is unlocked. Then push and release
the bottom of the switch. If you
forget to unlock the door first, you
will hear three beeps. Unlock the door and try again.
To close a sliding door, push and release the top of the appropriate
switch.
To stop the power sliding door'smovement, push either the top or the
bottom of the appropriate switch.
The door will stop, and you will hear three beeps.
To start the door moving again, push the switch again: bottom to open, or
top to close.
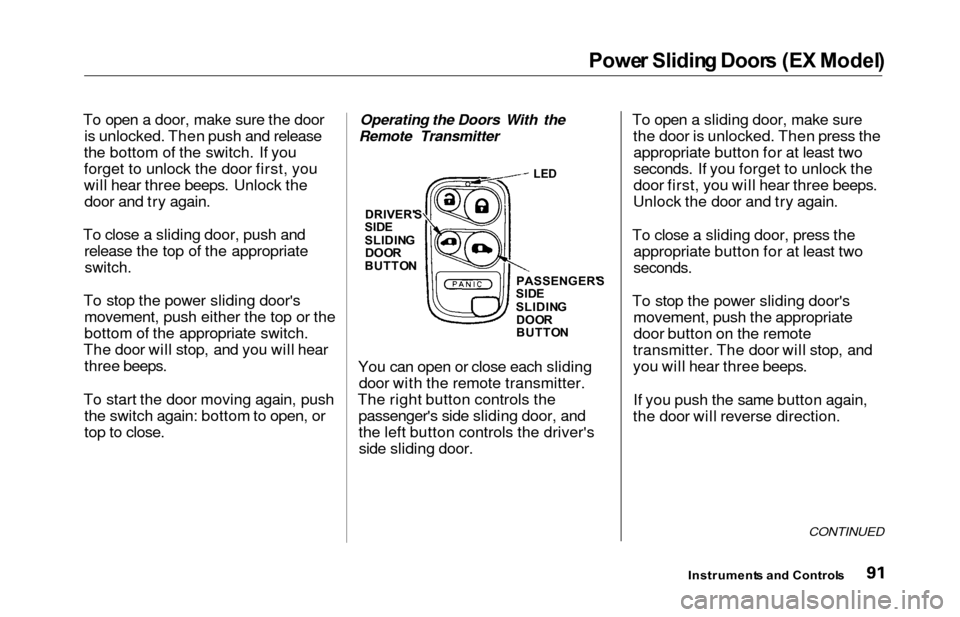
Operating the Doors With the
Remote Transmitter
You can open or close each slidingdoor with the remote transmitter.
The right button controls the passenger's side sliding door, and
the left button controls the driver'sside sliding door. To open a sliding door, make sure
the door is unlocked. Then press theappropriate button for at least two
seconds. If you forget to unlock the
door first, you will hear three beeps.
Unlock the door and try again.
To close a sliding door, press the appropriate button for at least two
seconds.
To stop the power sliding door'smovement, push the appropriate
door button on the remote
transmitter. The door will stop, and
you will hear three beeps.
If you push the same button again,
the door will reverse direction.
CONTINUED
Instrument s an d Control s
LED
DRIVER' S
SID E
SLIDIN G
DOORBUTTO N
PASSENGER'S
SID E
SLIDIN G
DOO R
BUTTO N
Page 95 of 352
Power Slidin g Door s (E X Model )
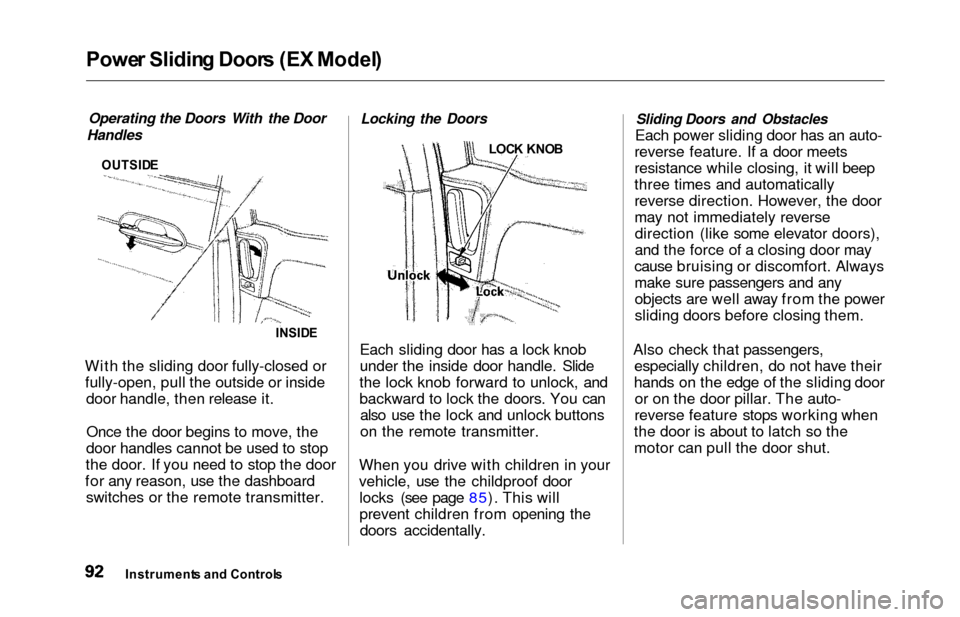
Operating the Doors With the Door
Handles
OUTSID E
INSIDE
With the sliding door fully-closed or
fully-open, pull the outside or inside door handle, then release it.
Once the door begins to move, the
door handles cannot be used to stop
the door. If you need to stop the door
for any reason, use the dashboard switches or the remote transmitter.
Locking the Doors
LOC K KNO B
Each sliding door has a lock knob
under the inside door handle. Slide
the lock knob forward to unlock, and
backward to lock the doors. You can also use the lock and unlock buttons
on the remote transmitter.
When you drive with children in your
vehicle, use the childproof door locks (see page 85). This will
prevent children from opening thedoors accidentally.
Sliding Doors and Obstacles
Each power sliding door has an auto-
reverse feature. If a door meets
resistance while closing, it will beep
three times and automatically
reverse direction. However, the door
may not immediately reverse direction (like some elevator doors),
and the force of a closing door may
cause bruising or discomfort. Always
make sure passengers and any objects are well away from the power
sliding doors before closing them.
Also check that passengers, especially children, do not have their
hands on the edge of the sliding door or on the door pillar. The auto-
reverse feature stops working when
the door is about to latch so the
motor can pull the door shut.
Instrument s an d Control s
Page 96 of 352
Power Slidin g Door s (E X Model )
If a person or object is in the way
after the door begins to close, the
door handles cannot be used to stop
the door. To stop the door, use the dashboard switches or the remote
transmitter.
A Note About Refueling
Before refueling, make sure the driver's side sliding door is fully
closed. When you release the fuel fill
door, the driver's side sliding door
automatically locks so it cannot open
and interfere with the fuel door. If a
passenger attempts to unlock the door by cycling the lock knob several
times, the door may unlock and can be opened.
If a passenger needs to get out of the
vehicle while you are refueling, instruct that person to exit on the
passenger's side, not the driver's
side.
After you close the fuel fill door, the sliding door does not automatically
unlock. You must unlock it manually.
Parking Facing Downhill
When parking facing downhill on a steep grade, the power sliding doors
may not open or close as they do
normally.
Make sure the MAIN switch is in
the ON position. This allows the
power assist to keep the doors
from slamming shut.
If the MAIN switch is off, the doorcan slam shut and possibly injure
someone.
Make sure the power sliding doors
are latched in the fully-open
position, then hold the door open
while allowing your passengers to enter or exit the vehicle. Do not
pull the inside or outside door
handle, or the latch will release
and the door will close.
How to Reset the Power Sliding
Doors
If your vehicle's battery is
disconnected or goes dead while asliding door is open, the power
sliding door system needs to be reset.
After reconnecting the battery:
Close each sliding door completely
by hand; or
Move the MAIN switch on the
dashboard to the ON position.
Push and hold the top of each door switch until each sliding door
closes completely.
If the power sliding doors are closed, the system will reset itselfautomatically once the battery has
been reconnected. If the power sliding doors do notoperate properly after resetting,
have your vehicle checked by a Honda dealer.
Instrument s an d Control s
CONTINUED
Page 97 of 352
Power Slidin g Door s (E X Model )
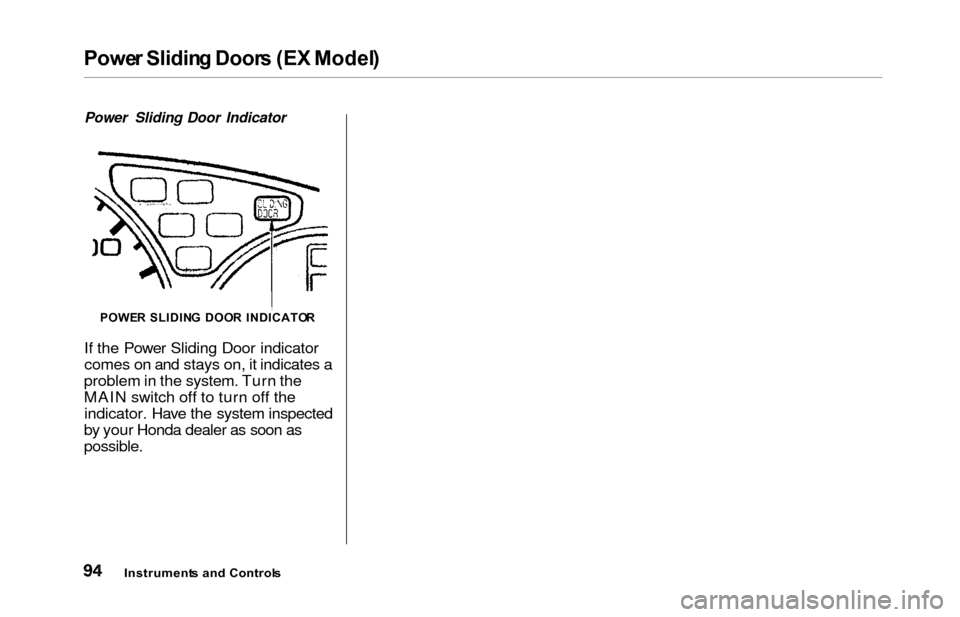
Power Sliding Door Indicator
If the Power Sliding Door indicator
comes on and stays on, it indicates a
problem in the system. Turn the
MAIN switch off to turn off the indicator. Have the system inspected
by your Honda dealer as soon as
possible.
Instrument s an d Control s
POWER SLIDIN G DOO R INDICATO R
Page 98 of 352

HomeLink Universa l Transmitte r
On EX model
The HomeLink Universal
Transmitter built into your vehicle
can be programmed to operate
remotely controlled devices around
your home, such as garage doors, lighting, or home security systems.
It can replace up to three remote
transmitters.
Custome r Assistanc e
If you have problems with training
the HomeLink Universal Transmitter,
or would like information on home
products that can be operated by the
transmitter, call (800) 355-3515. On
the internet, go to
www.homelink.jci.com.
Importan t Safet y Precaution s
Always refer to the operating
instructions and safety information
that came with your garage door
opener or other equipment you
intend to operate with the HomeLink Universal Transmitter.
If you do not have this information,
you should contact the
manufacturer of the equipment.
While training or using the transmitter, make sure you have a
clear view of the garage door or
gate, and that no one will be injured
by its movement.
Genera l Informatio n
If you are training the transmitter to
operate a garage door or gate, it is
recommended that you unplug the
motor for that device during
training. Repeatedly pressing the
remote control button could burn
out the motor.
The HomeLink transmitter stores the code in a permanent memory.
There should be no need to retrain
the transmitter if your vehicle's
battery goes dead or is
disconnected.
If your garage door opener was manufactured before April 1982,
you may not be able to program the
HomeLink Universal Transmitter tooperate it. Garage door openers
manufactured before that date do
not have a safety feature that
causes them to stop and reverse ifan obstacle is detected during
closing, increasing the risk of injury. If you have questions, call(800) 355-3515.
Trainin g th e Transmitte r
Before you can use the HomeLink
Universal Transmitter to operate devices around your home, it must
"learn" the proper codes. For
example, to train the transmitter to
open and close the garage door:
CONTINUED
Instrument s an d Control s
Page 99 of 352
HomeLink Universa l Transmitte r
Before you begin — If you just took
delivery of your vehicle and have
not trained any of the buttons in the
HomeLink transmitter before, you should erase any previously learned
codes before training the first
button. To do this, press and hold the two outside buttons on the
HomeLink transmitter until the red light flashes. Release the buttons,
then proceed to Step 1.
If you are training the second or
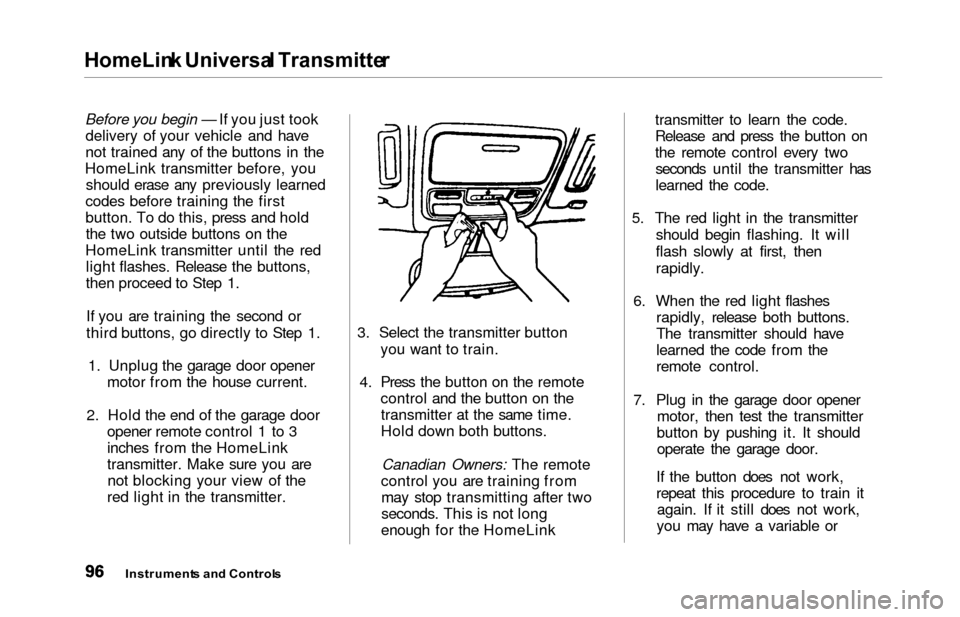
third buttons, go directly to Step 1. 1. Unplug the garage door opener motor from the house current.
2. Hold the end of the garage door opener remote control 1 to 3
inches from the HomeLink
transmitter. Make sure you arenot blocking your view of the
red light in the transmitter. 3. Select the transmitter button
you want to train.
4. Press the button on the remote control and the button on thetransmitter at the same time.
Hold down both buttons.
Canadian Owners: The remote
control you are training from may stop transmitting after two
seconds. This is not long
enough for the HomeLink transmitter to learn the code.
Release and press the button on
the remote control every two
seconds until the transmitter has
learned the code.
5. The red light in the transmitter should begin flashing. It will
flash slowly at first, then
rapidly.
6. When the red light flashes rapidly, release both buttons.
The transmitter should have
learned the code from the
remote control.
7. Plug in the garage door opener motor, then test the transmitter
button by pushing it. It should operate the garage door.
If the button does not work,
repeat this procedure to train it again. If it still does not work,
you may have a variable or
Instrument s an d Control s
Page 100 of 352
HomeLink Universa l Transmitte r
rolling code garage door
opener. Test this by pressing
and holding the HomeLink
transmitter button you just
trained. If the red light blinks
for two seconds, then stays on,
you have a rolling code garage
door opener. You may be able
to verify this with the
manufacturer's documentation.
Go to "Training With a Rolling
Code System."
8. Repeat these steps to train the other two transmitter buttons tooperate any other remotely-
controlled devices around your
home (lighting, automatic gate, security system, etc.).
Trainin g Wit h a Rollin g Cod e
Syste m
For security purposes, newer
garage door opening systems use a
"rolling" or variable code.
Information from the remote control and the garage door opener
are needed before the HomeLink
transmitter can operate the garage
door opener. The "Training the
Transmitter" procedure trains the
HomeLink transmitter to the proper garage door opener code. The
following procedure synchronizes the HomeLink transmitter to the
garage door opener so they sendand receive the correct codes.
It may be helpful to have someone assist you with this procedure.
1. Make sure you have properly completed the "Training the
Transmitter" procedure.
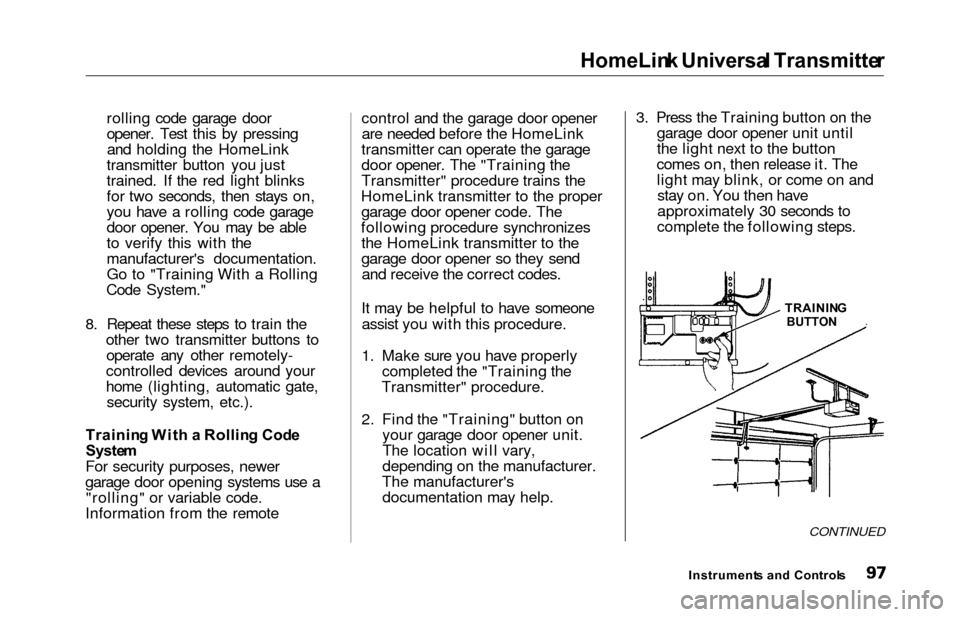
2. Find the "Training" button on your garage door opener unit.
The location will vary,
depending on the manufacturer.
The manufacturer's documentation may help. 3. Press the Training button on the
garage door opener unit until
the light next to the button
comes on, then release it. The light may blink, or come on andstay on. You then have
approximately 30 seconds to
complete the following steps.
CONTINUED
Instrument s an d Control s
TRAININ
G
BUTTON