steering wheel HONDA ODYSSEY 2000 RA6-RA9 / 2.G Owner's Manual
[x] Cancel search | Manufacturer: HONDA, Model Year: 2000, Model line: ODYSSEY, Model: HONDA ODYSSEY 2000 RA6-RA9 / 2.GPages: 352, PDF Size: 4.43 MB
Page 205 of 352
Preparing to Driv e
You should do the following checks
and adjustments every day before
you drive your vehicle.
1. Make sure all windows, mirrors, and outside lights are clean and
unobstructed. Remove frost, snow,or ice.
2. Check that the hood and tailgate are fully closed.
3. Visually check the tires. If a tire looks low, use a gauge to check its
pressure.
4. Check that any items you may be carrying with you inside are stored
properly or fastened down
securely.
5. Check the adjustment of the seat
(see page 100).
6. Check the adjustment of the inside and outside mirrors (see
page 115).
7. Check the adjustment of the steering wheel (see page 72).
8. Make sure the doors and tailgate are securely closed and locked.
9. Fasten your seat belt. Check that your passengers have fastenedtheir seat belts (see page 15). 10. Turn the ignition switch ON (II).
Check the indicator lights in the
instrument panel.
11. Start the engine (see page 203).
12. Check the gauges and indicator lights in the instrument panel (see
page 57).
Drivin g
Page 210 of 352
Automatic Transmissio n
Second (2 ) — To shift to Second,
pull the shift lever towards you, then shift to the lower gear. This position
locks the transmission in second
gear. It does not downshift to first
gear when you come to a stop. Second gives you more power when
climbing, and increased engine
braking when going down steep hills. Use second gear when starting outon a slippery surface or in deep snow.
It will help reduce wheelspin.
When driving down hill with a trailer, use the Second position.
Firs t (1 ) — To shift from Second to
First, pull the shift lever towards you,
then shift to the lower gear. With the
lever in this position, the transmis- sion locks in First gear. By upshift-
ing and downshifting through 1, 2,
D
3 and D4, you can operate this
transmission much like a manual
transmission without a clutch pedal. Engin
e Spee d Limite r
If you exceed the maximum speed
for the gear you are in, the engine speed will enter into the tachometer's
red zone. If this occurs, you may feel the engine cut in and out. This is
caused by a limiter in the engine's
computer controls. The engine will
run normally when you reduce the
RPM below the red zone. Shif
t Loc k Releas e
This allows you to move the shift lever out of Park if the normalmethod of pushing on the brake
pedal and pulling the shift lever does not work.
1. Set the Parking brake.
2. Remove the key from the ignition switch.
3. Place a cloth on the edge of the shift lock release slot cover on the
steering column. Remove the
cover by carefully prying on the
edge with a small flat-tipped screwdriver (not included in the
toolkit).
Drivin g
CONTINUED
Page 213 of 352
The Brakin g Syste m
Your Honda is equipped with front
disc brakes. The brakes on the rear
wheels are drum. A power assist helps reduce the effort needed on
the brake pedal. The ABS helps you
retain steering control when braking
very hard.
Put your foot on the brake pedal only
when you intend to brake. Resting
your foot on the pedal keeps the brakes applied lightly, causing them
to build up heat. Heat build-up canreduce how well your brakes work. It
also keeps your brake lights on all
the time, confusing drivers behind
you.
Constant application of the brakes
when going down a long hill builds up heat and reduces their effective-
ness. Use the engine to assist the
brakes by downshifting to a lower
gear and taking your foot off the accelerator pedal.
Check your brakes after driving
through deep water. Apply the
brakes moderately to see if they feel normal. If not, apply them gently and
frequently until they do. Since a
longer distance is needed to stop
with wet brakes, be extra cautious and alert in your driving. Brak
e Wea r Indicator s
The front disc brakes on all vehicles have audible brake wear indicators.
When the brake pads need replacing,
you will hear a distinctive metallic "screeching" sound when you apply
the brakes. If you do not have the
brake pads replaced, they will begin screeching all the time.
Your brakes may sometimes squeal or squeak when you apply them
lightly. Do not confuse this with the
brake wear indicators. They make a
very audible "screeching."
Drivin g
Page 214 of 352
The Brakin g Syste m
Brake Syste m Desig n
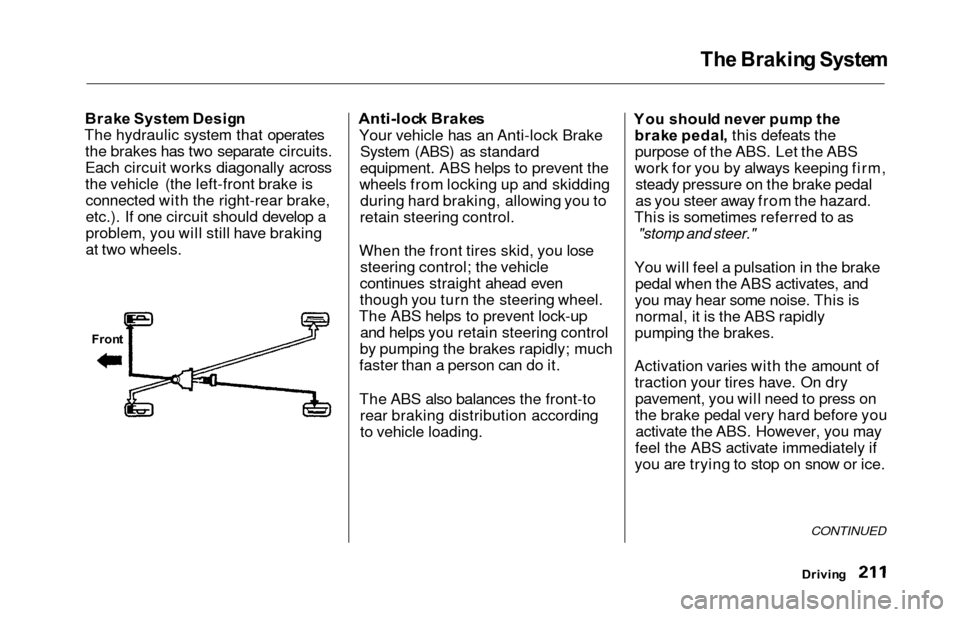
The hydraulic system that operates the brakes has two separate circuits.
Each circuit works diagonally across
the vehicle (the left-front brake isconnected with the right-rear brake,
etc.). If one circuit should develop a
problem, you will still have braking
at two wheels.Anti-loc k Brake s
Your vehicle has an Anti-lock Brake
System (ABS) as standard
equipment. ABS helps to prevent the
wheels from locking up and skidding during hard braking, allowing you to
retain steering control.
When the front tires skid, you lose steering control; the vehicle
continues straight ahead even
though you turn the steering wheel.
The ABS helps to prevent lock-up and helps you retain steering control
by pumping the brakes rapidly; much
faster than a person can do it.
The ABS also balances the front-to rear braking distribution according
to vehicle loading. Yo
u shoul d neve r pum p th e
brak e pedal , this defeats the
purpose of the ABS. Let the ABS
work for you by always keeping firm, steady pressure on the brake pedal
as you steer away from the hazard.
This is sometimes referred to as
"stomp and steer."
You will feel a pulsation in the brake pedal when the ABS activates, and
you may hear some noise. This is normal, it is the ABS rapidly
pumping the brakes.
Activation varies with the amount of traction your tires have. On drypavement, you will need to press on
the brake pedal very hard before youactivate the ABS. However, you may
feel the ABS activate immediately if
you are trying to stop on snow or ice.
Drivin g
CONTINUED
Front
Page 215 of 352
The Brakin g Syste m
Important Safety Reminders
ABS doe s no t reduc e th e tim e o r
distanc e i t take s t o sto p th e
vehicle , it only helps with steering
control during braking. You should always maintain a safe following
distance from other vehicles.
AB S wil l no t preven t a ski d tha t
result s fro m changin g directio n
abruptly , such as trying to take a
corner too fast or making a sudden
lane change. Always drive at a safe,
prudent speed for the road and
weather conditions.
AB S canno t preven t a los s o f
stability . Always steer moderately
when you are braking hard. Severe or sharp steering wheel movement
can still cause your vehicle to veer
into oncoming traffic or off the road. A
vehicl e wit h AB S ma y requir e a
longe r distanc e t o sto p on loose or
uneven surfaces, such as gravel or snow, than a vehicle without anti-
lock. Slow down and allow a greater distance between vehicles under
those conditions. ABS Indicator
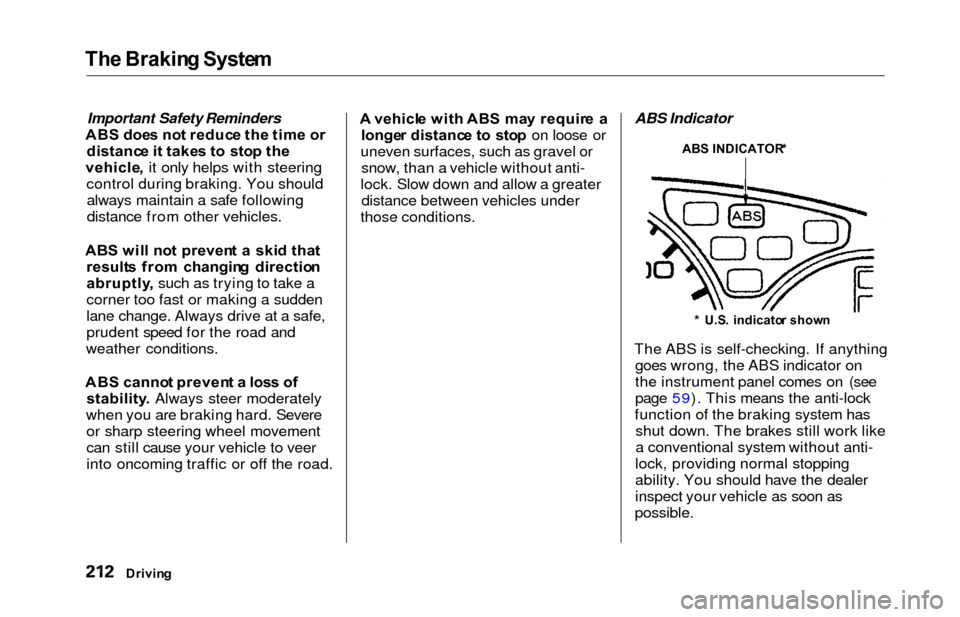
The ABS is self-checking. If anything goes wrong, the ABS indicator on
the instrument panel comes on (see
page 59). This means the anti-lock
function of the braking system has shut down. The brakes still work like
a conventional system without anti-
lock, providing normal stopping
ability. You should have the dealer
inspect your vehicle as soon as
possible.
Drivin g
ABS INDICATOR *
* U.S . indicato r show n
Page 219 of 352
Driving in Ba d Weathe r
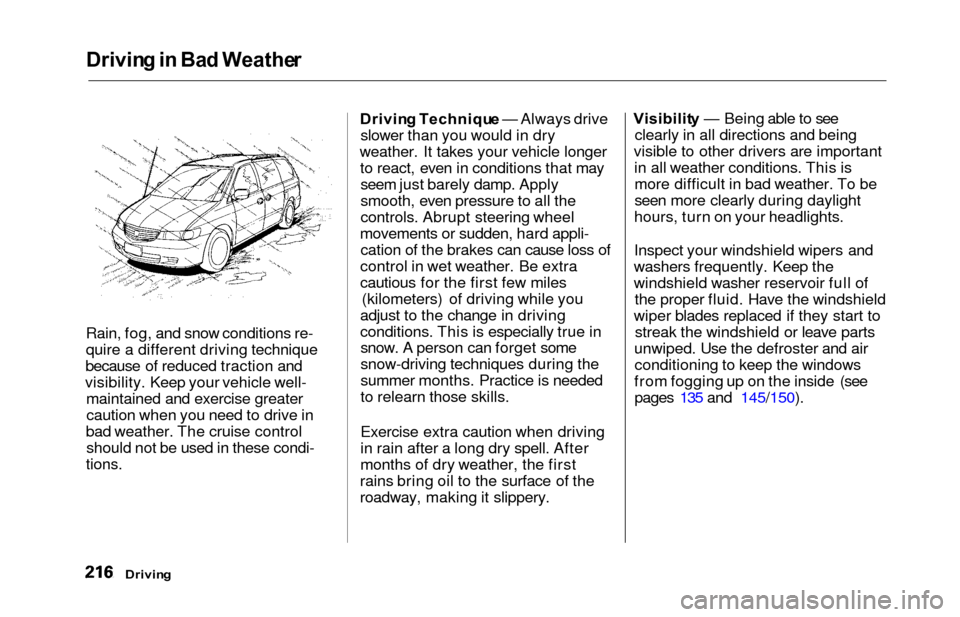
Rain, fog, and snow conditions re-
quire a different driving technique
because of reduced traction and
visibility. Keep your vehicle well- maintained and exercise greater
caution when you need to drive in
bad weather. The cruise control should not be used in these condi-
tions.
Drivin g Techniqu e — Always drive
slower than you would in dry
weather. It takes your vehicle longer to react, even in conditions that mayseem just barely damp. Apply
smooth, even pressure to all the
controls. Abrupt steering wheel
movements or sudden, hard appli- cation of the brakes can cause loss of
control in wet weather. Be extra
cautious for the first few miles (kilometers) of driving while you
adjust to the change in driving
conditions. This is especially true in snow. A person can forget some
snow-driving techniques during the
summer months. Practice is needed
to relearn those skills.
Exercise extra caution when driving
in rain after a long dry spell. After
months of dry weather, the first
rains bring oil to the surface of the
roadway, making it slippery. Visibilit
y — Being able to see
clearly in all directions and being
visible to other drivers are important in all weather conditions. This ismore difficult in bad weather. To be
seen more clearly during daylight
hours, turn on your headlights.
Inspect your windshield wipers and
washers frequently. Keep the
windshield washer reservoir full of the proper fluid. Have the windshield
wiper blades replaced if they start to streak the windshield or leave parts
unwiped. Use the defroster and air conditioning to keep the windows
from fogging up on the inside (see pages 135 and 145/150).
Drivin g
Page 227 of 352
Towing a Traile r
Handling Crosswinds and Buffeting
Crosswinds and air turbulence
caused by passing trucks can disrupt
your steering and cause trailer swaying. When being passed by a
large vehicle, keep a constant speed and steer straight ahead. Do not try
to make quick steering or braking corrections.
Backing Up
Always drive slowly and have someone guide you when backing up.
Grip the bottom of the steering
wheel; then turn the wheel to the left
to get the trailer to move to the left, and turn the wheel right to move the
trailer to the right.
Parking
Follow all normal precautions when
parking, including putting the
transmission in Park and firmly setting the parking brake. Also, place
wheel chocks at each of the trailer's
tires.
Drivin g
Page 228 of 352
Maintenance
This section explains why it is
important to keep your vehicle well
maintained and to follow basic
maintenance safety precautions.
This section also includes Maintenance Schedules for normal
driving and severe driving conditions,
a Maintenance Record, and instruc-
tions for simple maintenance tasks
you may want to take care of
yourself.
If you have the skills and tools to per-
form more complex maintenance tasks on your Honda, you may want
to purchase the Service Manual. See page 337 for information on how to
obtain a copy, or see your Honda
dealer.
Maintenance Safety....................... 226
Important Safety Precautions.. 227
Maintenance Schedule.................. 228
Required Maintenance Record.... 235
Owner Maintenance Checks........ 237
Fluid Locations............................... 238
Engine Oil....................................... 239 Adding Oil................................... 239Recommended Oil..................... 239
Synthetic Oil............................... 240
Additives..................................... 241
Changing the Oil and Filter...... 241
Cooling System.............................. 243
Adding Engine Coolant............. 243
Replacing Engine Coolant........ 245
Windshield Washers..................... 248
Automatic Transmission Fluid..... 249
Brake Fluid..................................... 250
Brake System............................ . 250
Power Steering............................... 251
Air Cleaner Element...................... 252
Hood Latch.................................... . 254
Spark Plugs..................................... 254
Replacement............................... 254
Specifications............................. 256
Battery............................................ 257
Wiper Blades.................................. 259
Air Conditioning System............... 261 Air Conditioning Filter.................. 262Drive Belts...................................... 262
Timing Belt.................................... . 263
Tires................................................ 263 Inflation....................................... 263
Inspection.................................. . 265
Maintenance............................... 266
Tire Rotation.............................. 266 Replacing Tires and Wheels.... 267
Wheels and Tires....................... 268
Winter Driving........................... 268
Snow Tires.............................. 269
Tire Chains............................. 269
Lights............................................. . 270
Headlight Aiming...................... 272
Replacing Bulbs......................... 272
Storing Your Vehicle..................... 281
Maintenanc e
Page 254 of 352
Power Steerin g
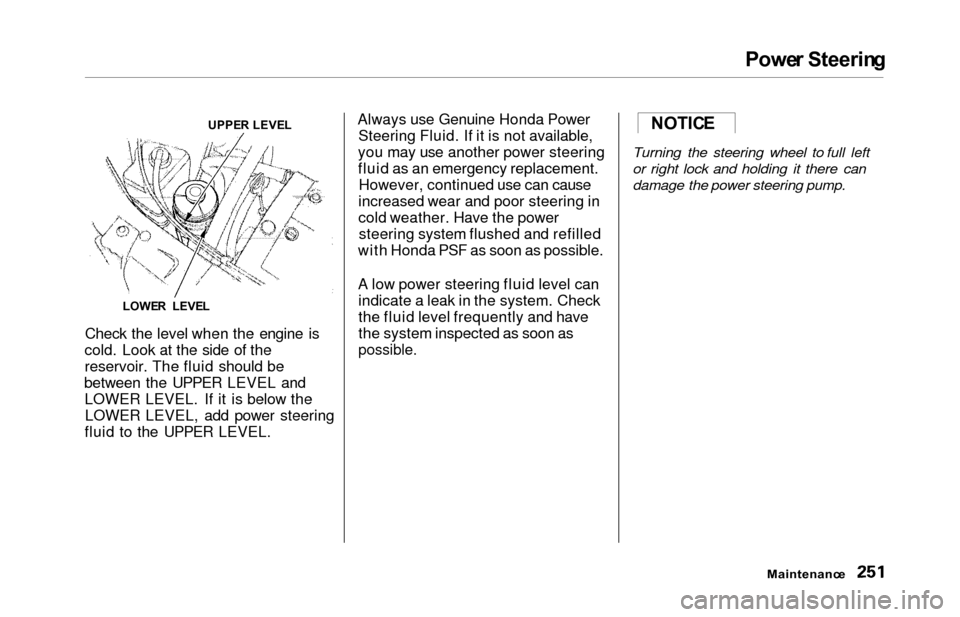
Check the level when the engine is
cold. Look at the side of the
reservoir. The fluid should be
between the UPPER LEVEL and LOWER LEVEL. If it is below theLOWER LEVEL, add power steering
fluid to the UPPER LEVEL. Always use Genuine Honda Power
Steering Fluid. If it is not available,
you may use another power steering
fluid as an emergency replacement. However, continued use can cause
increased wear and poor steering in
cold weather. Have the power steering system flushed and refilled
with Honda PSF as soon as possible.
A low power steering fluid level can indicate a leak in the system. Check
the fluid level frequently and have
the system inspected as soon as
possible.
Turning the steering wheel to full left
or right lock and holding it there can
damage the power steering pump.
Maintenanc e
UPPER LEVE L
LOWE R LEVE LNOTICE
Page 270 of 352
Tires
When shopping for replacement
tires, you may find that some tires
are "directional." This means they
are designed to rotate only in one direction. If you use directional tires,
they should be rotated only front-to-
back. Replacin
g Tire s an d Wheel s
The tires that came with your
vehicle were selected to match the performance capabilities of the
vehicle while providing the best combination of handling, ride
comfort, and long life. You should
replace them with radial tires of thesame size, load range, speed rating,
and maximum cold tire pressure
rating (as shown on the tire's sidewall). Mixing radial and bias-ply
tires on your vehicle can reduce its
braking ability, traction, and steering
accuracy.It is best to replace all four tires at
the same time. If that is not possible or necessary, then replace the two
front tires or the two rear tires as a pair. Replacing just one tire can
seriously affect your vehicle's han-
dling.
CONTINUED
Maintenanc e
Installing improper tires on your
vehicle can affect handling and stability. This can cause a crashin which you can be seriously
hurt or killed.
Always use the size and type of
tires recommended in this
owner's manual.