radio HONDA ODYSSEY 2000 RA6-RA9 / 2.G Owners Manual
[x] Cancel search | Manufacturer: HONDA, Model Year: 2000, Model line: ODYSSEY, Model: HONDA ODYSSEY 2000 RA6-RA9 / 2.GPages: 352, PDF Size: 4.43 MB
Page 132 of 352
Comfort an d Convenienc e Feature s
The heating and air conditioning
systems in your Honda provide a
comfortable driving environment in
all weather conditions.
The standard audio system has
many features. This section de-
scribes those features and how to
use them. (If you selected an
optional audio system, refer to the
operating instructions that came
with it.)
On EX model
Your Honda has an anti-theft audio
system that requires a code number
to enable it.
Heating and Cooling...................... 130
What Each Control Does.......... 130How to Use the System............. 133
To Turn Everything Off........... 137
Climate Control System................ 138 (EX model without Navigation
System)
Fully-automatic Operation........ 140
Semi-automatic Operation........ 142
(EX model with Navigation
System)
Fully-automatic Operation........ 146
Semi-automatic Operation........ 147
Sunlight Sensor/ Temperature Sensor............. 151
Rear A/C Unit............................ 152
Audio System (LX)........................ 155 AM/FM/Cassette StereoAudio System......................... 155
Operating the Radio.................. 156
Adjusting the Sound.................. 159
Audio System Lighting............. 160
Operating the Cassette Player...................................... 160
Tape Search Functions............. 160 Operating the Optional CD
Player/Changer..................... 163
CD Changer Error Indications.............................. 166
Audio System (EX)........................ 167 AM/FM/CD Audio System..... 167Operating the Radio.................. 168
Adjusting the Sound.................. 172
Audio System Lighting............. 173 Radio Frequencies.................... . 173
Radio Reception......................... 173 Operating the CD Player.......... 175
Operating the CD Changer...... 177
Protecting Compact Discs........ 178 CD Player Error Indications..... 179
CD Changer Error Indications.............................. 180
Operating the Cassette Player..................................... . 181
Tape Search Functions............. 182
Caring for the Cassette Player...................................... 184
Remote Audio Controls ............ 185
Theft Protection........................ 186
Comfor t an d Convenienc e Feature s
Page 159 of 352
Audio Syste m
Operatin g th e Radi o
The ignition switch must be in
ACCESSORY (I) or ON (II) to operate the audio system. Turn the
system on by pushing the PWR/
VOL knob.
Adjust the volume by turning thePWR/VOL knob.
The band and frequency that the radio was last tuned to is displayed.
To change bands, press the AM/FM button. On the FM band, ST will bedisplayed if the station is broadcast-
ing in stereo. Stereo reproduction on
AM is not available.
You can use any of four methods to find radio stations on the selectedband: TUNE, SEEK, SCAN or the
Preset buttons.
TUN E — Use the TUNE bar to tune
the radio to a desired frequency.
Press the upper part ( ) to tune
to a higher frequency, or the lower
part ( ) to tune to a lower
frequency. The frequency numbers
will start to change rapidly. Release the bar when the display reaches thedesired frequency. To change the
frequency in small increments, press and release the TUNE bar quickly. SEE
K — The SEEK function
searches the band for a station with
a strong signal. To activate it, push
the SEEK switch up or down, then release it. Depending on which way
you push the switch, the system scans upward or downward from the
current frequency. It stops when it
finds a station with a strong signal.
Comfor t an d Convenienc e Feature s
Page 161 of 352
Audio Syste m
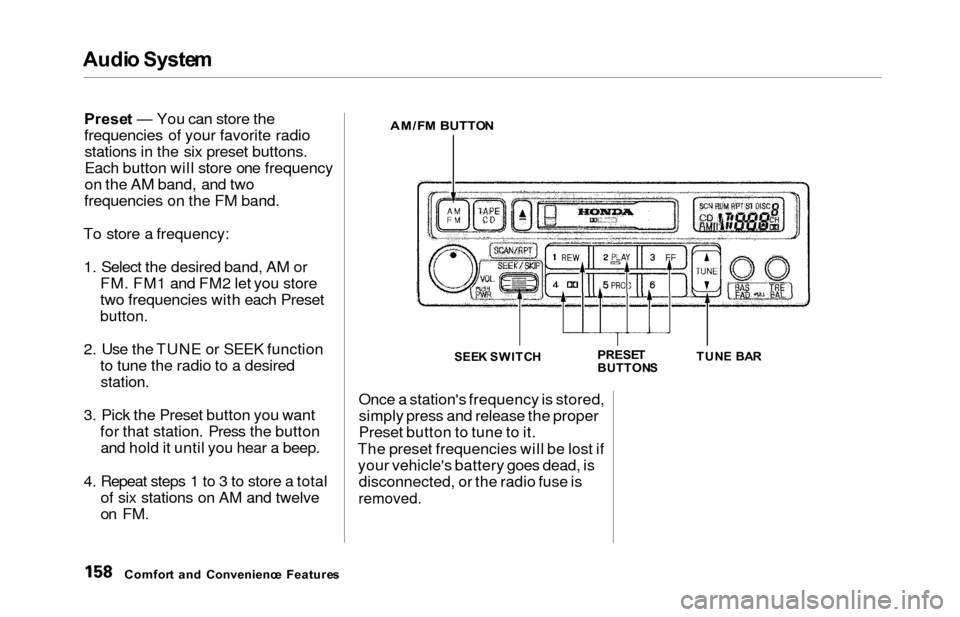
Prese t — You can store the
frequencies of your favorite radio stations in the six preset buttons.
Each button will store one frequency
on the AM band, and two
frequencies on the FM band.
To store a frequency: 1. Select the desired band, AM or FM. FM1 and FM2 let you store
two frequencies with each Preset
button.
2. Use the TUNE or SEEK functionto tune the radio to a desired
station.
3. Pick the Preset button you wantfor that station. Press the buttonand hold it until you hear a beep.
4. Repeat steps 1 to 3 to store a total of six stations on AM and twelve
on FM.
AM/F M BUTTO N
SEEK SWITC HPRESETBUTTON STUN
E BA R
Once a station's frequency is stored,
simply press and release the proper
Preset button to tune to it.
The preset frequencies will be lost if your vehicle's battery goes dead, is disconnected, or the radio fuse is
removed.
Comfor t an d Convenienc e Feature s
Page 163 of 352
Audio Syste m
Audio Syste m Lightin g
You can use the instrument panel brightness control knob to adjust theillumination of the audio system (see
page 67 ). The audio system illuminates when the parking lightsare on, even if the radio is turned off.
Operatin g th e Cassett e Playe r
Turn the audio system ON. Make sure the tape opening on the cassette
is facing to the right, then insert the cassette most of the way into the slot.
The system will pull it in the rest of the way, and begin to play.
The tape direction indicator will light to show you which side of the
cassette is playing. The indicatesthe side you inserted facing upward
is now playing. If you want to play
the other side, press the PROG
button. Dolby B noise reduction turns on
when you insert a cassette. If the tape was not recorded with Dolby B
noise reduction, turn it off by
pressing the button.
When the system reaches the end of
the tape, it will automatically reversedirection and play the other side. If
you want to remove the cassette from the drive, press the EJECT
button.
Tap e Searc h Function s
With a cassette playing, you can use the FF, REW, SKIP, or REPEAT
function to find a desired program.
FF/RE W — Fast Forward and Re-
wind move the tape rapidly. To re-
wind the tape, push the REW button.
You will see REW in the display. To fast forward the tape, push the FF
button. You will see FF displayed. Press the PLAY button to take the
system out of rewind or fast forward. If the system reaches the end of the
tape while in fast forward or rewind,
it automatically stops that function,
reverses direction, and begins to play.
SKI P — The Skip Function allows
you to find the beginning of a song or passage. To find the beginning of
the song or passage currently
playing, push the SKIP switch down.
You will see REW flashing in the display as the tape rewinds. To find
the beginning of the next song, push
the SKIP switch up. You will see FF
flashing in the display as the tape
fast forwards. When the system
finds the beginning of a song or
passage, it goes back to PLAY mode.
Comfor t an d Convenienc e Feature s
Page 166 of 352
Audio Syste m
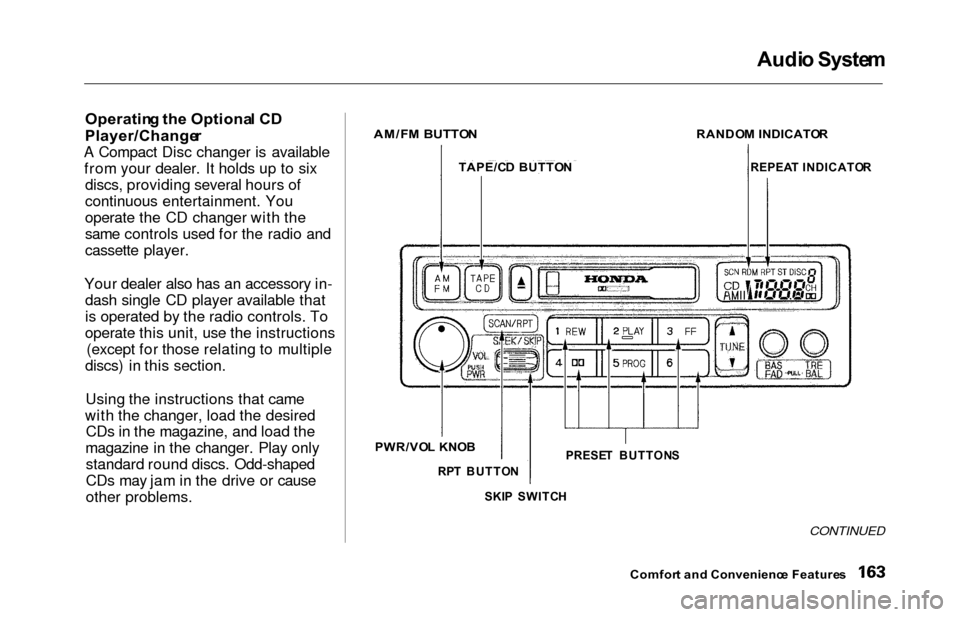
Operatin g th e Optiona l C D
Player/Change r
A Compact Disc changer is available
from your dealer. It holds up to six discs, providing several hours of
continuous entertainment. You
operate the CD changer with the
same controls used for the radio and
cassette player.
Your dealer also has an accessory in- dash single CD player available that
is operated by the radio controls. To
operate this unit, use the instructions (except for those relating to multiple
discs) in this section.
Using the instructions that came
with the changer, load the desired CDs in the magazine, and load the
magazine in the changer. Play only standard round discs. Odd-shaped
CDs may jam in the drive or cause
other problems.
CONTINUED
Comfor t an d Convenienc e Feature s
AM/FM BUTTO N
TAPE/C D BUTTO N
RANDOM INDICATO R
REPEAT INDICATO R
PRESE T BUTTON S
SKI P SWITC H
PWR/VO L KNO B
RPT BUTTO N
Page 171 of 352
Audio Syste m
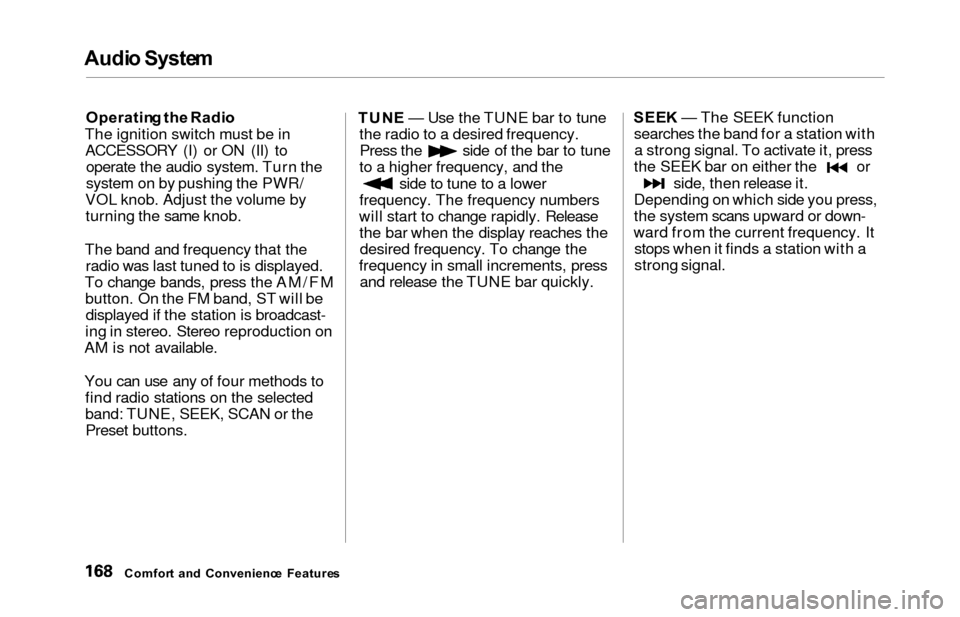
Operatin g th e Radi o
The ignition switch must be in ACCESSORY (I) or ON (II) to operate the audio system. Turn the
system on by pushing the PWR/
VOL knob. Adjust the volume by turning the same knob.
The band and frequency that the radio was last tuned to is displayed.
To change bands, press the AM/FM button. On the FM band, ST will bedisplayed if the station is broadcast-
ing in stereo. Stereo reproduction on
AM is not available.
You can use any of four methods to find radio stations on the selected
band: TUNE, SEEK, SCAN or thePreset buttons. TUN
E — Use the TUNE bar to tune
the radio to a desired frequency.
Press the side of the bar to tune
to a higher frequency, and the
side to tune to a lower
frequency. The frequency numbers
will start to change rapidly. Release the bar when the display reaches thedesired frequency. To change the
frequency in small increments, press and release the TUNE bar quickly. SEE
K — The SEEK function
searches the band for a station with a strong signal. To activate it, press
the SEEK bar on either the or
side, then release it.
Depending on which side you press,
the system scans upward or down-
ward from the current frequency. It stops when it finds a station with a
strong signal.
Comfor t an d Convenienc e Feature s
Page 172 of 352
Audio Syste m
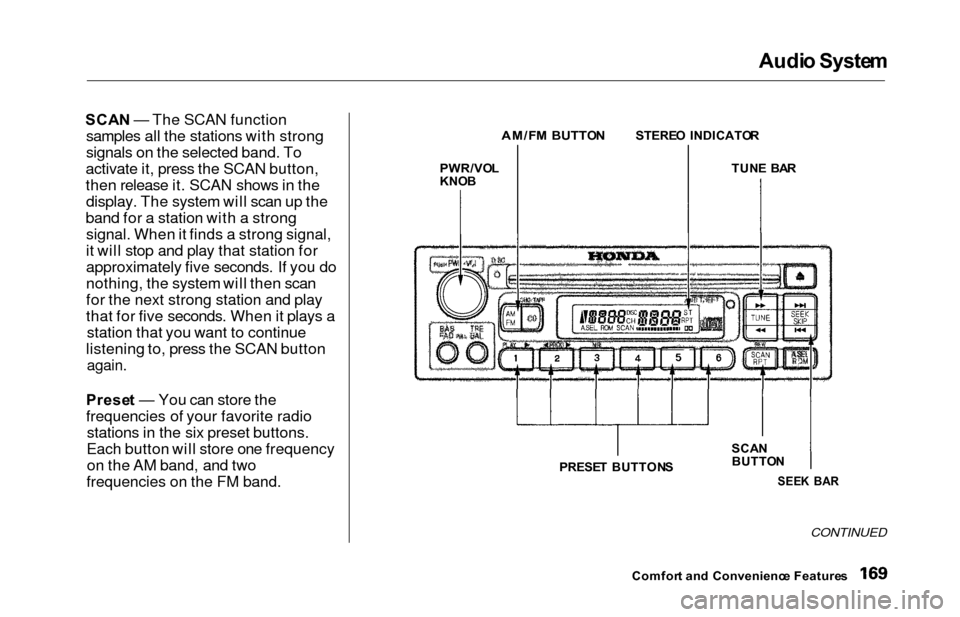
SCAN — The SCAN function
samples all the stations with strong
signals on the selected band. To
activate it, press the SCAN button,
then release it. SCAN shows in the display. The system will scan up the
band for a station with a strong signal. When it finds a strong signal,
it will stop and play that station for
approximately five seconds. If you do
nothing, the system will then scan
for the next strong station and play
that for five seconds. When it plays a station that you want to continue
listening to, press the SCAN button
again.
Prese t — You can store the
frequencies of your favorite radio stations in the six preset buttons.
Each button will store one frequency on the AM band, and two
frequencies on the FM band.
CONTINUED
Comfor t an d Convenienc e Feature s
PWR/VO
L
KNO B
AM/F M BUTTO NSTEREO INDICATO R
TUN E BA R
SCA N
BUTTO N
SEEK BA RPRESE T BUTTON S
Page 173 of 352
Audio Syste m
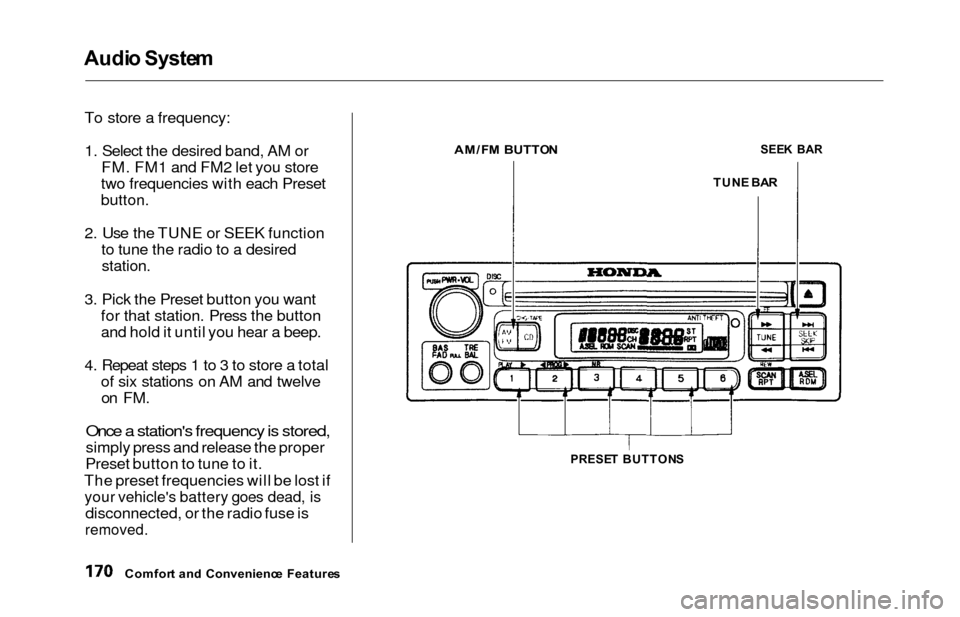
To store a frequency:
1. Select the desired band, AM or FM. FM1 and FM2 let you store
two frequencies with each Preset
button.
2. Use the TUNE or SEEK function to tune the radio to a desired
station.
3. Pick the Preset button you wantfor that station. Press the button
and hold it until you hear a beep.
4. Repeat steps 1 to 3 to store a total of six stations on AM and twelveon FM.
Once a station's frequency is stored,
simply press and release the proper
Preset button to tune to it.
The preset frequencies will be lost if
your vehicle's battery goes dead, is
disconnected, or the radio fuse is
removed.
Comfor t an d Convenienc e Feature s
AM/FM BUTTO NSEEK BA R
TUN E BA R
PRESE T BUTTON S
Page 176 of 352
Audio Syste m
Audio Syste m Lightin g
You can use the instrument panel brightness control knob to adjust the
illumination of the audio system (see
page 67). The audio systemilluminates when the parking lights
are on, even if the radio is turned off.
Radi o Frequencie s
Your Honda's radio can receive the
complete AM and FM bands.
Those bands cover these frequen-
cies:
AM band:
530 to 1,710 kilohertz
FM band:
87.7 to 107.9 megahertz
Radio stations on the AM band are
assigned frequencies at least ten
kilohertz apart (530, 540, 550).Stations on the FM band are
assigned frequencies at least 0.2
megahertz apart (87.9, 88.1, 88.3).
Stations must use these exact
frequencies. It is fairly common for stations to round-off the frequency in
their advertising, so your radio could display a frequency of 100.9 even
though the announcer may identify
the station as "FM101."
Radi o Receptio n
How well your Honda's radio
receives stations is dependent on many factors, such as the distance
from the station's transmitter,
nearby large objects, and atmos-
pheric conditions.
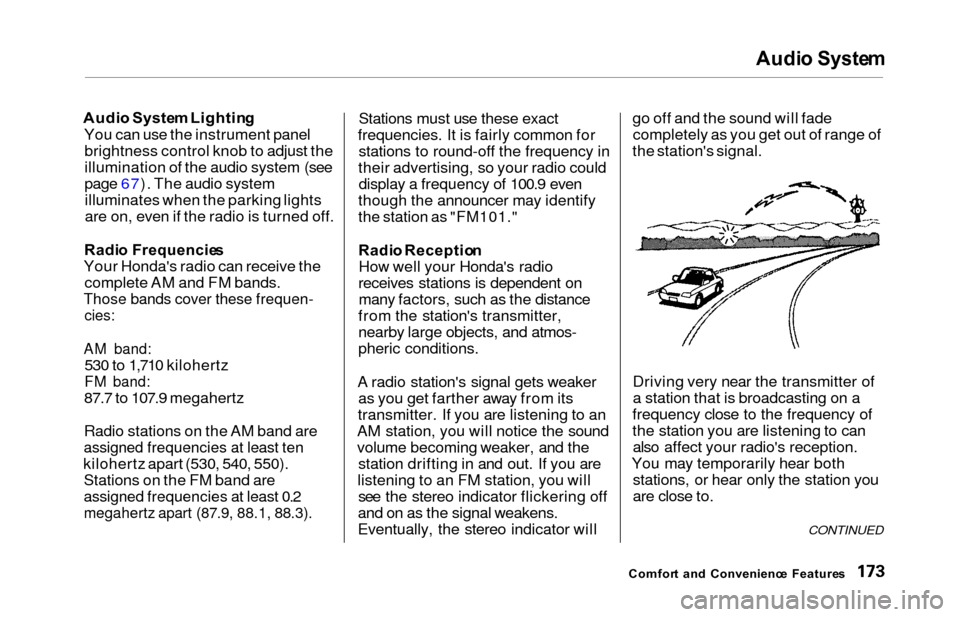
A radio station's signal gets weaker as you get farther away from its
transmitter. If you are listening to an
AM station, you will notice the sound
volume becoming weaker, and the station drifting in and out. If you are
listening to an FM station, you will see the stereo indicator flickering off
and on as the signal weakens.
Eventually, the stereo indicator will go off and the sound will fade
completely as you get out of range of
the station's signal.
Driving very near the transmitter of
a station that is broadcasting on a
frequency close to the frequency of
the station you are listening to can also affect your radio's reception.
You may temporarily hear both stations, or hear only the station you
are close to.
Comfor t an d Convenienc e Feature s
CONTINUED
Page 177 of 352
Audio Syste m
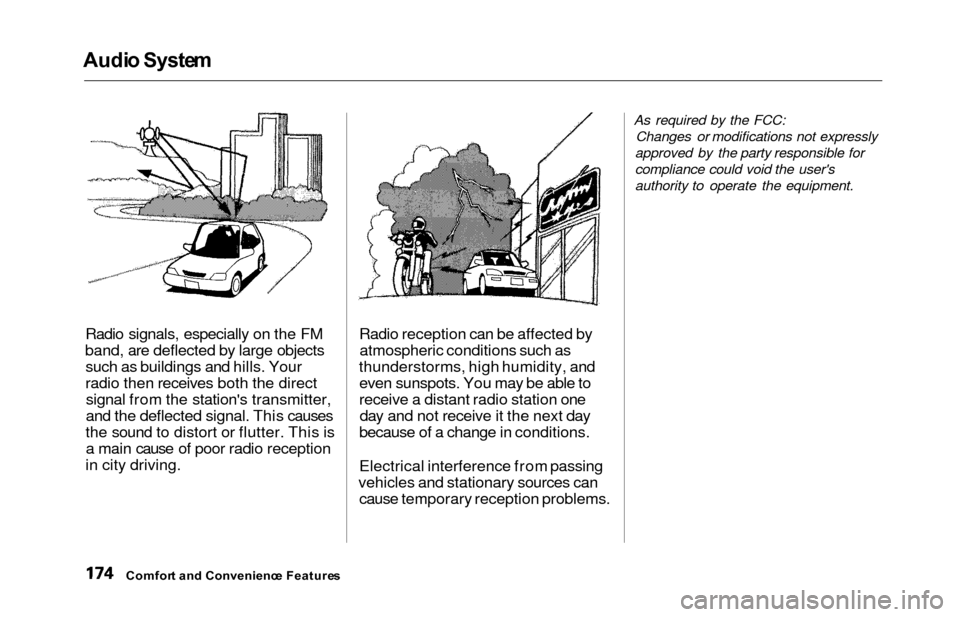
Radio signals, especially on the FM
band, are deflected by large objects such as buildings and hills. Your
radio then receives both the directsignal from the station's transmitter,
and the deflected signal. This causes
the sound to distort or flutter. This is a main cause of poor radio reception
in city driving. Radio reception can be affected by
atmospheric conditions such as
thunderstorms, high humidity, and even sunspots. You may be able to
receive a distant radio station oneday and not receive it the next day
because of a change in conditions.
Electrical interference from passing
vehicles and stationary sources can cause temporary reception problems.
As required by the FCC:
Changes or modifications not expressly
approved by the party responsible for
compliance could void the user's
authority to operate the equipment.
Comfor t an d Convenienc e Feature s