service indicator HONDA ODYSSEY 2000 RA6-RA9 / 2.G Owners Manual
[x] Cancel search | Manufacturer: HONDA, Model Year: 2000, Model line: ODYSSEY, Model: HONDA ODYSSEY 2000 RA6-RA9 / 2.GPages: 352, PDF Size: 4.43 MB
Page 8 of 352
Driver an d Passenge r Safet y
This sectio
n gives you important
information about how to protect
yourself and your passengers. It
shows you how to use seat belts
properly. It explains your Supple-
mental Restraint System. And it tells
you how to properly restrain infants
and children in your vehicle.
Important Safety Precautions ..........
6
Your Vehicle'
s Safety Features........
7
Seat
Belts.......................................
.
8
Airbags............................................
9
Seat
s & Seat-Backs......................
10
Head
Restraints..........................
. 10
Door Locks................................... 10
Pre-Drive Safety Checklist......... 11
Protecting Adults............................. 12
1. Close and Lock the Doors...... 12
2. Adjust the Front Seats............ 12 3. Adjust the Seat-Backs............. 13
4. Adjust the Head Restraints.... 14 5. Fasten and Position the Seat
Belts...................................... 15
6. Adjust the Steering Wheel.....
19
7. Maintai
n a Proper Sitting
Position................................. 19
Advice for Pregnant Women...... 20
Additional Safety Precautions.... 20
Protecting Children......................... 22 All Children Must Be
Restrained................................ 22
Children Should Sit in the Back
Seat............................................ 23
The Passenger's Airbag Poses Serious Risks to Children....... 23
If You Must Drive with Several Children.................................... 25
If a Child Requires Close Attention................................... 25 Additional Safety Precautions.... 25
General Guidelines for Using Child Seats................................ 26
Protecting Infants........................ 30
Protecting Small Children.......... 35
Protecting Larger Children........ 39
Using Child Seats with Tethers......................................
43
Additional Informatio
n About Your
Seat Belts.................................. 45
Seat Belt System Components... 45
Lap/Shoulder Belt....................... 45
Seat Belt Maintenance................ 47
Additional Information About Your
SRS............................................
48
SRS Components........................
.
48
How
You
r Airbags Work............ 48
How the Automatic Seat Belt
Tensioners Work..................... 50
How the SRS Indicator Light
Works........................................ 50
SRS Service...................................
51
Additional Safet
y Precautions.... 52
Carbon Monoxide Hazard.............. 53
Safety Labels.................................... 54
Driver an d Passenge r Safet y
Page 54 of 352
Additional Informatio n Abou t You r SR S
If the light comes on or flashes on
and off while you drive.
If you see any of these indications,
your airbags and seat belt tensioners may not deploy when you need them.See your Honda dealer as soon as
possible. SR
S Servic e
Your Supplemental Restraint System is virtually maintenance-free, and
there are no parts you can safelyservice. However, you must have
your vehicle serviced if:
Your airbags ever inflate. The
airbags, seat belt tensioners, and
control unit must be replaced. Do
not try to remove or replace the
airbags yourself.
This must be done by a Honda dealer or a knowledgeable body
shop.
The SRS indicator light alerts you
to a problem. Take your vehicle to
an authorized Honda dealer as soon as possible. If you ignore this
indication, the airbags might not
inflate when you need them (see
page 50).
Drive r an d Passenge r Safet y
Ignoring the SRS indicator light
can result in serious injury or
death if the airbags do not inflate when needed.
Have your vehicle checked by a
dealer as soon as possible if
the SRS light alerts you to a potential problem.
Page 192 of 352
Gasoline, Servic e Statio n Procedure s
In Canada, some gasolines contain
an octane-enhancing additive called
MMT. If you use such gasolines,
your emission control system performance may deteriorate and
the Malfunction Indicator Lamp on
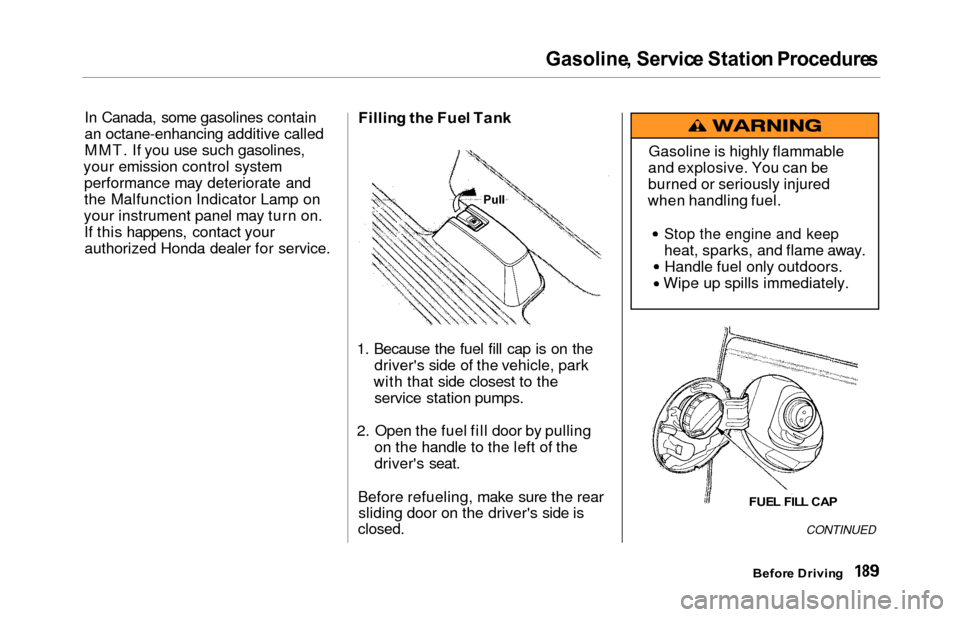
your instrument panel may turn on. If this happens, contact yourauthorized Honda dealer for service.Fillin g th e Fue l Tan k
1. Because the fuel fill cap is on the
driver's side of the vehicle, park
with that side closest to the service station pumps.
2. Open the fuel fill door by pulling on the handle to the left of the
driver's seat.
Before refueling, make sure the rear sliding door on the driver's side is
closed.CONTINUED
Befor e Drivin g
Gasoline is highly flammable
and explosive. You can be
burned or seriously injured
when handling fuel.
Stop the engine and keep
heat, sparks, and flame away. Handle fuel only outdoors.
Wipe up spills immediately.
FUE L FIL L CA P
Pull
Page 193 of 352
Service Statio n Procedure s
3. Remove the fuel fill cap slowly.
You may hear a hissing sound aspressure inside the tank escapes.
Place the cap in the holder on the
fuel fill door.
4. Stop filling the tank after the fuel nozzle automatically clicks off. Do
not try to "top off" the tank, leavesome room for the fuel to expand
with temperature changes.
5. Screw the fuel fill cap back on, tighten it until it clicks several
times. If you do not properly
tighten the cap, the Malfunction
Indicator Lamp may come on (seepage 309 ).
6. Push the fuel fill door closed until it latches.Openin g th e Hoo d
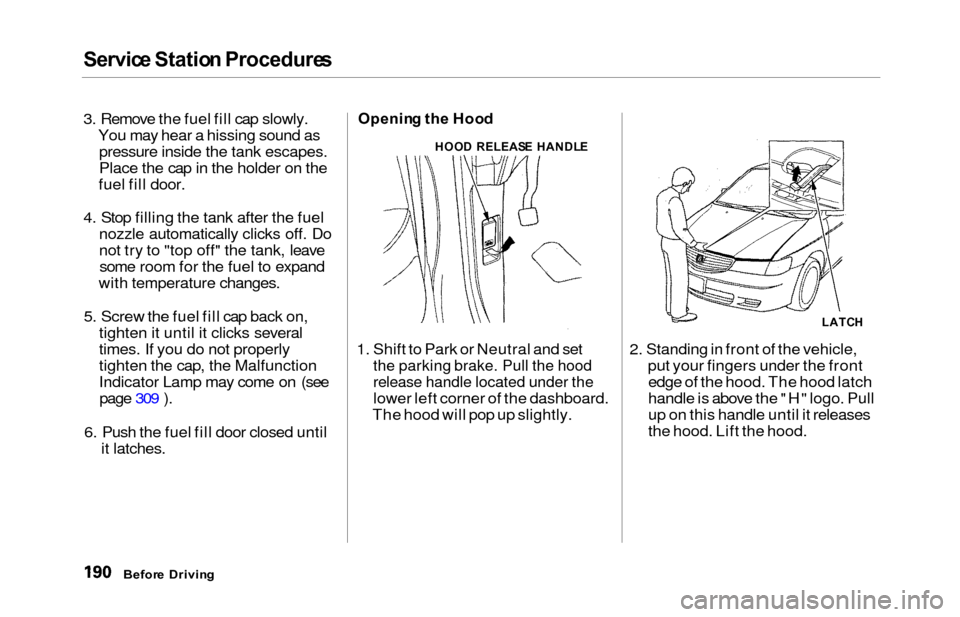
1. Shift to Park or Neutral and set
the parking brake. Pull the hood
release handle located under the
lower left corner of the dashboard.
The hood will pop up slightly. 2. Standing in front of the vehicle,
put your fingers under the frontedge of the hood. The hood latch
handle is above the "H" logo. Pull
up on this handle until it releases
the hood. Lift the hood.
Befor e Drivin g
HOOD RELEAS E HANDL E
LATCH
Page 311 of 352
Charging Syste m Indicato r
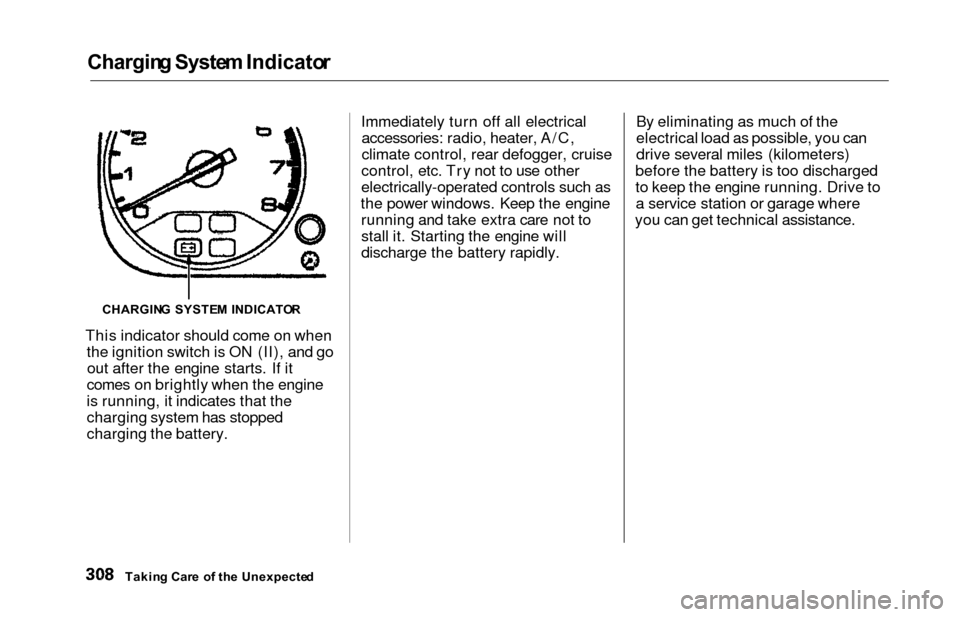
This indicator should come on when
the ignition switch is ON (II), and goout after the engine starts. If it
comes on brightly when the engine
is running, it indicates that the
charging system has stopped
charging the battery. Immediately turn off all electrical
accessories: radio, heater, A/C,
climate control, rear defogger, cruise
control, etc. Try not to use other
electrically-operated controls such as
the power windows. Keep the engine running and take extra care not to
stall it. Starting the engine will
discharge the battery rapidly. By eliminating as much of the
electrical load as possible, you can
drive several miles (kilometers)
before the battery is too discharged
to keep the engine running. Drive to a service station or garage where
you can get technical assistance.
Takin g Car e o f th e Unexpecte d
CHARGIN
G SYSTE M INDICATO R
Page 313 of 352
Brake Syste m Indicato r
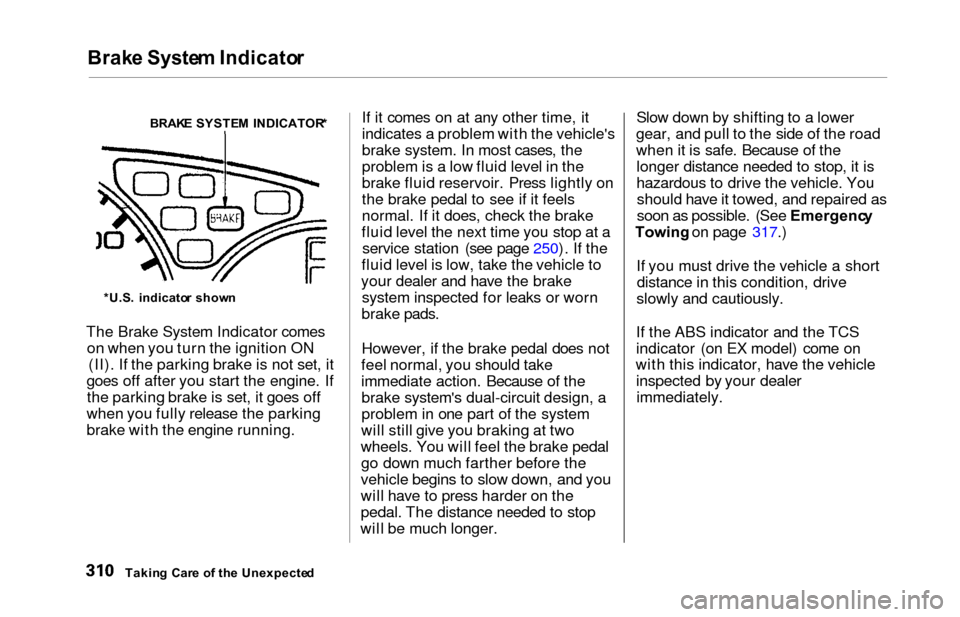
The Brake System Indicator comes
on when you turn the ignition ON (II). If the parking brake is not set, it
goes off after you start the engine. If the parking brake is set, it goes off
when you fully release the parking
brake with the engine running. If it comes on at any other time, it
indicates a problem with the vehicle's
brake system. In most cases, the
problem is a low fluid level in the
brake fluid reservoir. Press lightly on
the brake pedal to see if it feels
normal. If it does, check the brake
fluid level the next time you stop at a service station (see page 250). If the
fluid level is low, take the vehicle to
your dealer and have the brake system inspected for leaks or worn
brake pads.
However, if the brake pedal does not
feel normal, you should take
immediate action. Because of the brake system's dual-circuit design, a
problem in one part of the system
will still give you braking at two
wheels. You will feel the brake pedal go down much farther before the
vehicle begins to slow down, and you
will have to press harder on the
pedal. The distance needed to stop
will be much longer. Slow down by shifting to a lower
gear, and pull to the side of the road
when it is safe. Because of the longer distance needed to stop, it is
hazardous to drive the vehicle. Youshould have it towed, and repaired as
soon as possible. (See Emergenc y
Towing on page 317.)
If you must drive the vehicle a short distance in this condition, drive
slowly and cautiously.
If the ABS indicator and the TCS
indicator (on EX model) come on
with this indicator, have the vehicle inspected by your dealerimmediately.
Takin g Car e o f th e Unexpecte d
BRAK
E SYSTE M INDICATOR *
*U.S . indicato r show n
Page 349 of 352
Index
Safety Labels, Location of.............. 54
Safety Messages................................ ii
Seat Belt, Additional Information.. 45 Lap/Shoulder Belt....................... 45Seat Belt Maintenance................ 47
Seat Belt System Components... 45
Seat Belts..................................... . 8, 45
Cleaning...................................... 286
Maintenance................................ . 47
Reminder Light and Beeper................................. 45, 57
System Components.................... 45
Tether Attachment Points.......... 43 Use During Pregnancy................ 20
Wearing a Lap/Shoulder Belt.... 15
Seats................................................. 99
Adjustments............................... 100
Folding the Third Seat .............. 109
Head Restraints ........................ 104
Passenger Seating....................... 99
Reclining the Second Seat ....... 101
Reclining the Third Seat ........... 101
Removing the Second
Seats........................................ 108
Third Seat Access ...................... 105
Serial Number................................ 320
Service Intervals............................ 230
Service Manual*............................ 337
Service Station Procedures .......... 189
Setting the Clock .......................... 117
Shifting the Automatic Transmission.............................. 205
Shift Lever Position Indicator...... 204 Shift Lock Release......................... 20 7
Side Marker Lights, Bulb
Replacement in.......................... 273
Signaling Turns................................ 68
Sliding Doors.................................... 88
Snow Tires...................................... 269
Solvent-type Cleaners.................... 284
Sound System........................ 155, 16 7
Spare Tire Inflating...................................... . 292
Specifications............................. 323
Spark Plugs..................................... 254
Specifications Charts..................... 322
Speed Control................................... 7 3
Speedometer.................................... 62
SRS, Additional Information........... 48 Additional Safety Precautions.... 52How the Automatic Seat Belt Tensioners Work..................... 50
How the SRS Indicator
Works........................................ 50
How Your Airbags Work............ 48
SRS Components ....................... . 48
SRS Service ................................. 51
SRS Indicator ............................. 50, 58
START (Ignition Key Position)..... 79
Starting the Engine........................ 203 In Cold Weather at High
Altitude.................................. . 203
With a Dead Battery................. 303
Steam Coming from Engine......... 305
Steering Wheel Adjustment.................................. . 72
Anti-theft Column Lock.............. 78
Stereo Sound System........... 155, 167
Storing Your Vehicle.................... 28 1
Storage Box.................................... 123
Sunglasses Holder......................... 120
Sun Visor......................................... 121
Supplemental Restraint System Servicing...................................... . 51
SRS Indicator......................... 50, 58
System Components.................... 48
Synthetic Oil................................... 240