radiator cap HONDA ODYSSEY 2002 RA6-RA9 / 2.G Owners Manual
[x] Cancel search | Manufacturer: HONDA, Model Year: 2002, Model line: ODYSSEY, Model: HONDA ODYSSEY 2002 RA6-RA9 / 2.GPages: 399, PDF Size: 4.97 MB
Page 63 of 399
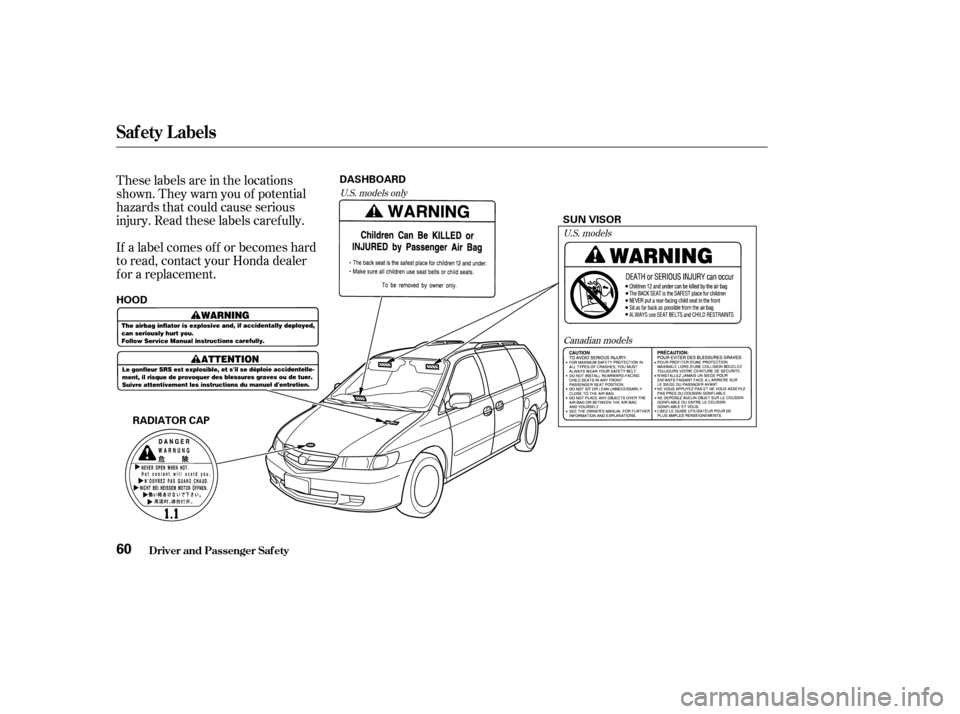
These labels are in the locations
shown. They warn you of potential
hazards that could cause serious
injury. Read these labels caref ully.
If a label comes of f or becomes hard
to read, contact your Honda dealer
f or a replacement.U.S. models onlyU.S. models
Canadian models
Driver and Passenger Saf ety
Saf ety L abels
60
RADIATOR CAP SUN VISOR
HOOD DASHBOARD
Page 292 of 399
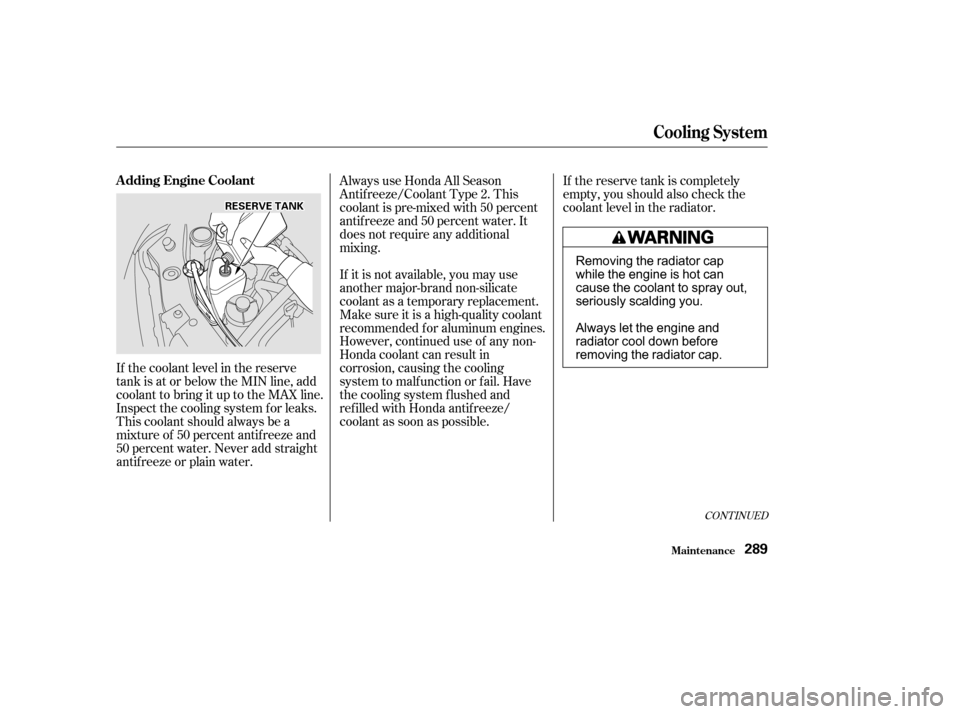
If the coolant level in the reserve
tank is at or below the MIN line, add
coolant to bring it up to the MAX line.
Inspect the cooling system f or leaks.
This coolant should always be a
mixtureof 50percentantifreezeand
50 percent water. Never add straight
antif reeze or plain water.If the reserve tank is completely
empty, you should also check the
coolant level in the radiator.
Always use Honda All Season
Antif reeze/Coolant Type 2. This
coolant is pre-mixed with 50 percent
antif reeze and 50 percent water. It
does not require any additional
mixing.
If it is not available, you may use
another major-brand non-silicate
coolant as a temporary replacement.
Make sure it is a high-quality coolant
recommended f or aluminum engines.
However, continued use of any non-
Honda coolant can result in
corrosion, causing the cooling
system to malf unction or f ail. Have
the cooling system f lushed and
ref illed with Honda antif reeze/
coolant as soon as possible.
CONT INUED
A dding Engine Coolant
Cooling Syst em
Maint enance289
R RE
ES
SE ER
RV V E
E T
TA
A N
NK K
Removing the radiator cap
while the engine is hot can
cause the coolant to spray out,
seriously scalding you.
Always let the engine and
radiator cool down before
removing the radiator cap.
Page 293 of 399
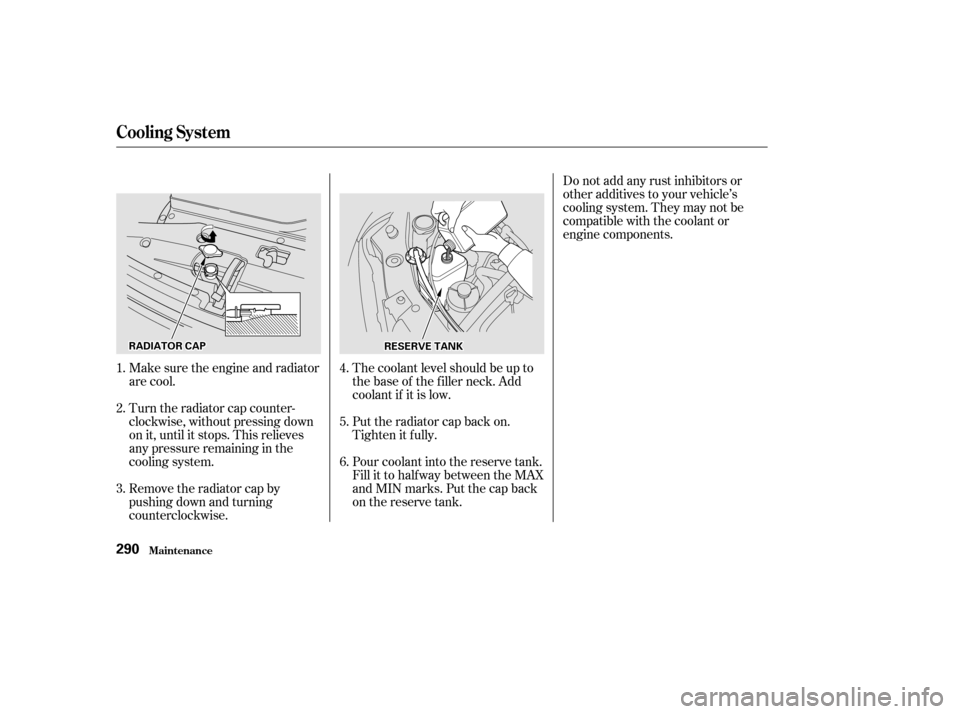
Make sure the engine and radiator
are cool.
Turn the radiator cap counter-
clockwise, without pressing down
on it, until it stops. This relieves
any pressure remaining in the
cooling system.
Remove the radiator cap by
pushing down and turning
counterclockwise.The coolant level should be up to
the base of the f iller neck. Add
coolant if it is low.
Put the radiator cap back on.
Tighten it f ully.
Pour coolant into the reserve tank.
Fill it to half way between the MAX
and MIN marks. Put the cap back
on the reserve tank.Do not add any rust inhibitors or
other additives to your vehicle’s
cooling system. They may not be
compatible with the coolant or
engine components.
3. 4.
5.
6.
1.
2.
Cooling Syst em
Maint enance290
R RA
A D
DI
IAA T
TO
OR R C
CAA P
P
R
REES
SE ER
RV V E
E T
TA
A N
NK K
Page 294 of 399
CONT INUED
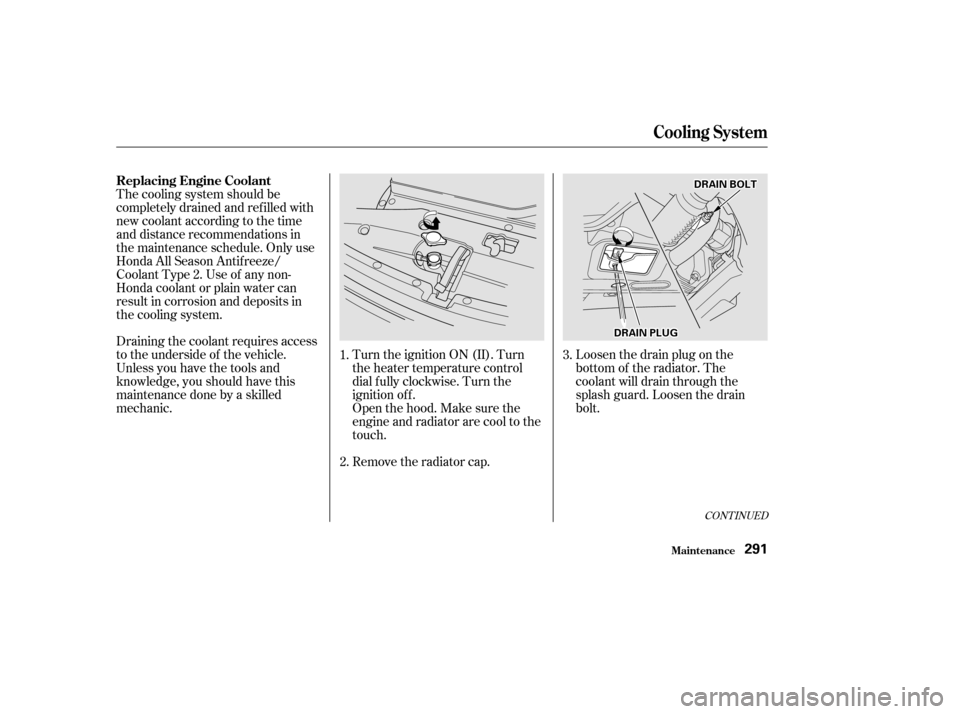
Loosen the drain plug on the
bottom of the radiator. The
coolant will drain through the
splash guard. Loosen the drain
bolt.
Turn the ignition ON (II). Turn
the heater temperature control
dial f ully clockwise. Turn the
ignition of f .
Openthehood.Makesurethe
engine and radiator are cool to the
touch.
Remove the radiator cap.
Draining the coolant requires access
to the underside of the vehicle.
Unless you have the tools and
knowledge, you should have this
maintenance done by a skilled
mechanic. Thecoolingsystemshouldbe
completely drained and ref illed with
new coolant according to the time
and distance recommendations in
the maintenance schedule. Only use
Honda All Season Antif reeze/
Coolant Type 2. Use of any non-
Honda coolant or plain water can
result in corrosion and deposits in
the cooling system.
1.3.
2.
Replacing Engine Coolant
Cooling Syst em
Maint enance291
D D
R
RAA I
INN B
BOOL LTT
D
D R
RAA I
INN P
PL
LUUG G
Page 296 of 399
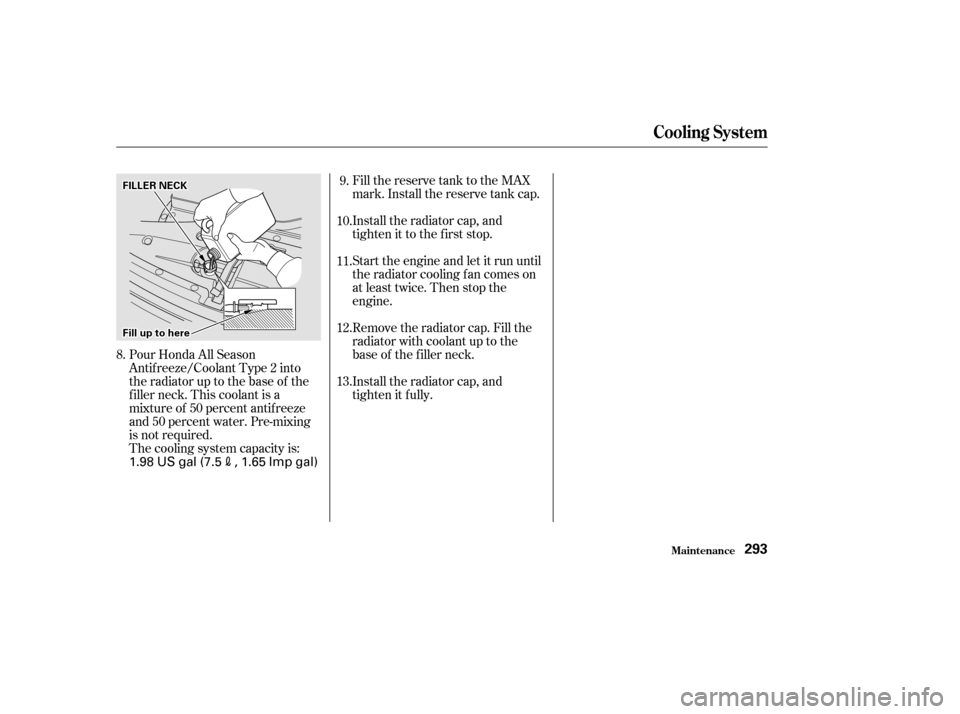
Fill the reserve tank to the MAX
mark. Install the reserve tank cap.
Install the radiator cap, and
tighten it to the first stop.
Start the engine and let it run until
the radiator cooling f an comes on
at least twice. Then stop the
engine.
Remove the radiator cap. Fill the
radiator with coolant up to the
base of the f iller neck.
Install the radiator cap, and
tighten it fully.
Pour Honda All Season
Antif reeze/Coolant Type 2 into
the radiator up to the base of the
f iller neck. This coolant is a
mixture of 50 percent antif reeze
and 50 percent water. Pre-mixing
is not required.
The cooling system capacity is:
8. 10.
11.
12.
13.9.
Cooling Syst em
Maint enance293
F FI
ILLL LEE R
R N
NEEC
CK K
F
Fi illll u
u p
p t
too h
he
erree
1.98 US gal (7.5, 1.65 Imp gal)
Page 310 of 399
Run the air conditioning at least once
a week during the cold weather
months. Run it f or at least ten
minutes while you are driving at a
steady speed with the engine at
normal operating temperature. This
circulates the lubricating oil con-
tained in the ref rigerant.If the air conditioning does not get as
cold as before, have your dealer
check the system. Recharge the
system with Ref rigerant HFC-134a
(R-134a). (See Specif ications on page
.)
Your vehicle’s air conditioning is a
sealed system. Any major mainte-
nance, such as recharging, should be
done by a qualif ied mechanic. You
can do a couple of things to make
sure the air conditioning works
ef f iciently.
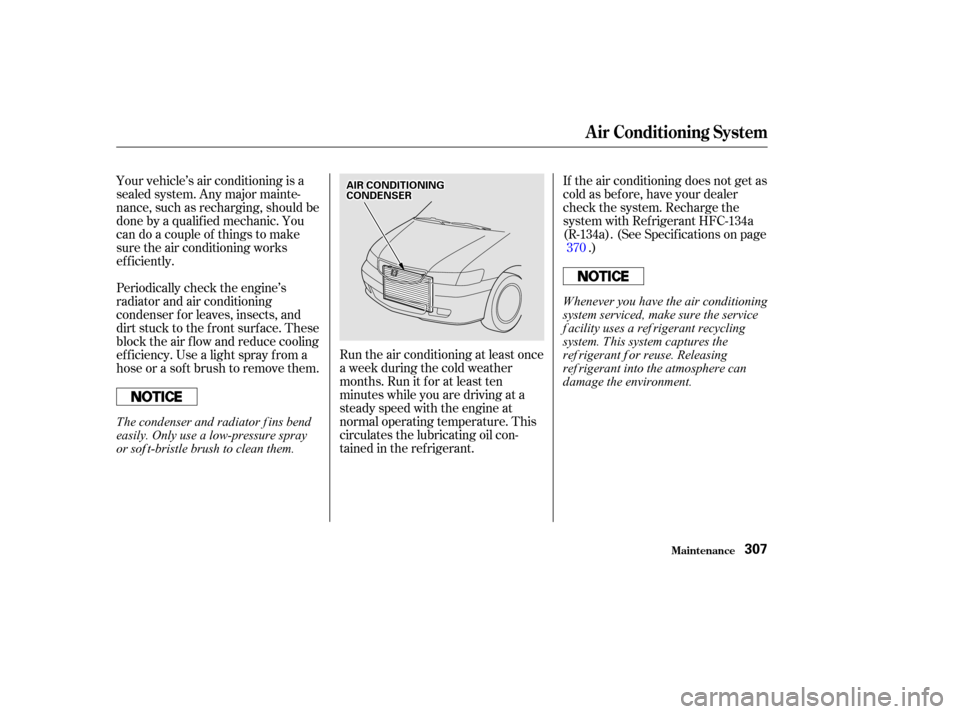
Periodically check the engine’s
radiator and air conditioning
condenser f or leaves, insects, and
dirt stuck to the f ront surf ace. These
block the air f low and reduce cooling
ef f iciency. Use a light spray f rom a
hose or a sof t brush to remove them. 370
Maint enance
A ir Condit ioning Syst em
307
A A
I
IRR C
COON NDDI
ITT I
IOON NIINNG G
C
CO ON NDDE
EN
NS SEER
R
Whenever you have the air conditioning
system serviced, make sure the service
f acility uses a ref rigerant recycling
system. This system captures the
ref rigerant f or reuse. Releasing
ref rigerant into the atmosphere can
damage the environment.
The condenser and radiator f ins bend
easily. Only use a low-pressure spray
or sof t-bristle brush to clean them.
Page 356 of 399

If there was no coolant in the
reserve tank, you may also have to
add coolant to the radiator. Let the
engine cool down until the pointer
reaches the middle of the tempera-
ture gauge, or lower, bef ore check-
ing the radiator.Using gloves or a large heavy
cloth, turn the radiator cap
counterclockwise, without pushing
down, to the f irst stop. This
releases any remaining pressure in
the cooling system. After the
pressure releases, push down on
the cap and turn it until it comes
off.
Start the engine and set the
temperature control dial to
maximum (climate control to
FULL AUTO at 90°F/32°C). Add
coolant to the radiator up to the
base of the f iller neck. If you do
not have the proper coolant
mixture available, you can add
plain water. Remember to have
the cooling system drained and
ref illed with the proper mixture as
soon as you can.Put the radiator cap back on
tightly. Run the engine and watch
the temperature gauge. If it goes
back to the red mark, the engine
needs repair. (See
on page .)
If the temperature stays normal,
check the coolant level in the
radiator reserve tank. If it has
gone down, add coolant to the
MAX mark. Put the cap back on
tightly.
8.
9.
10. 12. 11.
365Emergency
Towing
If Your Engine Overheats
T aking Care of t he Unexpect ed353
Removing the radiator cap
while the engine is hot can
cause the coolant to spray out,
seriously scalding you.
Always let the engine and
radiator cool down before
removing the radiator cap.