Light HONDA ODYSSEY 2006 RB1-RB2 / 3.G Workshop Manual
[x] Cancel search | Manufacturer: HONDA, Model Year: 2006, Model line: ODYSSEY, Model: HONDA ODYSSEY 2006 RB1-RB2 / 3.GPages: 420, PDF Size: 6.01 MB
Page 275 of 420
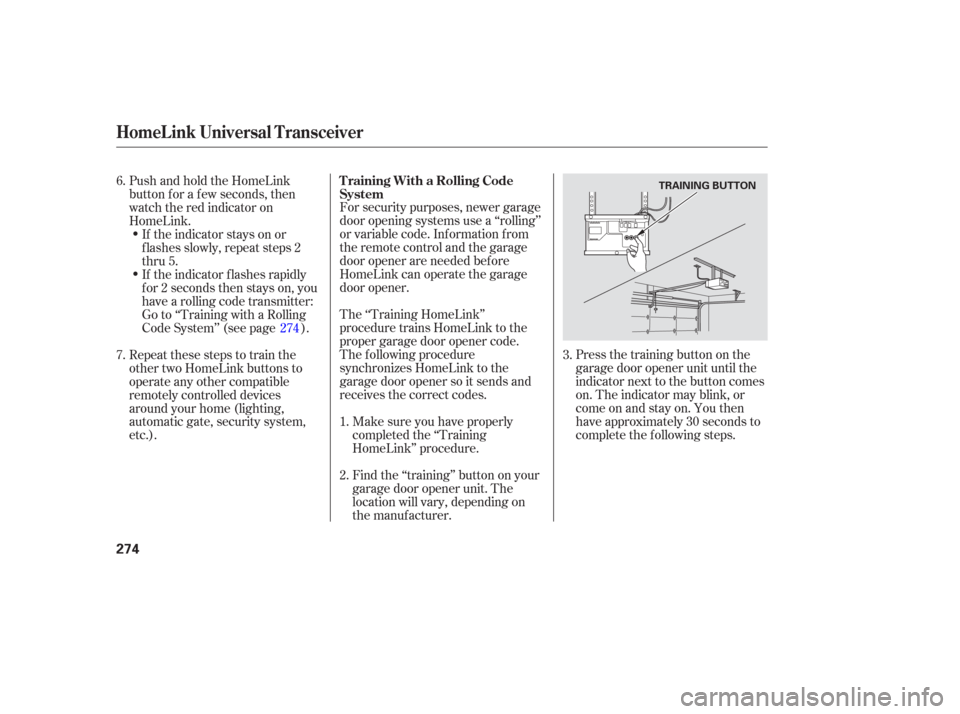
Press the training button on the
garage door opener unit until the
indicator next to the button comes
on. The indicator may blink, or
comeonandstayon.Youthen
have approximately 30 seconds to
complete the f ollowing steps.
For security purposes, newer garage
door opening systems use a ‘‘rolling’’
or variable code. Information from
the remote control and the garage
door opener are needed bef ore
HomeLink can operate the garage
door opener.
The ‘‘Training HomeLink’’
procedure trains HomeLink to the
proper garage door opener code.
The f ollowing procedure
synchronizes HomeLink to the
garage door opener so it sends and
receives the correct codes.
Make sure you have properly
completed the ‘‘Training
HomeLink’’ procedure.
Find the ‘‘training’’ button on your
garage door opener unit. The
location will vary, depending on
the manufacturer.
PushandholdtheHomeLink
button f or a f ew seconds, then
watch the red indicator on
HomeLink.
If the indicator stays on or
flashes slowly, repeat steps 2
thru 5.
If the indicator f lashes rapidly
f or 2 seconds then stays on, you
have a rolling code transmitter:
Go to ‘‘Training with a Rolling
Code System’’ (see page ).
Repeat these steps to train the
other two HomeLink buttons to
operate any other compatible
remotely controlled devices
around your home (lighting,
automatic gate, security system,
etc.).
6.
2. 1.3.
7. 274T raining With a Rolling Code
System
HomeL ink Universal Transceiver
274
TRAINING BUTTON
Page 287 of 420
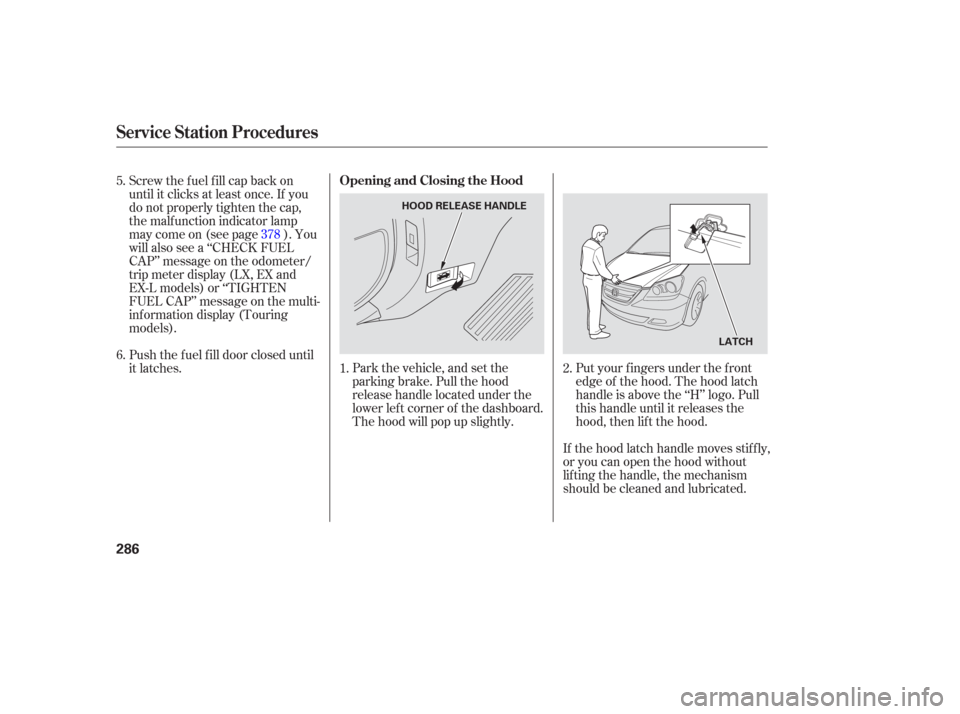
Park the vehicle, and set the
parking brake. Pull the hood
release handle located under the
lower lef t corner of the dashboard.
The hood will pop up slightly.Put your f ingers under the f ront
edge of the hood. The hood latch
handle is above the ‘‘H’’ logo. Pull
this handle until it releases the
hood, then lif t the hood.
If the hood latch handle moves stif f ly,
or you can open the hood without
lifting the handle, the mechanism
should be cleaned and lubricated.
Screw the fuel fill cap back on
until it clicks at least once. If you
do not properly tighten the cap,
the malf unction indicator lamp
maycomeon(seepage ).You
will also see a ‘‘CHECK FUEL
CAP’’ message on the odometer/
trip meter display (LX, EX and
EX-L models) or ‘‘TIGHTEN
FUEL CAP’’ message on the multi-
inf ormation display (Touring
models).
Push the f uel f ill door closed until
it latches.
1.
5.
6.
2.
378
Service Station Procedures
Opening and Closing the Hood
286
HOOD RELEASE HANDLE
LATCH
Page 288 of 420
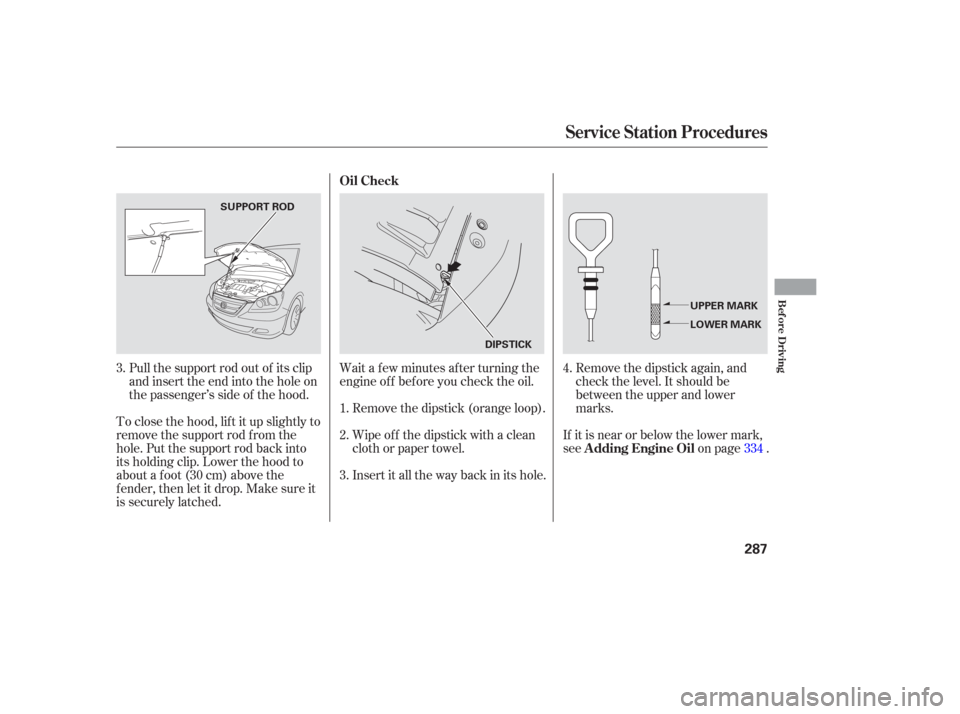
Wait a f ew minutes af ter turning the
engine of f bef ore you check the oil.Remove the dipstick again, and
check the level. It should be
between the upper and lower
marks.
To close the hood, lif t it up slightly to
remove the support rod f rom the
hole. Put the support rod back into
its holding clip. Lower the hood to
about a f oot (30 cm) above the
f ender, then let it drop. Make sure it
is securely latched. Remove the dipstick (orange loop).
Wipe of f the dipstick with a clean
cloth or paper towel.
Insert it all the way back in its hole.
Pull the support rod out of its clip
and insert the end into the hole on
thepassenger’ssideof thehood.
If it is near or below the lower mark,
seeon page .
1.
3.
2.
3.4.
334
Oil Check
A dding Engine Oil
Service Station Procedures
Bef ore Driving
287
DIPSTICK
SUPPORT ROD
UPPER MARK
LOWER MARK
Page 291 of 420
Your dealer has Honda accessories
that allow you to personalize your
vehicle. These accessories have
been designed and approved f or your
vehicle, and are covered by warranty.When properly installed, cellular
phones, alarms, two-way radios, and
low-powered audio systems should
not interf ere with your vehicle’s
computer controlled systems, such
as your airbags and anti-lock brakes.Bef ore installing any accessory:
Make sure the accessory does not
obscure any lights, or interf ere
with proper vehicle operation or
perf ormance.
Modif ying your vehicle, or installing
some non-Honda accessories, can
make it unsaf e. Bef ore you make any
modif ications or add any accessories,
be sure to read the f ollowing
inf ormation.
Although non-Honda accessories
may f it on your vehicle, they may not
meet f actory specif ications, and
could adversely af f ect your vehicle’s
handling and stability (see page ). Be sure electronic accessories do
not overload electrical circuits
(see page ) or interf ere with
the proper operation of your
vehicle.
Bef ore installing any electronic
accessory, have the installer
contact your dealer. If possible,
have your dealer inspect the f inal
installation.
Do not install accessories on the
side pillars or across the rear
windows as these may interf ere
with proper operation of the side
curtain airbags.
291 382
A ccessories
A ccessories and Modif ications
290
Improper accessories or
modifications can affect your
vehicle’s handling, stability, and
performance, and cause a
crash in which you can be hurt
or killed.
Follow all instructions in this
owner’s manual regarding
accessories and modifications.
Page 296 of 420
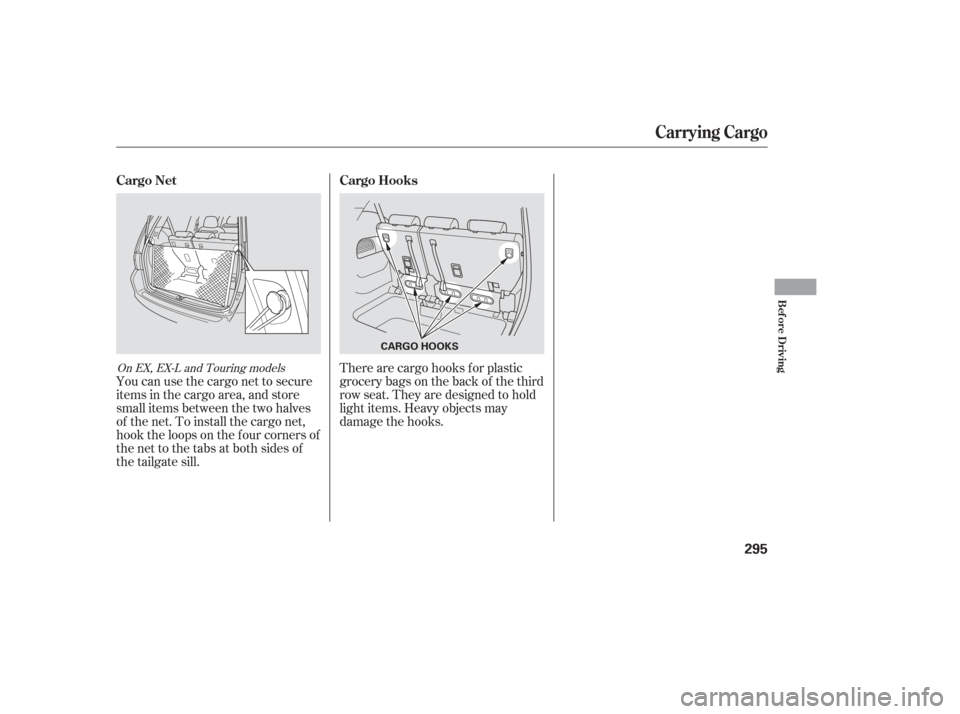
You can use the cargo net to secure
items in the cargo area, and store
small items between the two halves
of the net. To install the cargo net,
hook the loops on the f our corners of
the net to the tabs at both sides of
the tailgate sill.There are cargo hooks f or plastic
grocery bags on the back of the third
row seat. They are designed to hold
light items. Heavy objects may
damage the hooks.
On EX, EX-L and Touring models
Carrying Cargo
Cargo Net
Cargo Hooks
Bef ore Driving
295
CARGO HOOKS
Page 299 of 420
Youshoulddothefollowingchecks
and adjustments bef ore you drive
your vehicle.Make sure all windows, mirrors,
and outside lights are clean and
unobstructed. Remove f rost, snow,
or ice.
Check that the hood is f ully closed.
Visually check the tires. If a tire
looks low, use a gauge to check its
pressure.
Check that any items you may be
carrying are stored properly or
f astened down securely. Check the seat adjustment (see
page ).
Check the adjustment of the
inside and outside mirrors (see
page ).
Check the steering wheel
adjustment (see page ).
Make sure the doors and the
tailgate are securely closed and
locked.
Fasten your seat belt. Check that
your passengers have f astened
their seat belts (see page ).
When you start the engine, check
the gauges and indicators in the
instrument panel (see page ).
3.
2.
1.
4. 5.
6.
7.
8.
9.
10. 16
61
153
131
171
Preparing to Drive
298
Page 305 of 420
Always use the parking brake when
you park your vehicle. Make sure
the parking brake is set f irmly, or
your vehicle may roll if it is parked
on an incline.
Set the parking brake bef ore you put
the transmission in Park. This keeps
the vehicle from moving and putting
pressure on the parking mechanism
in the transmission.If the vehicle is f acing uphill, turn
the front wheels away from the
curb.
If the vehicle is f acing downhill,
turn the front wheels toward the
curb.
Make sure the parking brake is
f ully released bef ore driving away.
Driving with the parking brake
partially set can overheat or
damage the rear brakes.
Make sure the moonroof and the
windows are closed.
Never park over dry leaves, tall
grass, or other f lammable
materials. The hot three way
catalytic converter could cause
these materials to catch on fire. Lock the doors and the tailgate. Place any packages, valuables, etc.
in the cargo area or take them
with you. Turn of f the lights.
Parking T ips
Parking
304
Page 306 of 420
Check the brakes after driving
through deep water. Apply the
brakes moderately to see if they f eel
normal. If not, apply them gently and
f requently until they do. Be extra
cautious in your driving.
The hydraulic system that operates
the brakes has two separate circuits.
Each circuit works diagonally across
the vehicle (the lef t-f ront brake is
connected with the right-rear brake,
etc.). If one circuit should develop a
problem, you will still have braking
at two wheels.If the brake pads need replacing, you
will hear a distinctive, metallic
screeching sound when you apply
the brake pedal. If you do not have
the brake pads replaced, they will
screech all the time. It is normal f or
the brakes to occasionally squeal or
squeak when you apply them.
Your vehicle is equipped with disc
brakes at all f our wheels. A power
assist helps reduce the ef f ort needed
on the brake pedal. The anti-lock
brake system (ABS) helps you retain
steering control when braking very
hard.
Constant application of the brakes
when going down a long hill builds
up heat and reduces their ef f ective-
ness. Use the engine to assist the
brakes by taking your f oot of f the
accelerator and downshif ting to a
lower gear. Resting your f oot on the pedal keeps
the brakes applied lightly, builds up
heat, and reduces their ef f ectiveness.
It also keeps your brake lights on all
the time, conf using drivers behind
you.
Braking System
Braking System Design
Brake Wear Indicators
Driving
305
Page 311 of 420
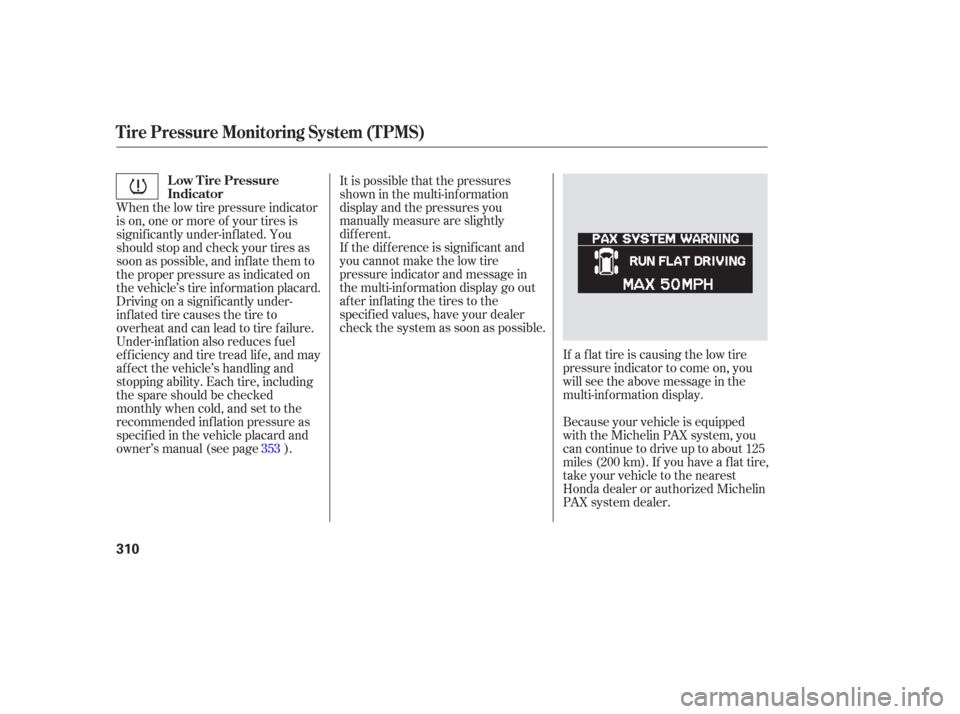
If a f lat tire is causing the low tire
pressure indicator to come on, you
will see the above message in the
multi-inf ormation display.
It is possible that the pressures
shown in the multi-inf ormation
display and the pressures you
manually measure are slightly
dif f erent.
If the dif f erence is signif icant and
you cannot make the low tire
pressure indicator and message in
the multi-inf ormation display go out
after inflating the tires to the
specified values, have your dealer
check the system as soon as possible.
When the low tire pressure indicator
is on, one or more of your tires is
signif icantly under-inf lated. You
should stop and check your tires as
soon as possible, and inflate them to
the proper pressure as indicated on
the vehicle’s tire inf ormation placard.
Driving on a signif icantly under-
inf lated tire causes the tire to
overheat and can lead to tire failure.
Under-inf lation also reduces f uel
efficiency and tire tread life, and may
af f ect the vehicle’s handling and
stopping ability. Each tire, including
the spare should be checked
monthly when cold, and set to the
recommended inf lation pressure as
specif ied in the vehicle placard and
owner’s manual (see page ).
Because your vehicle is equipped
with the Michelin PAX system, you
can continue to drive up to about 125
miles (200 km). If you have a f lat tire,
take your vehicle to the nearest
Honda dealer or authorized Michelin
PAX system dealer.
353
Tire Pressure Monitoring System (TPMS)
Low Tire Pressure
Indicator
310
Page 316 of 420
CONT INUED
If you choose electric brakes, be
sure they are electrically actuated.
Do not attempt to tap into your
vehicle’s hydraulic system. No
matter how successf ul it may seem,
any attempt to attach trailer brakes
to your vehicle’s hydraulic system
will lower braking ef f ectiveness and
create a potential hazard.Trailer lights and equipment must
comply with f ederal, state, province,
and local regulations. Check the
requirements f or the areas where
you plan to tow, and use only
equipment designed f or your vehicle.
If the total trailer weight exceeds
2,000 lbs (900 kg), you should install
a sway control device to minimize
swaying that can occur in crosswinds
and in normal and emergency
driving maneuvers. Your trailer
maker can tell you what kind of sway
control you need and how to install it.
To help prevent overheating, a
transmission f luid cooler and a
power steering f luid cooler are
required f or trailer towing. These
coolers are available only f rom your
Honda dealer. Honda recommends that any trailer
having a total weight of 1,000 lbs
(450 kg) or more be equipped with
its own electric or surge-type brakes.
Seeyourtrailerdealerformore
inf ormation on installing electric
brakes.
Towing a Trailer
Trailer Brakes
Trailer Lights
Sway Cont rol
T ransmission Fluid Cooler andPower St eering Fluid Cooler
Driving
315