HONDA ODYSSEY 2010 RB3-RB4 / 4.G Technology Reference Guide
Manufacturer: HONDA, Model Year: 2010, Model line: ODYSSEY, Model: HONDA ODYSSEY 2010 RB3-RB4 / 4.GPages: 20, PDF Size: 1.73 MB
Page 1 of 20

2010
Technology Reference Guide
Odyssey
2010_TRG_US.qxd:QSG_US.qxd 4/13/09 5:06 PM Page 13
Page 2 of 20
Information Display/
MID/Auto Door Lock
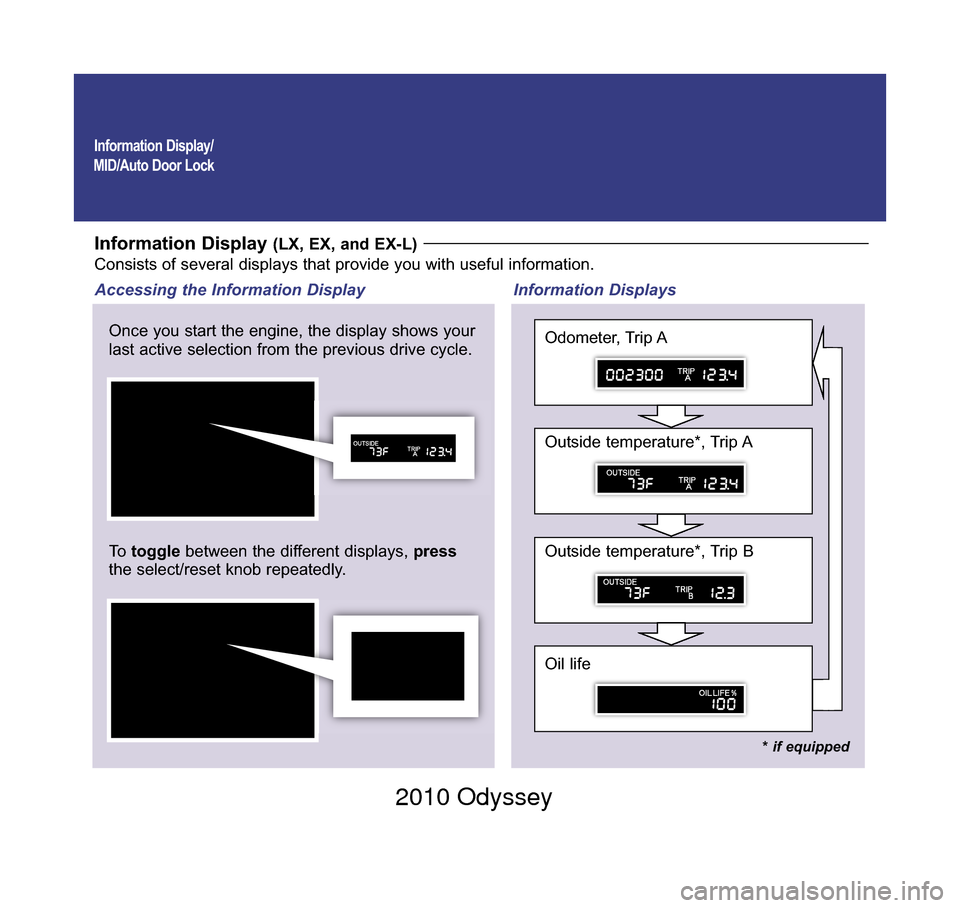
Information Display (LX, EX, and EX-L)Consists of several displays that provide you with useful information.
Once you start the engine, the display shows your
last active selection from the previous drive cycle.
To toggle between the different displays, press
the select/reset knob repeatedly. Information Displays
Accessing the Information Display
* if equipped
Oil life
Outside temperature*, Trip B
Outside temperature*, Trip A
Odometer, Trip A
10 Odyssey TRG_Front Inside:Inside Cvr 4/29/2009 11:46 AM Page 1 2010 Odyssey
Page 3 of 20
Multi-Information Display (MID) (Touring)
Upper
displayLower
display
SEL/
RESET
button
Info
button
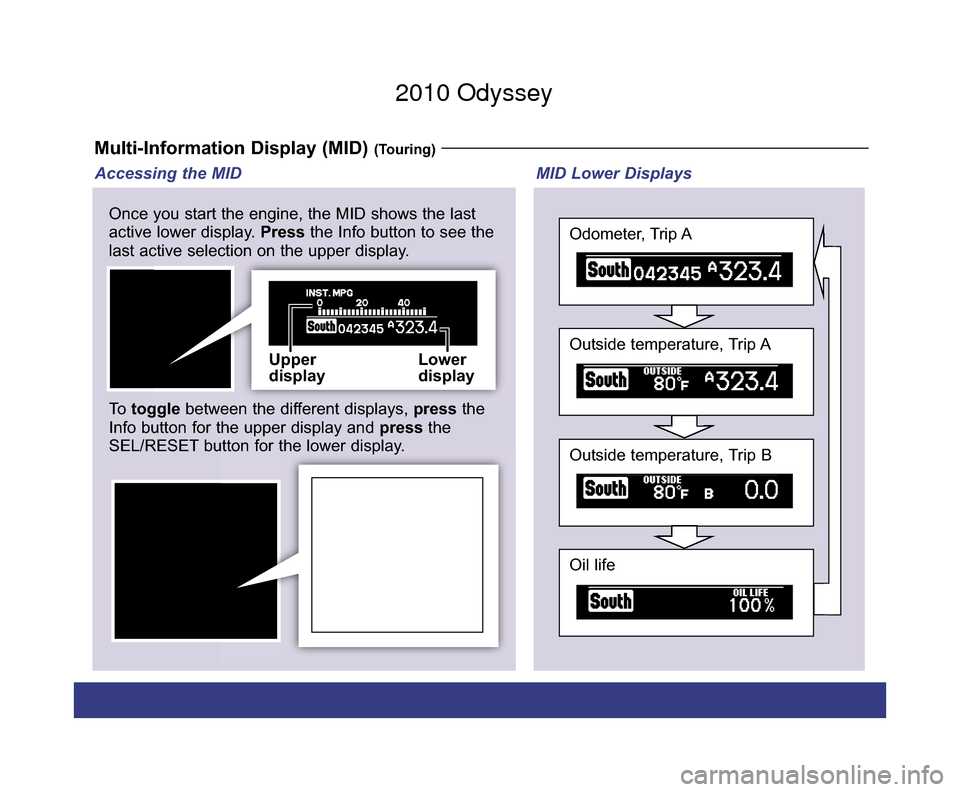
Once you start the engine, the MID shows the last
active lower display.
Pressthe Info button to see the
last active selection on the upper display.
To toggle between the different displays, pressthe
Info button for the upper display and pressthe
SEL/RESET button for the lower display.
Oil life
Outside temperature, Trip B
Outside temperature, Trip A
Odometer, Trip A
MID Lower Displays
Accessing the MID
10 Odyssey TRG_1ab:ExtraPages.qxd 9/24/2009 11:50 AM Page a1 2010 Odyssey
Page 4 of 20
MID Upper Displays
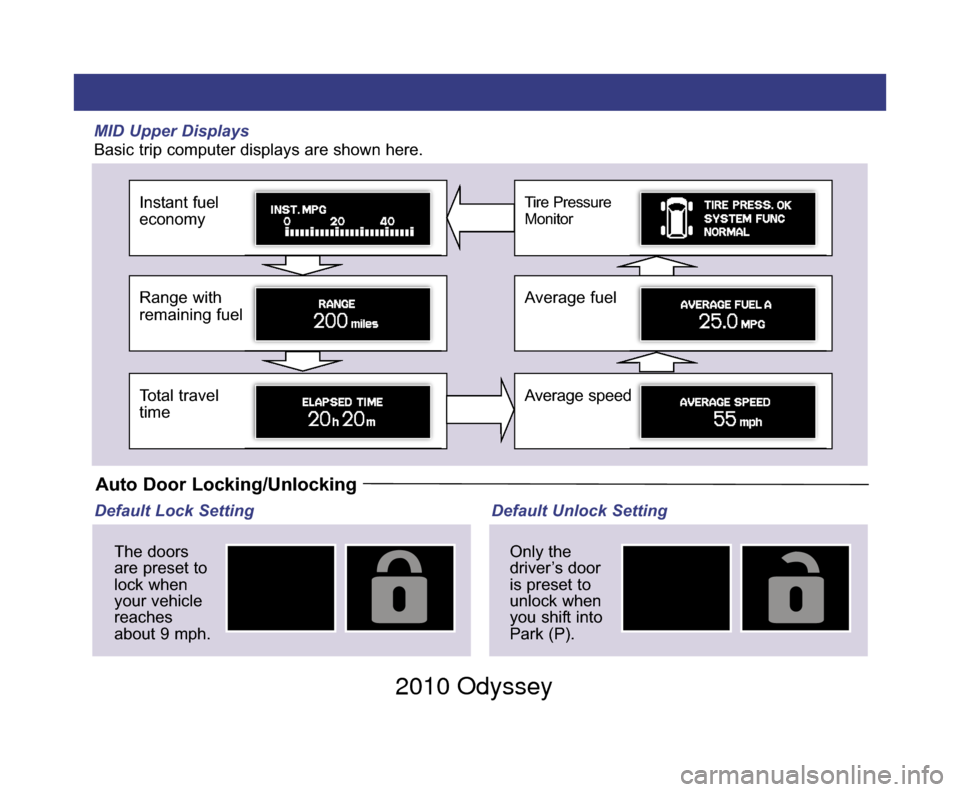
Basic trip computer displays are shown here.
Instant fuel
economy
Range with
remaining fuel
Total travel
time
Tire Pressure
Monitor
Average fuel
Average speed
Auto Door Locking/Unlocking
Default Lock SettingThe doors
are preset to
lock when
your vehicle
reaches
about 9 mph. Default Unlock Setting
Only the
driver’s door
is preset to
unlock when
you shift into
Park (P).
10 Odyssey TRG_1ab:ExtraPages.qxd 9/24/2009 11:51 AM Page b1 2010 Odyssey
Page 5 of 20
Information Display/
MID/Auto Door Lock
Modifying the Auto Door Unlock Setting
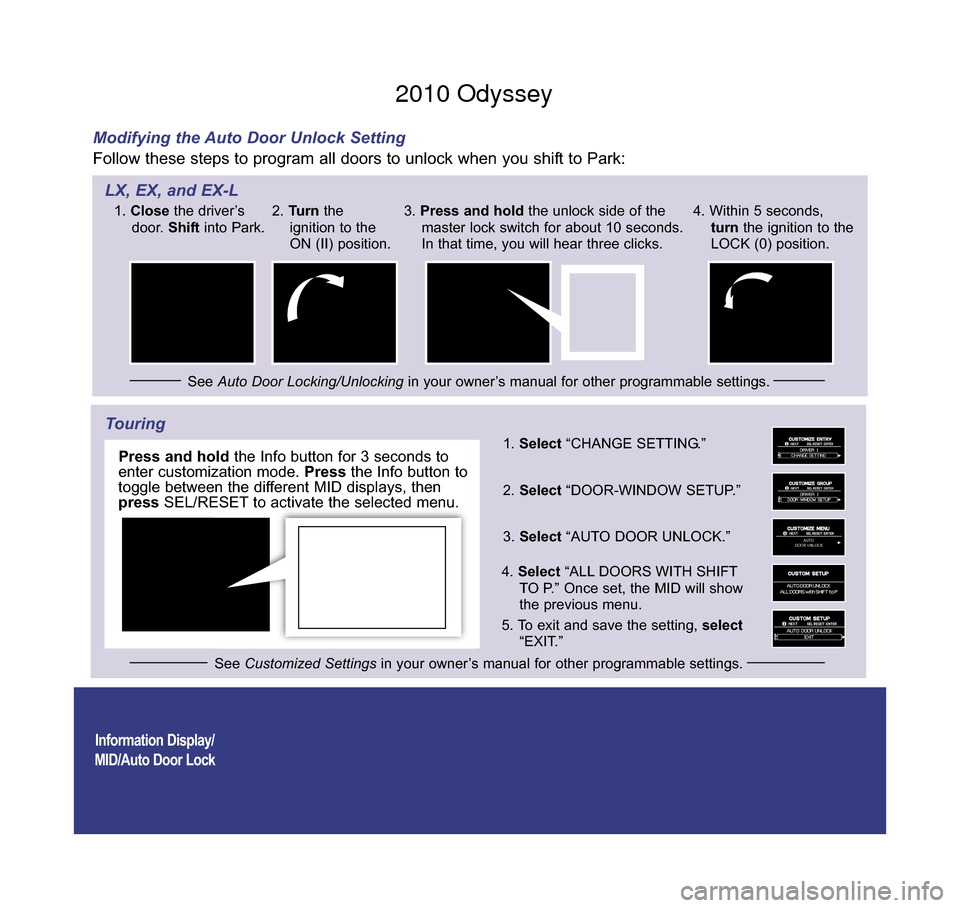
Follow these steps to program all doors to unlock when you shift to Park:
Touring
AUTO
DOOR UNLOCK
1. Select “CHANGE SETTING.”
2. Select “DOOR-WINDOW SETUP.”
3. Select “AUTO DOOR UNLOCK.”
4 . Select “ALL DOORS WITH SHIFT
TO P.” Once set, the MID will show
the previous menu.
5 . To exit and save the setting, select
“EXIT.”
SEL/
RESET
button
Info
button
1.
Close the driver’s
door. Shiftinto Park.
See Auto Door Locking/Unlocking in your owner’s manual for other programmable settings.
2.
Turn the
ignition to the
ON (II) position. 3.
Press and hold the unlock side of the
master lock switch for about 10 seconds.
In that time, you will hear three clicks. 4. Within 5 seconds,
turn the ignition to the
LOCK (0) position.
See Customized Settings in your owner’s manual for other programmable settings.
LX, EX, and EX-L
Press and holdthe Info button for 3 seconds to
enter customization mode. Pressthe Info button to
toggle between the different MID displays, then
press SEL/RESET to activate the selected menu.
10 Odyssey TRG_Base:Base 9/24/2009 3:38 PM Page 2 2010 Odyssey
Page 6 of 20
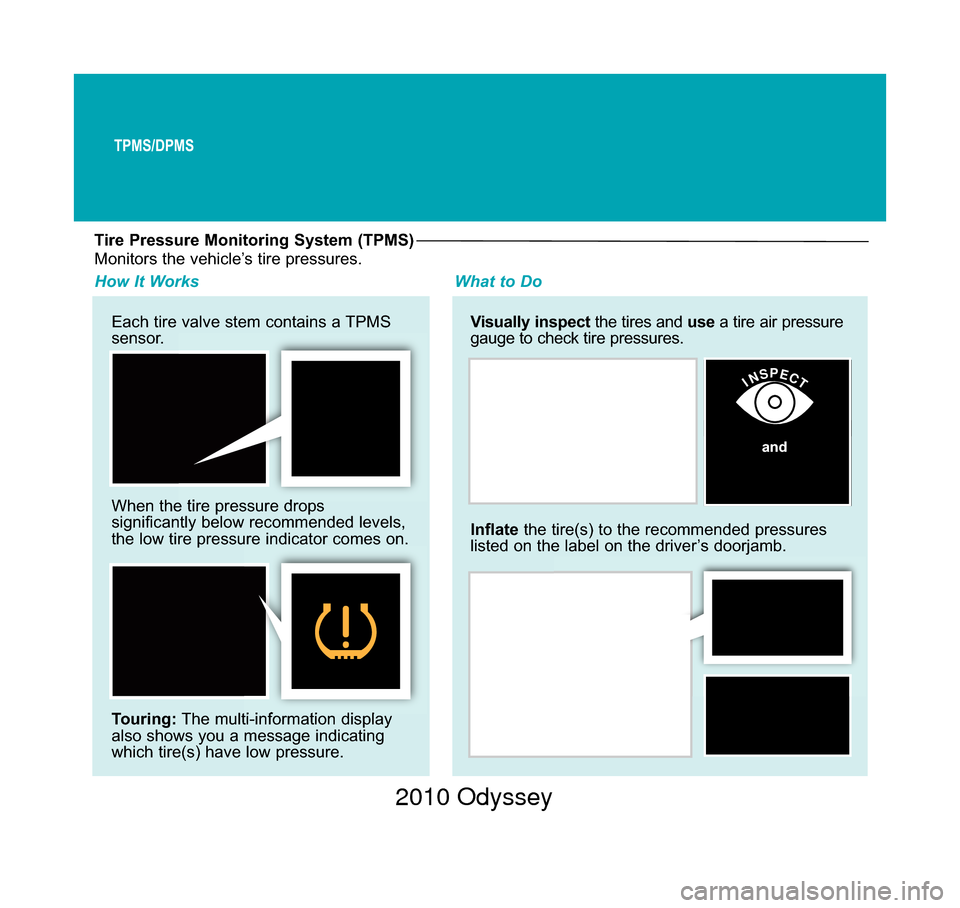
Tire Pressure Monitoring System (TPMS)
Each tire valve stem contains a TPMS
sensor.
When the tire pressure drops
significantly below recommended levels,
the low tire pressure indicator comes on.
Touring:The multi-information display
also shows you a message indicating
which tire(s) have low pressure. Visually inspect
the tires and use a tire air pressure
gauge to check tire pressures.
How It Works What to Do
Inflatethe tire(s) to the recommended pressures
listed on the label on the driver’s doorjamb.
INSPECT
Monitors the vehicle’s tire pressures.
and
TPMS/DPMS
10 Odyssey TRG_Base:Base 9/24/2009 3:39 PM Page 3 2010 Odyssey
Page 7 of 20
TPMS/DPMS
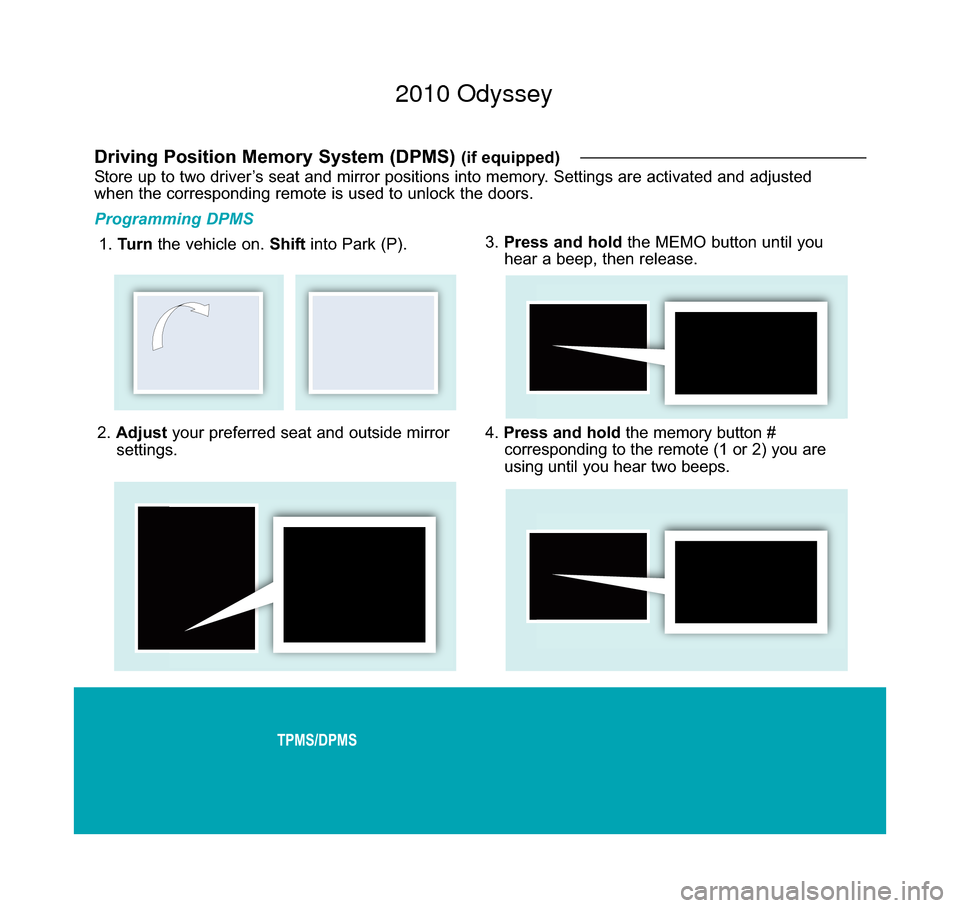
2. Adjust your preferred seat and outside mirror
settings.
Driving Position Memory System (DPMS) (if equipped)
Store up to two driver’s seat and mirror positions into memory. Settings are activated and adjusted
when the corresponding remote is used to unlock the doors.
Programming DPMS
1. Turn the vehicle on. Shift into Park (P). 3.
Press and hold the MEMO button until you
hear a beep, then release.
4. Press and hold the memory button #
corresponding to the remote (1 or 2) you are
using until you hear two beeps.
10 Odyssey TRG_Base:Base 9/24/2009 3:51 PM Page 4 2010 Odyssey
Page 8 of 20
Voice Command/HFL/Navigation
Using the Voice Command System
• Speak in a clear, natural voice.
• Reduce all background noise.
• Adjust the dashboard and sidevents away from the microphone in
the ceiling.
• Close the windows.
Voice Command
To reduce driver distraction, use voice commands for hands-free calling, \
navigation, audio, and climate
control functions. A full list of these commands is in the navigation system manual.
Voice Command Tips:
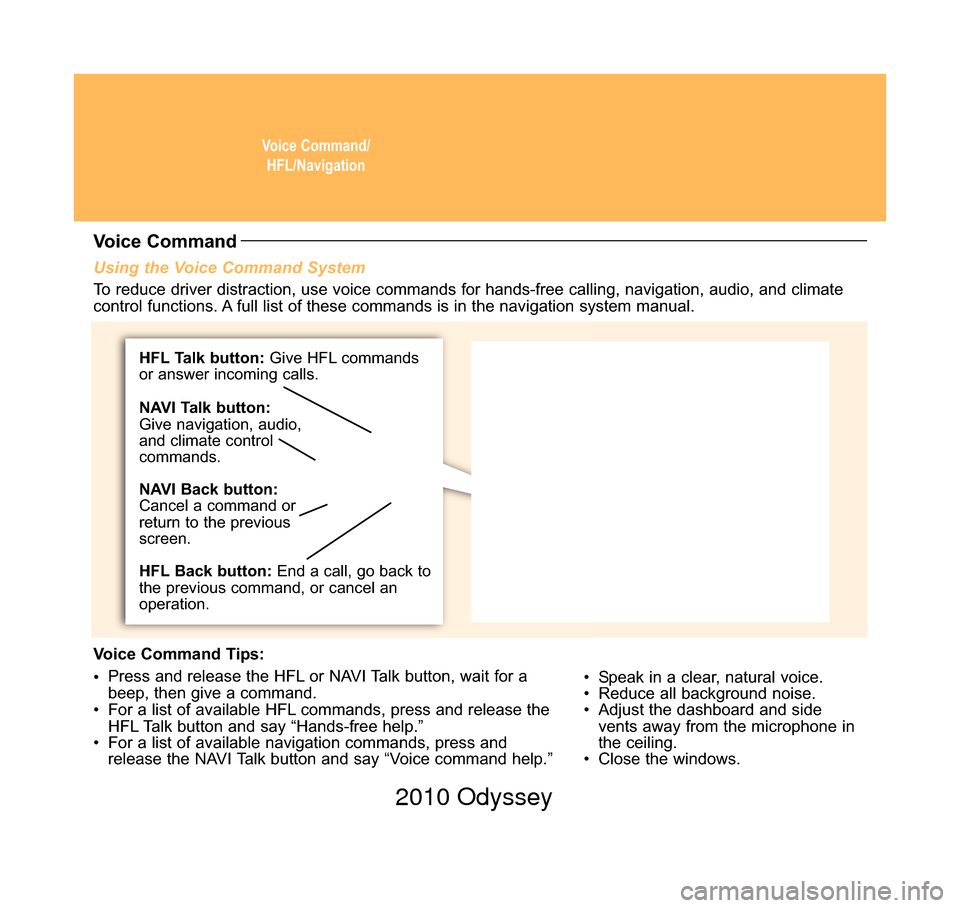
• Press and release the HFL or NAVI Talk button, wait for a
beep, then give a command.
• For a list of available HFL commands, press and release the HFL Talk button and say “Hands-free help.”
• For a list of available navigation commands, press and release the NAVI Talk button and say “Voice command help.”
HFL Talk button: Give HFL commands
or answer incoming calls.
HFL Back button: End a call, go back to
the previous command, or cancel an
operation. NAVI Talk button:
Give navigation, audio,
and climate control
commands.
NAVI Back button:
Cancel a command or
return to the previous
screen.
10 Odyssey TRG_Base:Base 9/24/2009 3:41 PM Page 5 2010 Odyssey
Page 9 of 20
Bluetooth® HandsFreeLink® (if equipped)
Pairing Your Phone
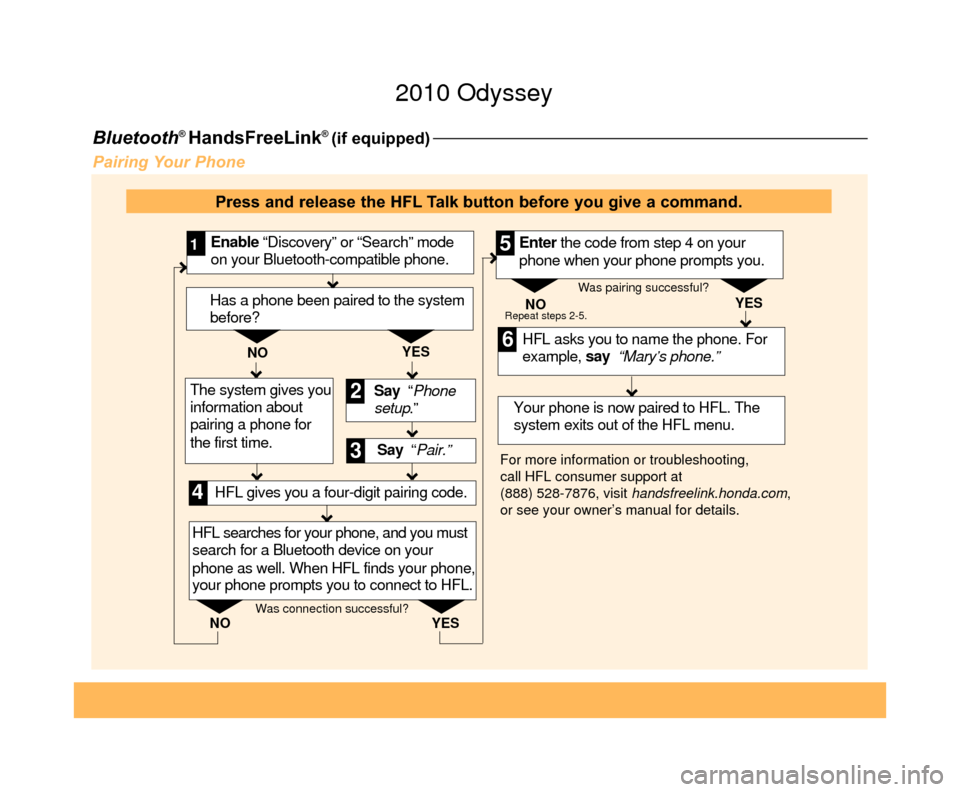
Say “ Pair.” HFL asks you to name the phone. For
example, say “Mary’s phone.”
YES
NO
Enable “Discovery” or “Search” mode
on your Bluetooth-compatible phone.
1
Say “Phone
setup .”
2
3
HFL searches for your phone, and you must
search for a Bluetooth device on your
phone as well. When HFL finds your phone,
your phone prompts you to connect to HFL. Your phone is now paired to HFL. The
system exits out of the HFL menu.Enter the code from step 4 on your
phone when your phone prompts you.
4
5
6
For more information or troubleshooting,
call HFL consumer support at
(888) 528-7876, visit
handsfreelink.honda.com ,
or see your owner’s manual for details. NO
YES
Repeat steps 2-5.
HFL gives you a four-digit pairing code.
Was connection successful? Was pairing successful?
Has a phone been paired to the system
before?
YES
NO
The system gives you
information about
pairing a phone for
the first time.
Press and release the HFL Talk button before you give a command.
10 Odyssey TRG_3ab:ExtraPages.qxd 9/24/2009 3:43 PM Page a5
2010 Odyssey
Page 10 of 20
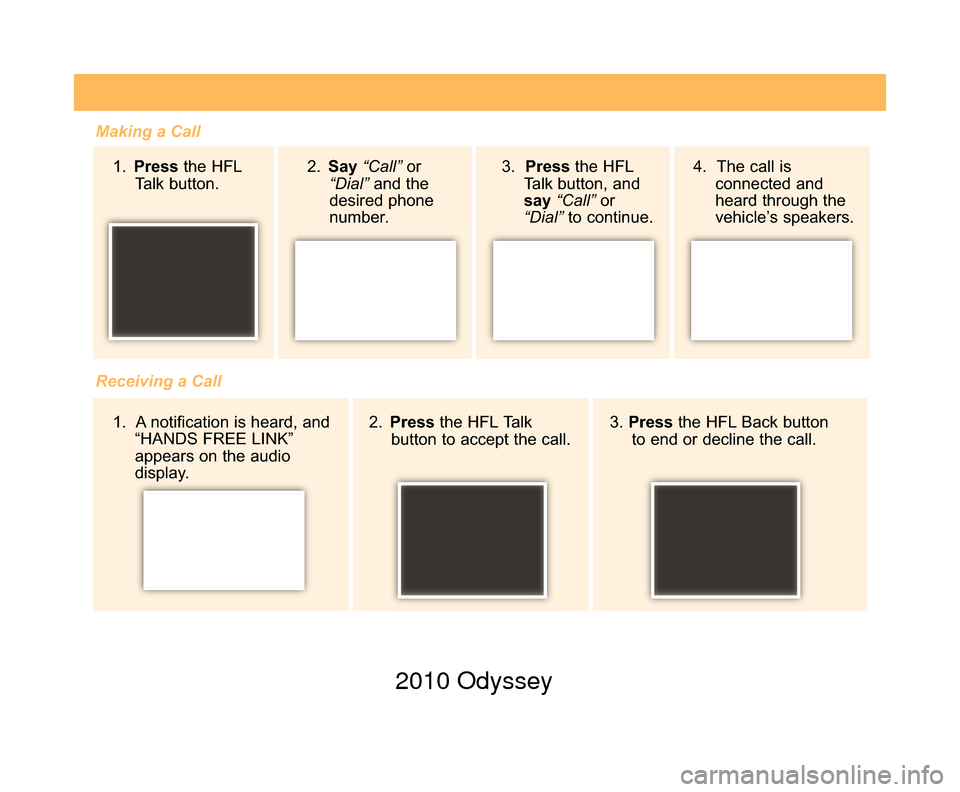
Making a Call1. Press the HFL
Talk button.
Receiving a Call 2. Press the HFL Talk
button to accept the call. 3.
Press the HFL Back button
to end or decline the call.
2.
Say “Call” or
“Dial” and the
desired phone
number . 4. The call is
connected and
heard through the
vehicle’s speakers.
3. Press
the HFL
Talk button, and
say “Call” or
“Dial” to continue.
1. A notification is heard, and “HANDS FREE LINK”
appears on the audio
display.
10 Odyssey TRG_3ab:ExtraPages.qxd 9/24/2009 3:43 PM Page b5
2010 Odyssey