lock HONDA ODYSSEY 2011 RB3-RB4 / 4.G Navigation Manual
[x] Cancel search | Manufacturer: HONDA, Model Year: 2011, Model line: ODYSSEY, Model: HONDA ODYSSEY 2011 RB3-RB4 / 4.GPages: 178, PDF Size: 3.97 MB
Page 2 of 178
2Navigation System
Table of Contents
Map Information ..............................61
Showing Icons on the Map...................61
Map Orientation ..................................63
Current Location .................................64
Map Legend .........................................65
Map Scale ........................................ 66
Destination Icon ............................... 67
Various Other Icons ......................... 67
Landmark Icons ...................................67
Incident Icons ......................................68
Going Off the Route ........................71
Off-road Tracking ............................ 71
Pop-ups and Disclaimers ................. 72
Changing the Route ......................... 73
DEST Screen (Route) ...................... 74
Cancel Route........................................74
Detour ..................................................74
Avoid Streets ........................................74
Change Route Preference ....................74
Waypoint ..............................................75
Destination List....................................76
Changing Your Destination .............77
Find Nearest (Voice command) ...........77
Go Home (Voice command) ................77
Using Interface Dial to Change
Destination .......................................77
Entering a Destination from the Menu Screen (while en route) ....................78
Continue Trip to Screen................... 78
Information Features ...................79
INFO Screen (Main Info.) ............... 79
Trip Computer ..................................... 79
Traffic Incidents................................... 80
Clock/Wallpaper .................................. 81
Calendar .............................................. 81
Voice Help ........................................... 83
Setup .................................................... 84
INFO Screen (Other) .......................84
Scenic Road Information ..................... 85
Calculator ............................................ 85
System/Device Information .................. 86
Map Data Update Status ..................... 86
Key to ZAGAT Ratings ........................ 87
Phone Features .............................88
System Setup ................................. 89
SETUP Mode................................... 89
SETUP Screen (Main Setup) ........... 89
Brightness ............................................ 89
Contrast ............................................... 89
Black Level .......................................... 89
Volume ................................................. 90
Interface Dial Feedback ...................... 90
Personal Information .......................90
Address Book ....................................... 90
Home Address ...................................... 94
PIN Number ......................................... 95Previous Destinations..........................
96
SETUP Screen (Other) .....................97
Music Search .................................... 97
Song By Voice™ (SBV) ....................... 97
Phonetic Modification ......................... 98
Basic Settings ...................................99
Units (mile or km)................................ 99
Voice Recognition Tutor ...................... 99
Routing & Guidance.......................100
Rerouting ........................................... 100
Unverified Area Routing.................... 101
Edit Avoid Area ................................. 105
Edit Waypoint Search Area ............... 107
Guidance Mode ........... ......................108
Street Name Guidance ....................... 108
Guidance Screen Interruption ........... 108
Vehicle............................................109
Off-road Tracking..............................109
Correct Vehicle Position ................... 109
Color ...............................................110
Map Color ......................................... 111
Menu Color........................................ 111
Switching Display Mode Manually ... 111
Switching Display Mode Automatically ................................. 112
Language ........................................ 113
Clock/Wallpaper............................. 113
Wallpaper Type ................................. 113
2011 Odyssey
Page 3 of 178
Navigation System3
Table of Contents
Clock Adjustment ............................... 114
Clock Type ......................................... 115
Picture Setup...................................... 115
Reset Factory Default Settings ......117
Clear Personal Data ....................... 118
Multi-view Rear Camera ............... 119
Three-way Rearview Modes .............. 119
Visible Range of the Rearview Image.............................................. 120
Multi-view Rear Camera Brightness Adjustment...................................... 120
System Initialization ...................121
System Initialization ......................121
Entering the Security Code ............ 121
GPS Initialization.................. .........121
Map Matching ................................ 122
System Limitations......................123
GPS Reception Issues ........................ 123
Database Limitations ..................124
Customer Assistance ................... 126
Reporting Errors ............................ 126
Honda Automobile Customer Service ........................................ 126
Visiting Your Dealer...................... 127
Obtaining a Navigation Update DVD ........................................... 127
Coverage Areas........................... 128
Map Coverage................................ 128
U.S. Detailed Coverage Areas........... 128
Puerto Rico Detailed Coverage Areas .............................................. 133
Canada Detailed Coverage Areas ..... 134
Operation in Alaska, Hawaii, Canada,
and Puerto Rico .......................... 144
Alaska, Hawaii, Canada, and Puerto
Rico ................................................ 144
Frequently Asked Questions .....146
Troubleshooting.......................... 153
Glossary ....................................... 154
Glossary ......................................... 154
Voice Command Index...............157
Global Commands ......................... 157
Navigation Commands .................. 157
General Commands ........................... 157
Map Display Commands ................... 158
Map Scale Commands .... ...................158
Find Place Commands ...................... 159
Route Commands ............ ...................160
Climate Control Commands .......... 160
Audio Commands .......................... 161
Radio Commands...............................161
Disc Commands .... .............................162
HDD Commands ............................... 162USB Commands .................................
163
iPod Commands................................. 163
Bluetooth
® Audio Commands............ 164
AUX Commands ................................ 164
Song By Voice™ Co mmands .............164
Rear Radio Commands .. ....................164
Rear CD Commands .......................... 165
Rear DVD Commands ....................... 165
Rear HDD Commands....................... 166
Rear iPod Commands ........................ 167
Rear AUX Commands........................ 167
Phone Commands ...........................167
SETUP Screen (Main Setup) Commands................................... 167
On-Screen Commands .................... 168
On-Screen Spelling Assist ..............168
Index ............................................ 172
2011 Odyssey
Page 11 of 178
Navigation System11
Getting Started
Display Mode button
Adjusts the screen brightness for Day or
Night mode, or turn s the screen OFF.
See page 111.
CANCEL button
Cancels the current screen and returns to
the previous screen display.
NOTE:
The BACK button on the steering wheel
performs the same basic function. See
page 13.
AUDIO button
Press to display the audio screen.
For more information on audio system
features, see the Audio section of your
Owner’s Manual.
Other buttons
See your Owner’s Manual.
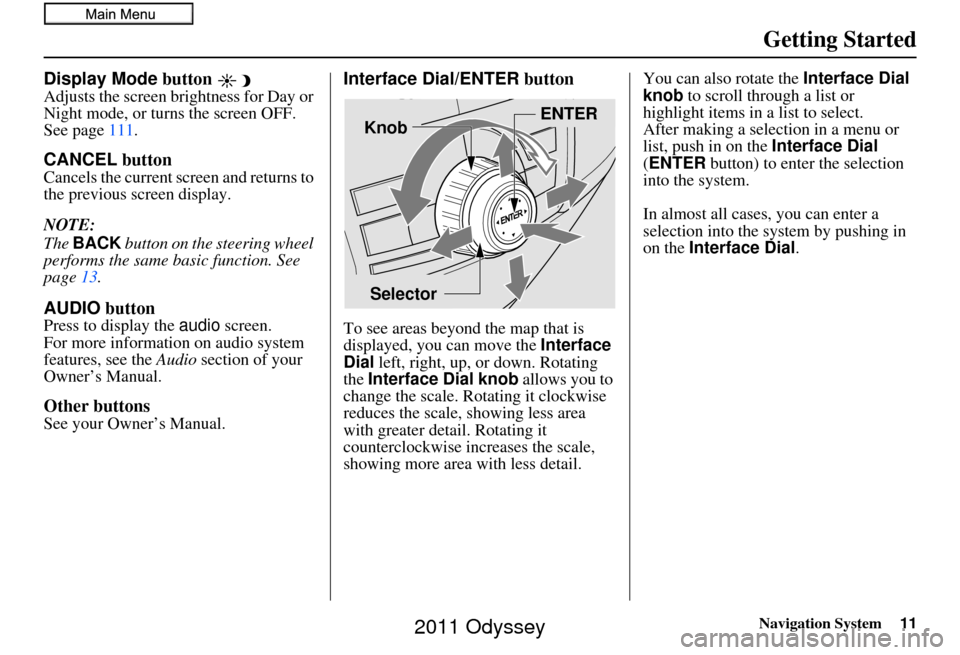
Interface Dial/ENTER button
To see areas beyond the map that is
displayed, you can move the Interface
Dial left, right, up, or down. Rotating
the Interface Dial knob allows you to
change the scale. Rotating it clockwise
reduces the scale, showing less area
with greater detail. Rotating it
counterclockwise increases the scale,
showing more area with less detail. You can also rotate the
Interface Dial
knob to scroll through a list or
highlight items in a list to select.
After making a selection in a menu or
list, push in on the Interface Dial
(ENTER button) to enter the selection
into the system.
In almost all cases , you can enter a
selection into the system by pushing in
on the Interface Dial .
Selector ENTER
Knob
2011 Odyssey
Page 18 of 178
18Navigation System
Getting Started
System Start-up
When you turn the ignition to ON (II), it
takes about 10 seconds for the
navigation system to boot up.
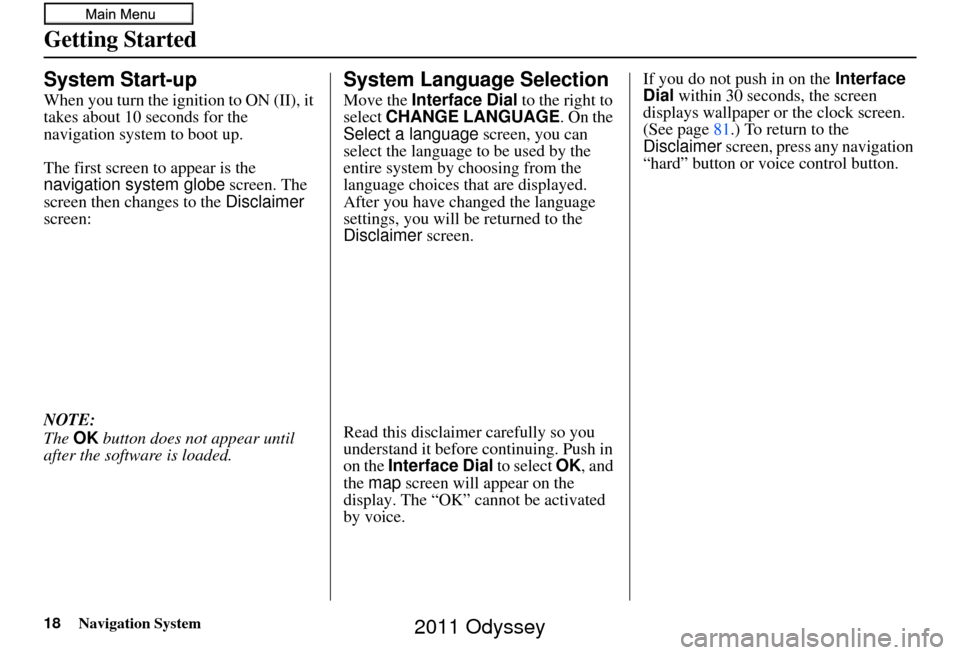
The first screen to appear is the
navigation system globe screen. The
screen then changes to the Disclaimer
screen:
NOTE:
The OK button does not appear until
after the software is loaded.
System Language Selection
Move the Interface Dial to the right to
select CHANGE LANGUAGE. On the
Select a language screen, you can
select the language to be used by the
entire system by choosing from the
language choices that are displayed.
After you have changed the language
settings, you will be returned to the
Disclaimer screen.
Read this disclaimer carefully so you
understand it before continuing. Push in
on the Interface Dial to select OK, and
the map screen will appear on the
display. The “OK” cannot be activated
by voice. If you do not push in on the
Interface
Dial within 30 seconds, the screen
displays wallpaper or the clock screen.
(See page 81.) To return to the
Disclaimer screen, press any navigation
“hard” button or voice control button.
2011 Odyssey
Page 27 of 178
Navigation System27
Getting Started
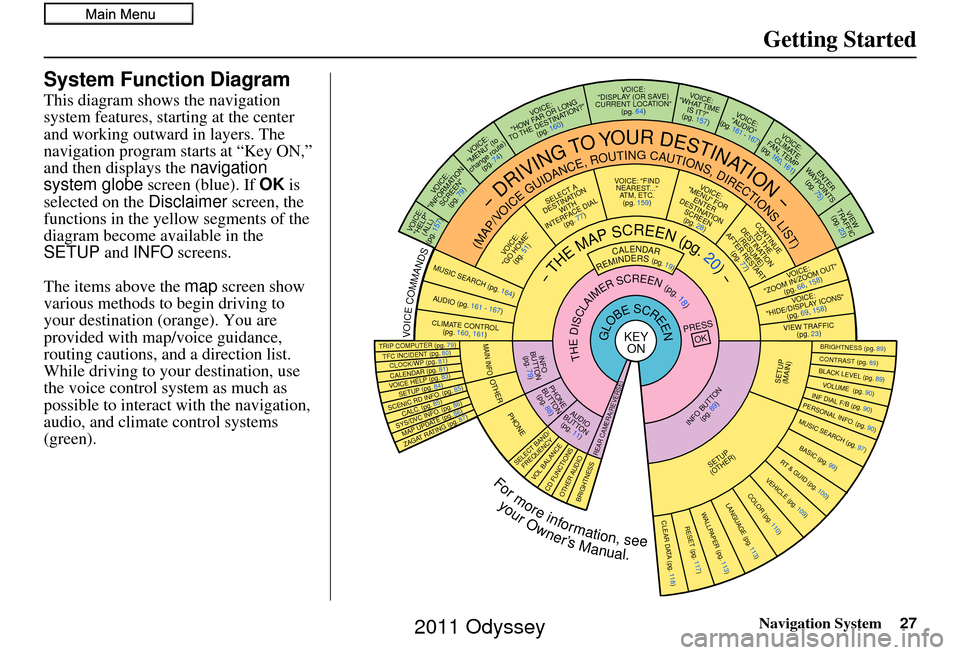
System Function Diagram
This diagram shows the navigation
system features, starting at the center
and working outward in layers. The
navigation program starts at “Key ON,”
and then displays the navigation
system globe screen (blue). If OK is
selected on the Disclaimer screen, the
functions in the yellow segments of the
diagram become available in the
SETUP and INFO screens.
The items above the map screen show
various methods to begin driving to
your destination (orange). You are
provided with map/voice guidance,
routing cautions, and a direction list.
While driving to your destination, use
the voice control system as much as
possible to interact with the navigation,
audio, and climat e control systems
(green).
REMINDERS(pg.19)CALENDAR
-THEMAPSCREEN(pg.20)-
(MAP/VOICEGUIDANCE,ROUTINGCAUTIONS,DIRECTIONSLIST)
-DRIVINGTOYOURDESTINATION-
VOICE: "HELP" (ALL)
(pg. 157)
VOICE:
"INFORMATION SCREEN"(pg. 79)
VOICE:
"MENU" (to
change route) (pg. 74)
VOICE:
"HOW FAR OR LONG
TO THE DESTINATION?" (pg. 160)
VOICE:
"DISPLAY (OR S AV E)
CURRENT LOCA TION"
(pg. 64)VOICE:
"WHAT TIME IS IT?"
(pg. 157)
VOI CE:
"AUDIO"
(pg. 161 - 167)
VOI CE:
CLIMATE
FAN, TEMP
(pg. 160, 161)
ENTER
WAY POINTS
(pg. 75)
VIEW
TRAFFIC(pg. 23)
VOICE:
"ZOOM IN/ZOOM OUT" (pg. 66, 158)
VOICE:
"HIDE/DISPLAY ICONS" (pg. 69, 158)
VIEW TRAFFIC(pg. 23)
BRIGHTN ESS (pg. 89)CONTRAST (pg. 89)BLACK LEVEL (pg. 89)VOLUME (pg. 90)INF DIAL F/B (pg. 90)PERSONAL INFO. (pg. 90)MUSIC SEARCH (pg. 97)
BASIC (pg. 99)RT & GUID (pg. 100)
VEHICLE (pg. 109)COLOR (pg. 110)LANGUAGE (pg. 113)CLEAR DATA (pg. 118)RESET (pg. 117)WALLPAPER (pg. 113)
ZAGAT RATING (pg. 87)
TFC INCIDENT (pg. 80)TRIP COMPUTER (pg. 79)
CALENDAR (pg. 81)VOICE HELP (pg. 83)SETUP (pg. 84)
SYS/DVC INFO. (pg. 86)MAP UPDATE (pg. 86)
SCENIC RD INFO . (pg. 85)
PRESS
OK
SELECT BAND/FREQUENCYVOL BALANCECD FUNCTIONSOTH ER AUDIOBRIGHTNESS
REAR CAMERA(R EVERSE)
INFO BUTTON
(pg. 89)AUD IO
BUTTON (pg. 11)
INFO
BUTTON (pg. 79)
PHONE
BUTTON (pg. 88)
PHONE
THEDISCLAIMERSCREEN(pg.18)
VOI CE: "FIND
NEARES T..."
AT M , ETC.
(pg. 159)
SELECT A
DESTINATION WITH
INTERFACE DIAL (pg. 77)
VOICE:
"GO HOME" (pg. 51)
VOICE:
"MENU" FOR ENTER
DESTINATION SCREEN(pg. 28)
CONTINUE TO THE
DESTINATION (RESUME)
AFTER RESTART (pg. 77)
GLOBESCREENKEYONVOICECOMMANDSMUSIC SEARCH
(pg. 164)AUD IO (pg. 161 - 167)
CLIMATE CONTR OL
(pg. 160, 161 )
Formoreinformation,see
yourOwner’sManual.
SETUP
(OTHER)
CLOCK/W P (pg. 81)
CALC. (pg. 85)
MAIN INFO
OTHERSETUP
(MAIN)
2011 Odyssey
Page 67 of 178
Navigation System67
Driving to Your Destination
Destination Icon
The destination icon only shows the
approximate location of the destination.
This occurs because a city block can
have as many as 100 possible addresses
(for example, the 1400 block is followed
by the 1500 block.) Since most cities
use only a portion of the 100 possible
addresses (for example, in the 1400
block, the addresses may only go up to
1425 before the 1500 block starts).
Therefore, the address 1425 will be
shown a quarter of the way down the
block by the system instead of near the
end of the block where the destination is
actually located.
Tip:
When en route, you can view a map
showing your destination. Using voice
control, say “Display destination map.”
Various Other Icons
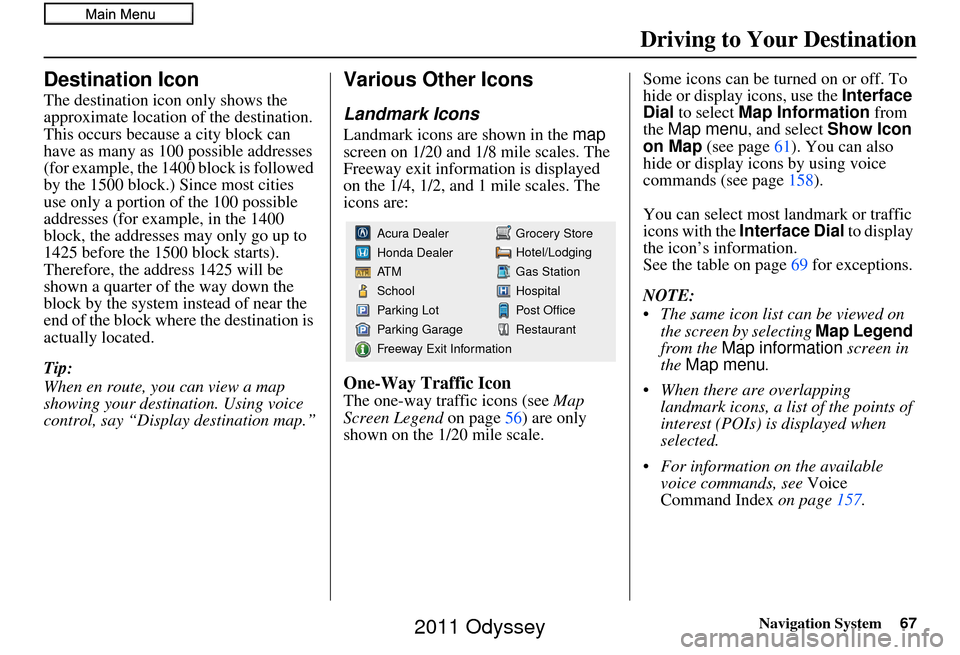
Landmark Icons
Landmark icons are shown in the map
screen on 1/20 and 1/8 mile scales. The
Freeway exit information is displayed
on the 1/4, 1/2, and 1 mile scales. The
icons are:
One-Way Traffic Icon
The one-way traffic icons (see Map
Screen Legend on page 56) are only
shown on the 1/20 mile scale. Some icons can be turned on or off. To
hide or display icons, use the
Interface
Dial to select Map Information from
the Map menu , and select Show Icon
on Map (see page 61). You can also
hide or display icons by using voice
commands (see page 158).
You can select most landmark or traffic
icons with the Interface Dial to display
the icon’s information.
See the table on page 69 for exceptions.
NOTE:
The same icon list can be viewed on the screen by selecting Map Legend
from the Map information screen in
the Map menu .
When there are overlapping landmark icons, a list of the points of
interest (POIs) is displayed when
selected.
For information on the available voice commands, see Voice
Command Index on page157.
Grocery Store
Hotel/Lodging
Gas Station
Hospital
Post Office
Restaurant
Acura Dealer
Honda Dealer
AT M
School
Parking Lot
Parking Garage
Freeway Exit Information
2011 Odyssey
Page 81 of 178
Navigation System81
Information Features
Clock/Wallpaper
The Clock/Wallpaper option allows
you to set up the clock screen or choose
a wallpaper image to display. See
page 113.
Calendar
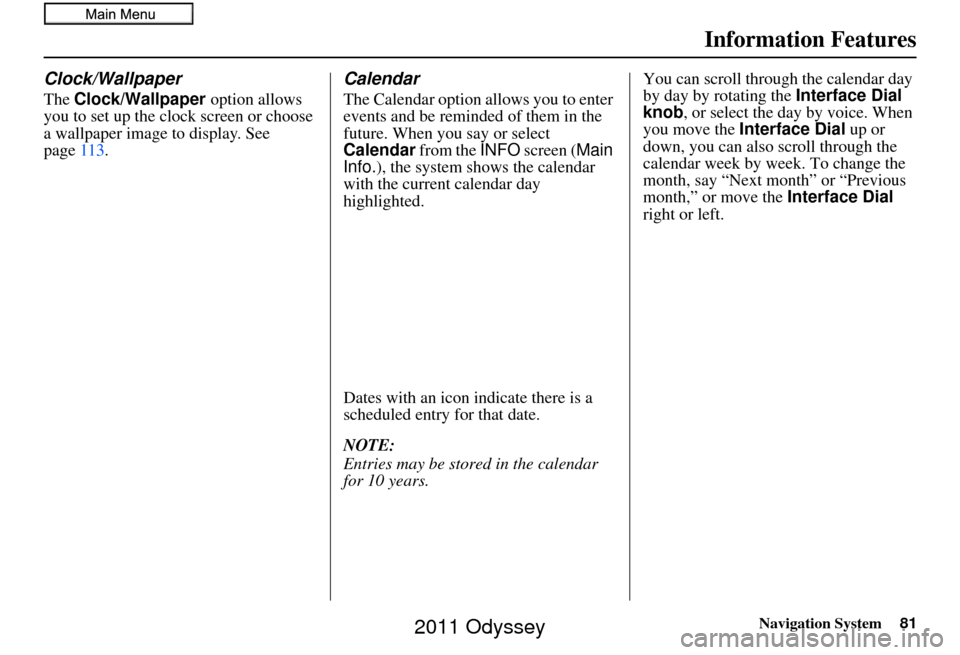
The Calendar option allows you to enter
events and be reminded of them in the
future. When you say or select
Calendar from the INFO screen ( Main
Info.), the system sh ows the calendar
with the current calendar day
highlighted.
Dates with an icon indicate there is a
scheduled entry for that date.
NOTE:
Entries may be stored in the calendar
for 10 years. You can scroll through the calendar day
by day by rotating the
Interface Dial
knob, or select the day by voice. When
you move the Interface Dial up or
down, you can also scroll through the
calendar week by week. To change the
month, say “Next month” or “Previous
month,” or move the Interface Dial
right or left.
2011 Odyssey
Page 109 of 178
Navigation System109
System Setup
Vehicle
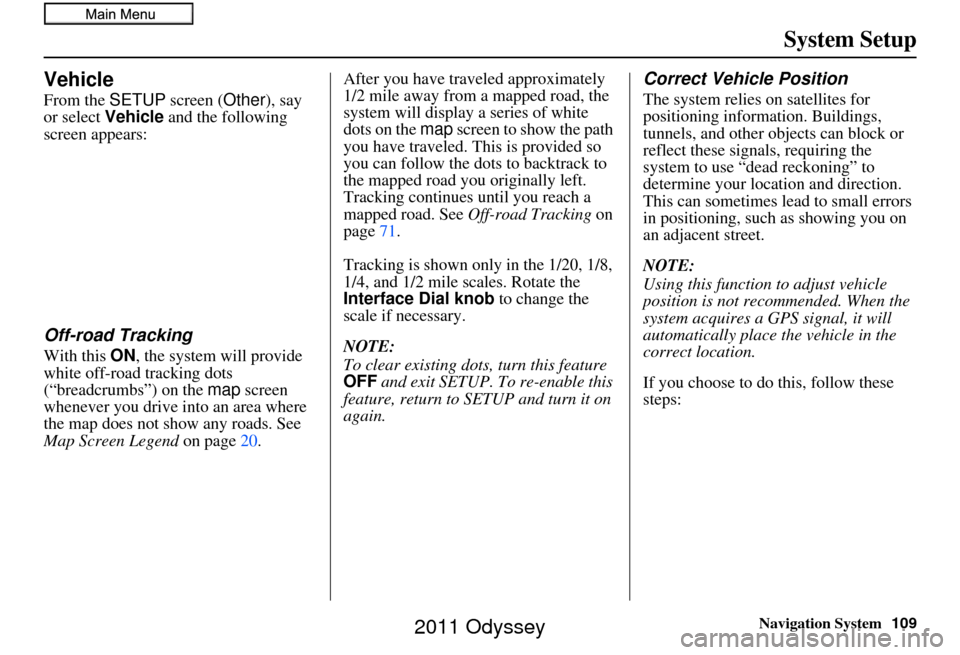
From the SETUP screen ( Other), say
or select Vehicle and the following
screen appears:
Off-road Tracking
With this ON , the system will provide
white off-road tracking dots
(“breadcrumbs”) on the map screen
whenever you drive into an area where
the map does not show any roads. See
Map Screen Legend on page 20.After you have traveled approximately
1/2 mile away from a mapped road, the
system will display a series of white
dots on the map
screen to show the path
you have traveled. This is provided so
you can follow the dots to backtrack to
the mapped road you originally left.
Tracking continues until you reach a
mapped road. See Off-road Tracking on
page 71.
Tracking is shown only in the 1/20, 1/8,
1/4, and 1/2 mile scales. Rotate the
Interface Dial knob to change the
scale if necessary.
NOTE:
To clear existing dots, turn this feature
OFF and exit SETUP. To re-enable this
feature, return to SETUP and turn it on
again.
Correct Vehicle Position
The system relies on satellites for
positioning inform ation. Buildings,
tunnels, and other objects can block or
reflect these signals, requiring the
system to use “dea d reckoning” to
determine your location and direction.
This can sometimes lead to small errors
in positioning, such as showing you on
an adjacent street.
NOTE:
Using this function to adjust vehicle
position is not recommended. When the
system acquires a GPS signal, it will
automatically place the vehicle in the
correct location.
If you choose to do this, follow these
steps:
2011 Odyssey
Page 113 of 178
Navigation System113
System Setup
Language
Selects the language to be used on each
screen that the system displays. From
the SETUP screen ( Other), say or
select Language and the following
screen will be displayed.
You can choose from three languages:
English , Français, or Español .NOTE:
Voice confirmation of cities and
streets only occurs when English has
been selected.
When Français or Español is selected, some messages will
continue to be displayed in English.
Clock/Wallpaper
You can display a clock or uploaded
picture on the navigation screen. From
the SETUP screen (Other), say or
select Wallpaper Settings and the
following screen will be displayed.
Wallpaper Type
You can choose the wallpaper type from
CLOCK, PICTURE, or OFF. If you
choose PICTURE, only the wallpaper
will be displayed on the screen. If you
choose CLOCK , the clock and
wallpaper will be displayed on the
screen. See Picture Setup on page115.
2011 Odyssey
Page 114 of 178
114Navigation System
System Setup
Clock Adjustment
Say or select Clock Adjustment and
the following screen appears:
This screen allows you to set or adjust
the following:
• Auto Daylight (Default = ON)
• Auto Time Zone (Default = ON)
• Adjust Time (adjust your clock)
• Clock Format (Default = 12H)
• Reset (resets this screen’s settings to factory defaults)
Auto Daylight
Sets automatic daylight saving time ON
or OFF . If set to ON , the clock will
automatically “spring ahead” or “fall
back” by one hour when a daylight
saving time change occurs.
NOTE:
Even if you have set Auto Daylight to
ON , this function is not activated in
areas that do not adopt daylight saving
time.
Auto Time Zone
Sets automatic time zone selection by
GPS to ON or OFF . If you are driving
across the country and passing through
time zones, then this feature will
automatically set the time to the time
zone you are traveling through.
However, if you live and work in two
different time zones, you may want to
turn this feature off.
NOTE:
When driving near a time zone
boundary, the displa yed time zone may
fluctuate between the two zone times.
2011 Odyssey