reset HONDA ODYSSEY 2013 RC1-RC2 / 5.G Navigation Manual
[x] Cancel search | Manufacturer: HONDA, Model Year: 2013, Model line: ODYSSEY, Model: HONDA ODYSSEY 2013 RC1-RC2 / 5.GPages: 267, PDF Size: 8.64 MB
Page 133 of 267
131
Audio System
Auxiliary Input Jack
Audio
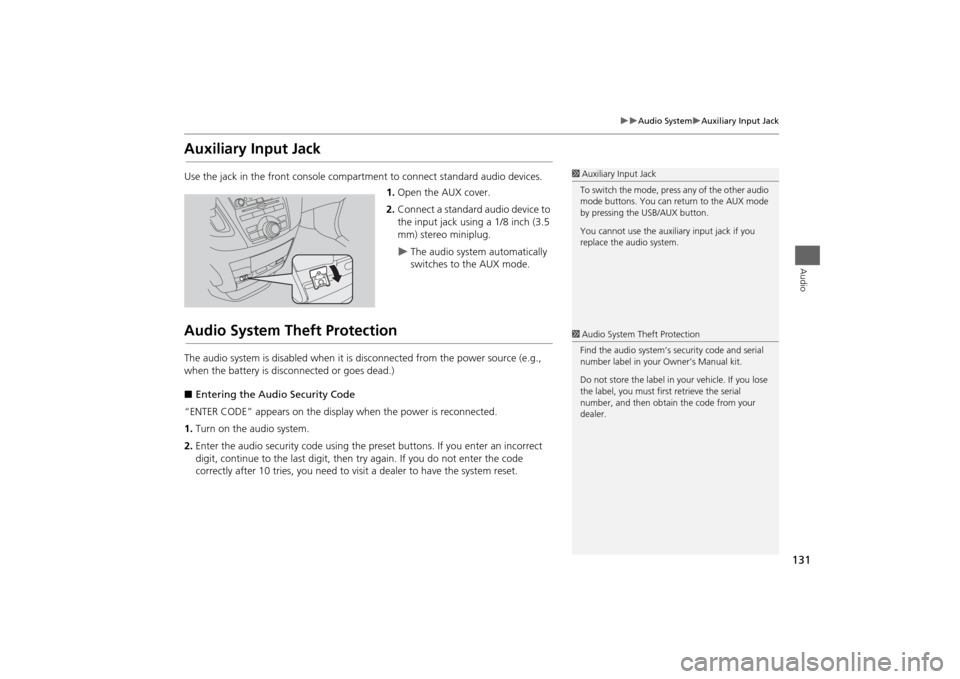
Auxiliary Input JackUse the jack in the front console compartment to connect standard audio devices.
1. Open the AUX cover.
2. Connect a standard audio device to
the input jack using a 1/8 inch (3.5
mm) stereo miniplug.
The audio system automatically
switches to the AUX mode.
Audio System Theft ProtectionThe audio system is disabled when it is disconnected from the power source (e.g.,
when the battery is disc onnected or goes dead.)
■ Entering the Audio Security Code
“ENTER CODE” appears on the displa y when the power is reconnected.
1. Turn on the audio system.
2. Enter the audio security code using the pr eset buttons. If you enter an incorrect
digit, continue to the last digit, then try again. If you do not enter the code
correctly after 10 tries, you need to vi sit a dealer to have the system reset.
1Auxiliary Input Jack
To switch the mode, press any of the other audio
mode buttons. You can return to the AUX mode
by pressing the USB/AUX button.
You cannot use the auxili ary input jack if you
replace the audio system.1 Audio System Theft Protection
Find the audio system’s se curity code and serial
number label in your Owner’s Manual kit.
Do not store the label in y our vehicle. If you lose
the label, you must first retrieve the serial
number, and then obtain the code from your
dealer.
Page 134 of 267
132Audio
Playing FM/AM RadioSelecting FM/AM Mode1.Press the AM/FM button.
Press the AM/FM button again, if necessa ry, to select the frequency band (AM,
FM1, FM2).
2. Select a station using the buttons (Prese t, SCAN), the bars (SKIP, CATEGORY), and
the TUNE knob.
On the FM bands, you can also use the CATEGORY bar and TITLE button to
select a station provided by the Radio Data System (RDS).
The band and frequency are displayed on the display.
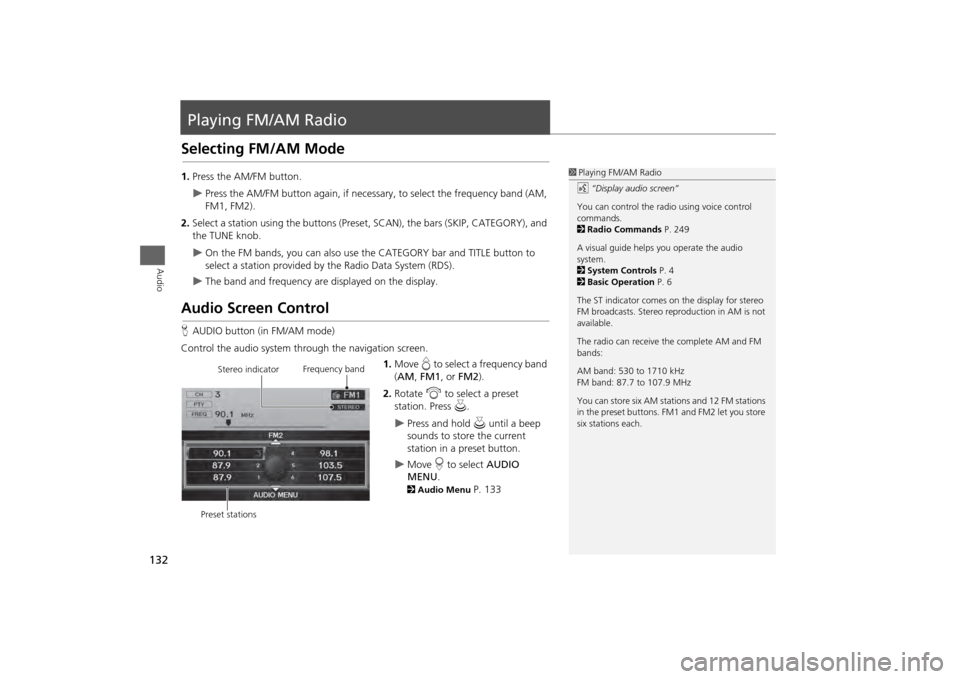
Audio Screen ControlH AUDIO button (in FM/AM mode)
Control the audio system through the navigation screen. 1.Move e to select a frequency band
( AM , FM1 , or FM2 ).
2. Rotate i to select a preset
station. Press u .
Press and hold u until a beep
sounds to store the current
station in a preset button.
Move r to select AUDIO
MENU . 2Audio Menu
P. 133
1Playing FM/AM Radio
d “Display audio screen”
You can control the radio using voice control
commands.
2 Radio Commands P. 249
A visual guide helps you operate the audio
system.
2 System Controls P. 4
2 Basic Operation P. 6
The ST indicator comes on the display for stereo
FM broadcasts. Stereo re production in AM is not
available.
The radio can receive the complete AM and FM
bands:
AM band: 530 to 1710 kHz
FM band: 87.7 to 107.9 MHz
You can store six AM stati ons and 12 FM stations
in the preset buttons. FM1 and FM2 let you store
six stations each.
Stereo indicator Frequency band
Preset stations
Page 135 of 267
133
Playing FM/AM Radio
Audio Menu
Audio
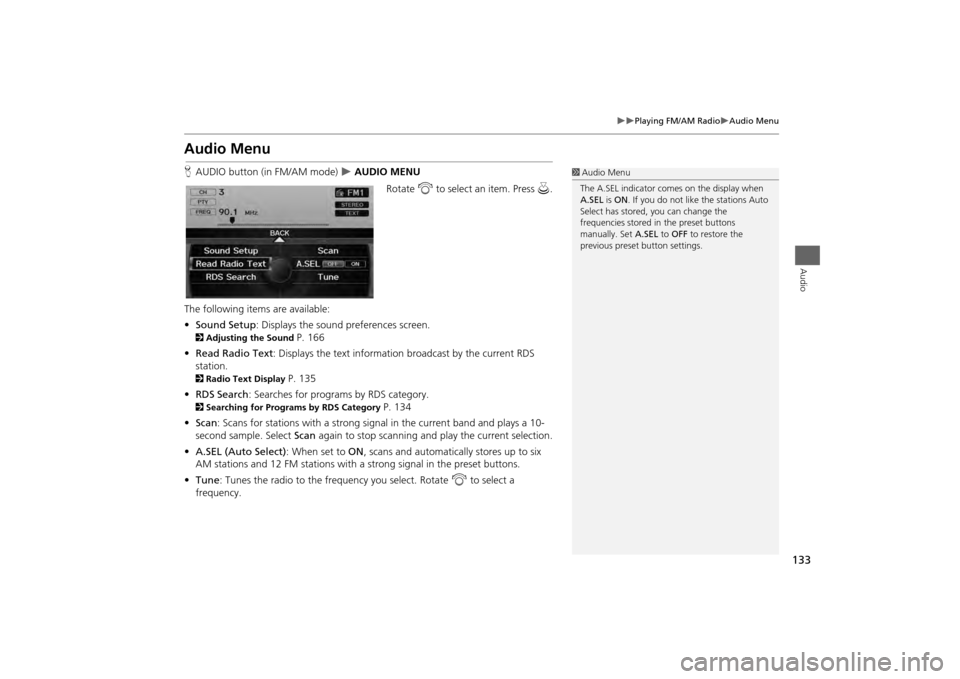
Audio MenuHAUDIO button (in FM/AM mode)
AUDIO MENU
Rotate i to select an item. Press u.
The following items are available:
• Sound Setup : Displays the sound preferences screen.
2Adjusting the Sound
P. 166
• Read Radio Text : Displays the text information broadcast by the current RDS
station.
2 Radio Text Display
P. 135
• RDS Search : Searches for programs by RDS category.
2Searching for Programs by RDS Category
P. 134
• Scan : Scans for stations with a strong signal in the current band and plays a 10-
second sample. Select Scan again to stop scanning and play the current selection.
• A.SEL (Auto Select) : When set to ON, scans and automatically stores up to six
AM stations and 12 FM stations with a strong signal in the preset buttons.
• Tune : Tunes the radio to the frequency you select. Rotate i to select a
frequency.
1 Audio Menu
The A.SEL indicator comes on the display when
A.SEL is ON . If you do not like the stations Auto
Select has stored, you can change the
frequencies stored in the preset buttons
manually. Set A.SEL to OFF to restore the
previous preset button settings.
Page 138 of 267
136Audio
Playing XM® RadioSelecting XM Mode1.Press the XM button.
Press the XM button again, if necess ary, to select the band (XM1, XM2).
2. Select a channel using the buttons (Preset, SCAN), the bars (SKIP, CATEGORY),
and the TUNE knob.
The band and channel are displayed on the display.
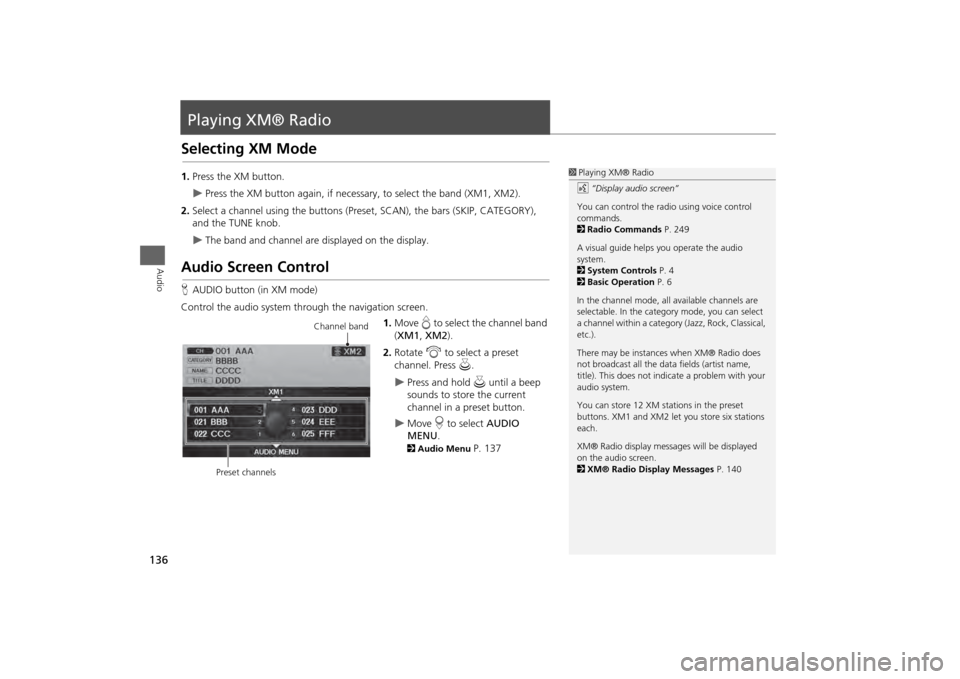
Audio Screen ControlHAUDIO button (in XM mode)
Control the audio system through the navigation screen. 1.Move e to select the channel band
( XM1 , XM2 ).
2. Rotate i to select a preset
channel. Press u.
Press and hold u until a beep
sounds to store the current
channel in a preset button.
Move r to select AUDIO
MENU . 2Audio Menu
P. 137
1Playing XM® Radio
d “Display audio screen”
You can control the radio using voice control
commands.
2 Radio Commands P. 249
A visual guide helps you operate the audio
system.
2 System Controls P. 4
2 Basic Operation P. 6
In the channel mode, all available channels are
selectable. In the categor y mode, you can select
a channel within a category (Jazz, Rock, Classical,
etc.).
There may be instance s when XM® Radio does
not broadcast all the data fields (artist name,
title). This does not indica te a problem with your
audio system.
You can store 12 XM stat ions in the preset
buttons. XM1 and XM2 let you store six stations
each.
XM® Radio display messag es will be displayed
on the audio screen.
2 XM® Radio Display Messages P. 140
Channel band
Preset channels
Page 143 of 267
141Audio
Playing a DiscSelecting Disc Mode1.Press the CD button to play a CD or other disc.
2. Insert a disc into the disc slot.
The disc automatically begins playing.
3. Select a track using the buttons (Preset, SCAN) and the bars (SKIP, CATEGORY).
The track number and elapsed time ar e displayed on the display. Title
information for audio CDs is displayed if found in the Gracenote® Album Info
(Gracenote® Media Database) stored on the built-in hard disc drive (HDD). Text
information stored on MP3/WMA/ AAC discs is also displayed.
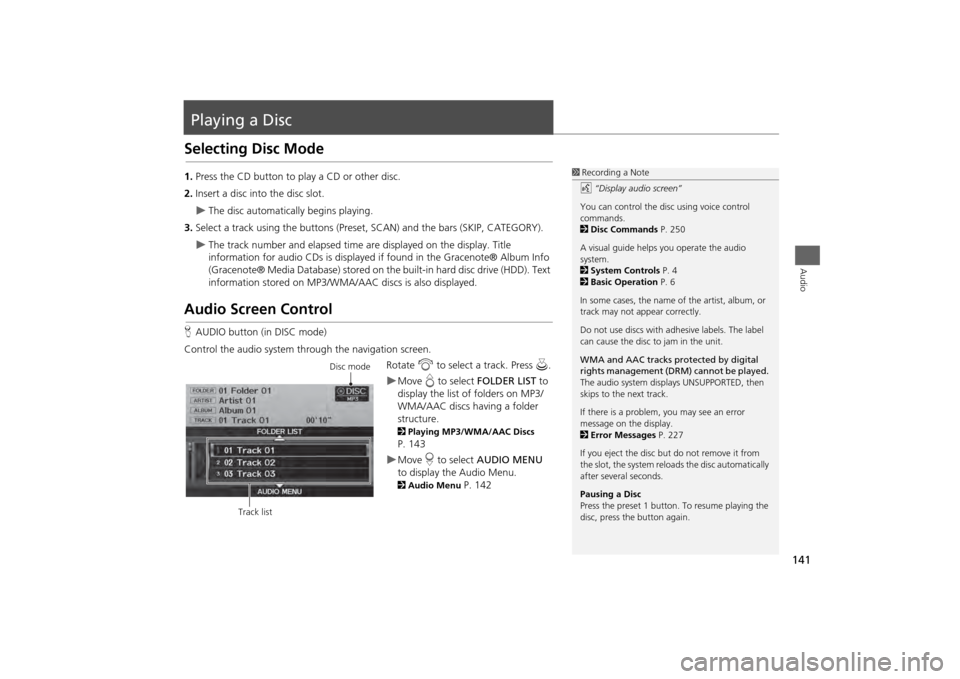
Audio Screen ControlHAUDIO button (in DISC mode)
Control the audio system through the navigation screen. Rotate i to select a track. Press u .
Move e to select FOLDER LIST to
display the list of folders on MP3/
WMA/AAC discs having a folder
structure. 2 Playing MP3/WMA/AAC Discs P. 143Move r to select AUDIO MENU
to display the Audio Menu. 2 Audio Menu
P. 142
1Recording a Note
d “Display audio screen”
You can control the disc using voice control
commands.
2 Disc Commands P. 250
A visual guide helps you operate the audio
system.
2 System Controls P. 4
2 Basic Operation P. 6
In some cases, the name of the artist, album, or
track may not appear correctly.
Do not use discs with a dhesive labels. The label
can cause the disc to jam in the unit.
WMA and AAC tracks protected by digital
rights management (DRM) cannot be played.
The audio system displays UNSUPPORTED, then
skips to the next track.
If there is a problem, you may see an error
message on the display.
2 Error Messages P. 227
If you eject the disc but do not remove it from
the slot, the system reloads the disc automatically
after severa l seconds.
Pausing a Disc
Press the preset 1 button. To resume playing the
disc, press the button again.
Disc mode
Track list
Page 170 of 267
168
Audio Remote Controls
Steering Wheel Controls
Audio
FM/AM, XM
•Press the N (Channel) button to change to the next preset station (channel).
• Press the B (Channel) button to go to the previous preset station (channel).
• FM/AM: Press and hold for one second to scan for a station with a strong signal.
• XM: Press and hold for one second to go to the next/previous channel in the
current category.
DISC, HDD, iPod®, USB, Bluetooth® Audio (on some phones)
• Press the N button to skip to the end of the current track.
• Press the B button to skip to the beginning of the current track. Press the B
button again to go to the beginning of the previous track.
• Press and hold to skip forward/backward to the first track of the next folder.■CH (Channel) Button
Page 199 of 267
197
Rear Control Panel Operation
Screen and Surround Settings
Rear Entertainment System
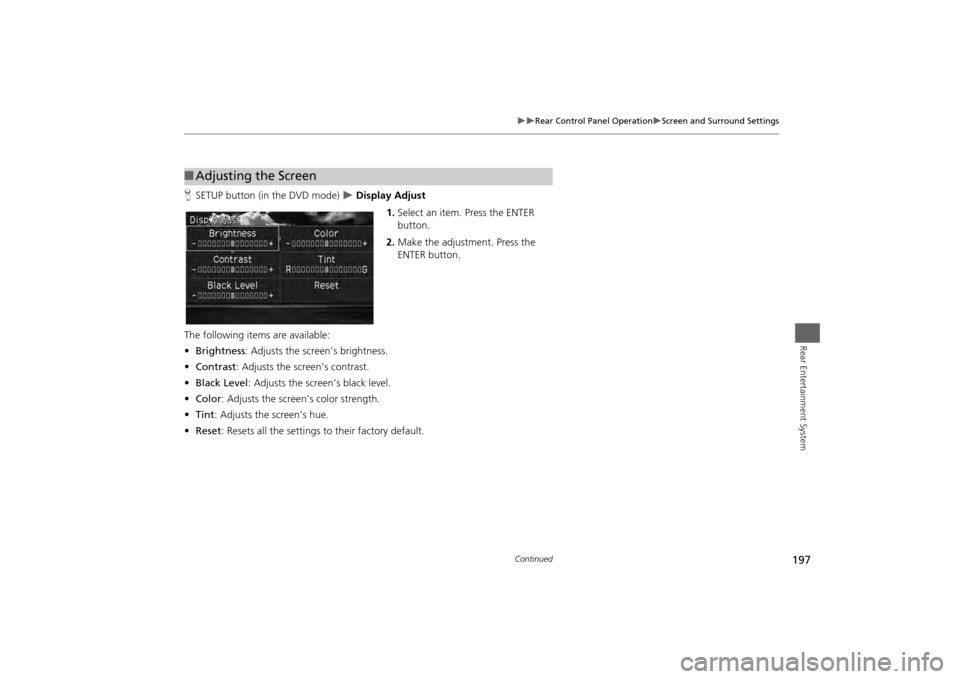
HSETUP button (in the DVD mode)
Display Adjust
1.Select an item. Press the ENTER
button.
2. Make the adjustment. Press the
ENTER button.
The following items are available:
• Brightness : Adjusts the screen’s brightness.
• Contrast : Adjusts the screen’s contrast.
• Black Level : Adjusts the screen’s black level.
• Color : Adjusts the screen’s color strength.
• Tint : Adjusts the screen’s hue.
• Reset : Resets all the settings to their factory default.
■Adjusting the Screen
Continued
Page 212 of 267
210Other Features
Trip ComputerHINFO button
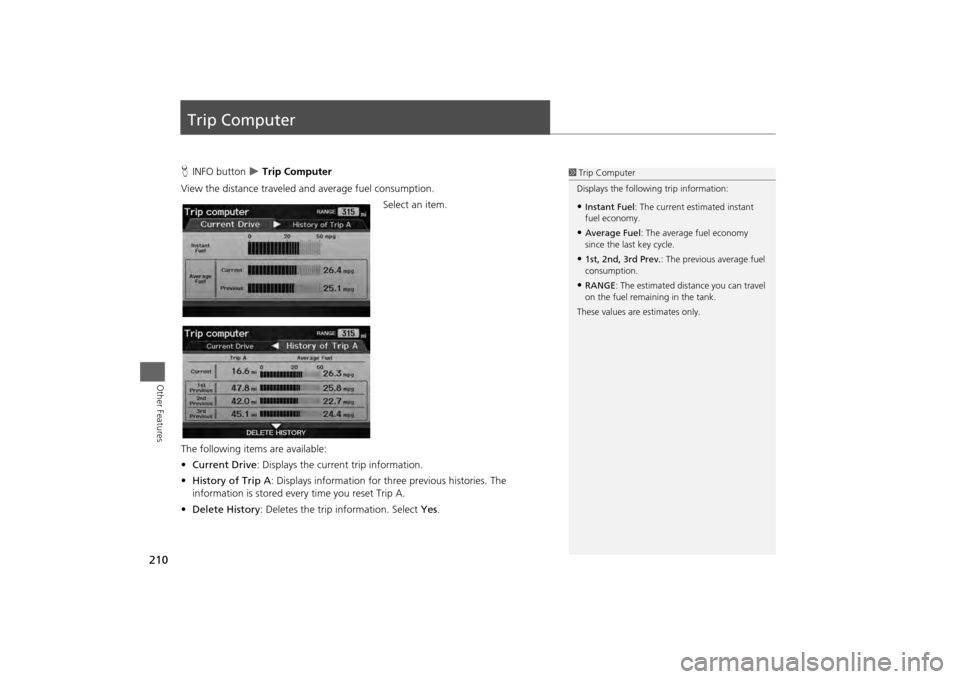
Trip Computer
View the distance traveled and average fuel consumption. Select an item.
The following item s are available:
• Current Drive : Displays the current trip information.
• History of Trip A : Displays information for three previous histories. The
information is stored ever y time you reset Trip A.
• Delete History : Deletes the trip information. Select Yes.
1Trip Computer
Displays the following trip information:•Instant Fuel : The current estimated instant
fuel economy.•Average Fuel : The average fuel economy
since the last key cycle.•1st, 2nd, 3rd Prev. : The previous average fuel
consumption.•RANGE : The estimated distance you can travel
on the fuel remaining in the tank.
These values are estimates only.
Page 223 of 267
221
Troubleshooting
Map, Voice, Entering Destinations
Troubleshooting
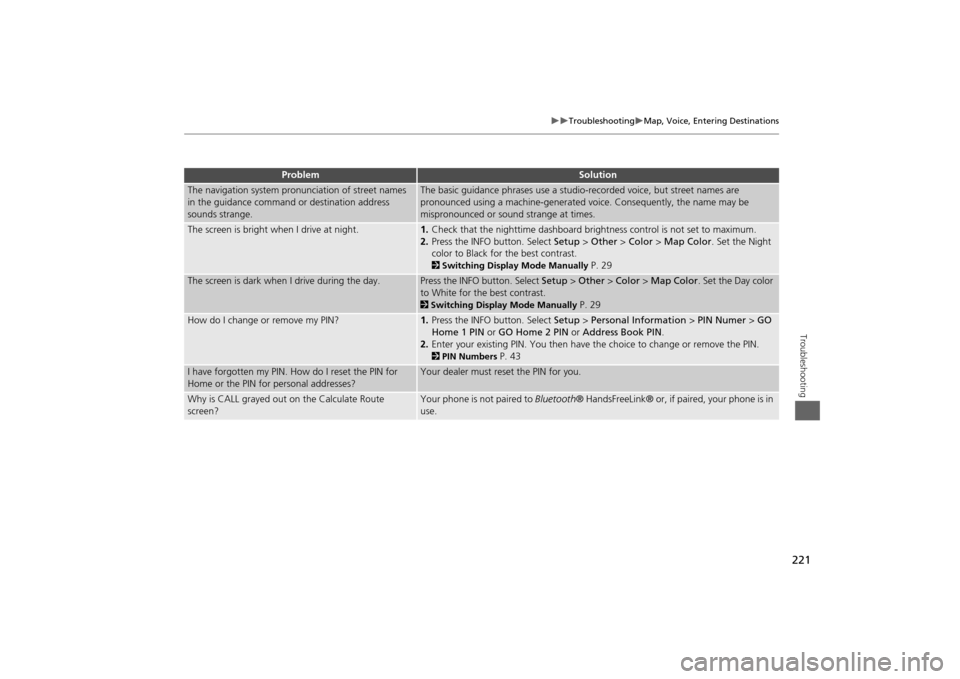
The navigation system pronunciation of street names
in the guidance command or destination address
sounds strange.
The basic guidance phrases use a studio- recorded voice, but street names are
pronounced using a machine-generated voice. Consequently, the name may be
mispronounced or sound strange at times.
The screen is bright when I drive at night.
1. Check that the nighttime dashboard brig htness control is not set to maximum.
2. Press the INFO button. Select Setup > Other > Color > Map Color . Set the Night
color to Black for the best contrast. 2 Switching Display Mode Manually
P. 29
The screen is dark when I drive during the day.
Press the INFO button. Select Setup > Other > Color > Map Color . Set the Day color
to White for the best contrast. 2 Switching Display Mode Manually
P. 29
How do I change or remove my PIN?
1. Press the INFO button. Select Setup > Personal Information > PIN Numer > GO
Home 1 PIN or GO Home 2 PIN or Address Book PIN .
2. Enter your existing PIN. Yo u then have the choice to change or remove the PIN. 2PIN Numbers
P. 43
I have forgotten my PIN. How do I reset the PIN for
Home or the PIN for personal addresses?
Your dealer must reset the PIN for you.
Why is CALL grayed out on the Calculate Route
screen?
Your phone is not paired to Bluetooth® HandsFreeLink® or, if paired, your phone is in
use.
Problem
Solution
Page 229 of 267
227Troubleshooting
Error MessagesNavigation System
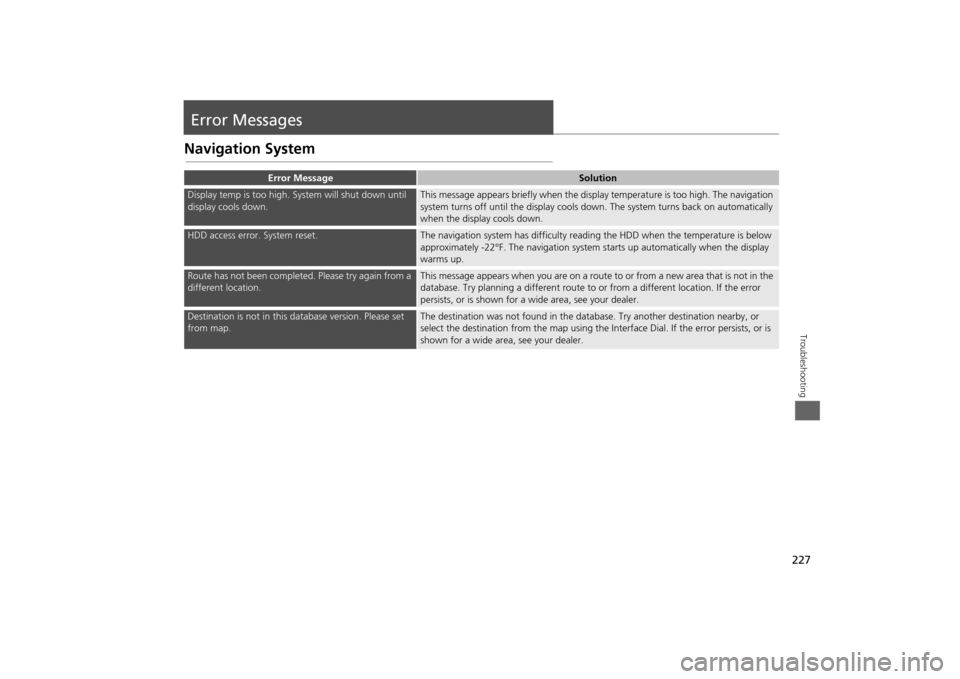
Error Message
Solution
Display temp is too high. System will shut down until
display cools down.
This message appears briefly when the display temperature is too high. The navigation
system turns off until the display cools do wn. The system turns back on automatically
when the display cools down.
HDD access error. System reset.
The navigation system has difficulty readi ng the HDD when the temperature is below
approximately -22°F. The navigation system starts up automatically when the display
warms up.
Route has not been completed. Please try again from a
different location.
This message appears when you are on a route to or from a new area that is not in the
database. Try planning a different route to or from a different location. If the error
persists, or is shown for a wide area, see your dealer.
Destination is not in this da tabase version. Please set
from map.
The destination was not found in the data base. Try another destination nearby, or
select the destination from the map using the In terface Dial. If the error persists, or is
shown for a wide area, see your dealer.