HONDA ODYSSEY 2013 RC1-RC2 / 5.G Owners Manual
ODYSSEY 2013 RC1-RC2 / 5.G
HONDA
HONDA
https://www.carmanualsonline.info/img/13/5982/w960_5982-0.png
HONDA ODYSSEY 2013 RC1-RC2 / 5.G Owners Manual
Trending: oil, oil pressure, air condition, lane assist, parking brake, oil viscosity, height adjustment
Page 91 of 433
90
uuGauges and DisplaysuInformation Display
*
Instrument Panel
Appears when the fuel fill cap is loose or is not installed.2Check/Tighten Fuel Cap Message P. 399Appears when there is a problem with the sensor on the battery.2Checking the Battery P. 371■
Check Fuel Cap
■
Check Batt Sensor
Page 92 of 433
91
uuGauges and DisplaysuAudio/Information Screen
Continued
Instrument Panel
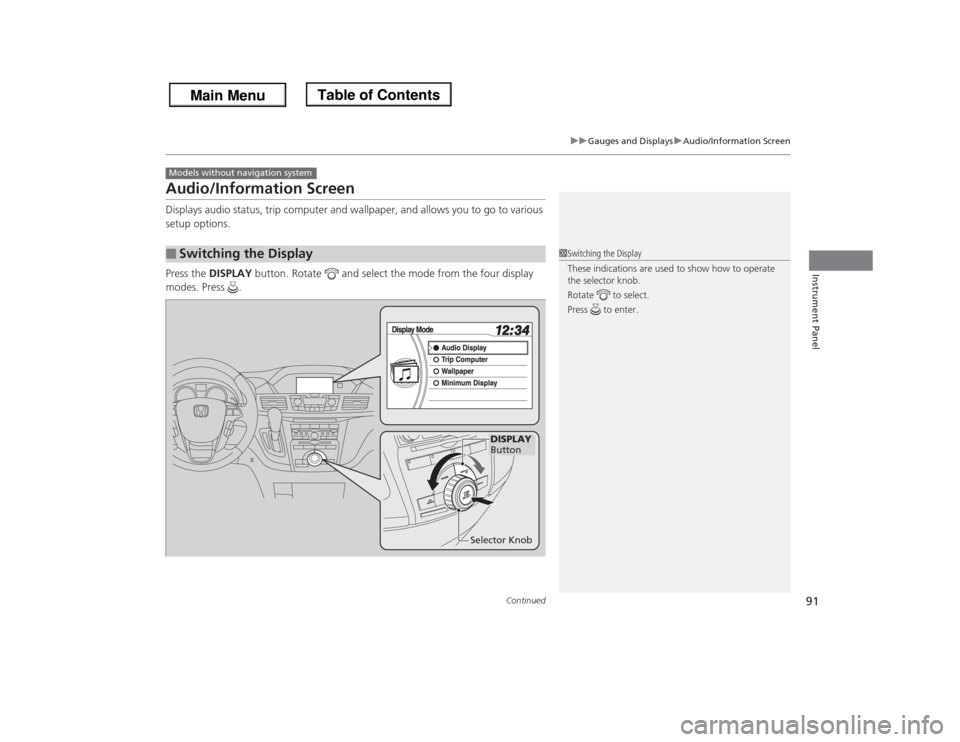
Audio/Information ScreenDisplays audio status, trip computer and wallpaper, and allows you to go to various
setup options.
Press the DISPLAY button. Rotate and select the mode from the four display
modes. Press .■
Switching the DisplayModels without navigation system
1Switching the Display
These indications are used to show how to operate
the selector knob.
Rotate to select.
Press to enter.
DISPLAY
Button
Selector Knob
Page 93 of 433
uuGauges and DisplaysuAudio/Information Screen
92Instrument Panel
Shows the current audio information.2Audio System Basic Operation P. 197Shows the instant fuel economy, average fuel economy, distance (trip meter),
average speed, elapsed time, and range.2Instant Fuel Economy P. 88
2Trip Meter P. 88
2Range P. 88■Average speed
Shows the average speed in mph (U.S.) or km/h (Canada).■Elapsed time
Shows the time during one drive cycle.
Shows a clock screen or an image you import.2Wallpaper Setup P. 94Minimizes the display by only showing the compass, audio status, and clock on the
upper part of the display.■
Audio Display
■
Trip Computer
■
Wallpaper
■
Minimum Display
1Trip Computer
You can reset the trip computer.
2Trip Computer Reset P. 96
Page 94 of 433
93
uuGauges and DisplaysuAudio/Information Screen
Continued
Instrument Panel
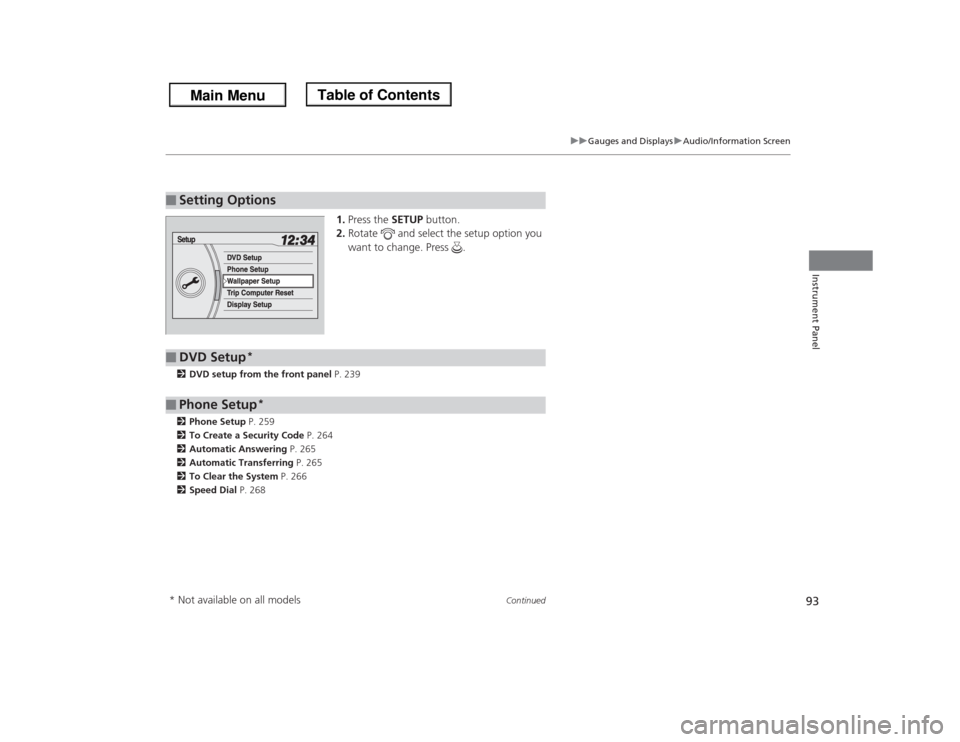
1.Press the SETUP button.
2.Rotate and select the setup option you
want to change. Press .
2DVD setup from the front panel P. 239
2Phone Setup P. 259
2To Create a Security Code P. 264
2Automatic Answering P. 265
2Automatic Transferring P. 265
2To Clear the System P. 266
2Speed Dial P. 268■
Setting Options
■
DVD Setup
*
■
Phone Setup
*
* Not available on all models
Page 95 of 433
uuGauges and DisplaysuAudio/Information Screen
94Instrument Panel
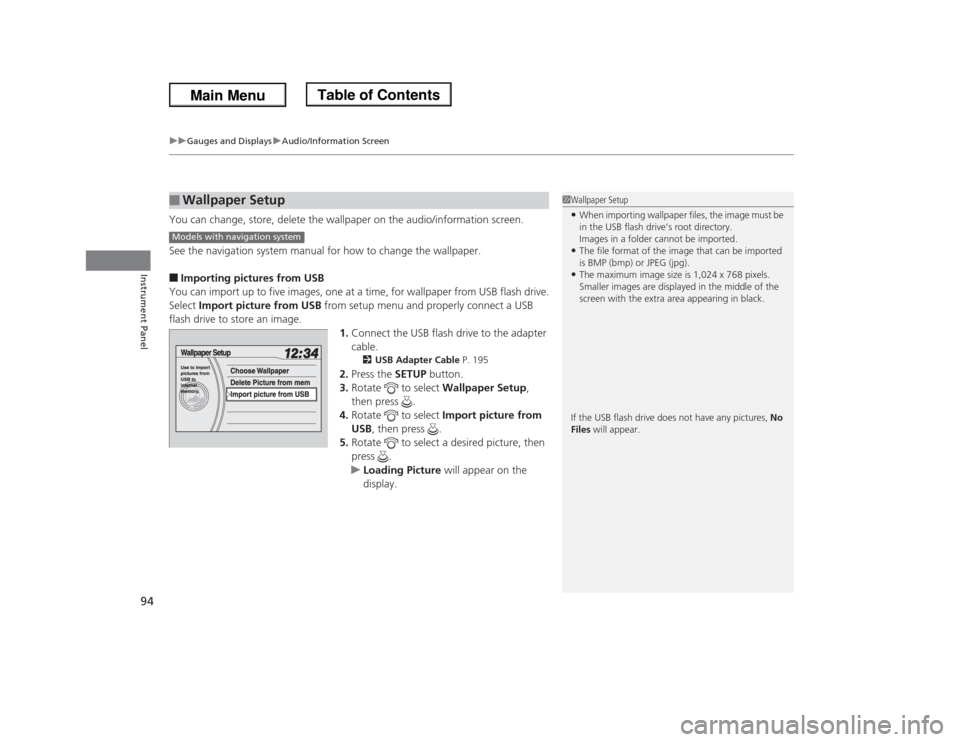
You can change, store, delete the wallpaper on the audio/information screen.
See the navigation system manual for how to change the wallpaper.■Importing pictures from USB
You can import up to five images, one at a time, for wallpaper from USB flash drive.
Select Import picture from USB from setup menu and properly connect a USB
flash drive to store an image.
1.Connect the USB flash drive to the adapter
cable.
2USB Adapter Cable P. 195
2.Press the SETUP button.
3.Rotate to select Wallpaper Setup,
then press .
4.Rotate to select Import picture from
USB, then press .
5.Rotate to select a desired picture, then
press .
uLoading Picture will appear on the
display.
■
Wallpaper Setup
1Wallpaper Setup•When importing wallpaper files, the image must be
in the USB flash drive’s root directory.
Images in a folder cannot be imported.•The file format of the image that can be imported
is BMP (bmp) or JPEG (jpg).•The maximum image size is 1,024 x 768 pixels.
Smaller images are displayed in the middle of the
screen with the extra area appearing in black.
If the USB flash drive does not have any pictures, No
Files will appear.
Models with navigation system
Page 96 of 433
95
uuGauges and DisplaysuAudio/Information Screen
Continued
Instrument Panel
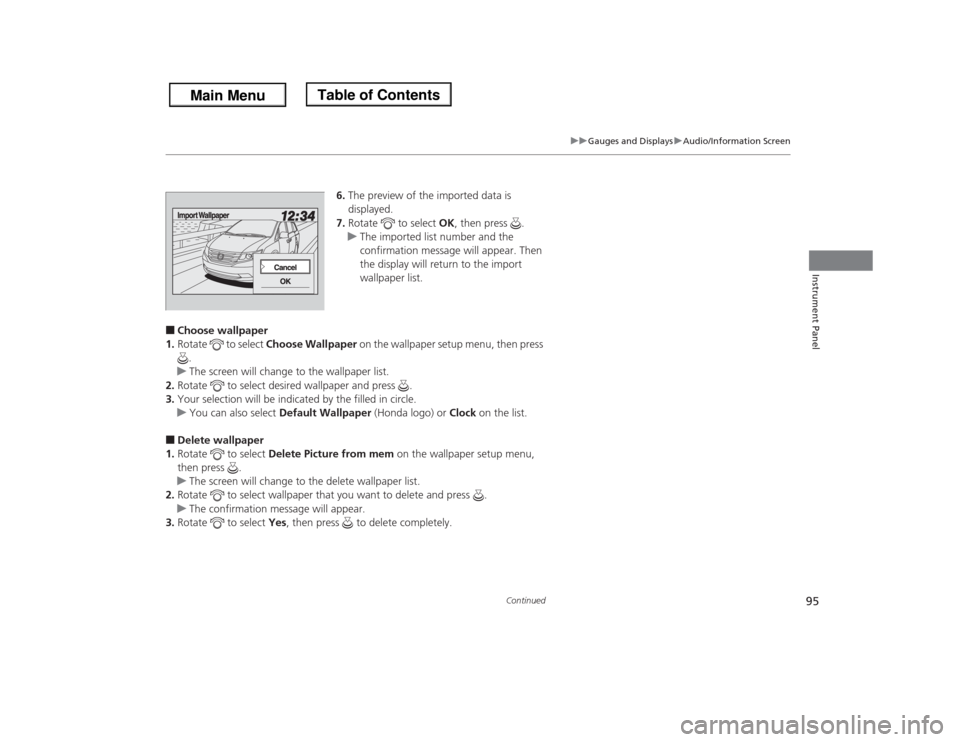
6.The preview of the imported data is
displayed.
7.Rotate to select OK, then press .
uThe imported list number and the
confirmation message will appear. Then
the display will return to the import
wallpaper list.
■Choose wallpaper
1.Rotate to select Choose Wallpaper on the wallpaper setup menu, then press
.
uThe screen will change to the wallpaper list.
2.Rotate to select desired wallpaper and press .
3.Your selection will be indicated by the filled in circle.
uYou can also select Default Wallpaper (Honda logo) or Clock on the list.■Delete wallpaper
1.Rotate to select Delete Picture from mem on the wallpaper setup menu,
then press .
uThe screen will change to the delete wallpaper list.
2.Rotate to select wallpaper that you want to delete and press .
uThe confirmation message will appear.
3.Rotate to select Yes, then press to delete completely.
Page 97 of 433
96
uuGauges and DisplaysuAudio/Information Screen
Instrument Panel
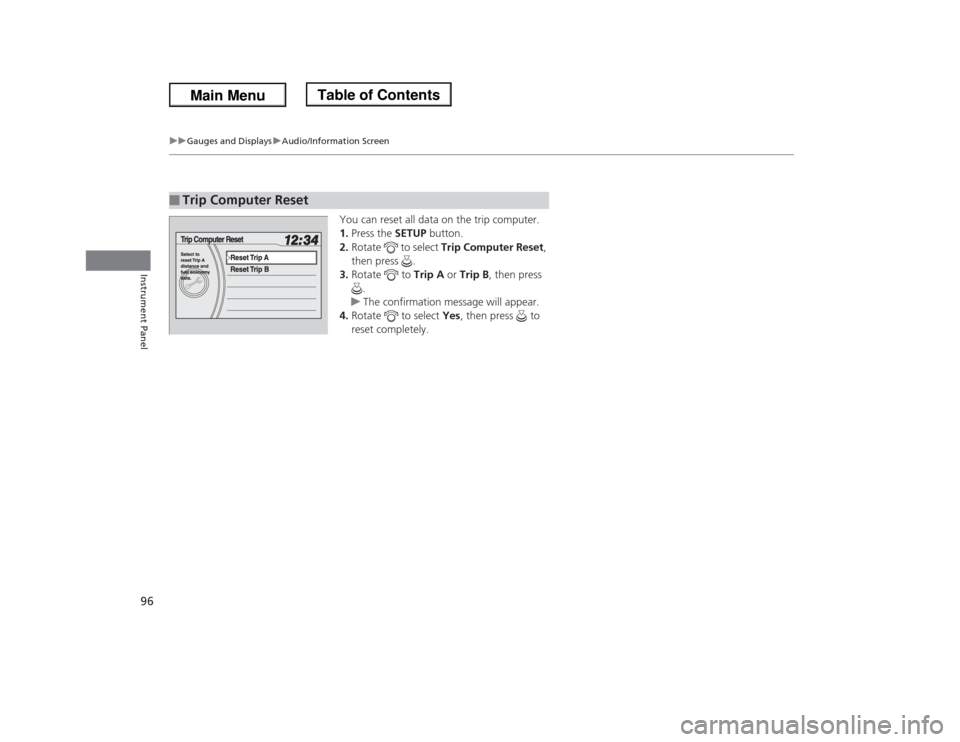
You can reset all data on the trip computer.
1.Press the SETUP button.
2.Rotate to select Trip Computer Reset,
then press .
3.Rotate to Trip A or Trip B, then press
.
uThe confirmation message will appear.
4.Rotate to select Yes, then press to
reset completely.
■
Trip Computer Reset
Page 98 of 433
97
uuGauges and DisplaysuAudio/Information Screen
Instrument Panel
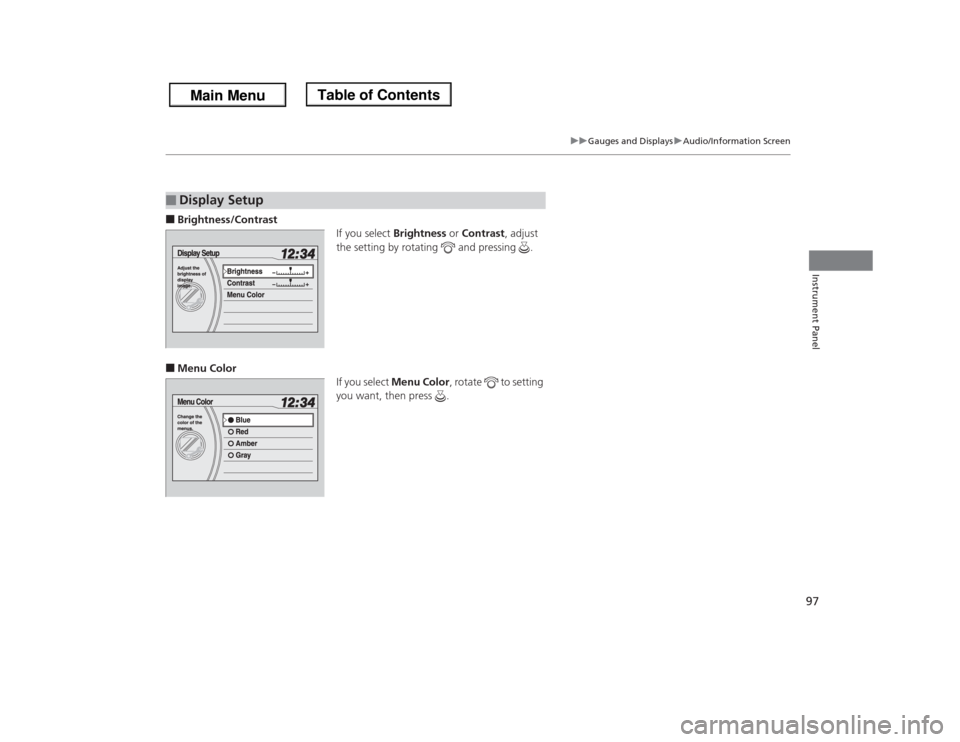
■Brightness/Contrast
If you select Brightness or Contrast, adjust
the setting by rotating and pressing .■Menu Color
If you select Menu Color, rotate to setting
you want, then press .■
Display Setup
Page 99 of 433
98
uuGauges and DisplaysuMulti-Information Display
*
Instrument Panel
Multi-Information Display
*
The multi-information display shows the odometer, trip meter, outside temperature
indicator, and other gauges.
It also displays important messages such as warnings and other helpful information.
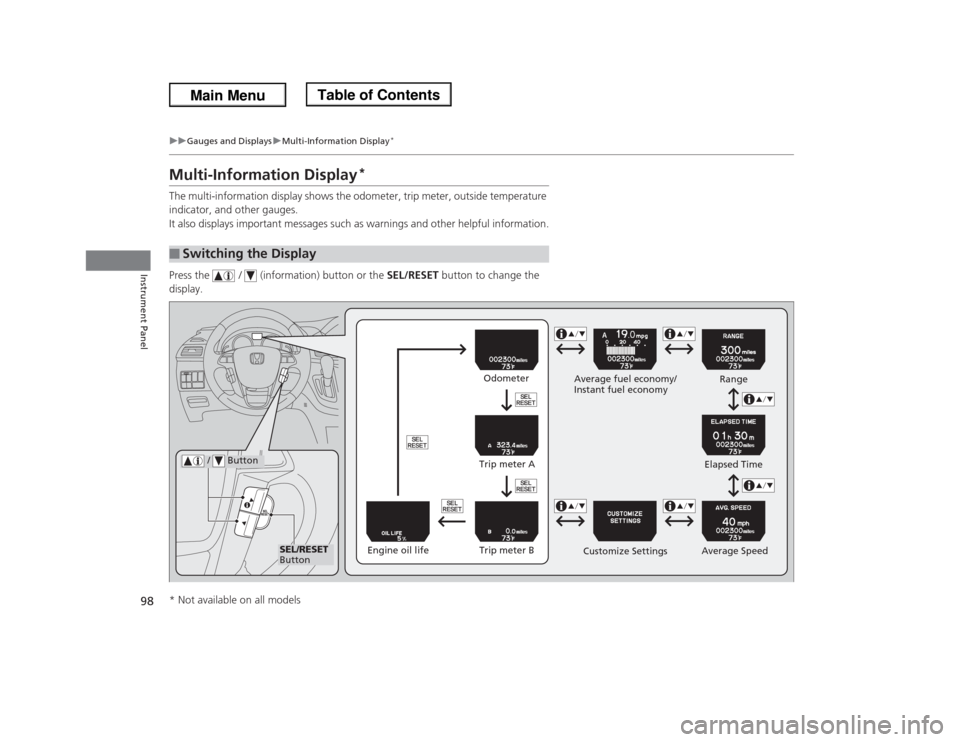
Press the / (information) button or the SEL/RESET button to change the
display.■
Switching the Display
SEL/RESET
ButtonAverage fuel economy/
Instant fuel economy
Average Speed
/ Button
Engine oil lifeTrip meter B Trip meter AOdometer
Customize SettingsElapsed TimeRange
* Not available on all models
Page 100 of 433
Continued
99
uuGauges and DisplaysuMulti-Information Display
*
Instrument Panel
Shows the total number of miles or kilometers that your vehicle has accumulated.
Shows the total number of miles or kilometers driven since the last reset. Meters A
and B can be used to measure two separate trips.■Resetting a trip meter
To reset a trip meter, display it, then press and hold the SEL/RESET button. The trip
meter is reset to 0.0.
Shows the estimated average fuel economy of each trip meter in mpg or l/100 km.
The display is updated at set intervals. When a trip meter is reset, the average fuel
economy is also reset.
Shows the instant fuel economy as a bar graph in mpg or l/100 km.
Shows the estimated distance you can travel on the remaining fuel. This distance is
estimated from the fuel economy of your trips in the past.
Shows the time elapsed since the last time Trip A or Trip B was reset.■
Odometer
■
Trip Meter
■
Average Fuel Economy
■
Instant Fuel Economy
■
Range
■
Elapsed Time
1Trip Meter
Switch between trip meter A and trip meter B by
pressing the SEL/RESET button.1Average Fuel Economy
You can change when to reset the average fuel
economy.
2Customized Features P. 101
Trending: height, key battery, TPMS, odometer, change language, oil, low oil pressure
