HONDA ODYSSEY 2016 RC1-RC2 / 5.G Navigation Manual
Manufacturer: HONDA, Model Year: 2016, Model line: ODYSSEY, Model: HONDA ODYSSEY 2016 RC1-RC2 / 5.GPages: 325, PDF Size: 8.63 MB
Page 51 of 325
50
RoutingRoute Preference
System Setup
Route Preference
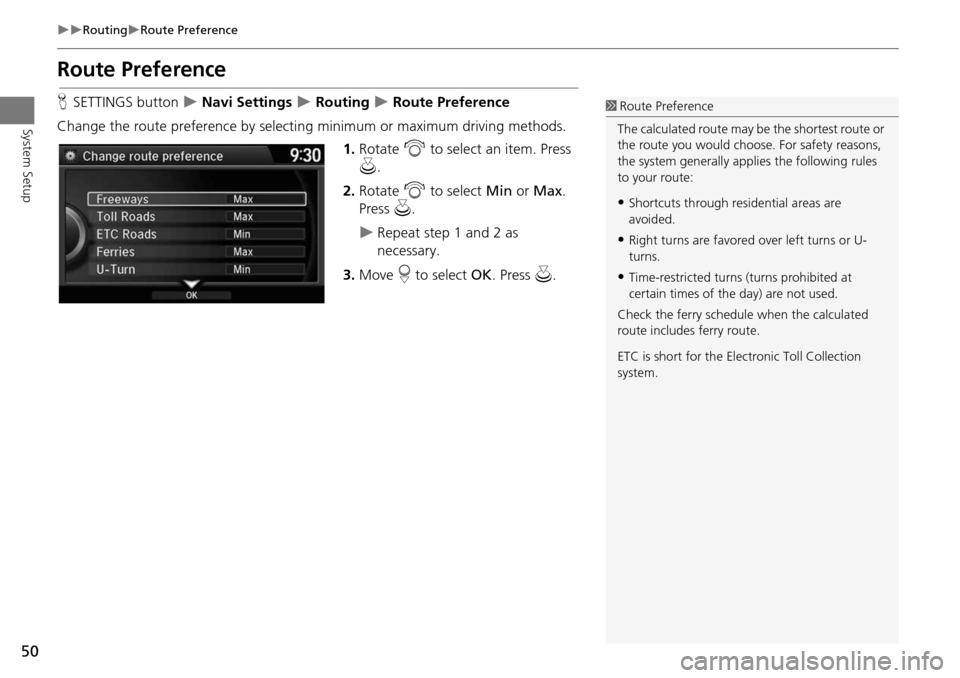
HSETTINGS button Navi Settings Routing Route Preference
Change the route preference by select ing minimum or maximum driving methods.
1.Rotate i to select an item. Press
u .
2. Rotate i to select Min or Max .
Press u.
Repeat step 1 and 2 as
necessary.
3. Move r to select OK. Press u.
1Route Preference
The calculated route may be the shortest route or
the route you would choose. For safety reasons,
the system generally appl ies the following rules
to your route:
•Shortcuts through resi dential areas are
avoided.
•Right turns are favored over left turns or U-
turns.
•Time-restricted turns (turns prohibited at
certain times of the day) are not used.
Check the ferry schedule when the calculated
route includes ferry route.
ETC is short for the Electronic Toll Collection
system.
Page 52 of 325
51
RoutingUnverified Routing
System Setup
Unverified Routing
HSETTINGS button Navi Settings Routing Unverified Routing
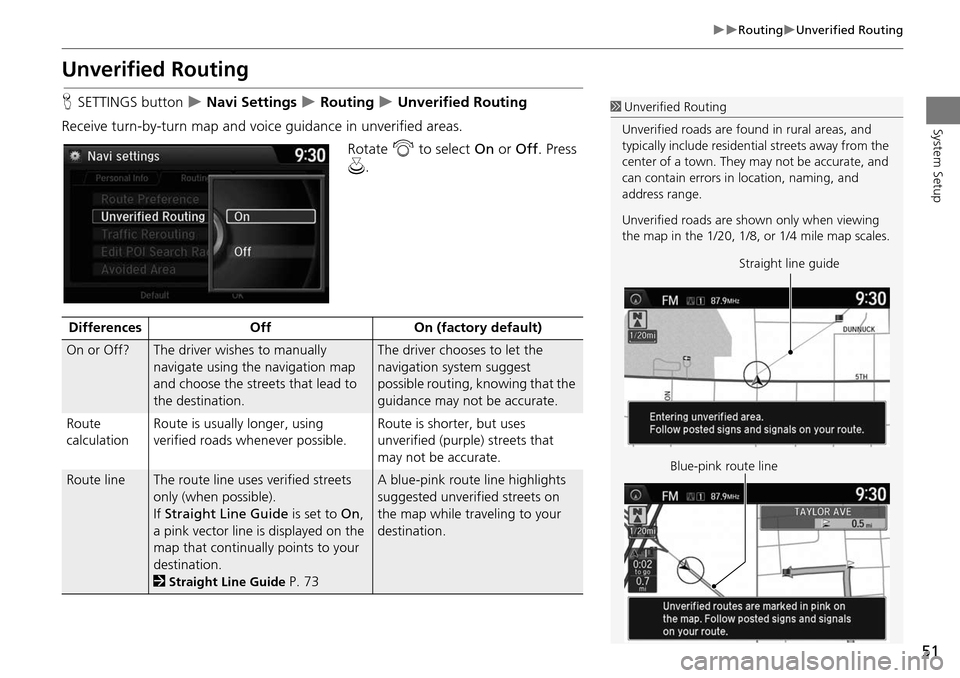
Receive turn-by-turn map and voice guidance in unverified areas. Rotate i to select On or Off . Press
u .1Unverified Routing
Unverified roads are found in rural areas, and
typically include residential streets away from the
center of a town. They may not be accurate, and
can contain errors in location, naming, and
address range.
Unverified roads are s hown only when viewing
the map in the 1/20, 1/8, or 1/4 mile map scales.
Straight line guide
Blue-pink route line
Differences OffOn (factory default)
On or Off?The driver wishes to manually
navigate using the navigation map
and choose the streets that lead to
the destination.The driver chooses to let the
navigation system suggest
possible routing, knowing that the
guidance may not be accurate.
Route
calculation Route is usually longer, using
verified roads whenever possible. Route is shorter, but uses
unverified (purple)
streets that
may not be accurate.
Route lineThe route line uses verified streets
only (when possible).
If Straight Line Guide is set to On,
a pink vector line is displayed on the
map that continually points to your
destination.
2
Straight Line Guide P. 73
A blue-pink route line highlights
suggested unverified streets on
the map while traveling to your
destination.
Page 53 of 325
52
RoutingUnverified Routing
System SetupCautionary
messagesCautionary pop-up screens and
voice announcements remind you to
obey all traffic restrictions when
starting route guidance,
approaching an unverified area, and
entering an unverified street. Cautionary pop-up screens and
voice announcements remind you
to obey all traffic restrictions
when entering an unverified
street.
Guidance
(map/voice)There is no turn
-by-turn map or
voice guidance.Voice guidance commands end
with the phrase “if possible” to
remind you to ve rify all traffic
restrictions.
Directions
list A direction list is typically not
available. However, depending on
your route, directions are provided
to help you reach the first available
verified road. A direction list is provided
showing street names and turn
symbols in pink.
Differences Off On (factory default)
Page 54 of 325
53
RoutingTraffic Rerouting
System Setup
Traffic Rerouting
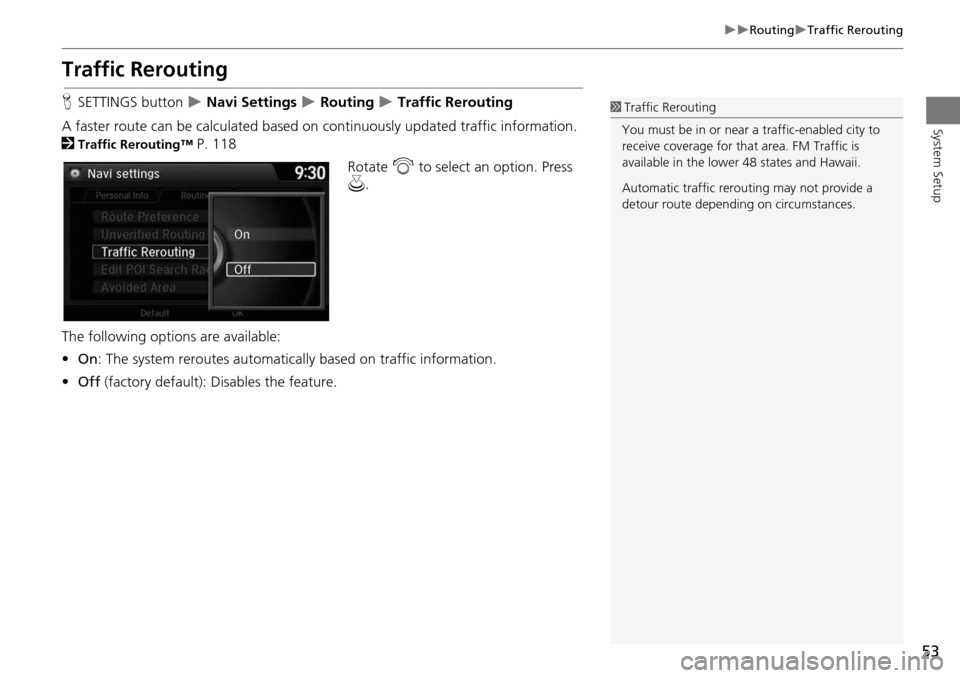
HSETTINGS button Navi Settings Routing Traffic Rerouting
A faster route can be calculated based on continuously updated traffic information.
2
Traffic Rerouting™ P. 118
Rotate i to select an option. Press
u .
The following options are available:
• On : The system reroutes automatica lly based on traffic information.
• Off (factory default): Disables the feature.
1Traffic Rerouting
You must be in or near a traffic-enabled city to
receive coverage for that area. FM Traffic is
available in the lower 48 states and Hawaii.
Automatic traffic rerouting may not provide a
detour route dependi ng on circumstances.
Page 55 of 325
54
RoutingEdit POI Search Radius Along Route
System Setup
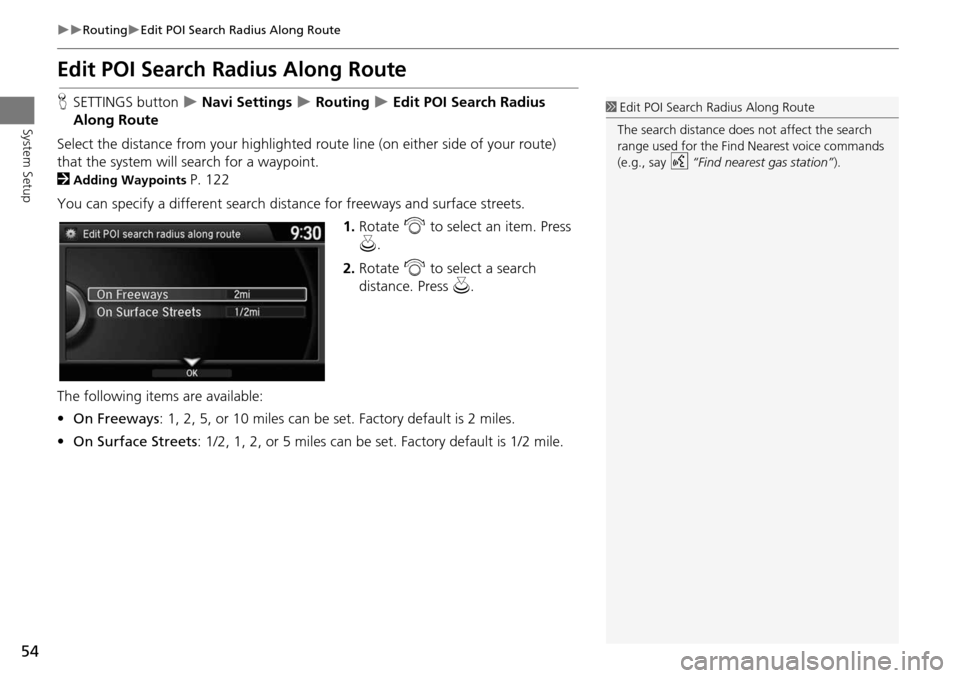
Edit POI Search Radius Along Route
HSETTINGS button Navi Settings Routing Edit POI Search Radius
Along Route
Select the distance from your highlighted route line (on either side of your route)
that the system will search for a waypoint.
2
Adding Waypoints P. 122
You can specify a different search dist ance for freeways and surface streets.
1.Rotate i to select an item. Press
u .
2. Rotate i to select a search
distance. Press u.
The following item s are available:
• On Freeways : 1, 2, 5, or 10 miles can be set. Factory default is 2 miles.
• On Surface Streets : 1/2, 1, 2, or 5 miles can be set. Factory default is 1/2 mile.
1Edit POI Search Radius Along Route
The search distance does not affect the search
range used for the Find Nearest voice commands
(e.g., say
d “Find nearest gas station” ).
Page 56 of 325
55
RoutingAvoided Area
System Setup
Avoided Area
HSETTINGS button Navi Settings Routing Avoided Area
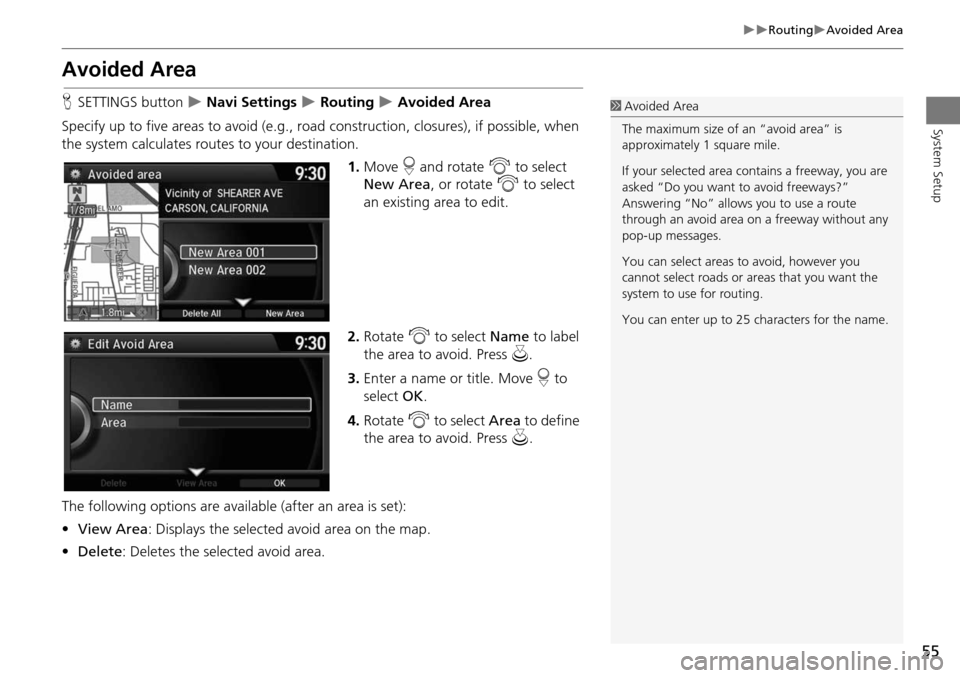
Specify up to five areas to avoid (e.g., road construction, closures), if possible, when
the system calculates routes to your destination.
1.Move r and rotate i to select
New Area , or rotate i to select
an existing area to edit.
2. Rotate i to select Name to label
the area to avoid. Press u.
3. Enter a name or title. Move r to
select OK.
4. Rotate i to select Area to define
the area to avoid. Press u.
The following options are available (after an area is set):
• View Area : Displays the selected avoid area on the map.
• Delete : Deletes the selected avoid area.1Avoided Area
The maximum size of an “avoid area” is
approximately 1 square mile.
If your selected area contains a freeway, you are
asked “Do you want to avoid freeways?”
Answering “No” allows you to use a route
through an avoid area on a freeway without any
pop-up messages.
You can select areas to avoid, however you
cannot select roads or areas that you want the
system to use for routing.
You can enter up to 25 ch aracters for the name.
Page 57 of 325
56
RoutingAvoided Area
System Setup
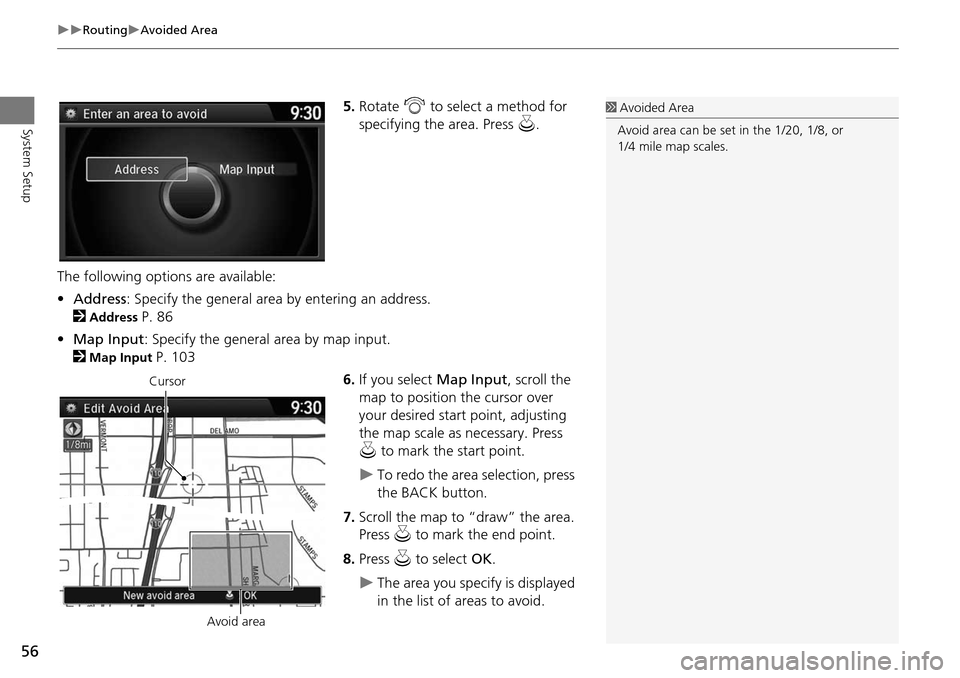
5.Rotate i to select a method for
specifying the area. Press u.
The following options are available:
• Address : Specify the general area by entering an address.
2
Address P. 86
• Map Input : Specify the general area by map input.
2
Map Input P. 103
6.If you select Map Input, scroll the
map to position the cursor over
your desired start point, adjusting
the map scale as necessary. Press
u to mark the start point.
To redo the area selection, press
the BACK button.
7. Scroll the map to “draw” the area.
Press u to mark the end point.
8. Press u to select OK.
The area you specify is displayed
in the list of areas to avoid.
1Avoided Area
Avoid area can be set in the 1/20, 1/8, or
1/4 mile map scales.
Cursor
Avoid area
Page 58 of 325
57
System Setup
Guidance
HSETTINGS button Navi Settings Guidance
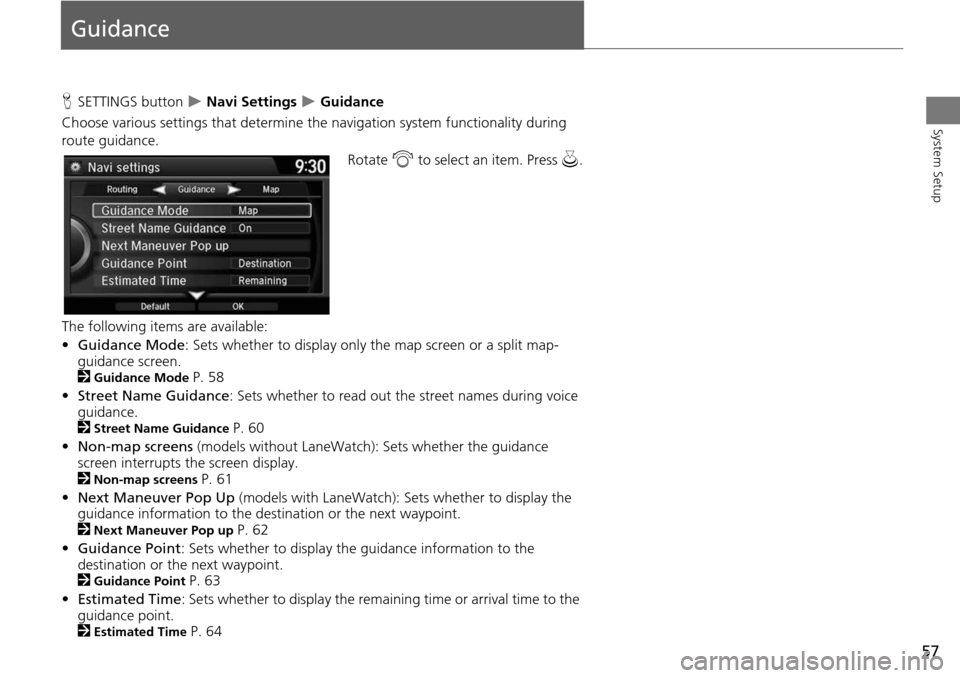
Choose various settings that determine the navigation system functionality during
route guidance. Rotate i to select an item. Press u.
The following items are available:
• Guidance Mode : Sets whether to display only the map screen or a split map-
guidance screen.
2
Guidance Mode P. 58
• Street Name Guidance : Sets whether to read out the street names during voice
guidance.
2
Street Name Guidance P. 60
• Non-map screens (models without LaneWatch): Sets whether the guidance
screen interrupts the screen display.
2
Non-map screens P. 61
• Next Maneuver Pop Up (models with LaneWatch): Sets whether to display the
guidance information to the destination or the next waypoint.
2
Next Maneuver Pop up P. 62
• Guidance Point : Sets whether to display the guidance information to the
destination or the next waypoint.
2
Guidance Point P. 63
• Estimated Time : Sets whether to display the remain ing time or arrival time to the
guidance point.
2
Estimated Time P. 64
Page 59 of 325
58
GuidanceGuidance Mode
System Setup
Guidance Mode
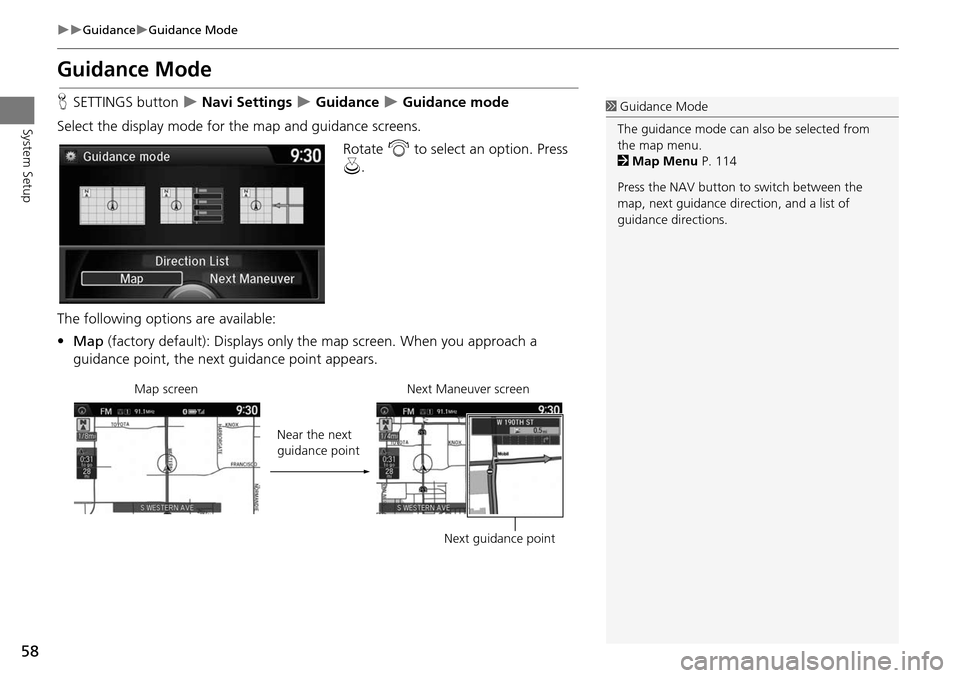
HSETTINGS button Navi Settings Guidance Guidance mode
Select the display mode for th e map and guidance screens.
Rotate i to select an option. Press
u .
The following options are available:
• Map (factory default): Disp lays only the map screen. When you approach a
guidance point, the next guidance point appears.1 Guidance Mode
The guidance mode can al so be selected from
the map menu.
2 Map Menu P. 114
Press the NAV button to switch between the
map, next guidance dire ction, and a list of
guidance directions.
Near the next
guidance point
Map screen Next Maneuver screen
Next guidance point
Page 60 of 325
59
GuidanceGuidance Mode
System Setup
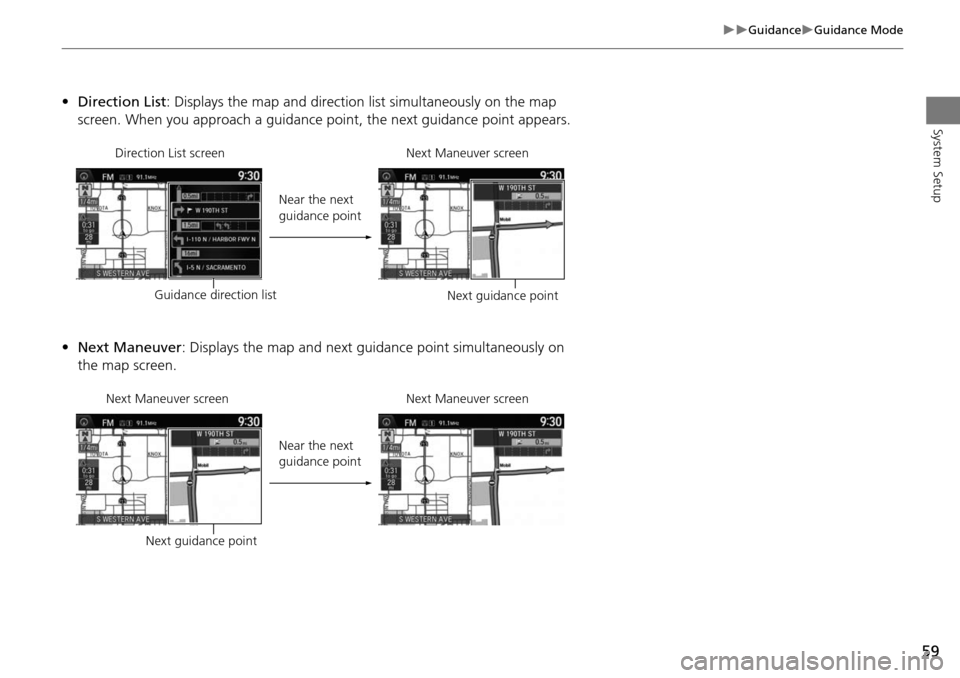
•Direction List : Displays the map and direction list simultaneously on the map
screen. When you approach a guidance point, the next guidance point appears.
• Next Maneuver : Displays the map and next guidance point simultaneously on
the map screen.
Guidance direction list Near the next
guidance point
Next guidance point
Direction List screen
Next Maneuver screen
Next guidance pointNear the next
guidance point
Next Maneuver screen
Next Maneuver screen