Bolt HONDA ODYSSEY 2016 RC1-RC2 / 5.G Owners Manual
[x] Cancel search | Manufacturer: HONDA, Model Year: 2016, Model line: ODYSSEY, Model: HONDA ODYSSEY 2016 RC1-RC2 / 5.GPages: 565
Page 403 of 565

uuTowing a Trailer uTowing Preparation
402
Driving
■Tongue load
The weight of the tongue with a fully loaded
trailer on the hitch should be approximately
10% of the total trailer weight.
• Excessive tongue load reduces front tire traction and steering control. Too little
tongue load can make the trailer unstable and cause it to sway.
• To achieve a proper tongue load, start by loading 60% of the load toward the
front of the trailer and 40% toward th e rear. Readjust the load as needed.
■Hitches
The hitch must be of an approved type and properly bolted to the underbody.
■Weight distribution hitches
A weight distributing hitch is not recommended for use with your vehicle.
An improperly adjusted weight distributin g hitch may reduce handling, stability, and
braking performance.
■Safety chains
Always use safety chains when you tow a trailer. Leave enough slack to allow the
trailer to turn corners easily, but do not allow the chains to drag on the ground.
To ngue LoadTongue Load
■Towing Equipment and Accessories1Towing Equipment and Accessories
Make sure that all equipment is properly installed and
maintained, and that it meets federal, state, province/
territory, and lo cal regulations.
Consult your traile r sales or rental agency if any other
items are recommended or required for your towing
situation.
The lighting and wiring of tra ilers can vary by type
and brand. If a connector is required, it should only
be installed by a qua lified technician.
16 US ODYSSEY-31TK86500.book 402 ページ 2015年6月24日 水曜日 午後3時0分
Page 469 of 565

468
uuMaintenance Under the Hood uChanging the Engine Oil and Oil Filter
Maintenance
Changing the Engine Oil and Oil Filter
You must change the engine oil and oil f ilter regularly in order to maintain the
engine's lubrication. The engine may be damaged if they are not changed regularly.
Change the oil and filter in accordan ce with the maintenance message on the
information display
*/multi-information display*.
1. Run the engine until it reaches normal
operating temperature, and then turn the
engine off.
2. Open the hood and remove the engine oil
fill cap.
3. Remove the drain bolt and washer from
the bottom of the engine, and drain the
oil into a suitable container.
1Changing the Engine Oil and Oil Filter
NOTICE
You may damage the environment if you do not
dispose of the oil in a suitable way. If you are
changing the oil by yourself , appropriately dispose of
the used oil. Put the oil in a sealed container and take
it to a recycling center. Do not throw the oil away
into a garbage can or onto the ground.
Washer
Drain Bolt
* Not available on all models
16 US ODYSSEY-31TK86500.book 468 ページ 2015年6月24日 水曜日 午後3時0分
Page 470 of 565

469
uuMaintenance Under the Hood uChanging the Engine Oil and Oil Filter
Maintenance
4. Remove the oil filter and dispose of the
remaining oil.
5. Check that the filter gasket is not stuck to
the engine contact surface.
u If it is stuck, you must detach it.
6. Wipe away dirt and dust adhering to the
contact surface of the engine block, and
install a new oil filter.
u Apply a light coat of new engine oil to
the filter gasket.
7. Put a new washer on the drain bolt, then
reinstall the drain bolt.
u Tightening torque:
29 lbf∙ft (39 N∙m, 4.0 kgf∙m)
8. Pour the recommended engine oil into the
engine.
u Engine oil change capacity (including
filter):
4.5 US qt (4.3 L)
9. Reinstall the engine oil fill cap securely and
start the engine.
10. Run the engine for a few minutes, and
then check that there is no leak from the
drain bolt or oil filter.
11. Stop the engine, wait for three minutes,
and then check the oil level on the
dipstick.
u If necessary, add more engine oil.1Changing the Engine Oil and Oil Filter
You will need a special wrench to replace the oil
filter. You can buy this wrench from a dealer.
When installing the new oil filter, follow the
instructions supplied with the oil filter.
Reinstall the engine oil fill cap. Start the engine. The
low oil pressure indicator should go off within five
seconds. If it does not, turn off the engine, and check
your work.
Oil Filter
16 US ODYSSEY-31TK86500.book 469 ページ 2015年6月24日 水曜日 午後3時0分
Page 480 of 565

479
uuReplacing Light Bulbs uFog Light Bulbs*
Maintenance
Fog Light Bulbs*
When replacing, use the following bulbs.
1.Turn the steering wheel all the way to the
opposite side from the fog light being
replaced.
Passenger side: Turn the steering wheel
to the left.
Driver side: Turn the steering wheel to the
right.
2. Remove the mounting bolt and screws, and
pull the inner fender back.
3. Push the tab to remove the coupler.
4. Rotate the old bulb counterclockwise to
remove.
5. Insert a new bulb into the fog light
assembly and turn it clockwise.
6. Insert the coupler into the connector of the
bulb.
Fog Light: 55 W (H11 for halogen bulb type)
1 Fog Light Bulbs*
NOTICE
Halogen bulbs get very hot when lit. Oil, perspiration,
or a scratch on the glass can cause the bulb to
overheat and shatter.
When replacing a halogen bulb, handle it by its
plastic case, and protect the glass from contact with
your skin or hard objects. If you touch the glass, clean
it with denatured alc ohol and a clean cloth.
Screws
Mounting
Bolt
Bulb
Coupler
Tab
* Not available on all models
16 US ODYSSEY-31TK86500.book 479 ページ 2015年6月24日 水曜日 午後3時0分
Page 482 of 565
481
uuReplacing Light Bulbs uBrake Light, Rear Turn Signal Light Bu lbs, and Rear Side Marker/Taillights
Continued
Maintenance
Brake Light, Rear Turn Signal Light Bulbs, and Rear
Side Marker/Taillights
When replacing, use the following bulbs.
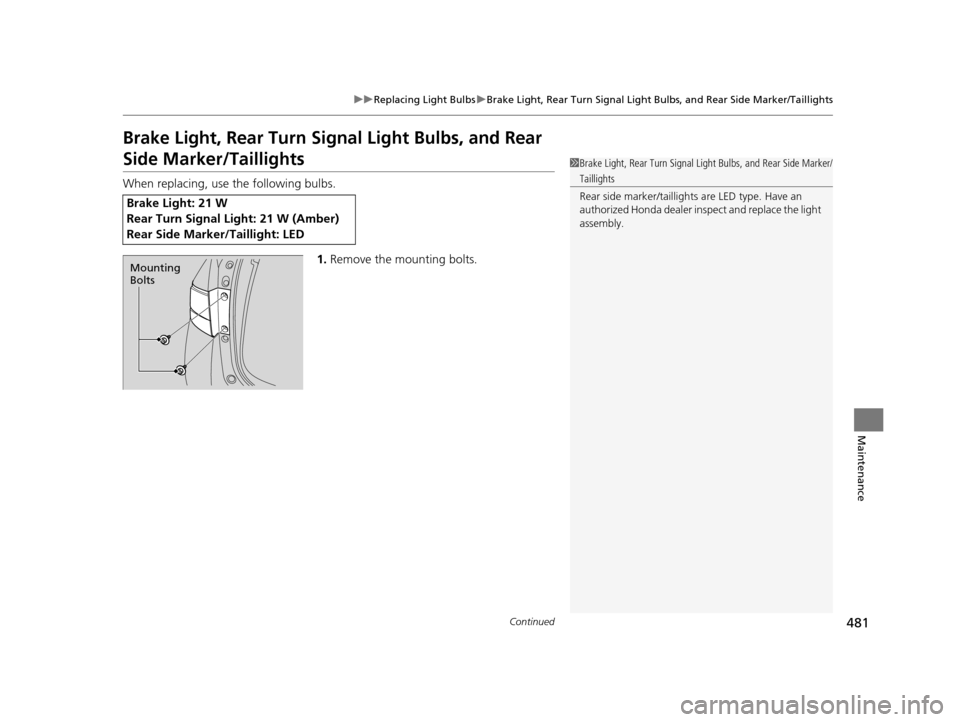
1.Remove the mounting bolts.
Brake Light: 21 W
Rear Turn Signal Light: 21 W (Amber)
Rear Side Marker/Taillight: LED
1Brake Light, Rear Turn Signal Light Bulbs, and Rear Side Marker/
Taillights
Rear side marker /taillights are LED type. Have an
authorized Honda dealer in spect and replace the light
assembly.
Mounting
Bolts
16 US ODYSSEY-31TK86500.book 481 ページ 2015年6月24日 水曜日 午後3時0分
Page 511 of 565

510
Handling the Unexpected
Tools
Types of Tools
1Types of Tools
The tools are stored u nder the second row seat.
Wheel Nut Wrench/
Jack Handle
Jack
Jack Handle Bar Bracket
Mounting Wing
Bolt (B)
Mounting Wing Bolt (A)
Storage Bag
16 US ODYSSEY-31TK86500.book 510 ページ 2015年6月24日 水曜日 午後3時0分
Page 513 of 565

512
uuIf a Tire Goes Flat uChanging a Flat Tire
Handling the Unexpected
1. Remove the floor mat under the second
row seat.
2 Floor Mats P. 506
2.Pull up the floor carpet.
3. Lift up the floor lid using the handle and
remove it.
4. Take the tool case out of the spare tire well.
Take the jack and wheel nut wrench out of
the tool case.
5. Unscrew the wing bolt, then remove the
spare tire.
6. Place a wheel block or ro ck in front and rear
of the wheel diagonal to the flat tire.
■Getting Ready to Replace the Flat Tire
Floor Carpet
HandleFloor Lid
Spare Tire
Tool Case
Wheel
Blocks
The tire to be replaced.
16 US ODYSSEY-31TK86500.book 512 ページ 2015年6月24日 水曜日 午後3時0分
Page 517 of 565

uuIf a Tire Goes Flat uChanging a Flat Tire
516
Handling the Unexpected
5. Lower the vehicle and remove the jack.
Tighten the wheel nuts in the order
indicated in the image. Go around,
tightening the nuts, two to three times in
this order.
Wheel nut torque:
94 lbf∙ft (127 N∙m, 13 kgf∙m)
The storage bag, bracket, mounting wing bolt
(A) and mounting wing bolt (B) are in the tool
case.
1. Put the flat tire in the storage bag provided
with your vehicle.
■Storing the Flat Tire1Storing the Flat Tire
3WARNING
Loose items can fly around the interior in a
crash and can seriously injure the
occupants.
Store the wheel, jack, and tools securely
before driving.
Bracket
Mounting Wing Bolt (A) Mounting Wing Bolt (B)Storage Bag
16 US ODYSSEY-31TK86500.book 516 ページ 2015年6月24日 水曜日 午後3時0分
Page 518 of 565

517
uuIf a Tire Goes Flat uChanging a Flat Tire
Continued
Handling the Unexpected
2. Pull down the U-shaped carpet piece, fold
it, and tuck the end under the carpet.
3. Remove the plastic screw with a coin.
4. Install the bracket an d the mounting wing
bolt (A) on the attachment point, and
tighten the bolt.
5. Install the flat tire on the bracket with the
inside of the wheel facing toward you.
6. Install the mounting wing bolt (B) to the
bracket through one of the five wheel nut
holes, and tighten the bolt.
u Poke a hole in the storage bag as
needed.Plastic Screw
Carpet Piece
Mounting Wing Bolt (A)
Mounting Wing
Bolt (B)
Bracket
16 US ODYSSEY-31TK86500.book 517 ページ 2015年6月24日 水曜日 午後3時0分
Page 519 of 565

518
uuIf a Tire Goes Flat uChanging a Flat Tire
Handling the Unexpected
■Storing a flat tire on the folded third row seat
1.Turn over the flap on the left side of the
cargo area floor.
2. Pull down the U-shaped carpet piece and
remove the plastic screw with a coin.
3. Place the flat tire face down on the
attachment point.
4. Put the tire mounting wing bolt (B) in the
attachment point through one of the five
wheel nut holes, and tighten the bolt.
u Poke a hole in the storage bag as
needed.
Plastic Screw
Carpet Piece
Mounting Wing
Bolt (B)
16 US ODYSSEY-31TK86500.book 518 ページ 2015年6月24日 水曜日 午後3時0分