sensor HONDA ODYSSEY 2020 (in English) Owner's Guide
[x] Cancel search | Manufacturer: HONDA, Model Year: 2020, Model line: ODYSSEY, Model: HONDA ODYSSEY 2020Pages: 767, PDF Size: 43.89 MB
Page 114 of 767
112
uuIndicators uDriver Information Interface Wa rning and Information Messages
Instrument Panel
MessageConditionExplanation
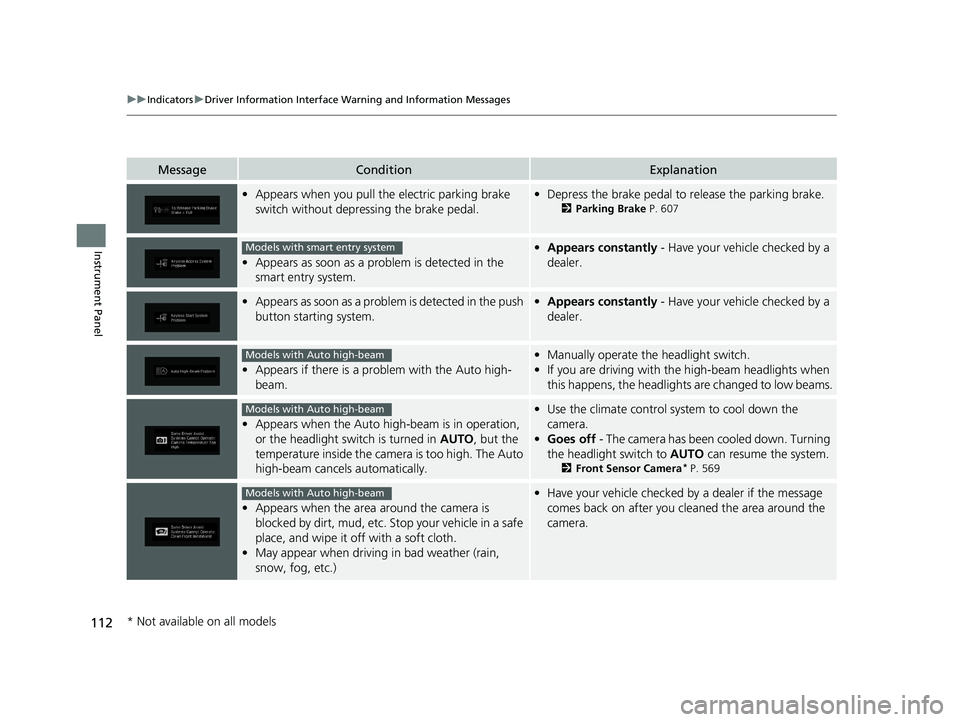
•Appears when you pull the electric parking brake
switch without depressing the brake pedal.•Depress the brake pedal to release the parking brake.
2 Parking Brake P. 607
•Appears as soon as a prob lem is detected in the
smart entry system.
• Appears constantly - Have your vehicle checked by a
dealer.
• Appears as soon as a proble m is detected in the push
button starting system.• Appears constantly - Have your vehicle checked by a
dealer.
• Appears if there is a prob lem with the Auto high-
beam.
• Manually operate the headlight switch.
• If you are driving with th e high-beam headlights when
this happens, the headlights are changed to low beams.
• Appears when the Auto high -beam is in operation,
or the headlight switch is turned in AUTO, but the
temperature inside the came ra is too high. The Auto
high-beam cancels automatically.
• Use the climate control sy stem to cool down the
camera.
• Goes off - The camera has been cooled down. Turning
the headlight switch to AUTO can resume the system.
2Front Sensor Camera* P. 569
•Appears when the area around the camera is
blocked by dirt, mud, etc. Stop your vehicle in a safe
place, and wipe it off with a soft cloth.
• May appear when driving in bad weather (rain,
snow, fog, etc.)
•Have your vehicle checked by a dealer if the message
comes back on after you cl eaned the area around the
camera.
Models with smart entry system
Models with Auto high-beam
Models with Auto high-beam
Models with Auto high-beam
* Not available on all models
20 US ODYSSEY-31THR6210.book 112 ページ 2020年2月28日 金曜日 午前7時26分
Page 118 of 767
116
uuIndicators uDriver Information Interface Wa rning and Information Messages
Instrument Panel
MessageConditionExplanation
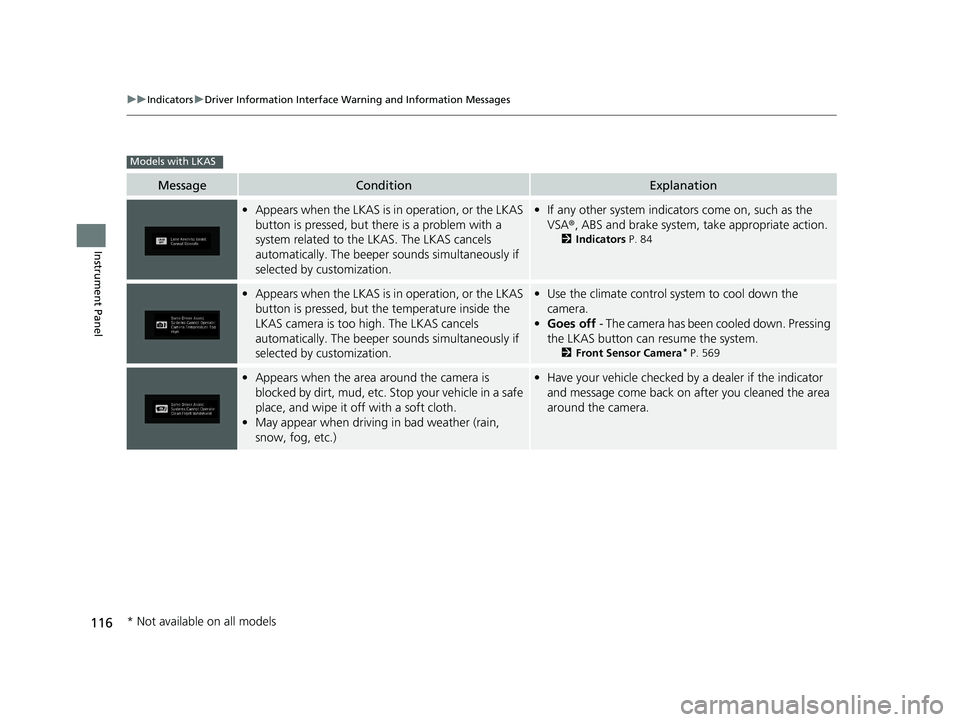
•Appears when the LKAS is in operation, or the LKAS
button is pressed, but there is a problem with a
system related to the LKAS. The LKAS cancels
automatically. The beeper s ounds simultaneously if
selected by customization.• If any other system indicators come on, such as the
VSA ®, ABS and brake system, take appropriate action.
2Indicators P. 84
•Appears when the LKAS is in operation, or the LKAS
button is pressed, but the temperature inside the
LKAS camera is too high. The LKAS cancels
automatically. The beeper s ounds simultaneously if
selected by customization.• Use the climate control sy stem to cool down the
camera.
• Goes off - The camera has been cooled down. Pressing
the LKAS button can resume the system.
2 Front Sensor Camera* P. 569
•Appears when the area around the camera is
blocked by dirt, mud, etc. Stop your vehicle in a safe
place, and wipe it off with a soft cloth.
• May appear when driving in bad weather (rain,
snow, fog, etc.)•Have your vehicle checked by a dealer if the indicator
and message come back on a fter you cleaned the area
around the camera.
Models with LKAS
* Not available on all models
20 US ODYSSEY-31THR6210.book 116 ページ 2020年2月28日 金曜日 午前7時26分
Page 123 of 767
Continued121
uuGauges and Displays uDriver Information Interface
Instrument Panel
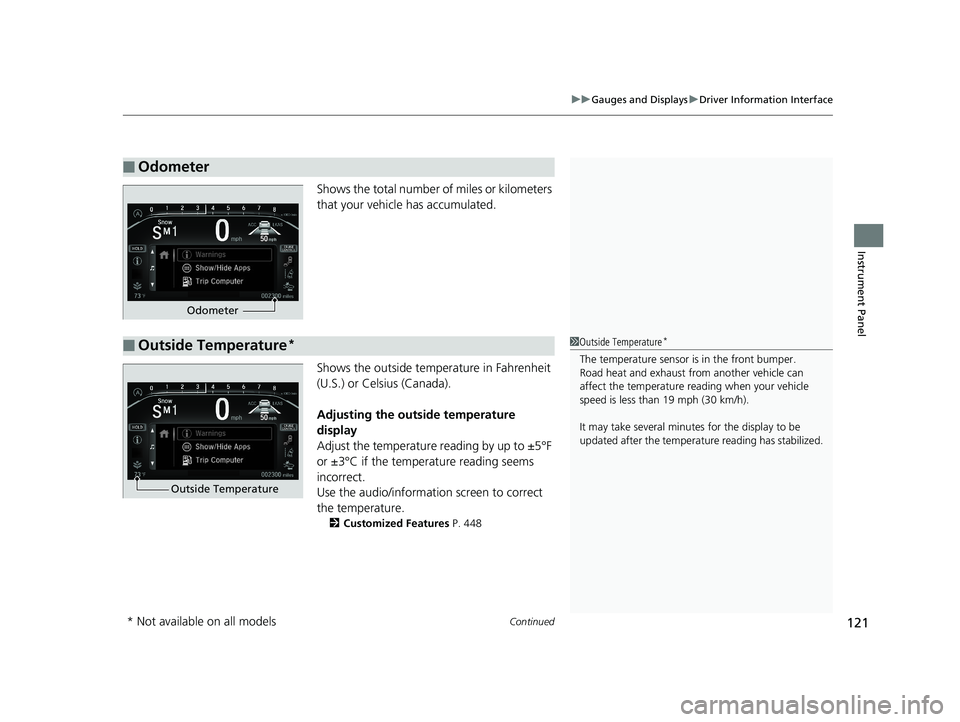
Shows the total number of miles or kilometers
that your vehicle has accumulated.
Shows the outside temperature in Fahrenheit
(U.S.) or Celsius (Canada).
Adjusting the outside temperature
display
Adjust the temperature reading by up to ±5°F
or ±3°C if the temperature reading seems
incorrect.
Use the audio/informatio n screen to correct
the temperature.
2 Customized Features P. 448
■Odometer
Odometer
■Outside Temperature*1Outside Temperature*
The temperature sensor is in the front bumper.
Road heat and exhaust fr om another vehicle can
affect the temperature reading when your vehicle
speed is less than 19 mph (30 km/h).
It may take several minutes for the display to be
updated after the temperature reading has stabilized.
Outside Temperature
* Not available on all models
20 US ODYSSEY-31THR6210.book 121 ページ 2020年2月28日 金曜日 午前7時26分
Page 145 of 767
143
Controls
This chapter explains how to operate the various controls necessary for driving.
Clock.................................................. 144
Locking and Unlocking the Doors
Key Types and Functions .................. 146
Low Remote Signal Strength ............ 148
Locking/Unlocking the Doors from the Outside .... 149
Locking/Unlocking the Doors from the Inside ...156
Childproof Door Locks ..................... 159
Auto Door Locking/Unlocking .......... 160
Opening and Closing the Tailgate ... 161
Opening and Closing the Sliding Doors.. 172Security System
Immobilizer System .............................. 181
Security System Alarm .......................... 181
Opening and Closing the Windows ..... 184
Moonroof
*............................................. 187
Operating the Switches Around the Steering Wheel
ENGINE START/STOP Button............. 188
Turn Signals ..................................... 191
Light Switches.................................. 192
Fog Lights
*...................................... 195
Daytime Running Lights ................... 196
Auto High-Beam
*............................ 197Wipers and Washers ............................ 200Rear Defogger/Heated Door Mirror* Button...203
Heated Windshield Button ................... 204
Brightness Control ............................... 205
Driving Position Memory System
*........ 206
Adjusting the Steering Wheel .............. 208
Canadian models
Adjusting the Mirrors ............................ 209
Interior Rearview Mirror ........................ 209
Power Door Mirrors .............................. 210
Adjusting the Seats
Front Seats ................................................212
Head Restraints .........................................224
Maintain a Proper Sitting Position ..............223
Interior Lights/Interior Convenience Items.. 228
Climate Control System
Using Automatic Climate Control ..............251
Rear Climate Control System .....................254
Climate Control System ..............................256
Using Automatic Climate Control ..............256
Automatic Climate Control Sensors ...........262Dual-zone climate control system
Tri-zone climate control system
* Not available on all models
20 US ODYSSEY-31THR6210.book 143 ページ 2020年2月28日 金曜日 午前7時26分
Page 151 of 767
149
uuLocking and Unlocking the Doors uLocking/Unlocking the Doors from the Outside
Continued
Controls
Locking/Unlocking the Doors from the Outside
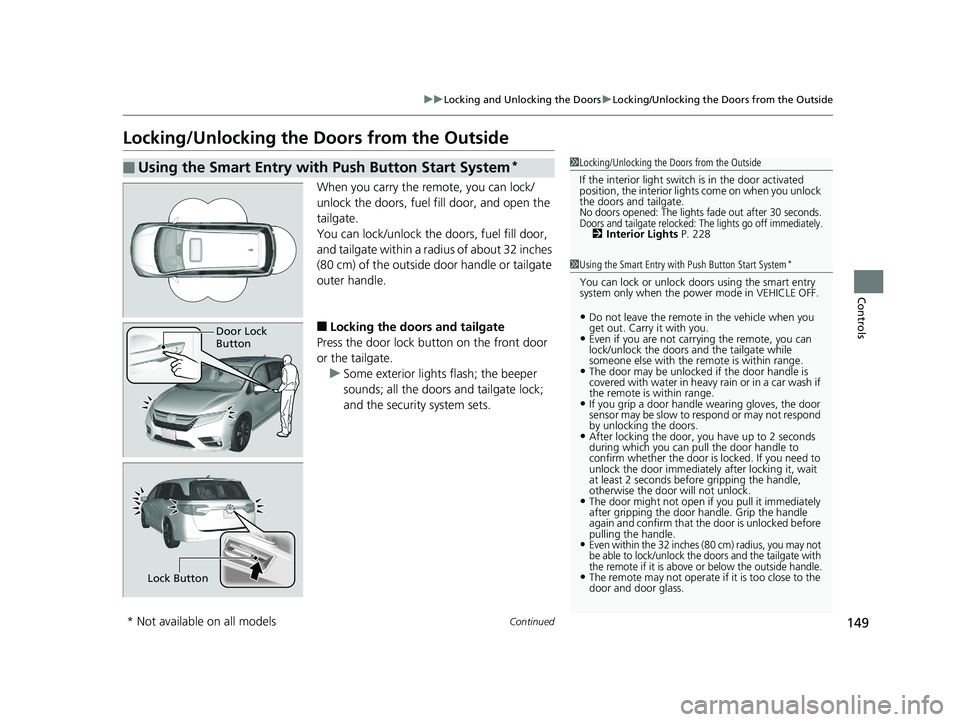
When you carry the re mote, you can lock/
unlock the doors, fuel fill door, and open the
tailgate.
You can lock/unlock the doors, fuel fill door,
and tailgate within a radi us of about 32 inches
(80 cm) of the outside door handle or tailgate
outer handle.
■Locking the doors and tailgate
Press the door lock button on the front door
or the tailgate. u Some exterior lights flash; the beeper
sounds; all the doors and tailgate lock;
and the security system sets.
■Using the Smart Entry with Push Button Start System*1Locking/Unlocking the Doors from the Outside
If the interior light switch is in the door activated
position, the interior lights come on when you unlock
the doors and tailgate.
No doors opened: The lights fade out after 30 seconds.Doors and tailgate relocked: The lights go off immediately.2 Interior Lights P. 228
1Using the Smart Entry with Push Button Start System*
You can lock or unlock doors using the smart entry
system only when the power mode in VEHICLE OFF.
•Do not leave the remote in the vehicle when you
get out. Carry it with you.
•Even if you are not carr ying the remote, you can
lock/unlock the doors and the tailgate while
someone else with the remote is within range.
•The door may be unlocked if the door handle is
covered with water in heavy rain or in a car wash if
the remote is within range.
•If you grip a door handle wearing gloves, the door
sensor may be slow to respond or may not respond
by unlocking the doors.
•After locking the door, you have up to 2 seconds
during which you can pull the door handle to
confirm whether the door is locked. If you need to
unlock the door immediately after locking it, wait
at least 2 seconds befo re gripping the handle,
otherwise the door will not unlock.
•The door might not open if you pull it immediately
after gripping the door handle. Grip the handle
again and confirm that th e door is unlocked before
pulling the handle.
•Even within the 32 inches (80 cm) radius, you may not
be able to lock/unlock the doors and the tailgate with
the remote if it is above or below the outside handle.
•The remote may not operate if it is too close to the
door and door glass.
Door Lock
Button
Lock Button
* Not available on all models
20 US ODYSSEY-31THR6210.book 149 ページ 2020年2月28日 金曜日 午前7時26分
Page 165 of 767
163
uuOpening and Closing the Tailgate uOpening/Closing the Power Tailgate*
Continued
Controls
Opening/Closing the Power Tailgate*
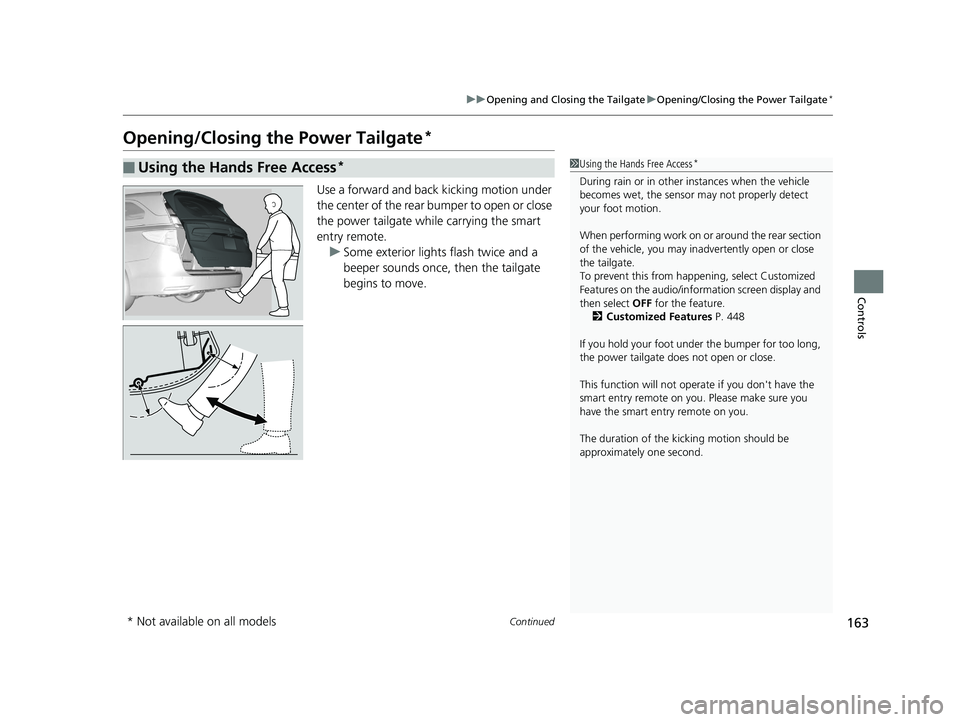
Use a forward and back kicking motion under
the center of the rear bumper to open or close
the power tailgate while carrying the smart
entry remote.
u Some exterior lights flash twice and a
beeper sounds once, then the tailgate
begins to move.
■Using the Hands Free Access*1Using the Hands Free Access*
During rain or in other instances when the vehicle
becomes wet, the sensor may not properly detect
your foot motion.
When performing work on or around the rear section
of the vehicle, you may in advertently open or close
the tailgate.
To prevent this from happe ning, select Customized
Features on the audio/info rmation screen display and
then select OFF for the feature.
2 Customized Features P. 448
If you hold your foot under the bumper for too long,
the power tailgate does not open or close.
This function will not opera te if you don't have the
smart entry remote on you. Please make sure you
have the smart entry remote on you.
The duration of the kick ing motion should be
approximately one second.
* Not available on all models
20 US ODYSSEY-31THR6210.book 163 ページ 2020年2月28日 金曜日 午前7時26分
Page 167 of 767
Continued165
uuOpening and Closing the Tailgate uOpening/Closing the Power Tailgate*
Controls
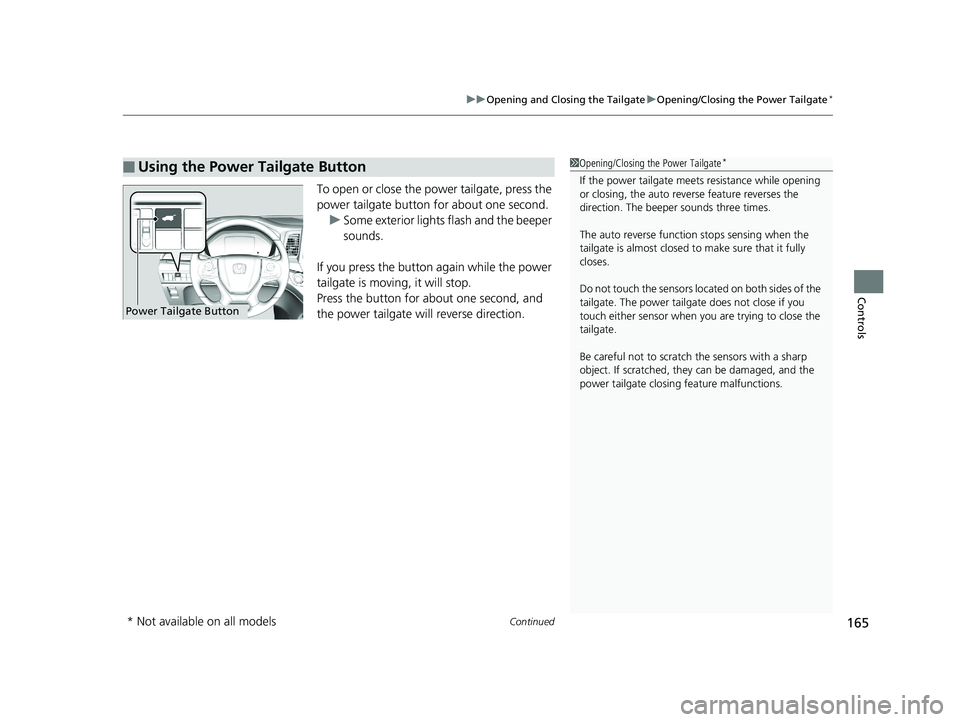
To open or close the power tailgate, press the
power tailgate button for about one second.
u Some exterior lights flash and the beeper
sounds.
If you press the button again while the power
tailgate is moving, it will stop.
Press the button for about one second, and
the power tailgate will reverse direction.
■Using the Power Tailgate Button1 Opening/Closing the Power Tailgate*
If the power tailgate meet s resistance while opening
or closing, the auto reverse feature reverses the
direction. The beeper sounds three times.
The auto reverse function stops sensing when the
tailgate is almost closed to make sure that it fully
closes.
Do not touch the sensors located on both sides of the
tailgate. The power tailga te does not close if you
touch either sensor when you are trying to close the
tailgate.
Be careful not to scratch the sensors with a sharp
object. If scratched, they can be damaged, and the
power tailgate closing feature malfunctions.
Power Tailgate Button
* Not available on all models
20 US ODYSSEY-31THR6210.book 165 ページ 2020年2月28日 金曜日 午前7時26分
Page 178 of 767
uuOpening and Closing the Sliding Doors uOpening/Closing the Power Sliding Doors*
176
Controls
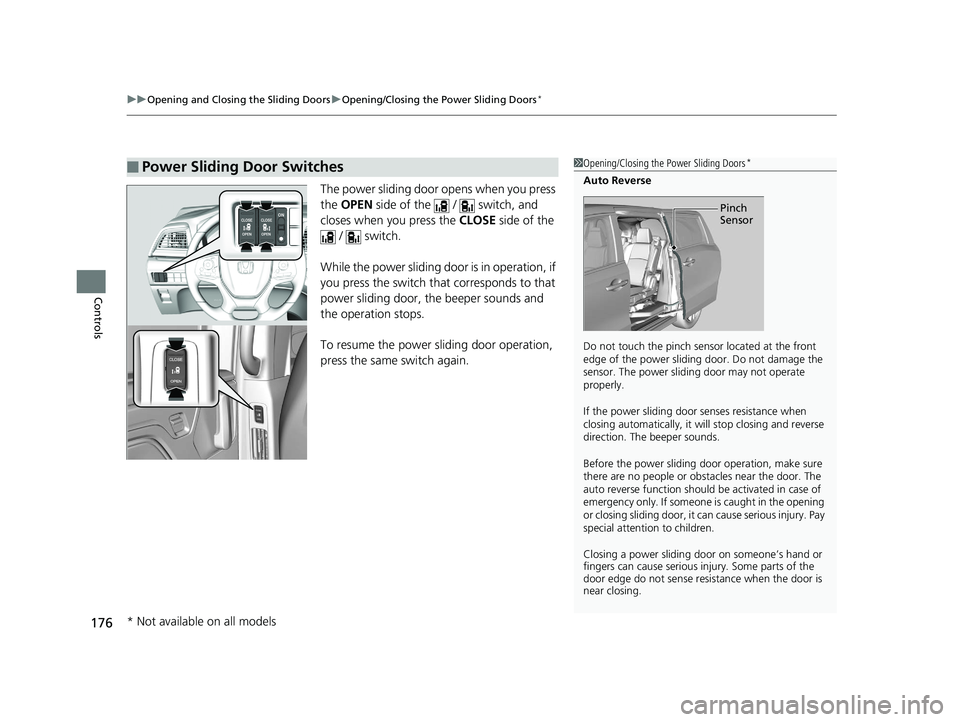
The power sliding door opens when you press
the OPEN side of the / switch, and
closes when you press the CLOSE side of the
/ switch.
While the power sliding door is in operation, if
you press the switch that corresponds to that
power sliding door, the beeper sounds and
the operation stops.
To resume the power sliding door operation,
press the same switch again.
■Power Sliding Door Switches1 Opening/Closing the Power Sliding Doors*
Auto Reverse
Do not touch the pinch sensor located at the front
edge of the power sliding door. Do not damage the
sensor. The power slidi ng door may not operate
properly.
If the power sliding door senses resistance when
closing automatically, it wi ll stop closing and reverse
direction. The beeper sounds.
Before the power sliding door operation, make sure
there are no people or obsta cles near the door. The
auto reverse function should be activated in case of
emergency only. If someone is caught in the opening
or closing sliding door, it ca n cause serious injury. Pay
special attention to children.
Closing a power sliding door on someone’s hand or
fingers can cause serious injury. Some parts of the
door edge do not sense resi stance when the door is
near closing.
Pinch
Sensor
* Not available on all models
20 US ODYSSEY-31THR6210.book 176 ページ 2020年2月28日 金曜日 午前7時26分
Page 195 of 767
Continued193
uuOperating the Switches Around the Steering Wheel uLight Switches
Controls
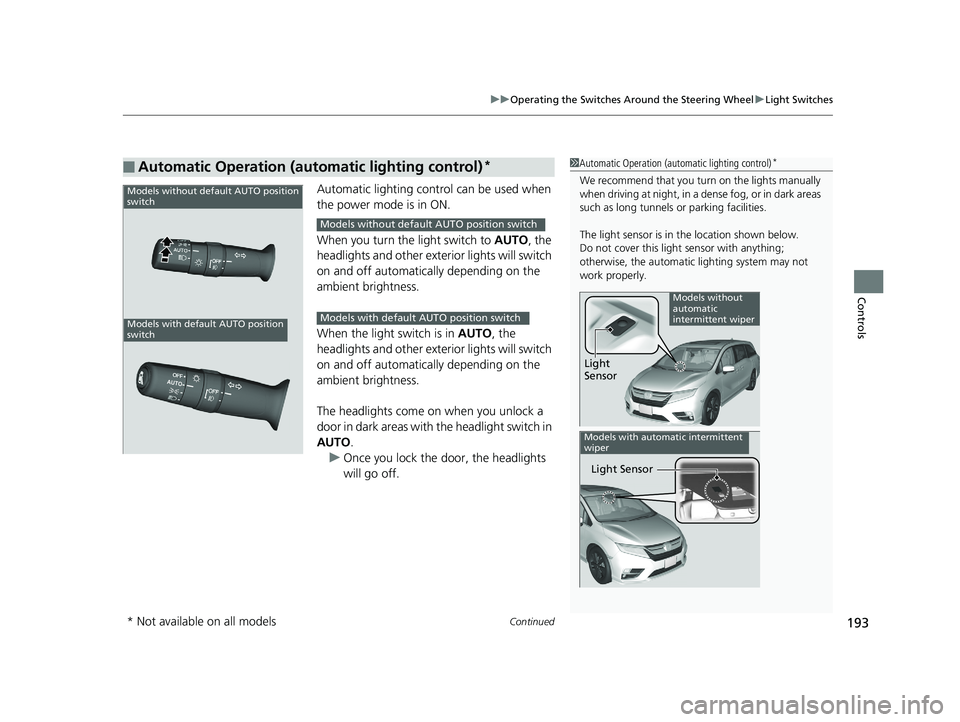
Automatic lighting control can be used when
the power mode is in ON.
When you turn the light switch to AUTO, the
headlights and other exterior lights will switch
on and off automatically depending on the
ambient brightness.
When the light switch is in AUTO, the
headlights and other exterior lights will switch
on and off automatically depending on the
ambient brightness.
The headlights come on when you unlock a
door in dark areas with the headlight switch in
AUTO .
u Once you lock the door, the headlights
will go off.
■Automatic Operation (automatic lighting control)*1 Automatic Operation (aut omatic lighting control)*
We recommend that you tu rn on the lights manually
when driving at night, in a dense fog, or in dark areas
such as long tunnels or parking facilities.
The light sensor is in the location shown below.
Do not cover this light sensor with anything;
otherwise, the automatic lighting system may not
work properly.
Light
Sensor
Models without
automatic
intermittent wiper
Light Sensor
Models with automatic intermittent
wiper
Models without default AUTO position
switch
Models with default AUTO position
switch
Models without default AUTO position switch
Models with default AUTO position switch
* Not available on all models
20 US ODYSSEY-31THR6210.book 193 ページ 2020年2月28日 金曜日 午前7時26分
Page 199 of 767
197
uuOperating the Switches Around the Steering Wheel uAuto High-Beam*
Continued
Controls
Auto High-Beam*
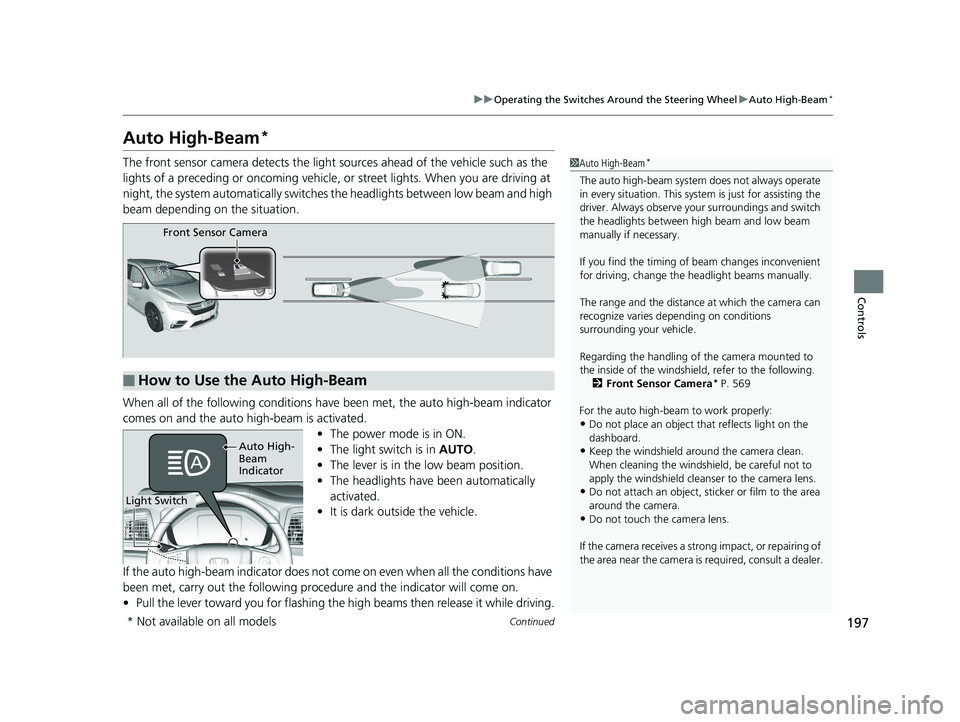
The front sensor camera detects the light sources ahead of the vehicle such as the
lights of a preceding or oncoming vehicle, or street lights. When you are driving at
night, the system automatica lly switches the headlights between low beam and high
beam depending on the situation.
When all of the following conditions have been met, the auto high-beam indicator
comes on and the auto high-beam is activated.
•The power mode is in ON.
• The light switch is in AUTO.
• The lever is in the low beam position.
• The headlights have been automatically
activated.
• It is dark outside the vehicle.
If the auto high-beam indicato r does not come on even when all the conditions have
been met, carry out the following procedure and the indicator will come on.
• Pull the lever toward you for flashing the high beams then release it while driving.1Auto High-Beam*
The auto high-beam system does not always operate
in every situation. This syst em is just for assisting the
driver. Always observe your surroundings and switch
the headlights between high beam and low beam
manually if necessary.
If you find the timing of beam changes inconvenient
for driving, change the headlight beams manually.
The range and the distance at which the camera can
recognize varies de pending on conditions
surrounding your vehicle.
Regarding the handling of the camera mounted to
the inside of the windshiel d, refer to the following.
2 Front Sensor Camera
* P. 569
For the auto high-beam to work properly:
•Do not place an object that reflects light on the
dashboard.
•Keep the windshield around the camera clean.
When cleaning the windshield, be careful not to
apply the windshield cleans er to the camera lens.
•Do not attach an object, sticker or film to the area
around the camera.
•Do not touch the camera lens.
If the camera receives a st rong impact, or repairing of
the area near the camera is required, consult a dealer.
■How to Use the Auto High-Beam
Front Sensor Camera
Light Switch
Auto High-
Beam
Indicator
* Not available on all models
20 US ODYSSEY-31THR6210.book 197 ページ 2020年2月28日 金曜日 午前7時26分