fog light HONDA ODYSSEY 2020 Owner's Manual (in English)
[x] Cancel search | Manufacturer: HONDA, Model Year: 2020, Model line: ODYSSEY, Model: HONDA ODYSSEY 2020Pages: 767, PDF Size: 43.89 MB
Page 7 of 767
5
Quick Reference Guide
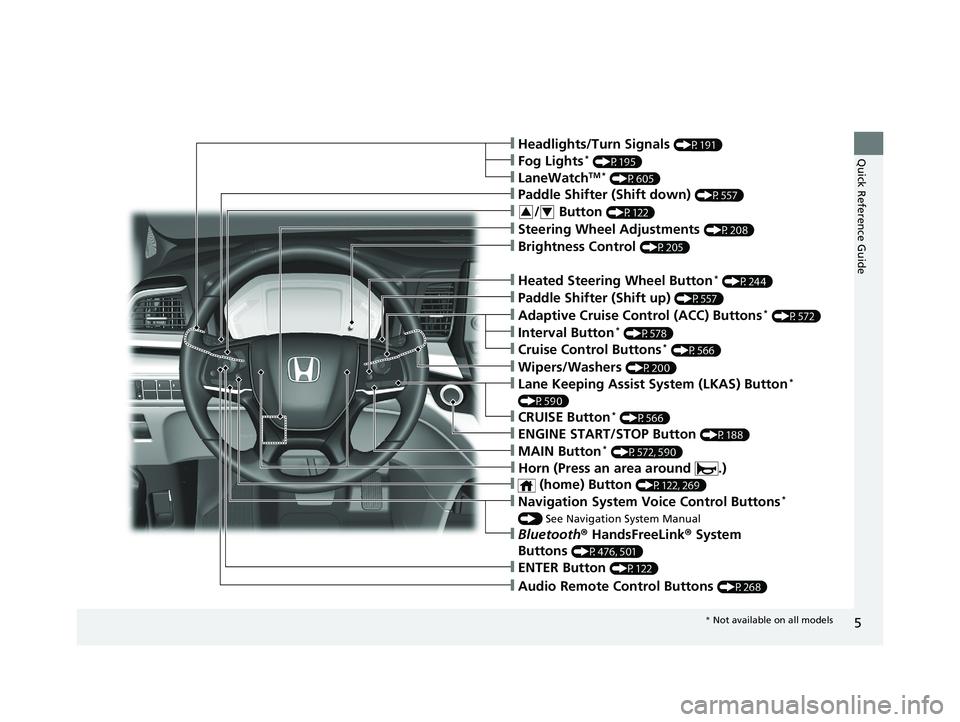
❙Navigation System Voice Control Buttons*
() See Navigation System Manual
❙Audio Remote Control Buttons (P268)
❙Steering Wheel Adjustments (P208)
❙Brightness Control (P205)
❙ENTER Button (P122)
❙/ Button (P122)34
❙Headlights/Turn Signals (P191)
❙LaneWatchTM * (P605)
❙Fog Lights* (P195)
❙Bluetooth ® HandsFreeLink ® System
Buttons
(P476, 501)
❙Paddle Shifter (Shift down) (P557)
❙Heated Steering Wheel Button* (P244)
❙Paddle Shifter (Shift up) (P557)
❙Adaptive Cruise Control (ACC) Buttons* (P572)
❙Interval Button* (P578)
❙Cruise Control Buttons* (P566)
❙ENGINE START/STOP Button (P188)
❙MAIN Button* (P572, 590)
❙Wipers/Washers (P200)
❙Lane Keeping Assist System (LKAS) Button*
(P590)
❙CRUISE Button* (P566)
❙ (home) Button (P122, 269)
❙Horn (Press an area around .)
* Not available on all models
20 US ODYSSEY-31THR6210.book 5 ページ 2020年2月28日 金曜日 午前7時26分
Page 11 of 767
9
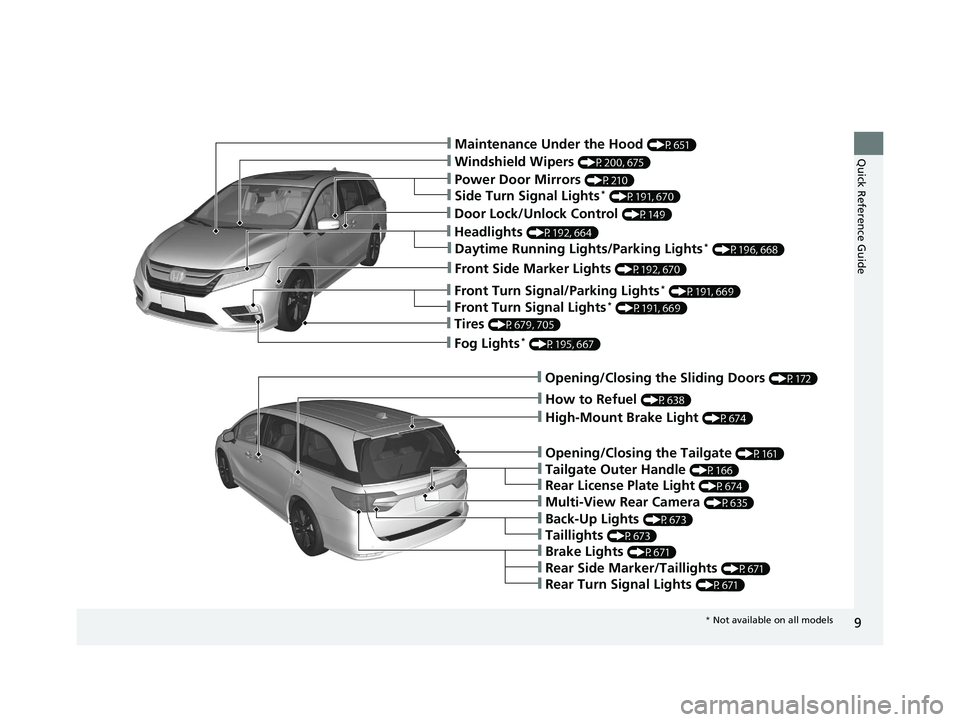
Quick Reference Guide❙Maintenance Under the Hood (P651)
❙Windshield Wipers (P200, 675)
❙Power Door Mirrors (P210)
❙Fog Lights* (P195, 667)
❙How to Refuel (P638)
❙Multi-View Rear Camera (P635)
❙Opening/Closing the Tailgate (P161)
❙Back-Up Lights (P673)
❙Opening/Closing the Sliding Doors (P172)
❙Taillights (P673)
❙Tailgate Outer Handle (P166)
❙Brake Lights (P671)
❙Rear Side Marker/Taillights (P671)
❙Rear Turn Signal Lights (P671)
❙High-Mount Brake Light (P674)
❙Headlights (P192, 664)
❙Front Side Marker Lights (P192, 670)
❙Front Turn Signal/Parking Lights* (P191, 669)
❙Tires (P679, 705)
❙Side Turn Signal Lights* (P191, 670)
❙Daytime Running Lights/Parking Lights* (P196, 668)
❙Front Turn Signal Lights* (P191, 669)
❙Rear License Plate Light (P674)
❙Door Lock/Unlock Control (P149)
* Not available on all models
20 US ODYSSEY-31THR6210.book 9 ページ 2020年2月28日 金曜日 午前7時26分
Page 15 of 767
13
Quick Reference Guide
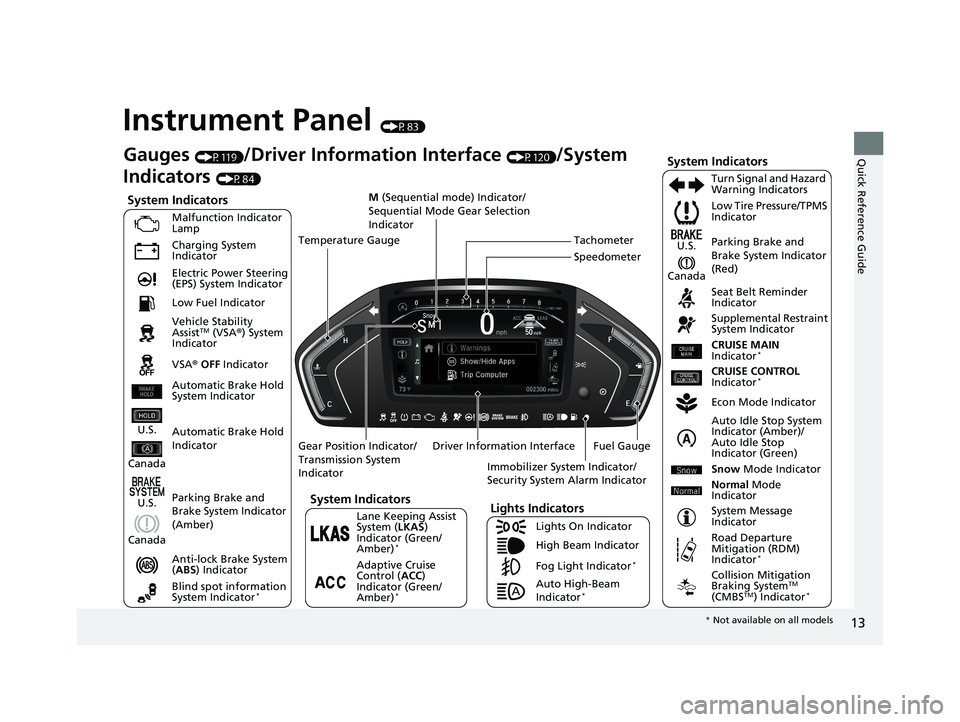
Instrument Panel (P83)
System Indicators
Malfunction Indicator
Lamp
Charging System
Indicator
Anti-lock Brake System
(ABS ) Indicator
Vehicle Stability
Assist
TM (VSA
®) System
Indicator
VSA ® OFF Indicator Low Tire Pressure/TPMS
Indicator
Immobilizer System Indicator/
Security System Alarm Indicator
Lights Indicators
Lights On Indicator
High Beam Indicator
Fog Light Indicator
*
Lane Keeping Assist
System ( LKAS)
Indicator (Green/
Amber)
*
Seat Belt Reminder
Indicator
System Indicators
Econ Mode Indicator
System Message
Indicator Parking Brake and
Brake System Indicator
(Red)
Supplemental Restraint
System Indicator
Driver Information Interface CRUISE MAIN
Indicator
*
Tachometer
M
(Sequential mode) Indicator/
Sequential Mode Gear Selection
Indicator
Speedometer
Fuel Gauge
Gear Position Indicator/
Transmission System
Indicator Auto Idle Stop System
Indicator (Amber)/
Auto Idle Stop
Indicator (Green)
Gauges (P119)/Driver Information Interface (P120)/System
Indicators
(P84)
Automatic Brake Hold
Indicator Adaptive Cruise
Control (ACC)
Indicator (Green/
Amber)
*
Turn Signal and Hazard
Warning Indicators
Electric Power Steering
(EPS) System Indicator
Blind spot information
System Indicator
*
CRUISE CONTROL
Indicator*
Temperature Gauge
Parking Brake and
Brake System Indicator
(Amber)
U.S.
Canada
U.S.
Canada
System Indicators
U.S.
Canada
Low Fuel Indicator
Automatic Brake Hold
System Indicator
Auto High-Beam
Indicator*
Snow Mode Indicator
Normal Mode
Indicator
Road Departure
Mitigation (RDM)
Indicator
*
Collision Mitigation
Braking SystemTM
(CMBSTM) Indicator*
* Not available on all models
20 US ODYSSEY-31THR6210.book 13 ページ 2020年2月28日 金曜日 午前7時26分
Page 95 of 767
93
uuIndicators u
Continued
Instrument Panel
*1:Canadian models only: Apply and hold th e brake pedal before selecting the ON mode.
IndicatorNameOn/BlinkingExplanationMessage
Lights On
Indicator
•Comes on whenever the light
switch is on, or in AUTO* when
the exterior lights are on.
• If you set the power mode to
ACCESSORY or VEHICLE OFF while the
exterior lights are on, a chime sounds
when the driver’s door is opened.
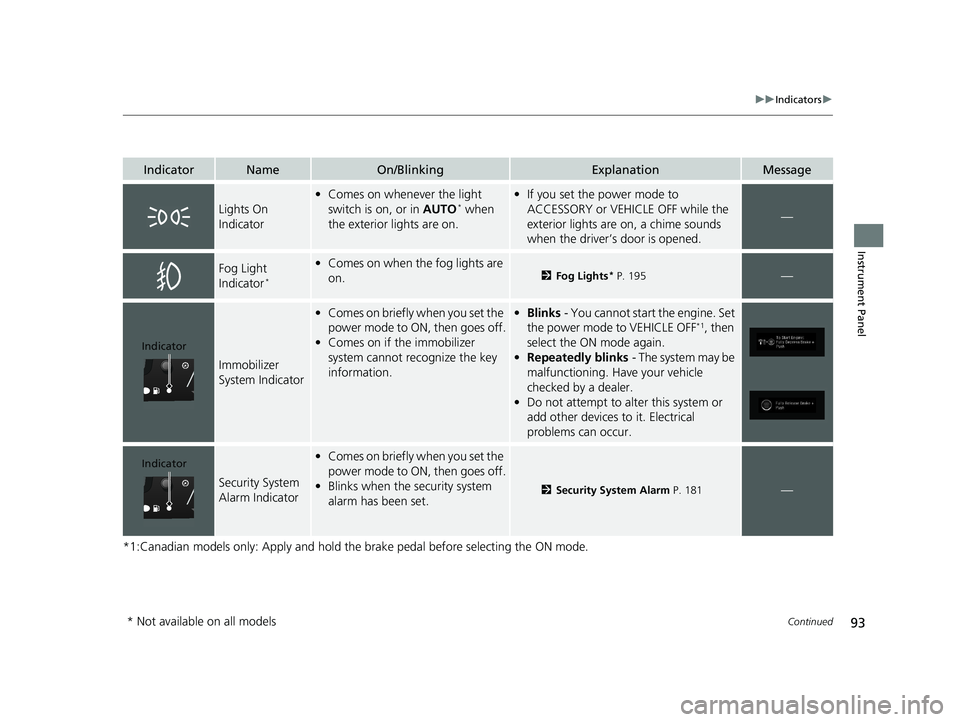
—
Fog Light
Indicator*
•Comes on when the fog lights are
on.2 Fog Lights* P. 195—
Immobilizer
System Indicator
•Comes on briefly when you set the
power mode to ON, then goes off.
• Comes on if the immobilizer
system cannot recognize the key
information.•Blinks - You cannot start the engine. Set
the power mode to VEHICLE OFF*1, then
select the ON mode again.
• Repeatedly blinks - The system may be
malfunctioning. Have your vehicle
checked by a dealer.
• Do not attempt to alter this system or
add other devices to it. Electrical
problems can occur.
Security System
Alarm Indicator
•Comes on briefly when you set the
power mode to ON, then goes off.
• Blinks when the security system
alarm has been set.
2 Security System Alarm P. 181—
Indicator
Indicator
* Not available on all models
20 US ODYSSEY-31THR6210.book 93 ページ 2020年2月28日 金曜日 午前7時26分
Page 114 of 767
112
uuIndicators uDriver Information Interface Wa rning and Information Messages
Instrument Panel
MessageConditionExplanation
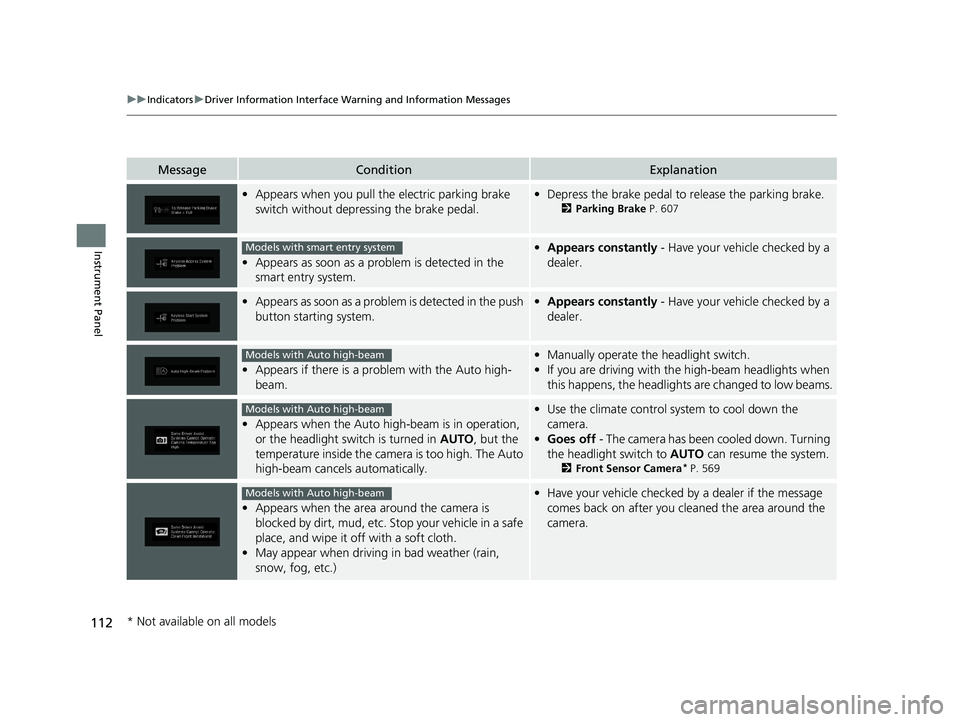
•Appears when you pull the electric parking brake
switch without depressing the brake pedal.•Depress the brake pedal to release the parking brake.
2 Parking Brake P. 607
•Appears as soon as a prob lem is detected in the
smart entry system.
• Appears constantly - Have your vehicle checked by a
dealer.
• Appears as soon as a proble m is detected in the push
button starting system.• Appears constantly - Have your vehicle checked by a
dealer.
• Appears if there is a prob lem with the Auto high-
beam.
• Manually operate the headlight switch.
• If you are driving with th e high-beam headlights when
this happens, the headlights are changed to low beams.
• Appears when the Auto high -beam is in operation,
or the headlight switch is turned in AUTO, but the
temperature inside the came ra is too high. The Auto
high-beam cancels automatically.
• Use the climate control sy stem to cool down the
camera.
• Goes off - The camera has been cooled down. Turning
the headlight switch to AUTO can resume the system.
2Front Sensor Camera* P. 569
•Appears when the area around the camera is
blocked by dirt, mud, etc. Stop your vehicle in a safe
place, and wipe it off with a soft cloth.
• May appear when driving in bad weather (rain,
snow, fog, etc.)
•Have your vehicle checked by a dealer if the message
comes back on after you cl eaned the area around the
camera.
Models with smart entry system
Models with Auto high-beam
Models with Auto high-beam
Models with Auto high-beam
* Not available on all models
20 US ODYSSEY-31THR6210.book 112 ページ 2020年2月28日 金曜日 午前7時26分
Page 145 of 767
143
Controls
This chapter explains how to operate the various controls necessary for driving.
Clock.................................................. 144
Locking and Unlocking the Doors
Key Types and Functions .................. 146
Low Remote Signal Strength ............ 148
Locking/Unlocking the Doors from the Outside .... 149
Locking/Unlocking the Doors from the Inside ...156
Childproof Door Locks ..................... 159
Auto Door Locking/Unlocking .......... 160
Opening and Closing the Tailgate ... 161
Opening and Closing the Sliding Doors.. 172Security System
Immobilizer System .............................. 181
Security System Alarm .......................... 181
Opening and Closing the Windows ..... 184
Moonroof
*............................................. 187
Operating the Switches Around the Steering Wheel
ENGINE START/STOP Button............. 188
Turn Signals ..................................... 191
Light Switches.................................. 192
Fog Lights
*...................................... 195
Daytime Running Lights ................... 196
Auto High-Beam
*............................ 197Wipers and Washers ............................ 200Rear Defogger/Heated Door Mirror* Button...203
Heated Windshield Button ................... 204
Brightness Control ............................... 205
Driving Position Memory System
*........ 206
Adjusting the Steering Wheel .............. 208
Canadian models
Adjusting the Mirrors ............................ 209
Interior Rearview Mirror ........................ 209
Power Door Mirrors .............................. 210
Adjusting the Seats
Front Seats ................................................212
Head Restraints .........................................224
Maintain a Proper Sitting Position ..............223
Interior Lights/Interior Convenience Items.. 228
Climate Control System
Using Automatic Climate Control ..............251
Rear Climate Control System .....................254
Climate Control System ..............................256
Using Automatic Climate Control ..............256
Automatic Climate Control Sensors ...........262Dual-zone climate control system
Tri-zone climate control system
* Not available on all models
20 US ODYSSEY-31THR6210.book 143 ページ 2020年2月28日 金曜日 午前7時26分
Page 195 of 767
Continued193
uuOperating the Switches Around the Steering Wheel uLight Switches
Controls
Automatic lighting control can be used when
the power mode is in ON.
When you turn the light switch to AUTO, the
headlights and other exterior lights will switch
on and off automatically depending on the
ambient brightness.
When the light switch is in AUTO, the
headlights and other exterior lights will switch
on and off automatically depending on the
ambient brightness.
The headlights come on when you unlock a
door in dark areas with the headlight switch in
AUTO .
u Once you lock the door, the headlights
will go off.
■Automatic Operation (automatic lighting control)*1 Automatic Operation (aut omatic lighting control)*
We recommend that you tu rn on the lights manually
when driving at night, in a dense fog, or in dark areas
such as long tunnels or parking facilities.
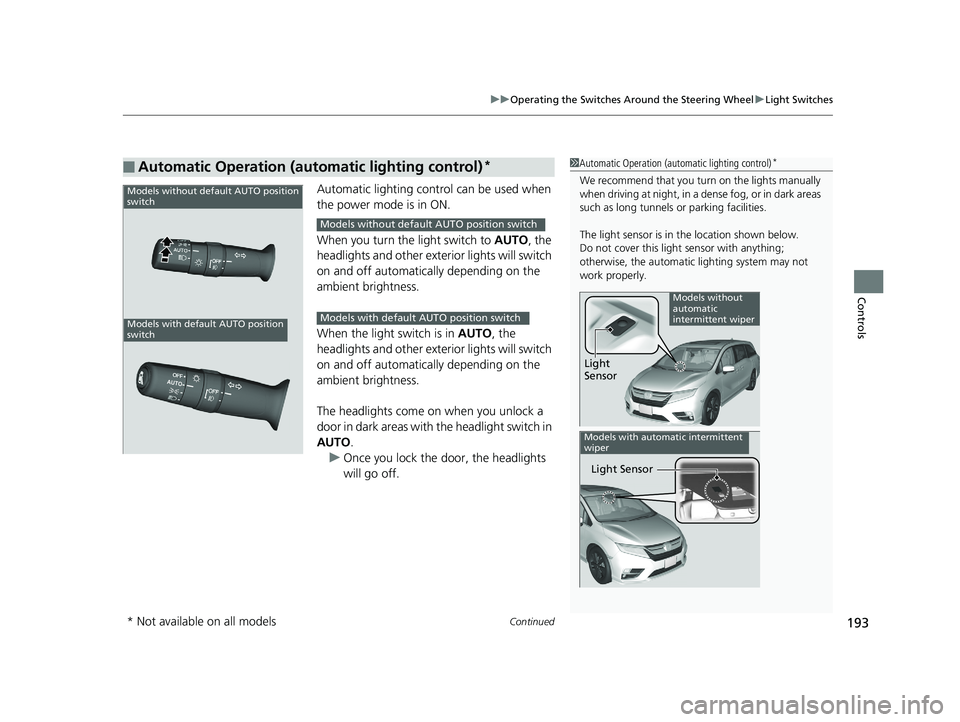
The light sensor is in the location shown below.
Do not cover this light sensor with anything;
otherwise, the automatic lighting system may not
work properly.
Light
Sensor
Models without
automatic
intermittent wiper
Light Sensor
Models with automatic intermittent
wiper
Models without default AUTO position
switch
Models with default AUTO position
switch
Models without default AUTO position switch
Models with default AUTO position switch
* Not available on all models
20 US ODYSSEY-31THR6210.book 193 ページ 2020年2月28日 金曜日 午前7時26分
Page 197 of 767
195
uuOperating the Switches Around the Steering Wheel uFog Lights*
Controls
Fog Lights*
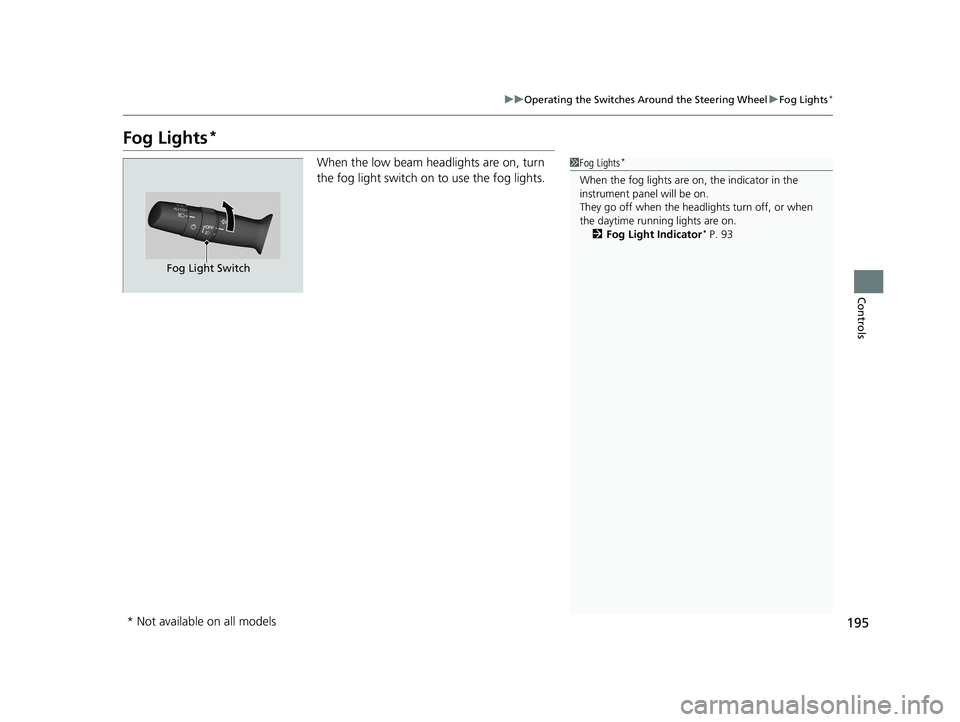
When the low beam headlights are on, turn
the fog light switch on to use the fog lights.1Fog Lights*
When the fog lights are on, the indicator in the
instrument panel will be on.
They go off when the headlights turn off, or when
the daytime running lights are on.
2 Fog Light Indicator
* P. 93
Fog Light Switch
* Not available on all models
20 US ODYSSEY-31THR6210.book 195 ページ 2020年2月28日 金曜日 午前7時26分
Page 198 of 767
196
uuOperating the Switches Around the Steering Wheel uDaytime Running Lights
Controls
Daytime Running Lights
When the conditions listed below are met, the daytime running lights come on:
• The power mode is in ON.
• The headlight switch is off.
• The parking brake is released.
The lights remain on even if you set the parking brake. Setting the power mode to
VEHICLE OFF will turn off the daytime running lights.
The daytime running lights go off once the headlight switch is turned on, or when
the headlight switch is in AUTO
* and it is getting dark outside.
The high beam headlights re turn to the original brightness once the headlight
switch is turned on.
1 Daytime Running Lights
The parking lights serve as daytime running lights.
The high beam headlights come on slightly dimmer
than normal to serve as daytime running lights.
Models with fog lights
Models without fog lights
Models without fog lights
* Not available on all models
20 US ODYSSEY-31THR6210.book 196 ページ 2020年2月28日 金曜日 午前7時26分
Page 200 of 767
uuOperating the Switches Around the Steering Wheel uAuto High-Beam*
198
Controls
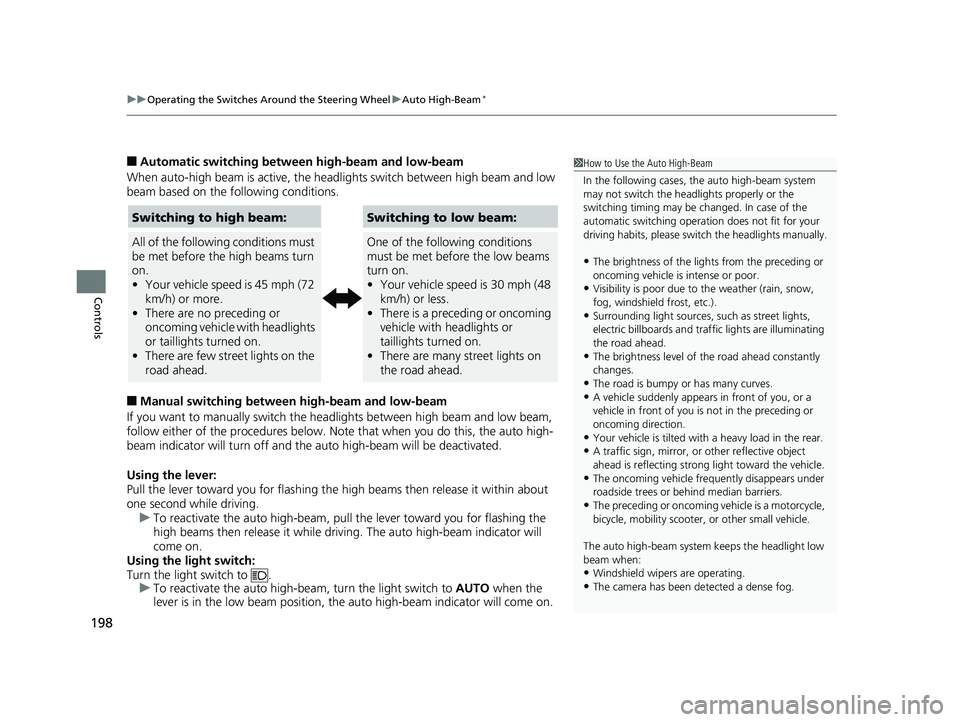
■Automatic switching between high-beam and low-beam
When auto-high beam is active, the headlights switch between high beam and low
beam based on the following conditions.
■Manual switching between high-beam and low-beam
If you want to manually switch the headlights between high beam and low beam,
follow either of the proced ures below. Note that when you do this, the auto high-
beam indicator will turn off and the auto high-beam will be deactivated.
Using the lever:
Pull the lever toward you fo r flashing the high beams th en release it within about
one second while driving. u To reactivate the auto high-beam, pull the lever toward you for flashing the
high beams then release it while driving. The auto high-beam indicator will
come on.
Using the light switch:
Turn the light switch to . u To reactivate the auto high-be am, turn the light switch to AUTO when the
lever is in the low beam position, the auto high-beam indicator will come on.
1How to Use the Auto High-Beam
In the following cases, th e auto high-beam system
may not switch the head lights properly or the
switching timing may be ch anged. In case of the
automatic switching operat ion does not fit for your
driving habits, please swit ch the headlights manually.
•The brightness of the lights from the preceding or
oncoming vehicle is intense or poor.
•Visibility is poor due to the weather (rain, snow,
fog, windshield frost, etc.).
•Surrounding light sources, such as street lights,
electric billboards and traf fic lights are illuminating
the road ahead.
•The brightness le vel of the road ahead constantly
changes.
•The road is bumpy or has many curves.•A vehicle suddenly appears in front of you, or a
vehicle in front of you is not in the preceding or
oncoming direction.
•Your vehicle is tilted with a heavy load in the rear.•A traffic sign, mirror, or other reflective object
ahead is reflecting strong light toward the vehicle.
•The oncoming vehicle freq uently disappears under
roadside trees or be hind median barriers.
•The preceding or oncoming vehicle is a motorcycle,
bicycle, mobility scooter, or other small vehicle.
The auto high-beam system keeps the headlight low
beam when:
•Windshield wipers are operating.
•The camera has been detected a dense fog.
Switching to high beam:
All of the following conditions must
be met before the high beams turn
on.
•Your vehicle speed is 45 mph (72
km/h) or more.
• There are no preceding or
oncoming vehicle with headlights
or taillights turned on.
• There are few street lights on the
road ahead.
Switching to low beam:
One of the following conditions
must be met before the low beams
turn on.
•Your vehicle speed is 30 mph (48
km/h) or less.
• There is a preceding or oncoming
vehicle with headlights or
taillights turned on.
• There are many street lights on
the road ahead.
20 US ODYSSEY-31THR6210.book 198 ページ 2020年2月28日 金曜日 午前7時26分