headlights HONDA ODYSSEY 2022 User Guide
[x] Cancel search | Manufacturer: HONDA, Model Year: 2022, Model line: ODYSSEY, Model: HONDA ODYSSEY 2022Pages: 782, PDF Size: 27.17 MB
Page 208 of 782
207
uuOperating the Switches Around the Steering Wheel uAuto High-Beam
Continued
Controls
Auto High-Beam
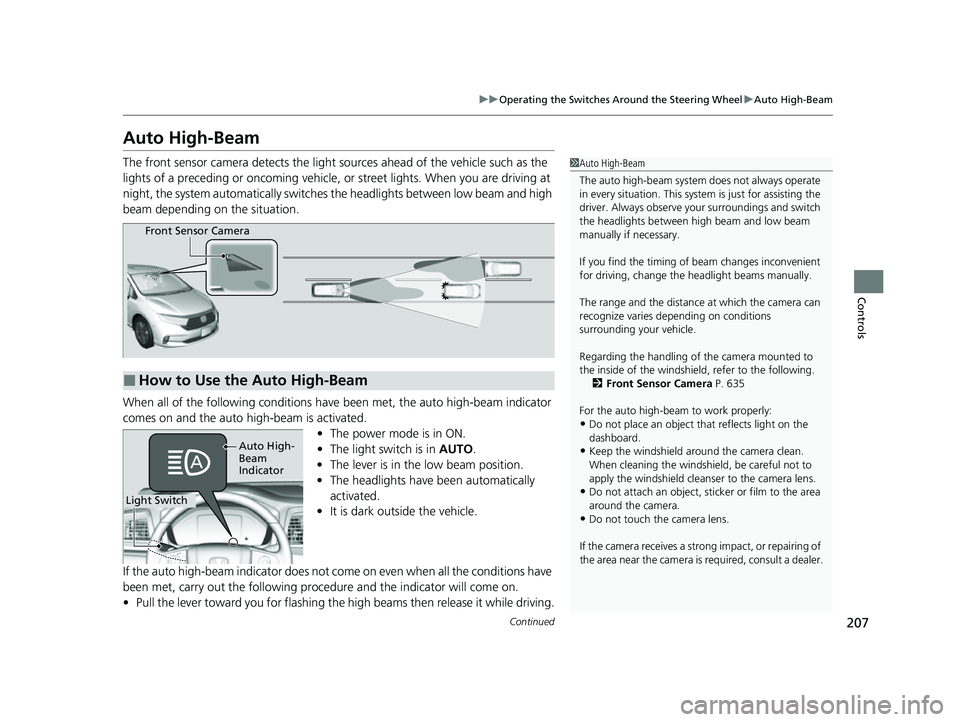
The front sensor camera detects the light sources ahead of the vehicle such as the
lights of a preceding or oncoming vehicle, or street lights. When you are driving at
night, the system automatically switches the headlights between low beam and high
beam depending on the situation.
When all of the following conditions have been met, the auto high-beam indicator
comes on and the auto high-beam is activated.
•The power mode is in ON.
• The light switch is in AUTO.
• The lever is in the low beam position.
• The headlights have been automatically
activated.
• It is dark outside the vehicle.
If the auto high-beam indica tor does not come on even when all the conditions have
been met, carry out the following procedure and the indicator will come on.
• Pull the lever toward you for flashing the high beams then release it while driving.1Auto High-Beam
The auto high-beam system does not always operate
in every situation. This syst em is just for assisting the
driver. Always observe your surroundings and switch
the headlights between high beam and low beam
manually if necessary.
If you find the timing of beam changes inconvenient
for driving, change the headlight beams manually.
The range and the distance at which the camera can
recognize varies de pending on conditions
surrounding your vehicle.
Regarding the handling of the camera mounted to
the inside of the windshiel d, refer to the following.
2 Front Sensor Camera P. 635
For the auto high-beam to work properly:
•Do not place an object that reflects light on the
dashboard.
•Keep the windshield around the camera clean.
When cleaning the windshield, be careful not to
apply the windshield cleans er to the camera lens.
•Do not attach an object, sticker or film to the area
around the camera.
•Do not touch the camera lens.
If the camera receives a st rong impact, or repairing of
the area near the camera is required, consult a dealer.
■How to Use the Auto High-Beam
Front Sensor Camera
Light Switch
Auto High-
Beam
Indicator
22 US ODYSSEY-31THR6400.book 207 ページ 2020年11月16日 月曜日 午後1時41分
Page 209 of 782
uuOperating the Switches Around the Steering Wheel uAuto High-Beam
208
Controls
■Automatic switching between high-beam and low-beam
When auto-high beam is active, the head lights switch between high beam and low
beam based on the following conditions.
■Manual switching between high-beam and low-beam
If you want to manually switch the headlights between high beam and low beam,
follow either of the proced ures below. Note that when you do this, the auto high-
beam indicator will turn off and the auto high-beam will be deactivated.
Using the lever:
Pull the lever toward you fo r flashing the high beams then release it within about
one second while driving. u To reactivate the auto high-beam, pull the lever toward you for flashing the
high beams then release it while driving. The auto high-beam indicator will
come on.
Using the light switch:
Turn the light switch to . u To reactivate the auto high-be am, turn the light switch to AUTO when the
lever is in the low beam position, the auto high-beam indicator will come on.
1 How to Use the Auto High-Beam
In the following cases, th e auto high-beam system
may not switch the head lights properly or the
switching timing may be ch anged. In case of the
automatic switching operati on does not fit for your
driving habits, please swit ch the headlights manually.
•The brightness of the lights from the preceding or
oncoming vehicle is intense or poor.
•Visibility is poor due to the weather (rain, snow,
fog, windshield frost, etc.).
•Surrounding light sources, such as street lights,
electric billboards and traf fic lights are illuminating
the road ahead.
•The brightness level of th e road ahead constantly
changes.
•The road is bumpy or has many curves.•A vehicle suddenly appears in front of you, or a
vehicle in front of you is not in the preceding or
oncoming direction.
•Your vehicle is tilted with a heavy load in the rear.•A traffic sign, mirror, or other reflective object
ahead is reflecting strong light toward the vehicle.
•The oncoming vehicle freq uently disappears under
roadside trees or be hind median barriers.
•The preceding or oncoming vehicle is a motorcycle,
bicycle, mobility scooter, or other small vehicle.
The auto high-beam system keeps the headlight low
beam when:
•Windshield wipers are op erating at a high speed.
•The camera has detected dense fog.
Switching to high beam:
All of the following conditions must
be met before the high beams turn
on.
•Your vehicle speed is 25 mph (40
km/h) or more.
• There are no preceding or
oncoming vehicle with headlights
or taillights turned on.
• There are few street lights on the
road ahead.
Switching to low beam:
One of the following conditions
must be met before the low beams
turn on.
•Your vehicle speed is 15 mph (24
km/h) or less.
• There is a preceding or oncoming
vehicle with headlights or
taillights turned on.
• There are many street lights on
the road ahead.
22 US ODYSSEY-31THR6400.book 208 ページ 2020年11月16日 月曜日 午後1時41分
Page 220 of 782
219
Controls
Mirrors
Interior Rearview Mirror
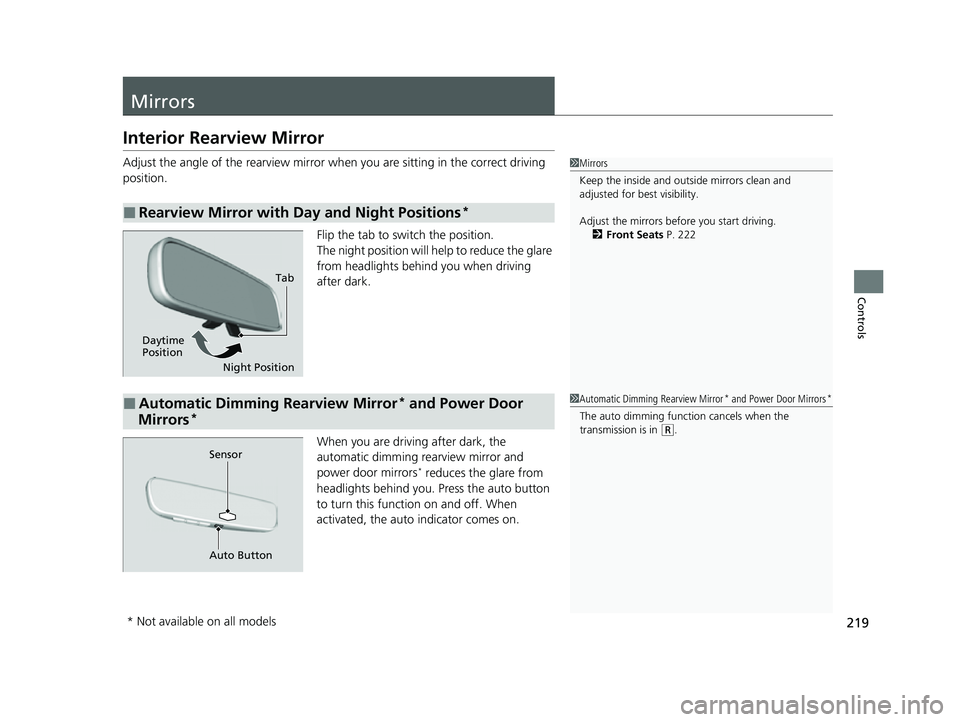
Adjust the angle of the rearview mirror when you are sitting in the correct driving
position.
Flip the tab to switch the position.
The night position will help to reduce the glare
from headlights behind you when driving
after dark.
When you are driving after dark, the
automatic dimming rearview mirror and
power door mirrors
* reduces the glare from
headlights behind you. Press the auto button
to turn this functi on on and off. When
activated, the auto indicator comes on.
■Rearview Mirror with Day and Night Positions*
1Mirrors
Keep the inside and out side mirrors clean and
adjusted for best visibility.
Adjust the mirrors before you start driving. 2 Front Seats P. 222
Tab
Daytime
Position Night Position
■Automatic Dimming Rearview Mirror* and Power Door
Mirrors*
1 Automatic Dimming Rearview Mirror* and Power Door Mirrors*
The auto dimming function cancels when the
transmission is in (R.
Sensor
Auto Button
* Not available on all models
22 US ODYSSEY-31THR6400.book 219 ページ 2020年11月16日 月曜日 午後1時41分
Page 479 of 782
478
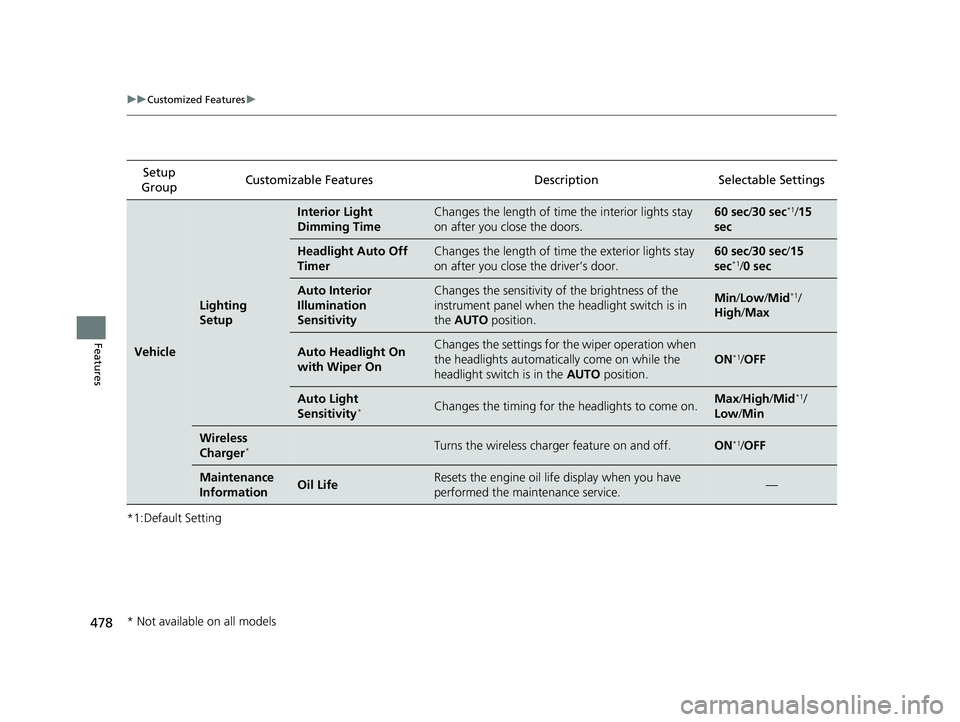
uuCustomized Features u
Features
*1:Default SettingSetup
Group Customizable Features Description Selectable Settings
Vehicle
Lighting
Setup
Interior Light
Dimming TimeChanges the length of time the interior lights stay
on after you close the doors.60 sec/
30 sec*1/15
sec
Headlight Auto Off
TimerChanges the length of time the exterior lights stay
on after you close the driver’s door.60 sec/ 30 sec/ 15
sec*1/ 0 sec
Auto Interior
Illumination
SensitivityChanges the sensitivity of the brightness of the
instrument panel when the headlight switch is in
the AUTO position.Min/Low/Mid*1/
High /Max
Auto Headlight On
with Wiper OnChanges the settings for th e wiper operation when
the headlights automati cally come on while the
headlight switch is in the AUTO position.
ON*1/OFF
Auto Light
Sensitivity*Changes the timing for the headlights to come on.Max /High /Mid*1/
Low /Min
Wireless
Charger*Turns the wireless charger feature on and off.ON*1/OFF
Maintenance
InformationOil LifeResets the engine oil life display when you have
performed the maintenance service.—
* Not available on all models
22 US ODYSSEY-31THR6400.book 478 ページ 2020年11月16日 月曜日 午後1時41分
Page 596 of 782
595
uuHonda Sensing ®u Collision Mitigation Braking SystemTM (CMBSTM)
Continued
Driving
■Vehicle conditions
• Headlight lenses are dirty or the h eadlights are not properly adjusted.
• The outside of the windshield is blocked by dirt, mud, leaves, wet snow, etc.
• The inside of the windshield is fogged.
• An abnormal tire or wheel condition (wrong size, varied size or construction,
improperly inflated, co mpact spare tire, etc.).
• When tire chains are installed.
• The vehicle is tilted due to a heavy load or suspension modifications.
• The camera temperature gets too high.
• Driving with the parking brake applied.
• When the radar sensor in the front grille gets dirty.
• The vehicle is towing a trailer.
• Driving at night or in a dark place (e.g., a tunnel) with the headlights off.
22 US ODYSSEY-31THR6400.book 595 ページ 2020年11月16日 月曜日 午後1時41分
Page 625 of 782
624
uuHonda Sensing ®u Lane Keeping Assist System (LKAS)
Driving
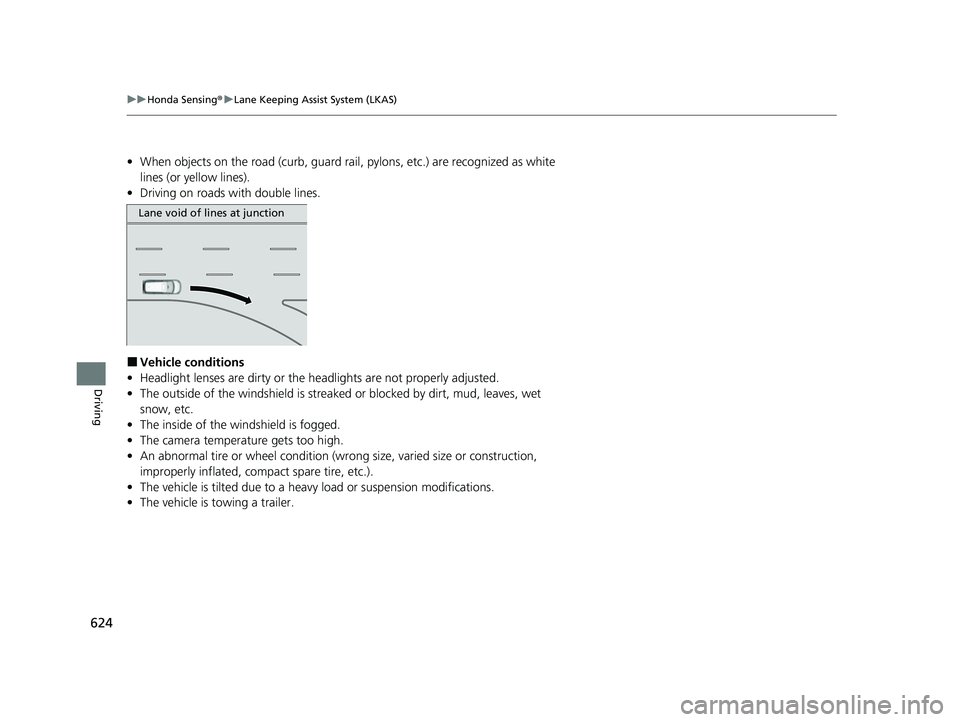
• When objects on the road (curb, guard rail, pylons, etc.) are recognized as white
lines (or yellow lines).
• Driving on roads with double lines.
■Vehicle conditions
• Headlight lenses are dirty or the headlights are not properly adjusted.
• The outside of the windshield is streake d or blocked by dirt, mud, leaves, wet
snow, etc.
• The inside of the windshield is fogged.
• The camera temperature gets too high.
• An abnormal tire or wheel condition (wrong size, varied size or construction,
improperly inflated, comp act spare tire, etc.).
• The vehicle is tilted due to a heav y load or suspension modifications.
• The vehicle is towing a trailer.
Lane void of lines at junction
22 US ODYSSEY-31THR6400.book 624 ページ 2020年11月16日 月曜日 午後1時41分
Page 687 of 782
686
Maintenance
Replacing Light Bulbs
Headlights
Headlights are LED type. Have an authorized Honda dealer inspect and replace the
light assembly.
Fog Lights*
Fog lights are LED type. Have an authoriz ed Honda dealer inspect and replace the
light assembly.
Parking/Daytime Running Lights
Parking/daytime running lights are LED type . Have an authorized Honda dealer
inspect and replace the light assembly.
1 Headlights
The headlight aim is set by the factory, and does not
need to be adjusted. Howeve r, if you regularly carry
heavy items in the cargo area or tow a trailer, have
the aiming readjusted at a dealer or by a qualified
technician.
* Not available on all models
22 US ODYSSEY-31THR6400.book 686 ページ 2020年11月16日 月曜日 午後1時41分
Page 752 of 782
751
uuFuses uInspecting and Changing Fuses
Handling the Unexpected
Inspecting and Changing Fuses
1. Set the power mode to VEHICLE OFF. Turn
headlights and all accessories off.
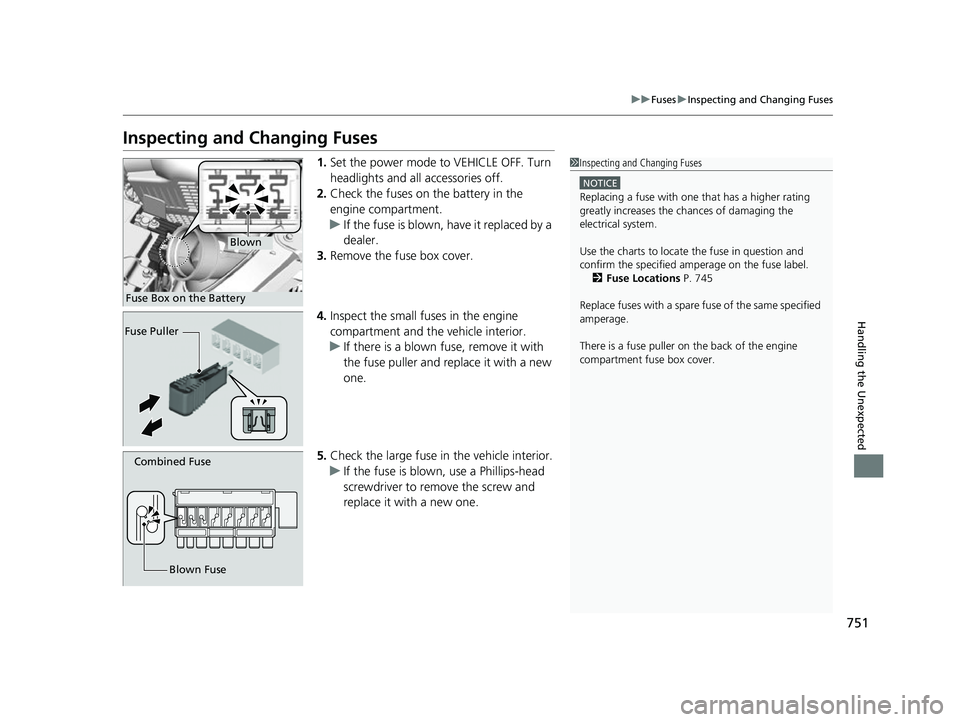
2. Check the fuses on the battery in the
engine compartment.
u If the fuse is blown, have it replaced by a
dealer.
3. Remove the fuse box cover.
4. Inspect the small fu ses in the engine
compartment and the vehicle interior.
u If there is a blown fuse, remove it with
the fuse puller and replace it with a new
one.
5. Check the large fuse in the vehicle interior.
u If the fuse is blown, use a Phillips-head
screwdriver to remove the screw and
replace it with a new one.1 Inspecting and Changing Fuses
NOTICE
Replacing a fuse with on e that has a higher rating
greatly increases the chances of damaging the
electrical system.
Use the charts to locate the fuse in question and
confirm the specified amperage on the fuse label. 2 Fuse Locations P. 745
Replace fuses with a spare fuse of the same specified
amperage.
There is a fuse puller on the back of the engine
compartment fuse box cover.
Blown
Fuse Box on the Battery
Fuse Puller
Combined Fuse
Blown Fuse
22 US ODYSSEY-31THR6400.book 751 ページ 2020年11月16日 月曜日 午後1時41分
Page 761 of 782
760
Information
Specifications
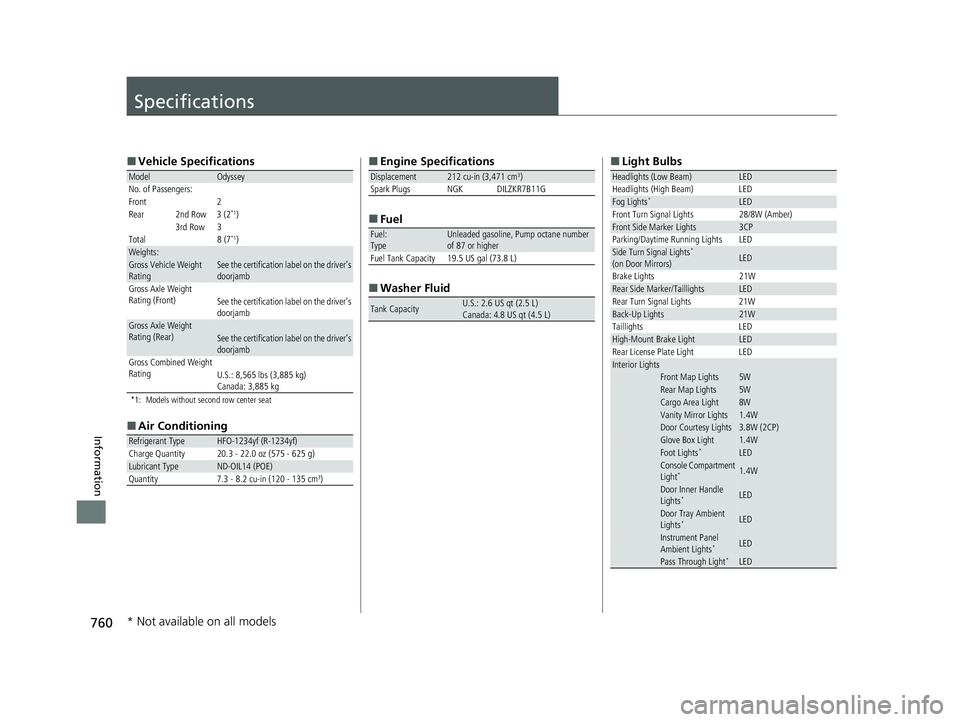
■Vehicle Specifications
*1: Models without second row center seat
■Air Conditioning
ModelOdyssey
No. of Passengers:
Front 2
Rear 2nd Row 3 (2
*1)
3rd Row 3
Total 8 (7
*1)Weights:Gross Vehicle Weight
Rating See the certification label on the driver’s
doorjamb
Gross Axle Weight
Rating (Front)See the certification label on the driver’s
doorjamb
Gross Axle Weight
Rating (Rear)See the certification label on the driver’s
doorjamb
Gross Combined Weight
Rating U.S.: 8,565 lbs (3,885 kg)
Canada: 3,885 kg
Refrigerant TypeHFO-1234yf (R-1234yf)
Charge Quantity 20.3 - 22.0 oz (575 - 625 g)
Lubricant TypeND-OIL14 (POE)
Quantity 7.3 - 8.2 cu-in (120 - 135 cm3)
■ Engine Specifications
■ Fuel
■ Washer Fluid
Displacement212 cu-in (3,471 cm3)
Spark Plugs NGK DILZKR7B11G
Fuel:
TypeUnleaded gasoline, Pump octane number
of 87 or higher
Fuel Tank Capacity 19.5 US gal (73.8 L)
Tank CapacityU.S.: 2.6 US qt (2.5 L)
Canada: 4.8 US qt (4.5 L)
■ Light Bulbs
Headlights (Low Beam)LED
Headlights (High Beam) LED
Fog Lights*LED
Front Turn Signal Lights 28/8W (Amber)
Front Side Marker Lights3CP
Parking/Daytime Running Lights LED
Side Turn Signal Lights*
(on Door Mirrors)LED
Brake Lights 21W
Rear Side Marker/TaillightsLED
Rear Turn Signal Lights 21W
Back-Up Lights21W
Taillights LED
High-Mount Brake LightLED
Rear License Plate Light LED
Interior LightsFront Map Lights5WRear Map Lights5WCargo Area Light8WVanity Mirror Lights1.4WDoor Courtesy Lights3.8W (2CP)Glove Box Light1.4WFoot Lights*LEDConsole Compartment
Light*1.4W
Door Inner Handle
Lights*LED
Door Tray Ambient
Lights*LED
Instrument Panel
Ambient Lights*LED
Pass Through Light*LED
* Not available on all models
22 US ODYSSEY-31THR6400.book 760 ページ 2020年11月16日 月曜日 午後1時41分
Page 775 of 782
774
Index
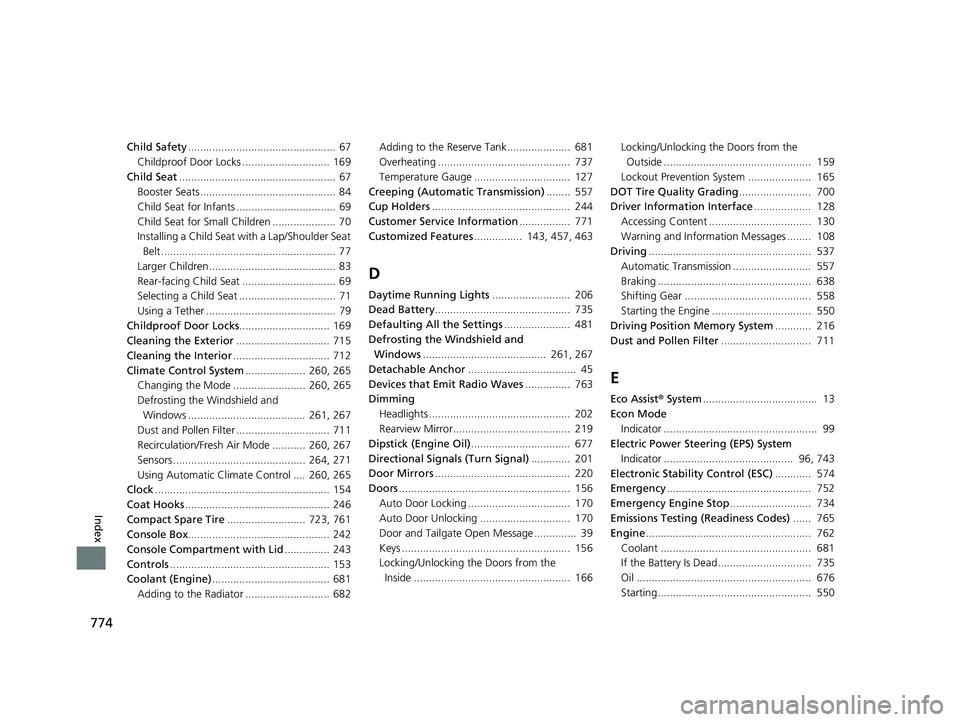
Child Safety................................................. 67
Childproof Door Locks ............................. 169
Child Seat .................................................... 67
Booster Seats ............................................. 84
Child Seat for Infants ................................. 69
Child Seat for Small Children ..................... 70
Installing a Child Seat wi th a Lap/Shoulder Seat
Belt .......................................................... 77
Larger Children .......................................... 83
Rear-facing Child Seat ............................... 69
Selecting a Child Seat ................................ 71
Using a Tether ........................................... 79
Childproof Door Locks .............................. 169
Cleaning the Exterior ............................... 715
Cleaning the Interior ................................ 712
Climate Control System .................... 260, 265
Changing the Mode ........................ 260, 265
Defrosting the Windshield and Windows ....................................... 261, 267
Dust and Pollen Filter ............................... 711
Recirculation/Fresh Air Mode ........... 260, 267
Sensors ............................................ 264, 271
Using Automatic Climate Control .... 260, 265
Clock .......................................................... 154
Coat Hooks ................................................ 246
Compact Spare Tire .......................... 723, 761
Console Box ............................................... 242
Console Compartment with Lid ............... 243
Controls ..................................................... 153
Coolant (Engine) ....................................... 681
Adding to the Radiator ............................ 682 Adding to the Reserve Tank..................... 681
Overheating ............................................ 737
Temperature Gauge ................................ 127
Creeping (Automatic Transmission) ........ 557
Cup Holders .............................................. 244
Customer Service Information ................. 771
Customized Features ................ 143, 457, 463
D
Daytime Running Lights .......................... 206
Dead Battery ............................................. 735
Defaulting All the Settings ...................... 481
Defrosting the Windshield and Windows ......................................... 261, 267
Detachable Anchor .................................... 45
Devices that Emit Radio Waves ............... 763
Dimming
Headlights ............................................... 202
Rearview Mirror....................................... 219
Dipstick (Engine Oil) ................................. 677
Directional Signals (Turn Signal) ............. 201
Door Mirrors ............................................. 220
Doors ......................................................... 156
Auto Door Locking .................................. 170
Auto Door Unlocking .............................. 170
Door and Tailgate Open Message .............. 39
Keys ........................................................ 156
Locking/Unlocking the Doors from the Inside .................................................... 166 Locking/Unlocking the Doors from the
Outside ................................................. 159
Lockout Prevention System ..................... 165
DOT Tire Quality Grading ........................ 700
Driver Information Interface ................... 128
Accessing Content .................................. 130
Warning and Information Messages ........ 108
Driving ...................................................... 537
Automatic Transmission .......................... 557
Braking ................................................... 638
Shifting Gear .......................................... 558
Starting the Engine ................................. 550
Driving Position Memory System ............ 216
Dust and Pollen Filter .............................. 711
E
Eco Assist® System ...................................... 13
Econ Mode Indicator ................................................... 99
Electric Power Steering (EPS) System
Indicator ........................................... 96, 743
Electronic Stability Control (ESC) ............ 574
Emergency ................................................ 752
Emergency Engine Stop ........................... 734
Emissions Testing (Readiness Codes) ...... 765
Engine ....................................................... 762
Coolant .................................................. 681
If the Battery Is Dead............................... 735
Oil .......................................................... 676
Starting................................................... 550
22 US ODYSSEY-31THR6400.book 774 ページ 2020年11月16日 月曜日 午後1時41分