Voice commands HONDA PILOT 2013 2.G Navigation Manual
[x] Cancel search | Manufacturer: HONDA, Model Year: 2013, Model line: PILOT, Model: HONDA PILOT 2013 2.GPages: 178, PDF Size: 5.64 MB
Page 3 of 178

Navigation System3
Table of Contents
Clock/Wallpaper ............................ 113
Wallpaper Type..................................113
Clock Adjustment ...............................114
Clock Type .........................................115
Picture Setup......................................115
Reset Factory Default Settings ...... 117
Clear Personal Data ....................... 118
Multi-view Rear Camera ............... 119
Three-way Rearview Modes ..............119
Visible Range of the Rearview
Image.............................................. 120
Multi-view Rear Camera Brightness Adjustment......................................120
System Initialization ...................121
System Initialization ...................... 121
Entering the Security Code ............ 121
GPS Initialization........................... 121
Map Matching ................................ 122
System Limitations......................123
GPS Reception Issues ........................ 123
Database Limitations ..................124
Customer Assistance ...................126
Reporting Errors ............................126
Honda Automobile Customer Service ........................................ 126
Visiting Your Dealer...................... 127Obtaining a Navigation Update ....
127
Coverage Areas........................... 128
Map Coverage................................128
U.S. Detailed Coverage Areas........... 128
Puerto Rico Detailed Coverage Areas .............................................. 133
Canada Detailed Coverage Areas ..... 134
Operation in Alaska, Hawaii, Canada,
and Puerto Rico .......................... 144
Alaska, Hawaii, Canada, and Puerto
Rico ................................................ 144
Frequently Asked Questions ..... 146
Troubleshooting.......................... 153
Glossary ....................................... 154
Glossary ......................................... 154
Voice Command Index............... 157
Global Commands ......................... 157
Navigation Commands .................. 157
General Commands ........................... 157
Map Display Commands ................... 158
Map Scale Commands ...... .................158
Find Place Commands ...................... 159
Route Commands ........... .................... 160
Climate Control Commands .......... 160
Audio Commands .......................... 161
Radio Commands............................... 161
Disc Commands ............. .................... 162 HDD Commands ...........
....................162
USB Commands ............. ....................163
iPod Commands............. ....................163
Bluetooth
® Audio Commands............ 164
AUX Commands ................................ 164
Song By Voice™ Commands ............. 164
Rear Radio Commands ............. .........164
Rear CD Commands ...... ....................165
Rear DVD Commands .... ...................165
Rear HDD Commands.... ...................166
Rear iPod Commands .... ....................167
Rear AUX Commands.... ....................167
Phone Commands ........................... 167
SETUP Screen (Main Setup) Commands................................... 167
On-Screen Commands .................... 168
On-Screen Spelling Assist .............. 168
Index ............................................ 172
Intro
Index
Home
In dex
Ta ble of Contents
Na vigation
Ke y
Introduction
S
Intro
Index
Home
SECSection - 1st page
2013 Pilot
Page 5 of 178
Navigation System5
Introduction
The navigation system applies location,
direction, and speed information to the
maps and calculates a route to the
destination you enter. As you drive to
that destination, the system provides
map and voice guidance.
The navigation system is easy to use.
The locations of many places of
business and entertainment are already
entered in the system. You can select
any of them as a des tination by using the
Interface Dial or voice control.
There are several ways to enter a
destination, such as by point of interest
(POI), by address, by phone number,
and by selecting it from the map. The
last 50 destinations are saved for reuse
at a later date. The system also allows
you to store a home address to simplify
returning home from your destination.Accessories Precautions
If you have front or side window tinting
installed, be aware that if the tint has
metallic properties, it can seriously
degrade or prevent GPS reception. This
is because the GPS antenna is located in
the dashboard.
If you plan to install electronic
components such as radar detectors,
vehicle tracking devices, remote
starters, additional amplifiers, or other
audio components, ensure that they are
not located near the navigation display,
or near the GPS antenna in the
dashboard. Signal noise emanating from
these devices can cause intermittent
disruption of the navigation system.
Important Safety Information
The navigation system can distract your
attention from the road if you focus on
the screen or operate the system’s
controls while driving.
Enter as much info rmation as possible
into the system before you begin
driving, or when the vehicle is stopped.
Then, as you drive, listen to the audio
instructions and use voice commands
when possible.
Intro
Index
Home
2013 Pilot
Page 13 of 178
Navigation System13
Getting Started
Voice Control Basics
Your vehicle has a voice control system
that allows hands-free operation of most
of the navigation system functions. You
can also control the audio, phone, and
climate control system. The voice
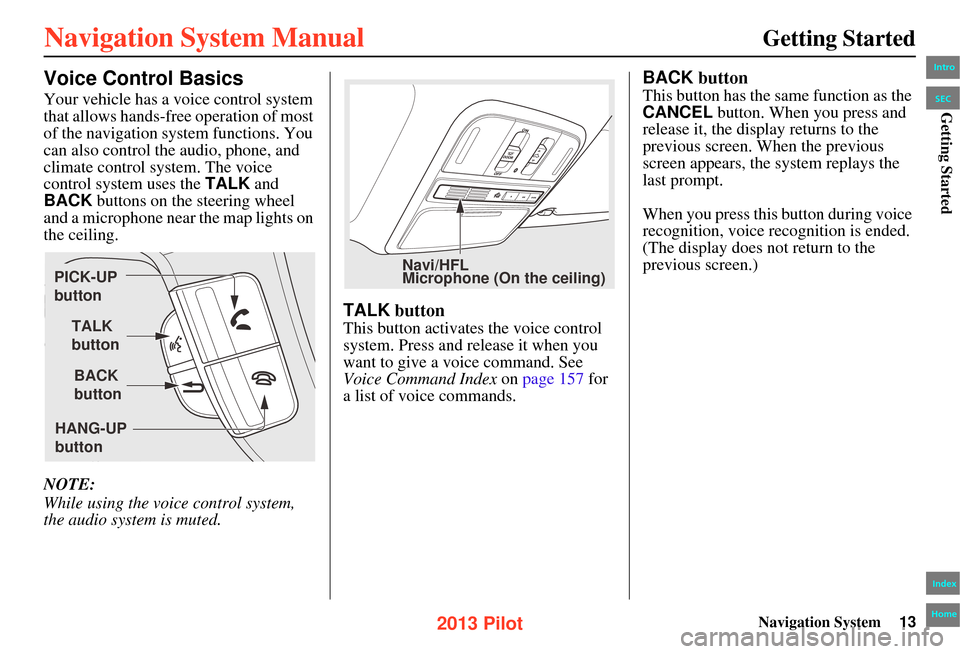
control system uses the TALK and
BACK buttons on the steering wheel
and a microphone near the map lights on
the ceiling.
NOTE:
While using the voic e control system,
the audio system is muted.
TALK button
This button activates the voice control
system. Press and release it when you
want to give a vo ice command. See
Voice Command Index on page 157 for
a list of voice commands.
BACK button
This button has the same function as the
CANCEL button. When you press and
release it, the display returns to the
previous screen. When the previous
screen appears, the system replays the
last prompt.
When you press this button during voice
recognition, voice recognition is ended.
(The display does not return to the
previous screen.)
TALK
button
BACK
button
PICK-UP
button
HANG-UP
button
Navi/HFL
Microphone (On the ceiling)
Intro
Index
Home
SECGetting Started
2013 Pilot
Page 14 of 178
14Navigation System
Getting Started
Using the Voice Control System
You should use the voice control system
as much as possible, and consider
manual entry using the Interface Dial
as a backup method.
Most of the system’s functions can be
controlled by voice commands activated
with the TALK button. To control the
navigation system by voice:
• Press and release the TALK button. A
guidance prompt will be played, and
a pop-up voice icon ( ) will appear
in the upper left corner of the screen.
• Wait for the beep.
• Give a voice command. (Voice commands that the system recognizes
are highlighted.)
Once the microphone picks up your
command, the system changes the
display in response to the command.
Press the TALK button to get a
guidance prompt for the next command.
NOTE:
To interrupt guidance prompts, press
the TALK button again. Wait for the
beep, and give a command. If the system does not understand a
command or you wait too long to give a
command, it responds with “Pardon? No
comment was heard. Please press the
Talk button and say a command.” If the
system cannot perform a command or
the command is not appropriate for the
screen you are on, a beep will sound.
You can find out which voice
commands are available for a particular
screen by saying “Help.” The system
will display and read the list of available
commands to you. (When
Help is
grayed out, this feature cannot be used.)
When you give a command, the system
either performs the command or
transitions to the next step in a task.
NOTE:
Guidance prompts can be turned off.
See page 55. If you hear a prompt such as “Please use
the
Interface Dial to...” or “Please
choose an area with the Interface Dial,”
the system is asking for input that
cannot be performed using the voice
control system.
Improving Voice Recognition
To achieve optimum voice recognition
when using the voice control system, the
following guidelines should be
followed:
NOTE:
Make sure the correct screen is
displayed for the voice command that
you are using. See Voice Command
Index on page 157.
• It is best if the windows and moonroof are closed. If they are open,
speak a little louder to overcome the
wind noises.
Intro
Index
Home
SECGetting Started
2013 Pilot
Page 18 of 178
18Navigation System
Getting Started
System Start-up
When you turn the ignition to ON (II), it
takes about 10 seconds for the
navigation system to boot up.
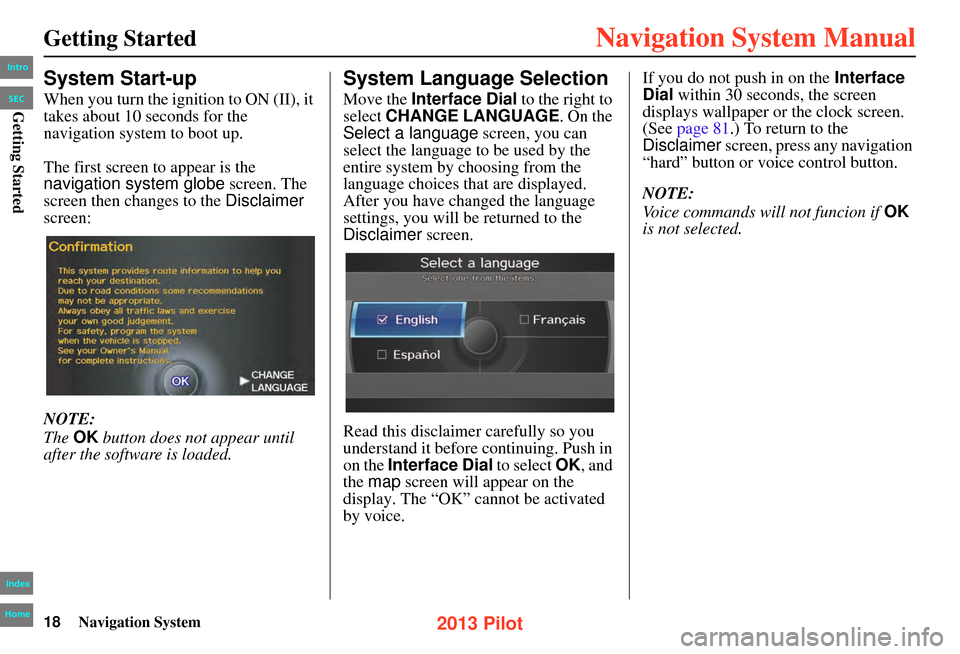
The first screen to appear is the
navigation system globe screen. The
screen then changes to the Disclaimer
screen:
NOTE:
The OK button does not appear until
after the software is loaded.
System Language Selection
Move the Interface Dial to the right to
select CHANGE LANGUAGE . On the
Select a language screen, you can
select the language to be used by the
entire system by choosing from the
language choices that are displayed.
After you have changed the language
settings, you will be returned to the
Disclaimer screen.
Read this disclaimer carefully so you
understand it before continuing. Push in
on the Interface Dial to select OK, and
the map screen will appear on the
display. The “OK” cannot be activated
by voice. If you do not push in on the
Interface
Dial within 30 seconds, the screen
displays wallpaper or the clock screen.
(See page 81.) To return to the
Disclaimer screen, press any navigation
“hard” button or voice control button.
NOTE:
Voice commands will not funcion if OK
is not selected.
Intro
Index
Home
SECGetting Started
2013 Pilot
Page 27 of 178
Navigation System27
Getting Started
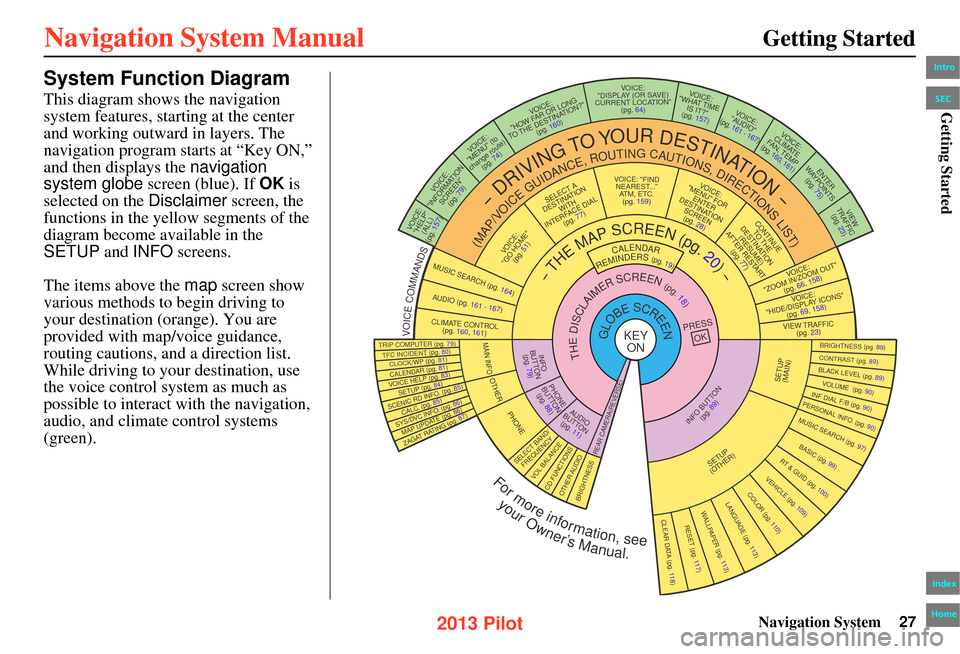
System Function Diagram
This diagram shows the navigation
system features, starting at the center
and working outward in layers. The
navigation program starts at “Key ON,”
and then displays the navigation
system globe screen (blue). If OK is
selected on the Disclaimer screen, the
functions in the yellow segments of the
diagram become available in the
SETUP and INFO screens.
The items above the map screen show
various methods to begin driving to
your destination (orange). You are
provided with map/voice guidance,
routing cautions, an d a direction list.
While driving to your destination, use
the voice control system as much as
possible to interact with the navigation,
audio, and climate control systems
(green).
REMINDERS(pg.19)CALENDAR
-THEMAPSCREEN(pg.20)-
(MAP/VOICEGUIDANCE,ROUTINGCAUTIONS,DIRECTIONSLIST)
-DRIVINGTOYOURDESTINATION-
VOI CE:
"HELP" (ALL)
(pg. 157)
VOI CE:
"INFORMATION SCREEN"(pg. 79)
VOICE:
"MENU" (to
change route) (pg. 74)
VOICE:
"HOW FAR OR LONG
TO THE DESTINATION?" (pg. 160)
VOICE:
"DISPLAY (OR SAVE)
CURRENT LOCATION" (pg. 64)VOICE:
"WHAT TIME IS IT?"
(pg. 157)
VOICE:
"AUDIO"
(pg. 161 - 167)
VOI CE:
CLIMATE
FA N , TEMP
(pg. 160, 161)
ENTER
WAYPOINTS (pg. 75)
VIEW
TRAFFIC(pg. 23)
VOICE:
"ZOOM IN/ZOOM OUT" (pg. 66, 158)
VOICE:
"HIDE/DISPLAY ICONS" (pg. 69, 158)
VIEW TRAFFIC(pg. 23)
BRIGHTNESS (pg. 89)CONTRAST (pg. 89)BLACK LEVE L (pg. 89)VOLUME (pg. 90)INF DIAL F/B (pg. 90)PERSONAL INFO. (pg. 90)
MUSIC SEARCH (pg. 97)
BASIC (pg. 99)RT & GUID (pg. 100)
VEHICLE (pg. 109)COLOR (pg. 110)LANGUAGE (pg. 113)
CLEAR DATA (pg. 118)RESET (pg. 117)WALLPAPER (pg. 113)
ZAGAT RATING (pg. 87)
TFC INCIDENT (pg. 80)TRIP COMPUTER (pg. 79)
CALENDAR (pg. 81)VOICE HELP (pg. 83)SETUP (pg. 84)
SYS/DVC INFO. (pg. 86)MAP UPDATE (pg. 86)
SCENIC RD INFO. (pg. 85)
PRESS
OK
SELECT BAND/FREQUENCYVOL BALANCECD FUNCTIONSOTHER AUDIOBRIGHTNESS
REAR CAMERA(REVERSE)
INFO BUTTON (pg. 89)AUD IO
BUTTON (pg. 11)
INFO
BUT TON
(pg. 79)
PHONE
BUT TON
(pg. 88)
PHONE
THEDISCLAIMERSCREEN(pg.18)
VOICE: "FIND NEAREST..." ATM, ETC.(pg. 159)
SELECT A
DESTINATION WITH
INTERF ACE DIAL
(pg. 77)
VOI CE:
"GO HOME" (pg. 51)
VOICE:
"MENU" FOR ENTER
DESTINATION SCREEN(pg. 28)
CONTINUE TO THE
DESTINATION (RESUME)
AFTER RESTART (pg. 77)
GLOBESCREENKEYONVOICECOMMANDSMUSIC SEARCH
(pg. 164)AUDIO (pg. 161 - 167)
CLIMATE CONTROL
(pg. 160, 161)
Formoreinformation,see
yourOwner’sManual.
SETUP
(OTHER)
CLOCK/WP (pg. 81)
CALC. (pg. 85)
MAIN INFO
OTHERSETUP
(MAIN)
Intro
Index
Home
SECGetting Started
2013 Pilot
Page 36 of 178
36Navigation System
Entering a Destination
Scroll through the list and say the line
number (1-6) of the destination, or
select the desired destination you want.
Once you select the desired destination,
the system then displays the Calculate
route to screen (see Driving to Your
Destination on page 52 ).
NOTE:
• Prior to departure, you can set areas to avoid. The system then includes
them in its calculations for the
destination you have entered. See
Edit Avoid Area on page 105.
• For information on the available voice commands, see Voice
Command Index on page 157.By Place Name
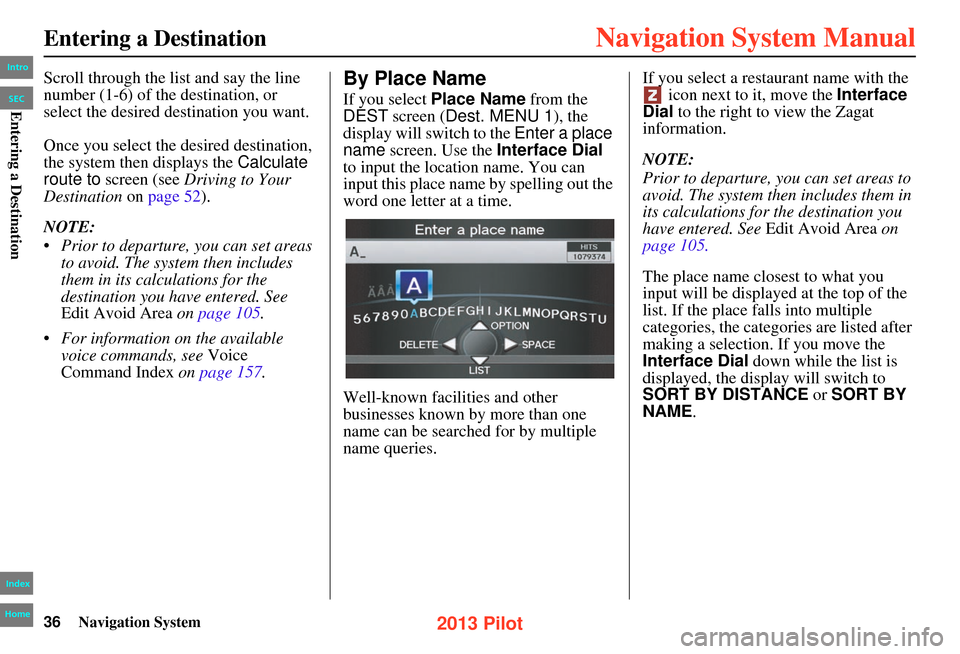
If you select Place Name from the
DEST screen ( Dest. MENU 1), the
display will switch to the Enter a place
name screen. Use the Interface Dial
to input the locati on name. You can
input this place name by spelling out the
word one letter at a time.
Well-known facilities and other
businesses known by more than one
name can be searched for by multiple
name queries. If you select a restaurant name with the
icon next to it, move the Interface
Dial to the right to view the Zagat
information.
NOTE:
Prior to departure, you can set areas to
avoid. The system then includes them in
its calculations for the destination you
have entered. See Edit Avoid Area on
page 105.
The place name closest to what you
input will be displayed at the top of the
list. If the place falls into multiple
categories, the categories are listed after
making a selection. If you move the
Interface Dial down while the list is
displayed, the display will switch to
SORT BY DISTANCE or SORT BY
NAME .
Intro
Index
Home
SECEntering a Destination
2013 Pilot
Page 37 of 178
Navigation System37
Entering a Destination
NOTE:
When there are more than 2,000
destinations, the ordering of the items in
the list cannot be sorted by distance or
name.
When you select a location, the system
displays the Calculate route to screen.
(See Driving to Your Destination on
page 52 .)By Place Category
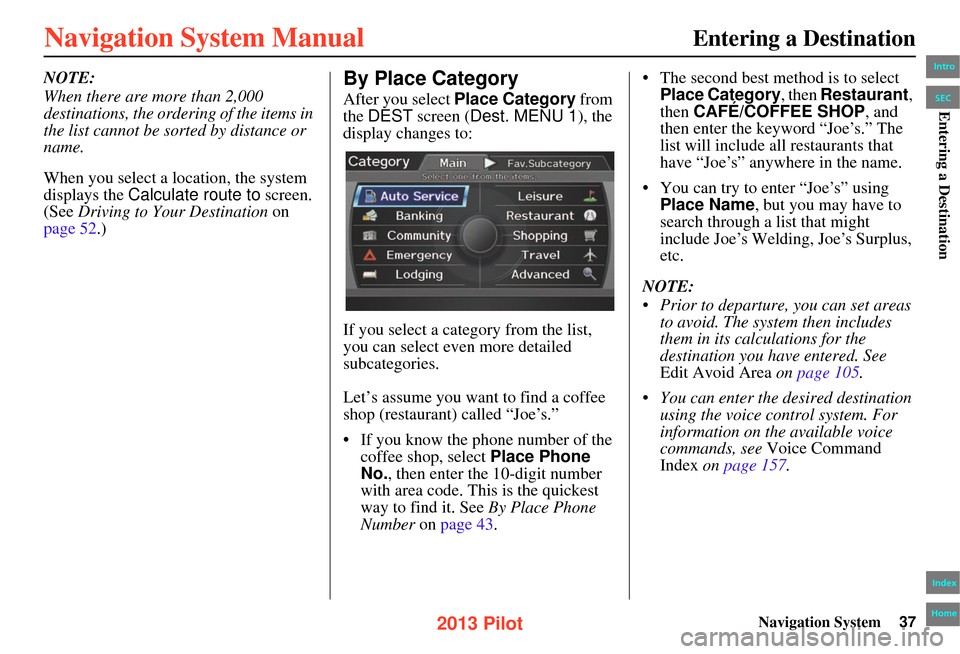
After you select Place Category from
the DEST screen ( Dest. MENU 1 ), the
display changes to:
If you select a category from the list,
you can select even more detailed
subcategories.
Let’s assume you want to find a coffee
shop (restaurant) called “Joe’s.”
• If you know the phone number of the coffee shop, select Place Phone
No. , then enter the 10-digit number
with area code. This is the quickest
way to find it. See By Place Phone
Number on page 43 . • The second best method is to select
Place Category, then Restaurant,
then CAFÉ/COFFEE SHOP , and
then enter the keyword “Joe’s.” The
list will include all restaurants that
have “Joe’s” anywhere in the name.
• You can try to enter “Joe’s” using Place Name , but you may have to
search through a list that might
include Joe’s Welding, Joe’s Surplus,
etc.
NOTE:
• Prior to departure, you can set areas to avoid. The system then includes
them in its calculations for the
destination you have entered. See
Edit Avoid Area on page 105 .
• You can enter the desired destination using the voice control system. For
information on the available voice
commands, see Voice Command
Index on page 157.
Intro
Index
Home
SECEntering a Destination
2013 Pilot
Page 46 of 178
46Navigation System
Entering a Destination
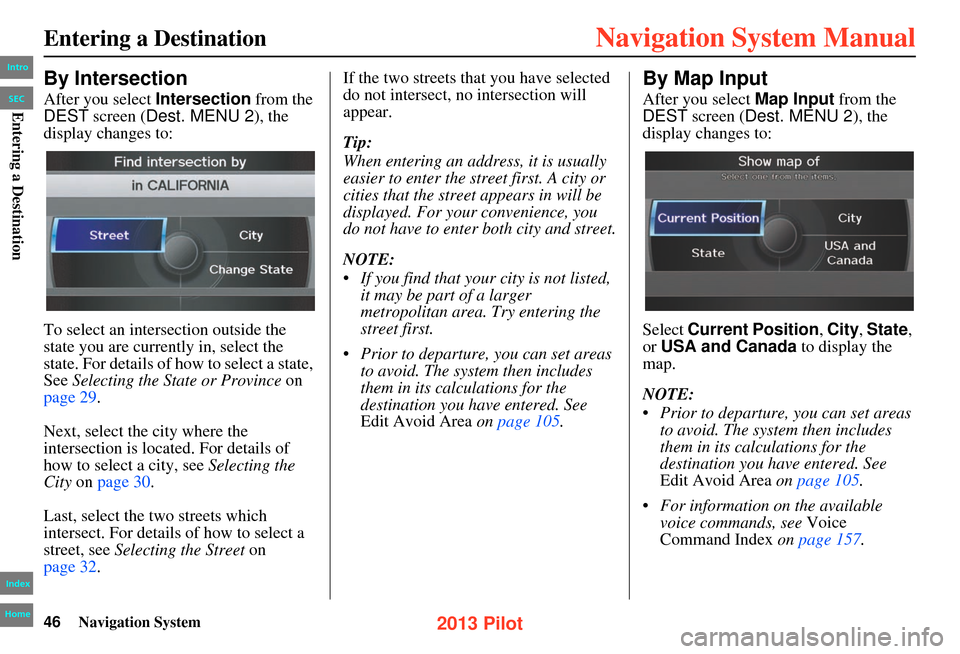
By Intersection
After you select Intersection from the
DEST screen ( Dest. MENU 2), the
display changes to:
To select an intersection outside the
state you are currently in, select the
state. For details of how to select a state,
See Selecting the State or Province on
page 29 .
Next, select the city where the
intersection is located. For details of
how to select a city, see Selecting the
City on page 30 .
Last, select the two streets which
intersect. For details of how to select a
street, see Selecting the Street on
page 32 . If the two streets that you have selected
do not intersect, no intersection will
appear.
Tip:
When entering an address, it is usually
easier to enter the street first. A city or
cities that the street appears in will be
displayed. For your convenience, you
do not have to enter both city and street.
NOTE:
• If you find that your city is not listed,
it may be part of a larger
metropolitan area. Try entering the
street first.
• Prior to departure, you can set areas to avoid. The system then includes
them in its calculations for the
destination you have entered. See
Edit Avoid Area on page 105 .
By Map Input
After you select Map Input from the
DEST screen (Dest. MENU 2 ), the
display changes to:
Select Current Position , City , State ,
or USA and Canada to display the
map.
NOTE:
• Prior to departure, you can set areas
to avoid. The system then includes
them in its calculations for the
destination you have entered. See
Edit Avoid Area on page 105 .
• For information on the available voice commands, see Voice
Command Index on page 157.
Intro
Index
Home
SECEntering a Destination
2013 Pilot
Page 52 of 178
52Navigation System
Driving to Your Destination
A route typically has three phases.
• Initial route calculation (the Calculate route to screen) (see
this page).
• Change the route while en route (see page 73 ).
• Resume the route when restarting the engine (see Continue Trip to Screen
on page 78 ).
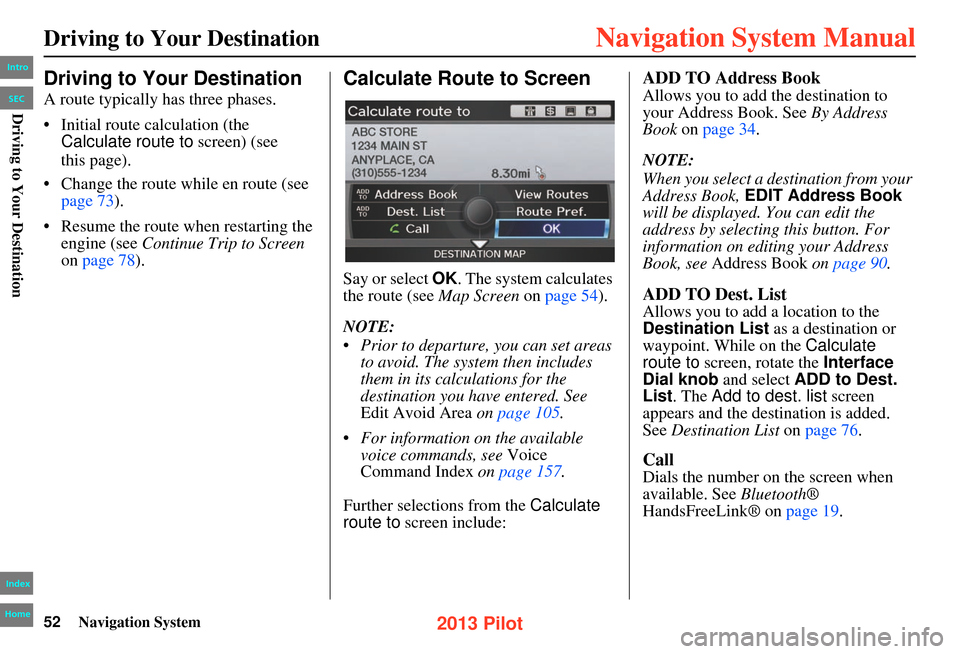
Calculate Route to Screen
Say or select OK. The system calculates
the route (see Map Screen on page 54).
NOTE:
• Prior to departure, you can set areas to avoid. The system then includes
them in its calculations for the
destination you have entered. See
Edit Avoid Area on page 105 .
• For information on the available voice commands, see Voice
Command Index on page 157.
Further selections from the Calculate
route to screen include:
ADD TO Address Book
Allows you to add the destination to
your Address Book. See By Address
Book on page 34 .
NOTE:
When you select a destination from your
Address Book, EDIT Address Book
will be displayed. You can edit the
address by selecting this button. For
information on editing your Address
Book, see Address Book on page 90.
ADD TO Dest. List
Allows you to add a location to the
Destination List as a destination or
waypoint. While on the Calculate
route to screen, rotate the Interface
Dial knob and select ADD to Dest.
List . The Add to dest. list screen
appears and the destination is added.
See Destination List on page 76.
Call
Dials the number on the screen when
available. See Bluetooth ®
HandsFreeLink® on page 19 .
Driving to Your Destination
Intro
Index
Home
SECDriving to Your Destination
2013 Pilot