change time HONDA PILOT 2015 2.G Navigation Manual
[x] Cancel search | Manufacturer: HONDA, Model Year: 2015, Model line: PILOT, Model: HONDA PILOT 2015 2.GPages: 175, PDF Size: 5.87 MB
Page 52 of 175
52
Navigation System
Driving to Your DestinationBased on the route data, you can change
the routing method by rotating the
Interface Dial knob.
Once you confirm your selection, say
the number of the desired routing
method or push in on the Interface
Dial .
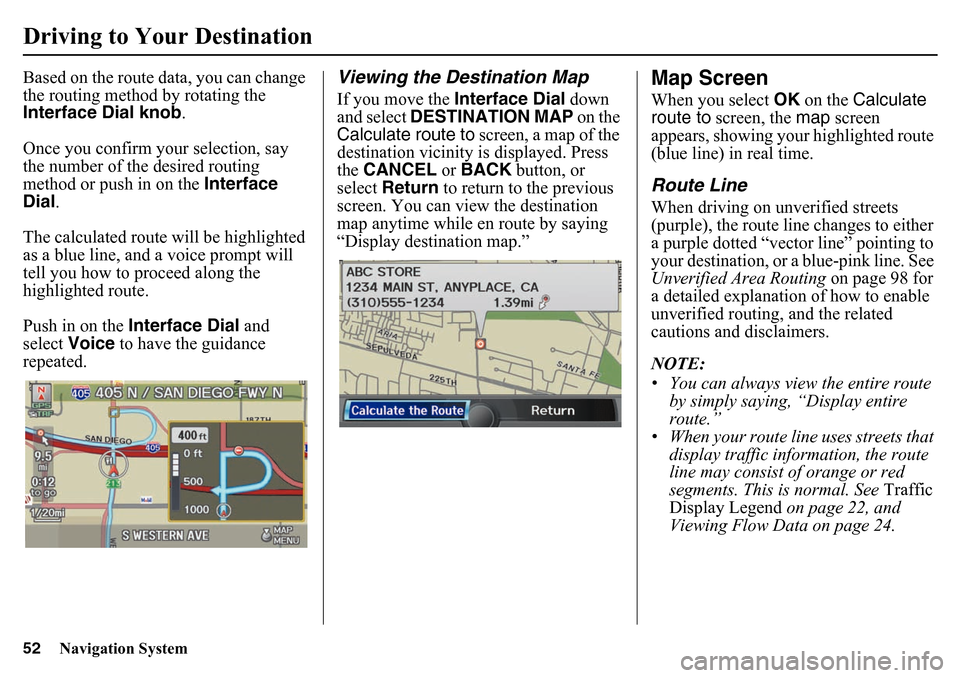
The calculated route will be highlighted
as a blue line, and a voice prompt will
tell you how to proceed along the
highlighted route.
Push in on the Interface Dial and
select Voice to have the guidance
repeated.
Viewing the Destination MapIf you move the Interface Dial down
and select DESTINATION MAP on the
Calculate route to screen, a map of the
destination vicinity is displayed. Press
the CANCEL or BACK button, or
select Return to return to the previous
screen. You can view the destination
map anytime while en route by saying
“Display destination map.”
Map ScreenWhen you select OK on the Calculate
route to screen, the map screen
appears, showing your highlighted route
(blue line) in real time.Route LineWhen driving on unverified streets
(purple), the route line changes to either
a purple dotted “vector line” pointing to
your destination, or a blue-pink line. See
Unverified Area Routing on page 98 for
a detailed explanation of how to enable
unverified routing, and the related
cautions and disclaimers.
NOTE:
• You can always view the entire route by simply saying, “Display entire
route.”
• When your route line uses streets that display traffic information, the route
line may consist of orange or red
segments. This is normal. See Traffic
Display Legend on page 22, and
Viewing Flow Data on page 24.
Page 56 of 175
56
Navigation System
Driving to Your DestinationDistance and Time to
DestinationWhen you select a destination, the
distance to the destination is the actual
road distance of the calculated route,
and not “as the crow flies.” When
viewing a list of destinations (points of
interest), such as restaurants, the
distance is “as the crow flies” (see Sort
by Distance to Travel on page 40).
The displayed time to the destination
may differ from the actual travel time
because the time is calculated based on
the posted road speed data and your
current speed.
NOTE:
If you are en route and the Interface
Dial is moved, the “Time to
Destination” an d “Distance to
Destination” indica tions are replaced
with an indicator showing distance from
the current vehicle location.
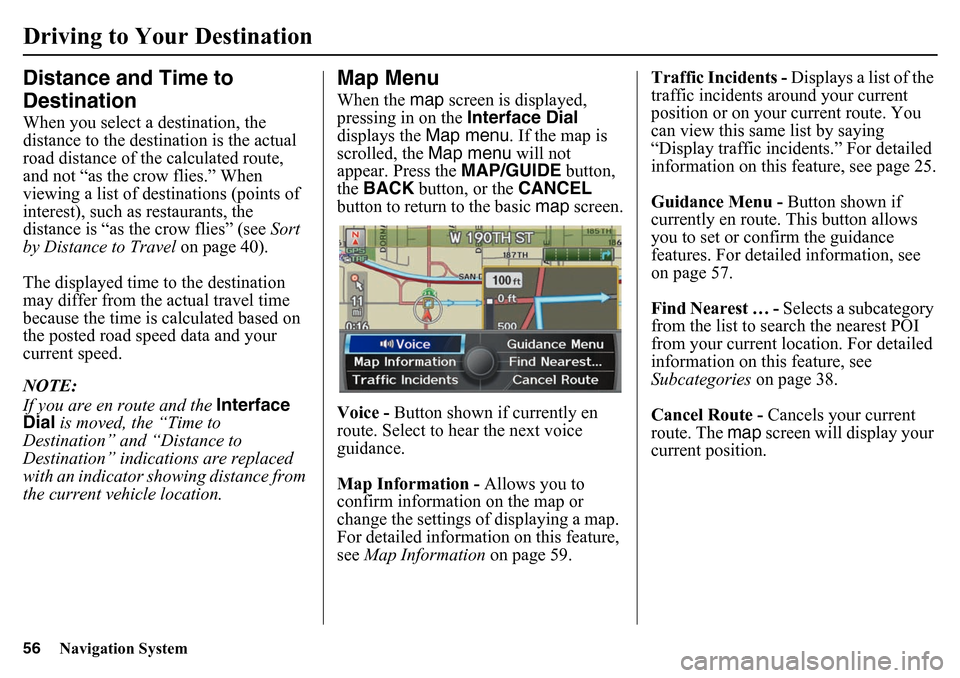
Map MenuWhen the map screen is displayed,
pressing in on the Interface Dial
displays the Map menu. If the map is
scrolled, the Map menu will not
appear. Press the MAP/GUIDE button,
the BACK button, or the CANCEL
button to return to the basic map screen.
Voice - Button shown if currently en
route. Select to hear the next voice
guidance.
Map Information - Allows you to
confirm information on the map or
change the settings of displaying a map.
For detailed informatio n on this feature,
see Map Information on page 59. Traffic Incidents -
Displays a list of the
traffic incidents around your current
position or on your current route. You
can view this same list by saying
“Display traffic incidents.” For detailed
information on this feature, see page 25.
Guidance Menu - Button shown if
currently en route. This button allows
you to set or confirm the guidance
features. For detailed information, see
on page 57.
Find Nearest … - Selects a subcategory
from the list to search the nearest POI
from your current location. For detailed
information on this feature, see
Subcategories on page 38.
Cancel Route - Cancels your current
route. The map screen will display your
current position.
Page 57 of 175
Navigation System57
Driving to Your Destination
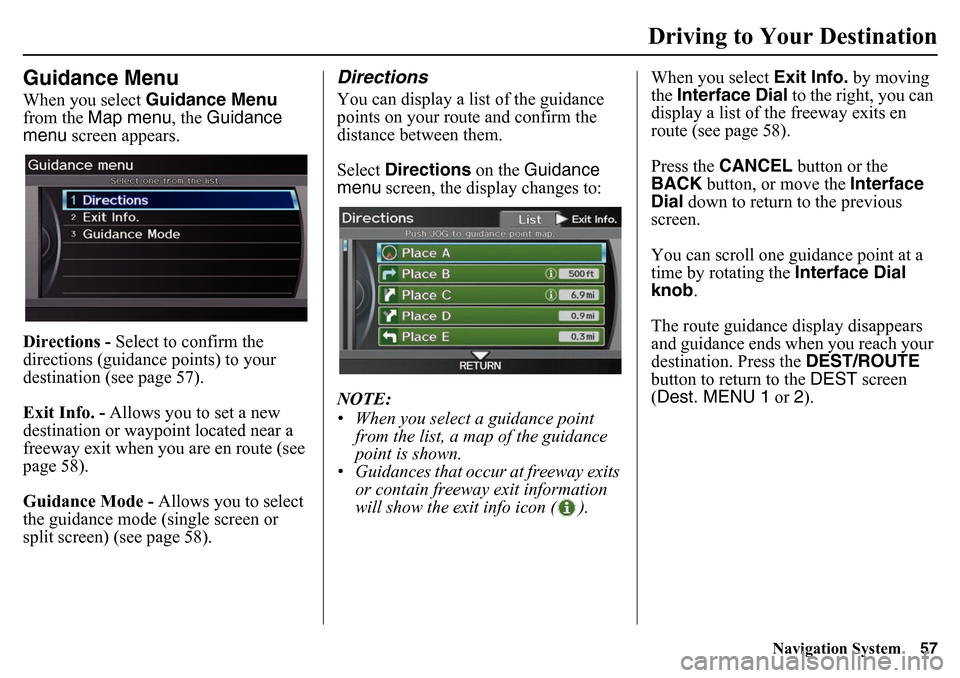
Guidance MenuWhen you select Guidance Menu
from the Map menu , the Guidance
menu screen appears.
Directions - Select to confirm the
directions (guidance points) to your
destination (see page 57).
Exit Info. - Allows you to set a new
destination or waypoint located near a
freeway exit when you are en route (see
page 58).
Guidance Mode - Allows you to select
the guidance mode (single screen or
split screen) (see page 58).
DirectionsYou can display a list of the guidance
points on your route and confirm the
distance between them.
Select Directions on the Guidance
menu screen, the display changes to:
NOTE:
• When you select a guidance point from the list, a map of the guidance
point is shown.
• Guidances that occur at freeway exits or contain freeway exit information
will show the exit info icon ( ). When you select
Exit Info. by moving
the Interface Dial to the right, you can
display a list of the freeway exits en
route (see page 58).
Press the CANCEL button or the
BACK button, or move the Interface
Dial down to return to the previous
screen.
You can scroll one guidance point at a
time by rotating the Interface Dial
knob .
The route guidance display disappears
and guidance ends when you reach your
destination. Press the DEST/ROUTE
button to return to the DEST screen
(Dest. MENU 1 or 2).
Page 62 of 175
62
Navigation System
Driving to Your DestinationCurrent LocationWhenever you are on a map screen, you
can always obtain your current location
either by pushing in on the Interface
Dial , selecting Current Location
from Map Information, or by using
the voice control system and saying
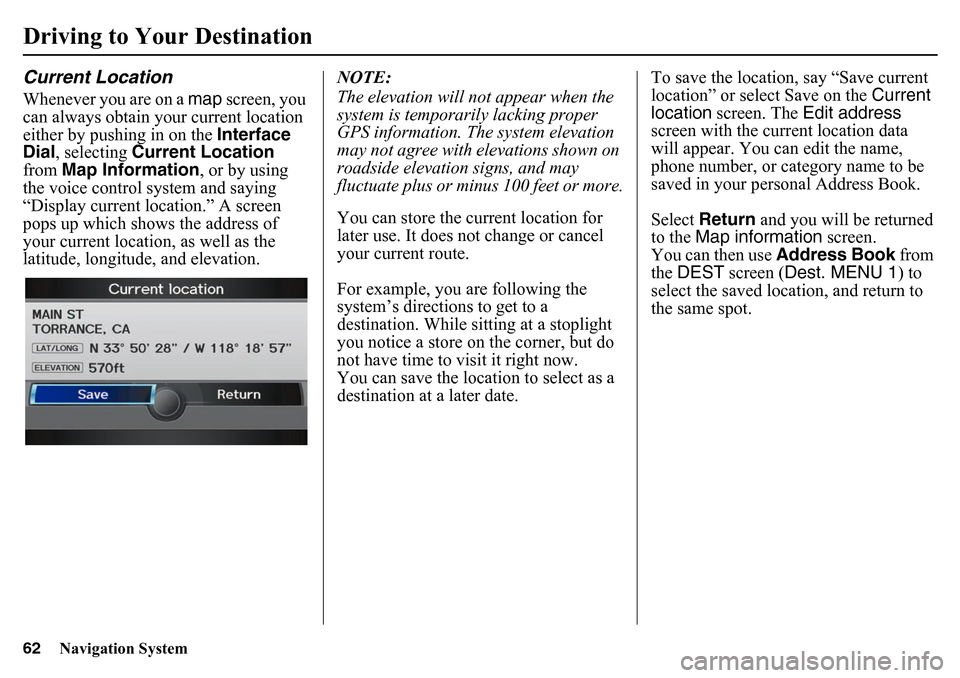
“Display current location.” A screen
pops up which shows the address of
your current location, as well as the
latitude, longitude, and elevation. NOTE:
The elevation will not appear when the
system is temporarily lacking proper
GPS information. The system elevation
may not agree with elevations shown on
roadside elevation signs, and may
fluctuate plus or minus 100 feet or more.
You can store the current location for
later use. It does not change or cancel
your current route.
For example, you are following the
system’s directions to get to a
destination. While sitting at a stoplight
you notice a store on the corner, but do
not have time to visit it right now.
You can save the location to select as a
destination at a later date.To save the location, say “Save current
location” or select Save on the
Current
location screen. The Edit address
screen with the current location data
will appear. You ca n edit the name,
phone number, or category name to be
saved in your personal Address Book.
Select Return and you will be returned
to the Map information screen.
You can then use Address Book from
the DEST screen ( Dest. MENU 1 ) to
select the saved location, and return to
the same spot.
Page 73 of 175
Navigation System73
Driving to Your Destination
WaypointWaypoints allow you to add an interim
“pit stop” while traveling to a
destination. For instance, you may want
to stop for gas or food, and then
continue on to your destination.
Although you can enter up to five places
including the destination at a time,
typically you may never use more than
one at a time.
Waypoints are routed to in the order
they were entered (number 1 first, etc.),
with your final destination routed to last.
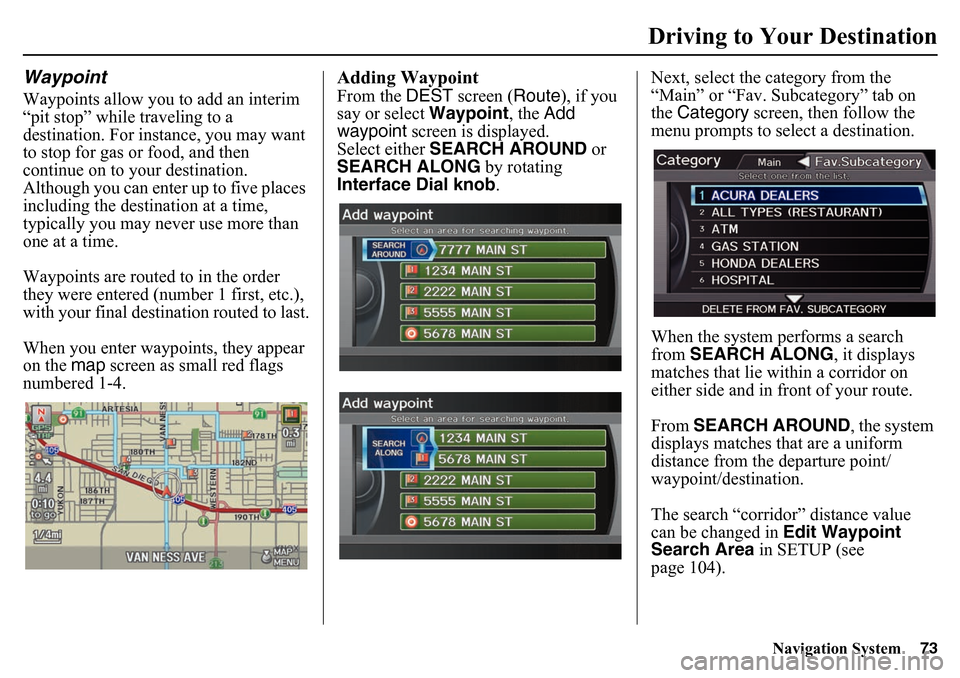
When you enter waypoints, they appear
on the map screen as small red flags
numbered 1-4.
Adding WaypointFrom the DEST screen (Route ), if you
say or select Waypoint, the Add
waypoint screen is displayed.
Select either SEARCH AROUND or
SEARCH ALONG by rotating
Interface Dial knob .Next, select the category from the
“Main” or “Fav. Subcategory” tab on
the
Category screen, then follow the
menu prompts to select a destination.
When the system performs a search
from SEARCH ALONG , it displays
matches that lie within a corridor on
either side and in front of your route.
From SEARCH AROUND, the system
displays matches that are a uniform
distance from the departure point/
waypoint/destination.
The search “corridor” distance value
can be changed in Edit Waypoint
Search Area in SETUP (see
page 104).
Page 78 of 175
78
Navigation System
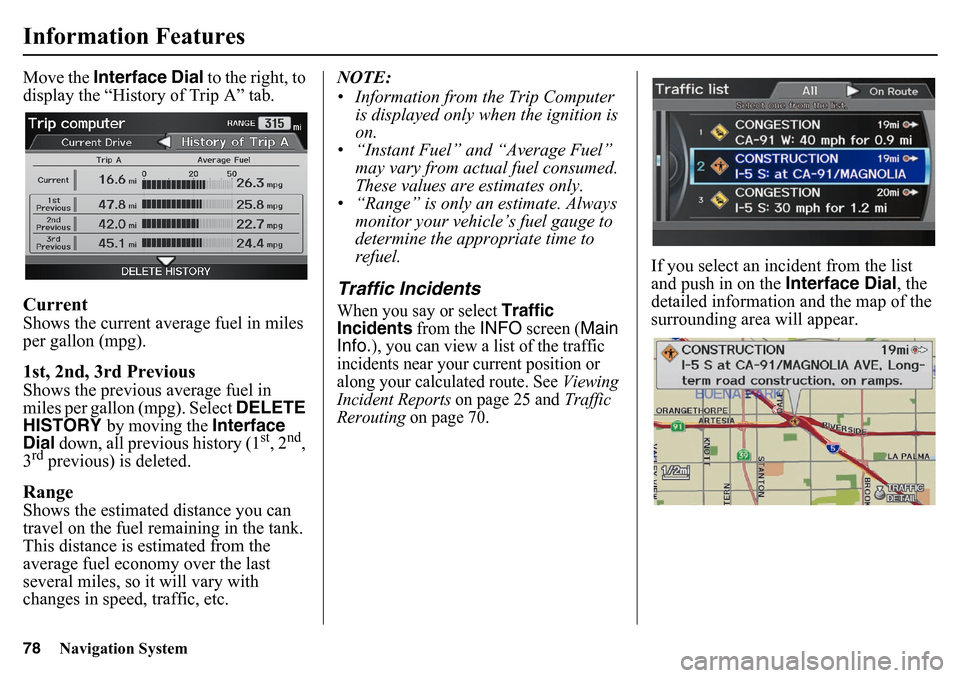
Information FeaturesMove the Interface Dial to the right, to
display the “History of Trip A” tab. CurrentShows the current average fuel in miles
per gallon (mpg).1st, 2nd, 3rd PreviousShows the previous average fuel in
miles per gallon (mpg). Select DELETE
HISTORY
by moving the
Interface
Dial
down
, all previous history (1
st, 2
nd,
3
rd previous) is deleted.
RangeShows the estimated distance you can
travel on the fuel remaining in the tank.
This distance is estimated from the
average fuel economy over the last
several miles, so it will vary with
changes in speed, traffic, etc. NOTE:
• Information from the Trip Computer
is displayed only when the ignition is
on.
• “Instant Fuel” and “Average Fuel”
may vary from actual fuel consumed.
These values are estimates only.
• “Range” is only an estimate. Always
monitor your vehicle’s fuel gauge to
determine the appropriate time to
refuel.
Traffic IncidentsWhen you say or select
Traffic
Incidents
from the
INFO
screen (
Main
Info.
), you can view a list of the traffic
incidents near your current position or
along your calculated route. See
Viewing
Incident Reports
on page 25 and
Traffic
Rerouting
on page 70.
If you select an incident from the list
and push in on the Interface Dial, the
detailed information and the map of the
surrounding area will appear.
Page 80 of 175
80
Navigation System
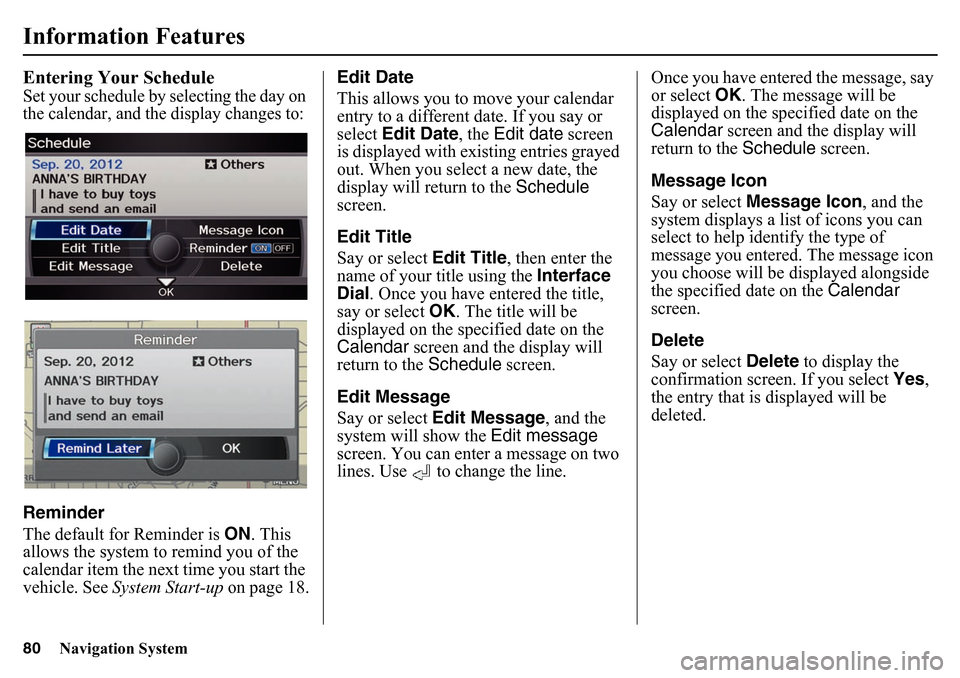
Information FeaturesEntering Your ScheduleSet your schedule by selecting the day on
the calendar, and the display changes to:Reminder
The default for Reminder is ON. This
allows the system to remind you of the
calendar item the next time you start the
vehicle. See System Start-up on page 18.Edit Date
This allows you to
move your calendar
entry to a different date. If you say or
select Edit Date , the Edit date screen
is displayed with ex isting entries grayed
out. When you select a new date, the
display will return to the Schedule
screen.
Edit Title
Say or select Edit Title, then enter the
name of your title using the Interface
Dial . Once you have entered the title,
say or select OK. The title will be
displayed on the spec ified date on the
Calendar screen and the display will
return to the Schedule screen.
Edit Message
Say or select Edit Message, and the
system will show the Edit message
screen. You can enter a message on two
lines. Use to change the line. Once you have entered the message, say
or select
OK. The message will be
displayed on the specified date on the
Calendar screen and the display will
return to the Schedule screen.
Message Icon
Say or select Message Icon , and the
system displays a list of icons you can
select to help identify the type of
message you entered. The message icon
you choose will be displayed alongside
the specified date on the Calendar
screen.
Delete
Say or select Delete to display the
confirmation screen. If you select Yes,
the entry that is displayed will be
deleted.
Page 86 of 175
86
Navigation System
SETUP ModeThe SETUP function consists of two
main screens that allow you to change
and update information in the system.
NOTE:
For information on the available voice
commands, see page 164.
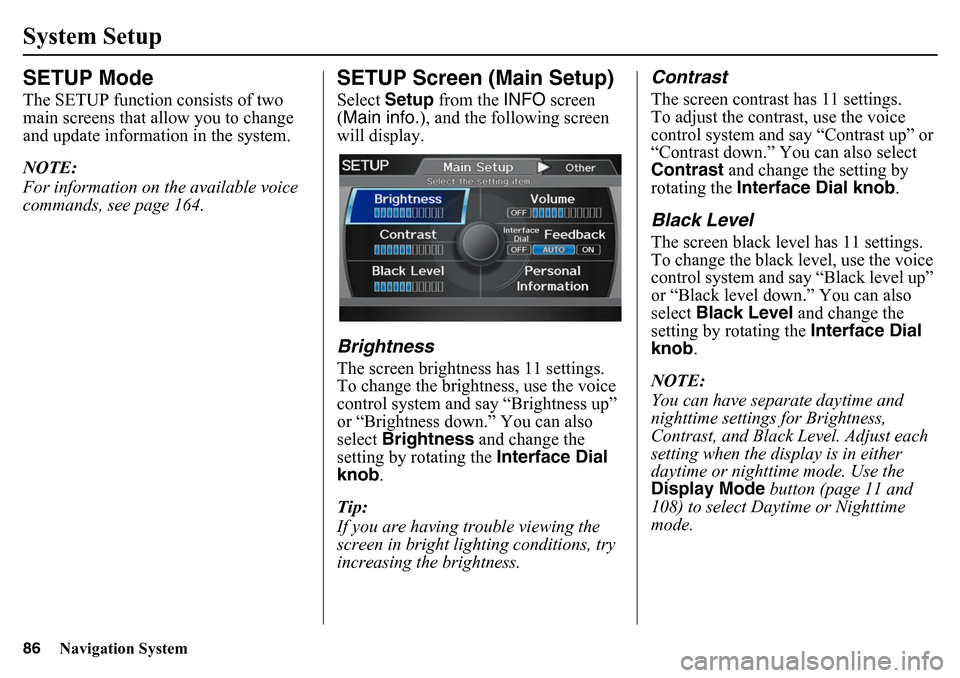
SETUP Screen (Main Setup)Select Setup from the INFO screen
(Main info.), and the following screen
will display.BrightnessThe screen brightness has 11 settings.
To change the brightness, use the voice
control system and say “Brightness up”
or “Brightness down.” You can also
select Brightness and change the
setting by rotating the Interface Dial
knob.
Tip:
If you are having trouble viewing the
screen in bright lig hting conditions, try
increasing the brightness.
ContrastThe screen contrast has 11 settings.
To adjust the contrast, use the voice
control system and say “Contrast up” or
“Contrast down.” You can also select
Contrast and change the setting by
rotating the Interface Dial knob .Black LevelThe screen black level has 11 settings.
To change the black level, use the voice
control system and say “Black level up”
or “Black level down.” You can also
select Black Level and change the
setting by rotating the Interface Dial
knob .
NOTE:
You can have separate daytime and
nighttime settings for Brightness,
Contrast, and Black Level. Adjust each
setting when the display is in either
daytime or nighttime mode. Use the
Display Mode button (page 11 and
108) to select Daytime or Nighttime
mode.
System Setup
Page 92 of 175
92
Navigation System
System SetupPIN NumberYou can set a four-digit PIN (Personal
Identification Number) for accessing
and changing personal addresses and
your home address if desired. Once you
set the PIN on this screen, the system
asks you to enter the PIN when you
access a personal address or your home
address.
NOTE:
PINs are optional. If you choose to use a
PIN, make sure you remember it. If you
forget your PIN, the dealer will have to
reset it for you, and all of your stored
information will be cleared.
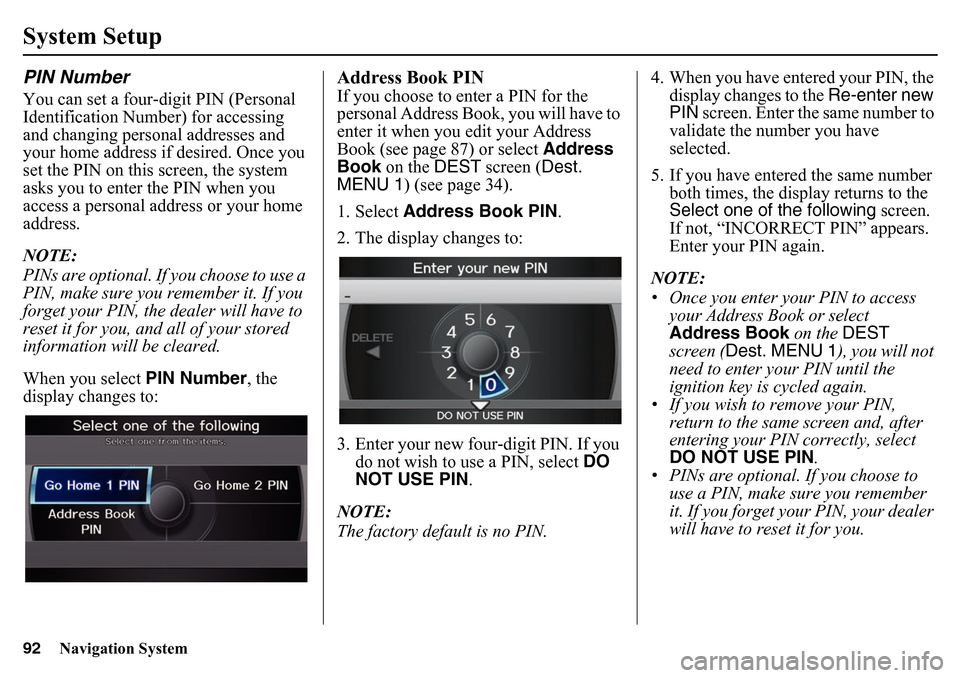
When you select PIN Number, the
display changes to:
Address Book PINIf you choose to enter a PIN for the
personal Address Book, you will have to
enter it when you edit your Address
Book (see page 87) or select Address
Book on the DEST screen ( Dest.
MENU 1) (see page 34).
1. Select Address Book PIN .
2. The display changes to:
3. Enter your new four-digit PIN. If you do not wish to use a PIN, select DO
NOT USE PIN .
NOTE:
The factory default is no PIN. 4. When you have entered your PIN, the
display changes to the Re-enter new
PIN screen. Enter the same number to
validate the number you have
selected.
5. If you have entered the same number both times, the display returns to the
Select one of the following screen.
If not, “INCORRECT PIN” appears.
Enter your PIN again.
NOTE:
• Once you enter your PIN to access your Address Book or select
Address Book on the DEST
screen ( Dest. MENU 1 ), you will not
need to enter your PIN until the
ignition key is cycled again.
• If you wish to remove your PIN,
return to the same screen and, after
entering your PIN correctly, select
DO NOT USE PIN .
• PINs are optional. If you choose to use a PIN, make sure you remember
it. If you forget your PIN, your dealer
will have to reset it for you.
Page 106 of 175
106
Navigation System
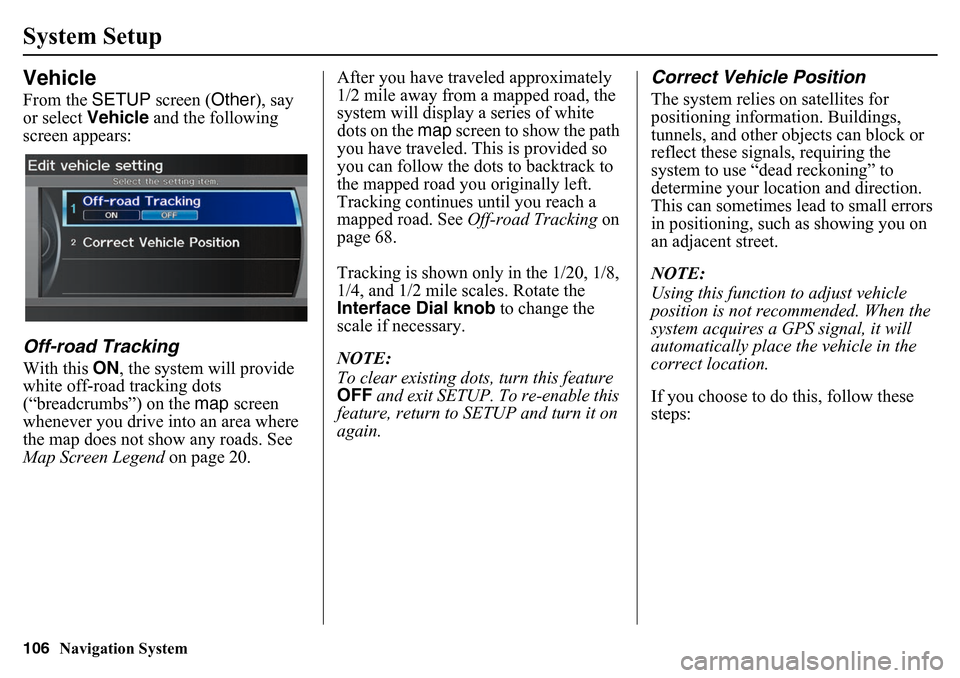
System SetupVehicleFrom the SETUP screen ( Other), say
or select Vehicle and the following
screen appears:Off-road TrackingWith this ON, the system will provide
white off-road tracking dots
(“breadcrumbs”) on the map screen
whenever you drive into an area where
the map does not show any roads. See
Map Screen Legend on page 20. After you have traveled approximately
1/2 mile away from a mapped road, the
system will display a series of white
dots on the map
screen to show the path
you have traveled. This is provided so
you can follow the dots to backtrack to
the mapped road yo u originally left.
Tracking continues until you reach a
mapped road. See Off-road Tracking on
page 68.
Tracking is shown only in the 1/20, 1/8,
1/4, and 1/2 mile scales. Rotate the
Interface Dial knob to change the
scale if necessary.
NOTE:
To clear existing dots, turn this feature
OFF and exit SETUP. To re-enable this
feature, return to SETUP and turn it on
again.
Correct Vehicle PositionThe system relies on satellites for
positioning information. Buildings,
tunnels, and other objects can block or
reflect these signals, requiring the
system to use “dead reckoning” to
determine your location and direction.
This can sometimes lead to small errors
in positioning, such as showing you on
an adjacent street.
NOTE:
Using this function to adjust vehicle
position is not recommended. When the
system acquires a GPS signal, it will
automatically place the vehicle in the
correct location.
If you choose to do this, follow these
steps: