warning light HONDA PILOT 2023 Owners Manual
[x] Cancel search | Manufacturer: HONDA, Model Year: 2023, Model line: PILOT, Model: HONDA PILOT 2023Pages: 814, PDF Size: 29.02 MB
Page 99 of 814
98
Instrument Panel
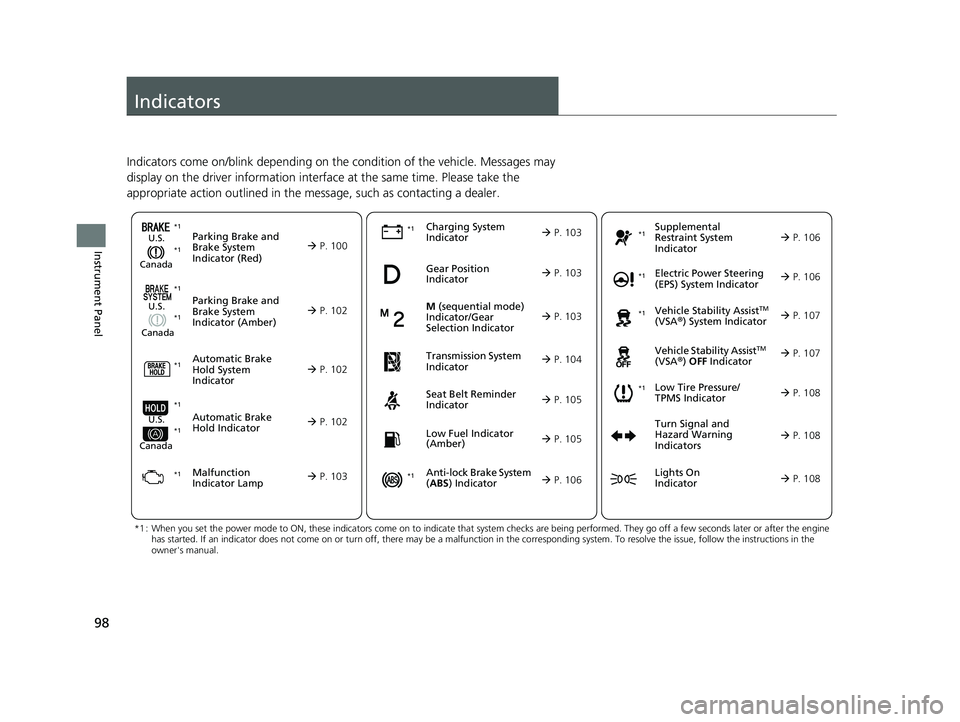
Indicators
Indicators come on/blink depending on the condition of the vehicle. Messages may
display on the driver information interface at the same time. Please take the
appropriate action outlined in the message, such as contacting a dealer.
Parking Brake and
Brake System
Indicator (Red)U.S.
Canada P. 100*1
M (sequential mode)
Indicator/Gear
Selection Indicator
P. 103Parking Brake and
Brake System
Indicator (Amber)U.S.
Canada
Automatic Brake
Hold System
Indicator
Automatic Brake
Hold IndicatorU.S.
Canada
*1 : When you set the power mode to ON, these indicators come on to indicate that system checks are being performed. They go off a few seconds later or after the engine
has started. If an indicator does not come on or turn off, ther e may be a malfunction in the corresponding system. To resolve the issue, follow the instructions in the
owner's manual.
Malfunction
Indicator Lamp Charging System
Indicator
Seat Belt Reminder
Indicator
Low Fuel Indicator
(Amber)
P. 102
P. 10
2
P. 102
P. 103
P. 103*1
*1 *1
Gear Position
Indicator
P. 103
Tr
ansmission System
Indica
tor
P. 104
P. 105
P. 105
*1
*1
Anti-lock Brake System
(ABS ) Indicator
Vehicle Stability AssistTM
(VSA®) System Indicator
Vehicle Stability Assist
TM
(VSA®) OFF Indicator
Supplemental
Restraint System
Indicator
Electric Power Steering
(EPS) System Indicator
*1
P. 106
P. 106
P. 107*1 *1
P. 107
*1 P. 106
*1
*1
*1
Low Tire Pressure/
TPMS Indicator
Turn Signal and
Hazard Warning
Indicators
Lights On
Indicator
P. 108
*1
P. 108
P. 108
23 PILOT-31T906000_03.book 98 ページ 2022年10月31日 月曜日 午前10時26分
Page 109 of 814
108
uuIndicators u
Instrument Panel
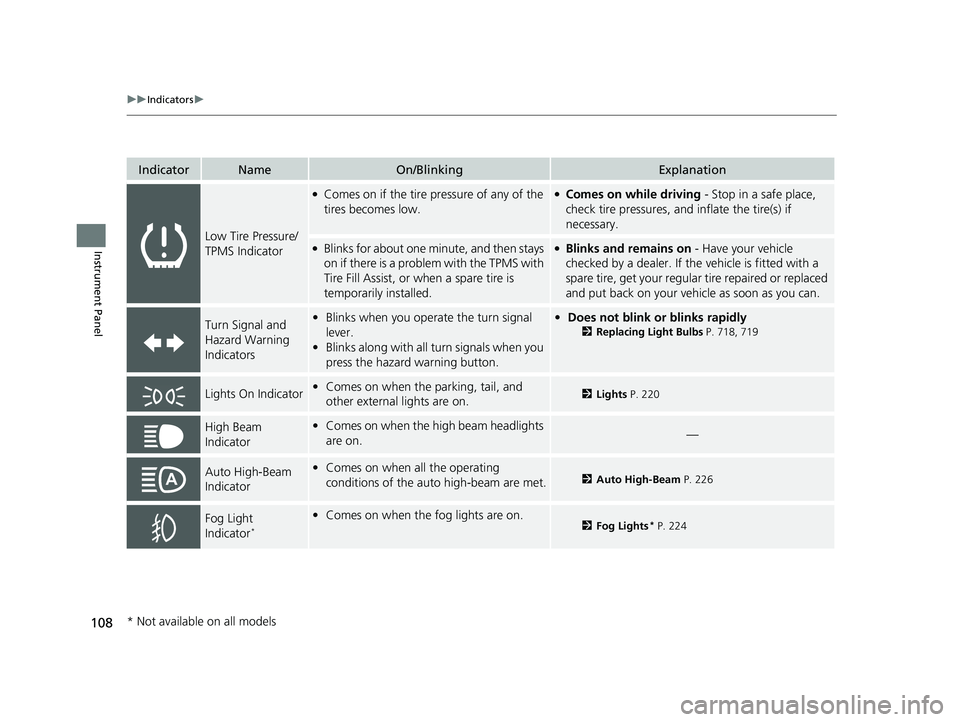
IndicatorNameOn/BlinkingExplanation
Low Tire Pressure/
TPMS Indicator
●Comes on if the tire pressure of any of the
tires becomes low.●Comes on while driving - Stop in a safe place,
check tire pressures, a nd inflate the tire(s) if
necessary.
●Blinks for about one minute, and then stays
on if there is a problem with the TPMS with
Tire Fill Assist, or when a spare tire is
temporarily installed.●Blinks and remains on - Have your vehicle
checked by a dealer. If the vehicle is fitted with a
spare tire, get your regular tire repaired or replaced
and put back on your vehicle as soon as you can.
Turn Signal and
Hazard Warning
Indicators• Blinks when you oper ate the turn signal
lever.
• Blinks along with all turn signals when you
press the hazard warning button.•Does not blink or blinks rapidly
2 Replacing Light Bulbs P. 718, 719
Lights On Indicator•Comes on when the parking, tail, and
other external lights are on.2 Lights P. 220
High Beam
Indicator•Comes on when the high beam headlights
are on.—
Auto High-Beam
Indicator•Comes on when all the operating
conditions of the auto high-beam are met.2 Auto High-Beam P. 226
Fog Light
Indicator*
•Comes on when the fog lights are on.2 Fog Lights* P. 224
* Not available on all models
23 PILOT-31T906000_03.book 108 ページ 2022年10月31日 月曜日 午前10時26分
Page 110 of 814
109
uuIndicators u
Continued
Instrument Panel
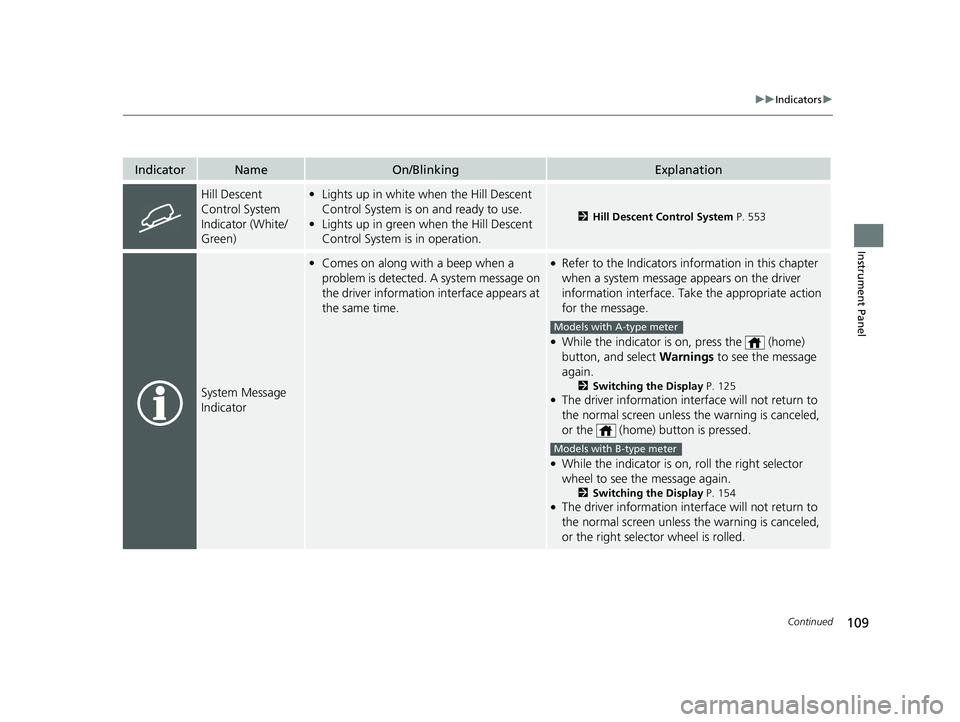
IndicatorNameOn/BlinkingExplanation
Hill Descent
Control System
Indicator (White/
Green)•Lights up in white when the Hill Descent
Control System is on and ready to use.
• Lights up in green when the Hill Descent
Control System is in operation.
2 Hill Descent Control System P. 553
System Message
Indicator
•Comes on along with a beep when a
problem is detected. A system message on
the driver information interface appears at
the same time.●Refer to the Indicators in formation in this chapter
when a system message appears on the driver
information interface. Take the appropriate action
for the message.
●While the indicator is on, press the (home)
button, and select Warnings to see the message
again.
2 Switching the Display P. 125●The driver information interface will not return to
the normal screen unless the warning is canceled,
or the (home) button is pressed.
●While the indicator is on, roll the right selector
wheel to see the message again.
2Switching the Display P. 154●The driver information interface will not return to
the normal screen unless the warning is canceled,
or the right selector wheel is rolled.
Models with A-type meter
Models with B-type meter
23 PILOT-31T906000_03.book 109 ページ 2022年10月31日 月曜日 午前10時26分
Page 145 of 814
144
uuGauges and Displays uDriver Information Interface (A-type Meter)
Instrument Panel
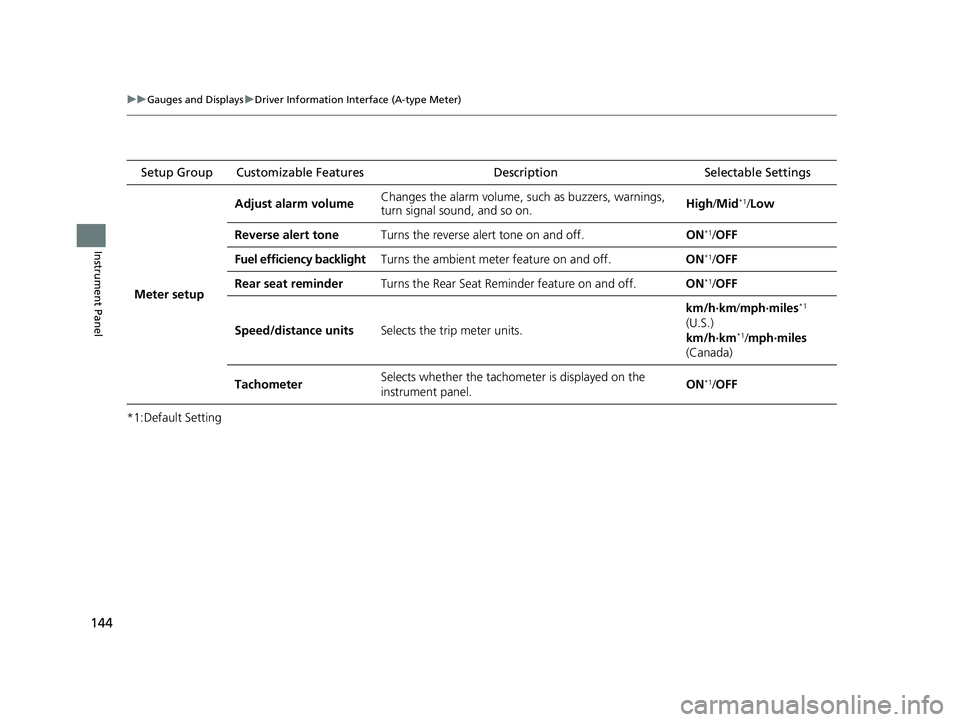
*1:Default Setting Setup Group Customizable Features
Description Selectable Settings
Meter setup Adjust alarm volume
Changes the alarm volume, su
ch as buzzers, warnings,
turn signal sound, and so on. High
/Mid
*1/Low
Reverse alert tone Turns the reverse alert tone on and off. ON
*1/OFF
Fuel efficiency backlight Turns the ambient meter feature on and off. ON
*1/OFF
Rear seat reminder Turns the Rear Seat Reminder feature on and off. ON
*1/OFF
Speed/distance units Selects the trip meter units. km/h∙km/
mph∙miles
*1
(U.S.)
km/h∙km
*1/ mph∙miles
(Canada)
Tachometer Selects whether the tachomet
er is displayed on the
instrument panel. ON
*1/
OFF
23 PILOT-31T906000_03.book 144 ページ 2022年10月31日 月曜日 午前10時26分
Page 170 of 814
169
uuGauges and Displays uHead-Up Display*
Continued
Instrument Panel
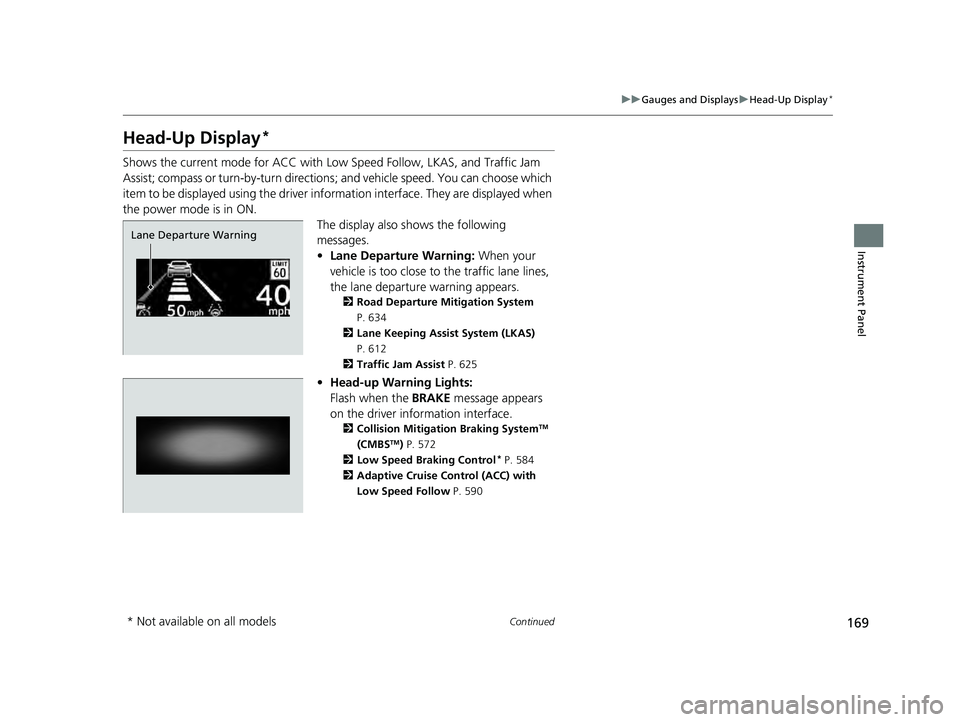
Head-Up Display*
Shows the current mode for ACC with Low Speed Follow, LKAS, and Traffic Jam
Assist; compass or turn-by-turn directions ; and vehicle speed. You can choose which
item to be displayed using the driver in formation interface. They are displayed when
the power mode is in ON. The display also shows the following
messages.
•Lane Departure Warning: When your
vehicle is too close to the traffic lane lines,
the lane departure warning appears.
2 Road Departure Mitigation System
P. 634
2 Lane Keeping Assist System (LKAS)
P. 612
2 Traffic Jam Assist P. 625
•Head-up Warning Lights:
Flash when the BRAKE message appears
on the driver information interface.
2 Collision Mitigation Braking SystemTM
(CMBSTM) P. 572
2 Low Speed Braking Control* P. 584
2 Adaptive Cruise Control (ACC) with
Low Speed Follow P. 590
Lane Departure Warning
* Not available on all models
23 PILOT-31T906000_03.book 169 ページ 2022年10月31日 月曜日 午前10時26分
Page 192 of 814
191
uuLocking and Unlocking the Doors uLocking/Unlocking the Doors from the Outside
Controls
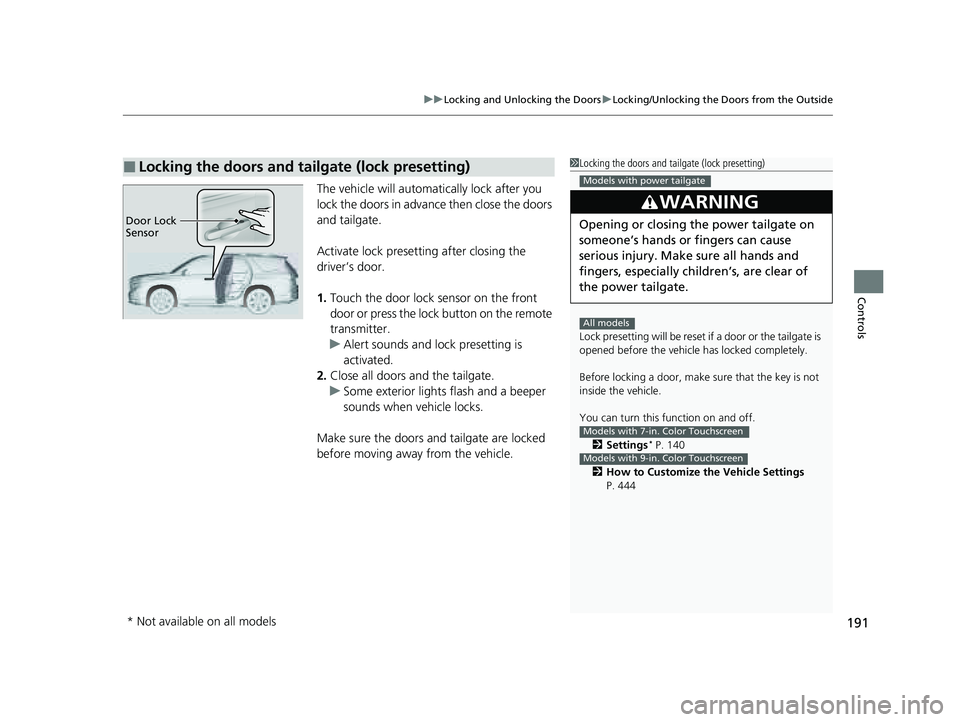
The vehicle will automatically lock after you
lock the doors in advance then close the doors
and tailgate.
Activate lock presetting after closing the
driver’s door.
1. Touch the door lock sensor on the front
door or press the lock button on the remote
transmitter.
u Alert sounds and lock presetting is
activated.
2. Close all doors and the tailgate.
u Some exterior lights flash and a beeper
sounds when vehicle locks.
Make sure the doors and tailgate are locked
before moving away from the vehicle.
■Locking the doors and tailgate (lock presetting)1 Locking the doors and tailgate (lock presetting)
Lock presetting will be reset if a door or the tailgate is
opened before the vehicle has locked completely.
Before locking a door, make sure that the key is not
inside the vehicle.
You can turn this function on and off.
2 Settings
* P. 140
2 How to Customize the Vehicle Settings
P. 444
3WARNING
Opening or closing the power tailgate on
someone’s hands or fingers can cause
serious injury. Make sure all hands and
fingers, especially children’s, are clear of
the power tailgate.
Models with power tailgate
All models
Models with 7-in. Color Touchscreen
Models with 9-in. Color Touchscreen
Door Lock
Sensor
* Not available on all models
23 PILOT-31T906000_03.book 191 ページ 2022年10月31日 月曜日 午前10時26分
Page 257 of 814
uuSeats uHead Restraints
256
Controls
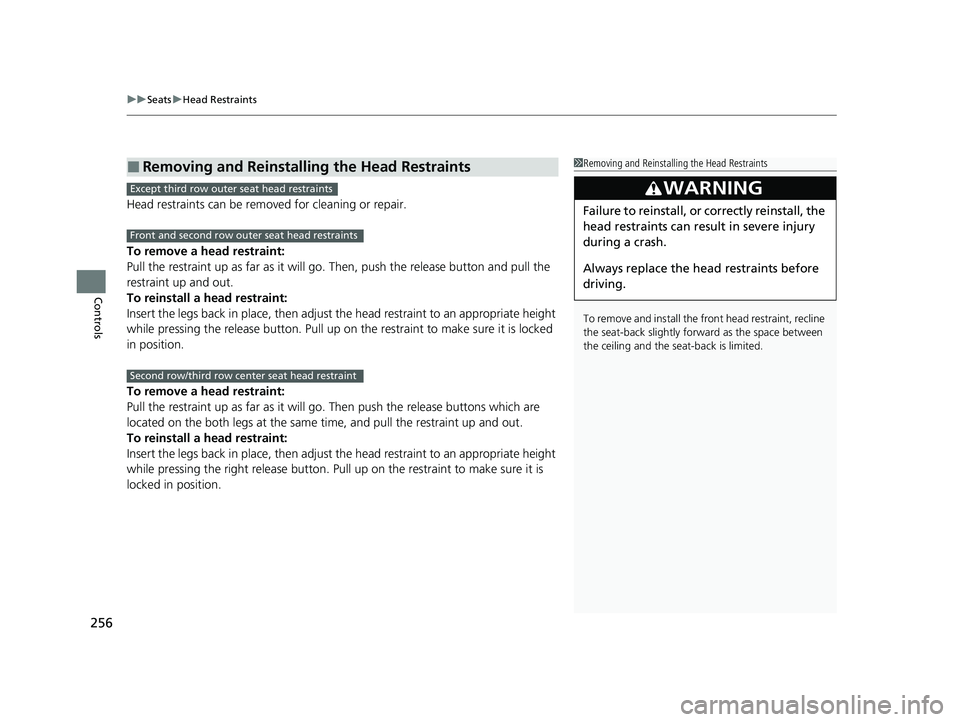
Head restraints can be removed for cleaning or repair.
To remove a head restraint:
Pull the restraint up as far as it will go. Then, push the release button and pull the
restraint up and out.
To reinstall a head restraint:
Insert the legs back in place, then adjust the head restraint to an appropriate height
while pressing the release button. Pull up on the restraint to make sure it is locked
in position.
To remove a head restraint:
Pull the restraint up as far as it will go. Then push the release buttons which are
located on the both legs at the same time, and pull the restraint up and out.
To reinstall a head restraint:
Insert the legs back in place, then adjust the head restraint to an appropriate height
while pressing the right release button. Pull up on the restraint to make sure it is
locked in position.
■Removing and Reinstalling the Head Restraints1 Removing and Reinstalling the Head Restraints
To remove and install the front head restraint, recline
the seat-back slightly forward as the space between
the ceiling and the seat-back is limited.
3WARNING
Failure to reinstall, or correctly reinstall, the
head restraints can result in severe injury
during a crash.
Always replace the he ad restraints before
driving.
Except third row outer seat head restraints
Front and second row outer seat head restraints
Second row/third row center seat head restraint
23 PILOT-31T906000_03.book 256 ページ 2022年10月31日 月曜日 午前10時26分
Page 451 of 814
450
uuCustomized Features u
Features
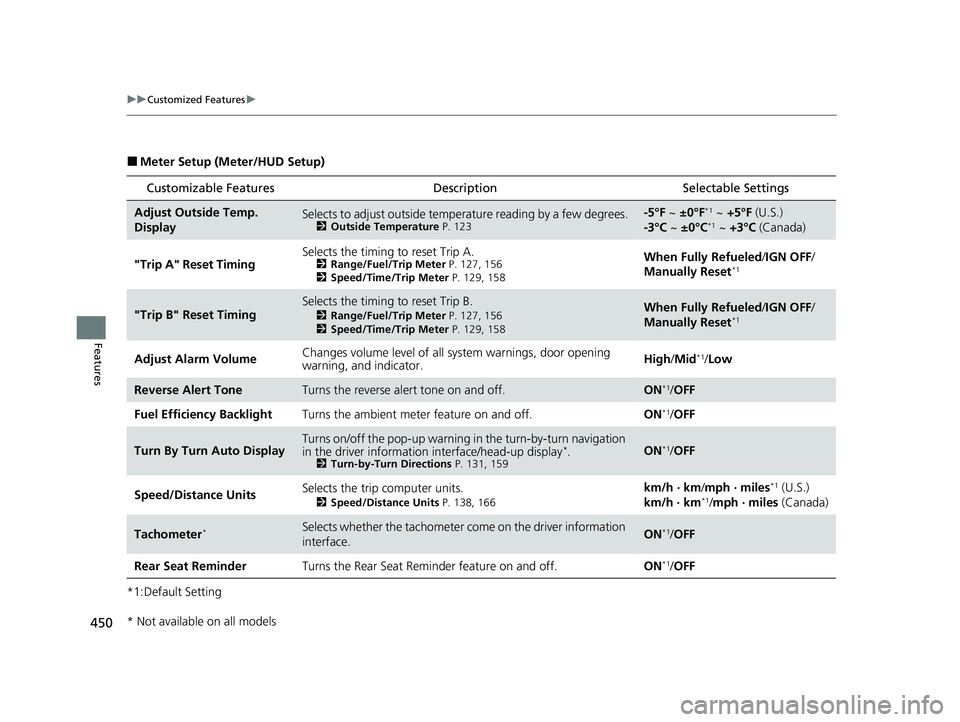
■Meter Setup (Meter/HUD Setup)
*1:Default Setting
Customizable Features Description Selectable Settings
Adjust Outside Temp.
DisplaySelects to adjust outside temperature reading by a few degrees.2Outside Temperature P. 123
-5°F ~ ±0°F*1 ~ +5°F (U.S.)
-3°C ~ ±0°C*1 ~ +3°C (Canada)
"Trip A" Reset Timing Selects the timing to reset Trip A.
2
Range/Fuel/Trip Meter P. 127, 156
2 Speed/Time/Trip Meter P. 129, 158When Fully Refueled /IGN OFF /
Manually Reset*1
"Trip B" Reset TimingSelects the timing to reset Trip B.
2 Range/Fuel/Trip Meter P. 127, 156
2 Speed/Time/Trip Meter P. 129, 158When Fully Refueled /IGN OFF /
Manually Reset*1
Adjust Alarm Volume Changes volume level of all system warnings, door opening
warning, and indicator. High/
Mid*1/Low
Reverse Alert ToneTurns the reverse alert tone on and off.ON*1/OFF
Fuel Efficiency Backlight Turns the ambient meter feature on and off. ON
*1/OFF
Turn By Turn Auto DisplayTurns on/off the pop-up warning in the turn-by-turn navigation
in the driver informatio n interface/head-up display*.2Turn-by-Turn Directions P. 131, 159ON*1/OFF
Speed/Distance Units Selects the trip computer units.
2
Speed/Distance Units P. 138, 166
km/h · km /mph · miles*1 (U.S.)
km/h · km*1/ mph · miles (Canada)
Tachometer*Selects whether the tachometer come on the driver information
interface.ON*1/ OFF
Rear Seat Reminder Turns the Rear Seat Reminder feature on and off. ON
*1/OFF
* Not available on all models
23 PILOT-31T906000_03.book 450 ページ 2022年10月31日 月曜日 午前10時26分
Page 527 of 814
uuWhen Driving uStarting the Engine
526
Driving
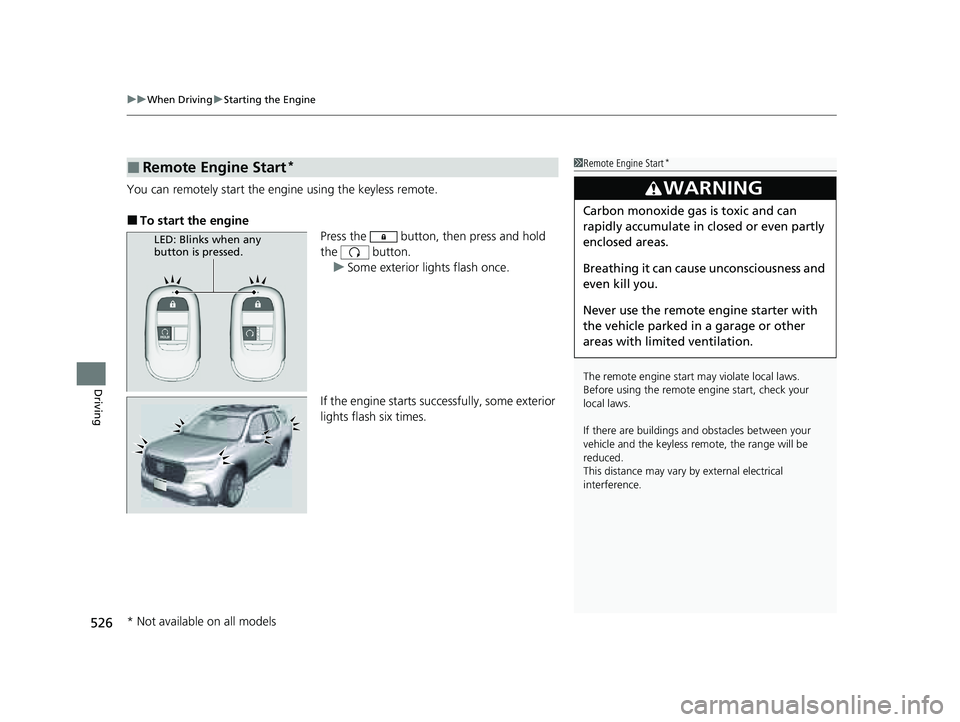
You can remotely start the engine using the keyless remote.
■To start the engine
Press the button, then press and hold
the button.
u Some exterior lights flash once.
If the engine starts successfully, some exterior
lights flash six times.
■Remote Engine Start*1 Remote Engine Start*
The remote engine start may violate local laws.
Before using the remote e ngine start, check your
local laws.
If there are buildings an d obstacles between your
vehicle and the keyless re mote, the range will be
reduced.
This distance may vary by external electrical
interference.
3WARNING
Carbon monoxide ga s is toxic and can
rapidly accumulate in closed or even partly
enclosed areas.
Breathing it can cause unconsciousness and
even kill you.
Never use the remote engine starter with
the vehicle parked in a garage or other
areas with limited ventilation.
LED: Blinks when any
button is pressed.
* Not available on all models
23 PILOT-31T906000_03.book 526 ページ 2022年10月31日 月曜日 午前10時26分
Page 554 of 814
553
uuWhen Driving uHill Descent Control System
Continued
Driving
Hill Descent Control System
When driving down hills where engine braking is not enough to decelerate the
vehicle, this system helps maintain a constant vehicle speed without needing to
depress the brake pedal.
The system operates under the following conditions.
• Driving at a speed between about 2-12 mph (3-20 km/h).
• Driving downhill.
• Accelerator pedal and brake pedal are not depressed.
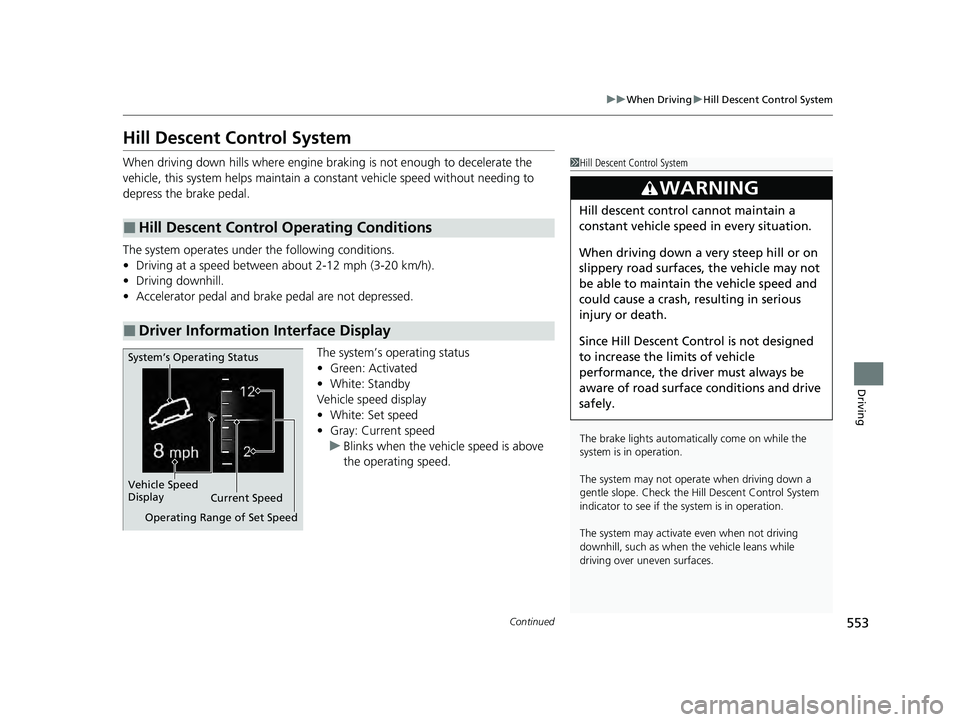
The system’s operating status
•Green: Activated
• White: Standby
Vehicle speed display
• White: Set speed
• Gray: Current speed
u Blinks when the vehi cle speed is above
the operating speed.
■Hill Descent Control Operating Conditions
■Driver Information Interface Display
1 Hill Descent Control System
The brake lights automati cally come on while the
system is in operation.
The system may not operate when driving down a
gentle slope. Check the Hill Descent Control System
indicator to see if the system is in operation.
The system may activate even when not driving
downhill, such as when the vehicle leans while
driving over uneven surfaces.
3WARNING
Hill descent control cannot maintain a
constant vehicle speed in every situation.
When driving down a very steep hill or on
slippery road surfaces, the vehicle may not
be able to maintain the vehicle speed and
could cause a crash, resulting in serious
injury or death.
Since Hill Descent Control is not designed
to increase the limits of vehicle
performance, the driver must always be
aware of road surface conditions and drive
safely.
System’s Operating Status
Vehicle Speed
Display Current Speed
Operating Range of Set Speed
23 PILOT-31T906000_03.book 553 ページ 2022年10月31日 月曜日 午前10時26分