engine HONDA RIDGELINE 2018 (in English) Owner's Guide
[x] Cancel search | Manufacturer: HONDA, Model Year: 2018, Model line: RIDGELINE, Model: HONDA RIDGELINE 2018Pages: 623, PDF Size: 25.85 MB
Page 146 of 623
uuOperating the Switches Around the Steering Wheel uENGINE START/STOP Button
144
Controls
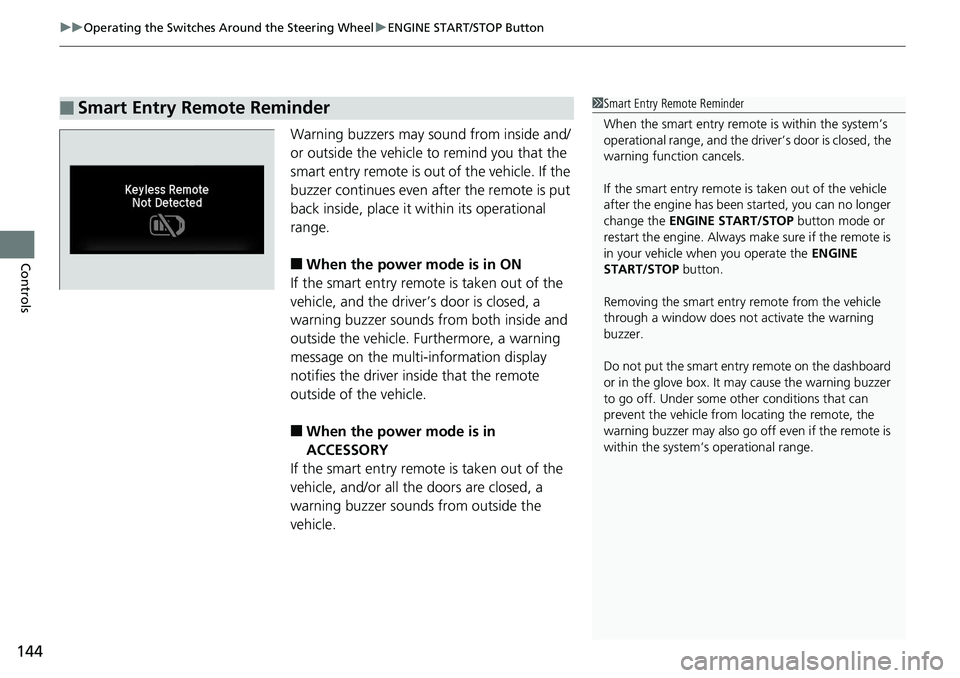
Warning buzzers may sound from inside and/
or outside the vehicle to remind you that the
smart entry remote is out of the vehicle. If the
buzzer continues even after the remote is put
back inside, place it within its operational
range.
■When the power mode is in ON
If the smart entry remote is taken out of the
vehicle, and the driver’s door is closed, a
warning buzzer sounds from both inside and
outside the vehicle. Furthermore, a warning
message on the multi-information display
notifies the driver inside that the remote
outside of the vehicle.
■When the power mode is in
ACCESSORY
If the smart entry remote is taken out of the
vehicle, and/or all the doors are closed, a
warning buzzer sounds from outside the
vehicle.
■Smart Entry Remote Reminder1 Smart Entry Remote Reminder
When the smart entry remote is within the system’s
operational range, and the driv er’s door is closed, the
warning function cancels.
If the smart entry remote is taken out of the vehicle
after the engine has been started, you can no longer
change the ENGINE START/STOP button mode or
restart the engine. Always make sure if the remote is
in your vehicle when you operate the ENGINE
START/STOP button.
Removing the smart entry remote from the vehicle
through a window does not activate the warning
buzzer.
Do not put the smart entr y remote on the dashboard
or in the glove box. It may cause the warning buzzer
to go off. Under some other conditions that can
prevent the vehicle from locating the remote, the
warning buzzer may al so go off even if the remote is
within the system’s operational range.
Page 148 of 623
146
uuOperating the Switches Around the Steering Wheel uLight Switches
Controls
Light Switches
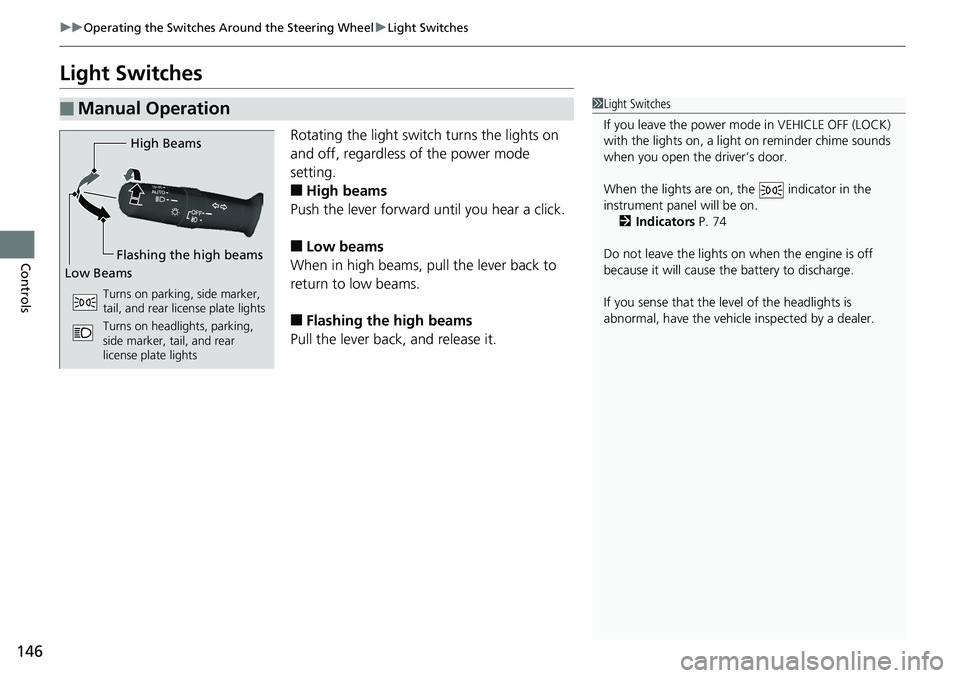
Rotating the light switch turns the lights on
and off, regardless of the power mode
setting.
■High beams
Push the lever forward until you hear a click.
■Low beams
When in high beams, pull the lever back to
return to low beams.
■Flashing the high beams
Pull the lever back, and release it.
■Manual Operation1 Light Switches
If you leave the power mode in VEHICLE OFF (LOCK)
with the lights on, a light on reminder chime sounds
when you open the driver’s door.
When the lights are on, the indicator in the
instrument pane l will be on.
2 Indicators P. 74
Do not leave the lights on when the engine is off
because it will cause the battery to discharge.
If you sense that the le vel of the headlights is
abnormal, have the vehicl e inspected by a dealer.
High Beams
Flashing the high beams
Low Beams
Turns on parking, side marker,
tail, and rear license plate lights
Turns on headlights, parking,
side marker, tail, and rear
license plate lights
Page 155 of 623
153
uuOperating the Switches Around the Steering Wheel uAuto High-Beam (High Beam Support System)*
Controls
■To manually cancel th e system temporarily
You can cancel the operation when you manually change the headlights to high
beams. Push the lever forward until you hear a click, or lightly pull the lever towards
you to flash high beams. The auto high-beam indicator goes off.
If you want the auto high-beam operation to resume at once, pull the lever towards
you.
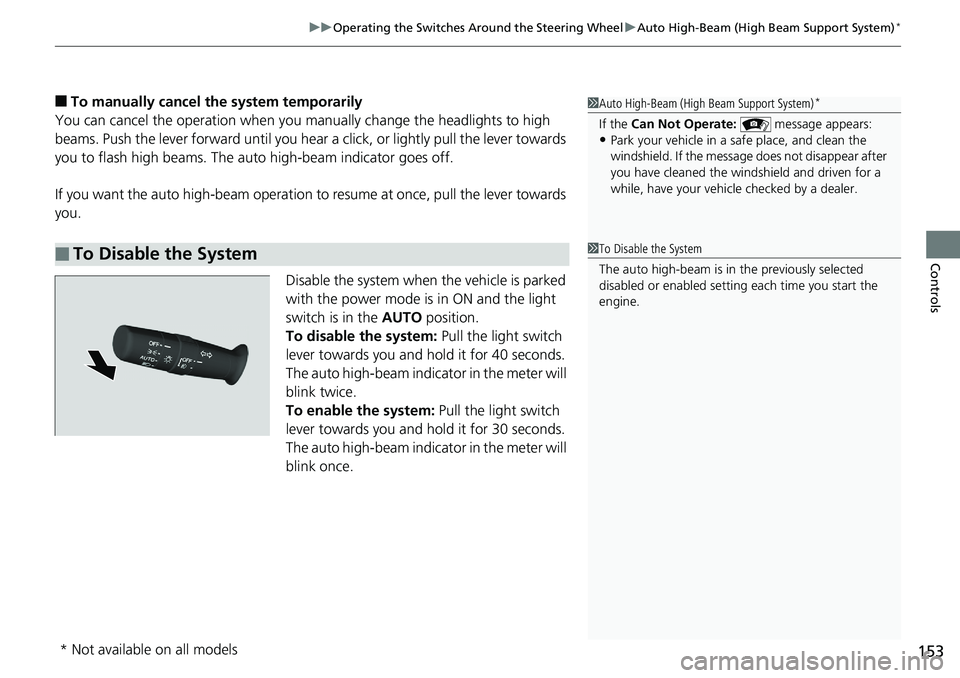
Disable the system when the vehicle is parked
with the power mode is in ON and the light
switch is in the AUTO position.
To disable the system: Pull the light switch
lever towards you and hold it for 40 seconds.
The auto high-beam indicator in the meter will
blink twice.
To enable the system: Pull the light switch
lever towards you and hold it for 30 seconds.
The auto high-beam indicator in the meter will
blink once.
■To Disable the System
1 Auto High-Beam (High Beam Support System)*
If the Can Not Operate: message appears:•Park your vehicle in a safe place, and clean the
windshield. If the message does not disappear after
you have cleaned the winds hield and driven for a
while, have your vehicle checked by a dealer.
1 To Disable the System
The auto high-beam is in the previously selected
disabled or enabled setti ng each time you start the
engine.
* Not available on all models
Page 158 of 623
156
uuOperating the Switches Around the Steering Wheel uRear Defogger/Heated Door Mirror* Button
Controls
Rear Defogger/Heated Door Mirror* Button
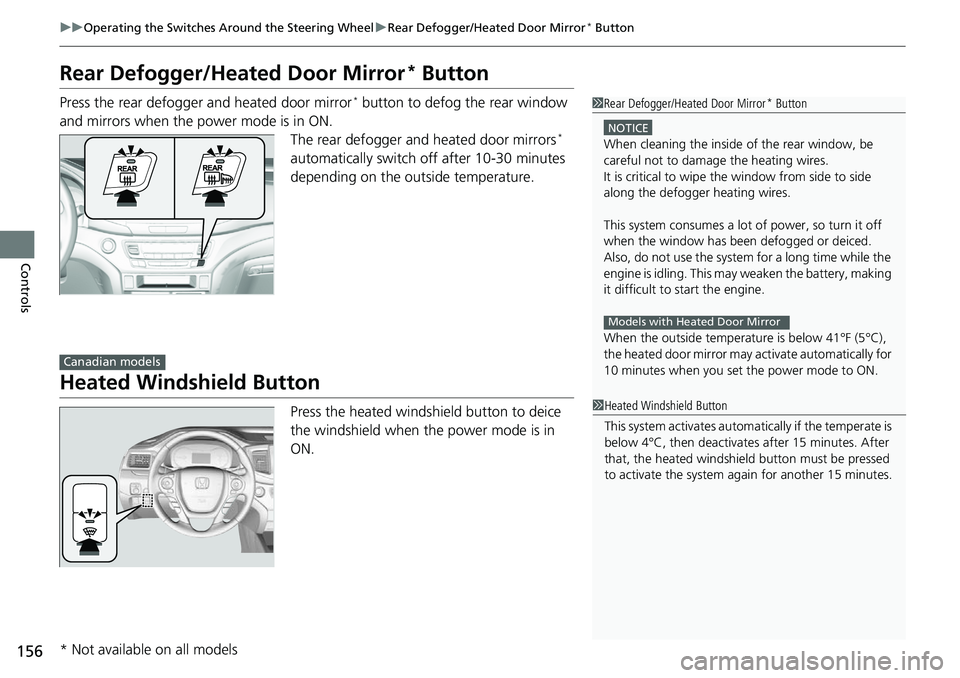
Press the rear defogger and heated door mirror* button to defog the rear window
and mirrors when the power mode is in ON. The rear defogger and heated door mirrors
*
automatically switch off after 10-30 minutes
depending on the outside temperature.
Heated Windshield Button
Press the heated windshield button to deice
the windshield when the power mode is in
ON.
1 Rear Defogger/Heated Door Mirror* Button
NOTICE
When cleaning the inside of the rear window, be
careful not to damage the heating wires.
It is critical to wipe the window from side to side
along the defogger heating wires.
This system consumes a lot of power, so turn it off
when the window has been defogged or deiced.
Also, do not use the system for a long time while the
engine is idling. This may weaken the battery, making
it difficult to start the engine.
When the outside temperature is below 41
Page 160 of 623
158
uuOperating the Switches Around the Steering Wheel uDriving Position Memory System*
Controls
Driving Position Memory System*
You can store two driver’s seat (except for power lumbar) and door mirror positions
with the driving position memory system.
When you unlock and open the driver’s do or with a remote transmitter or smart
entry system, the seat and door mirrors adju st automatically to one of the two preset
positions.
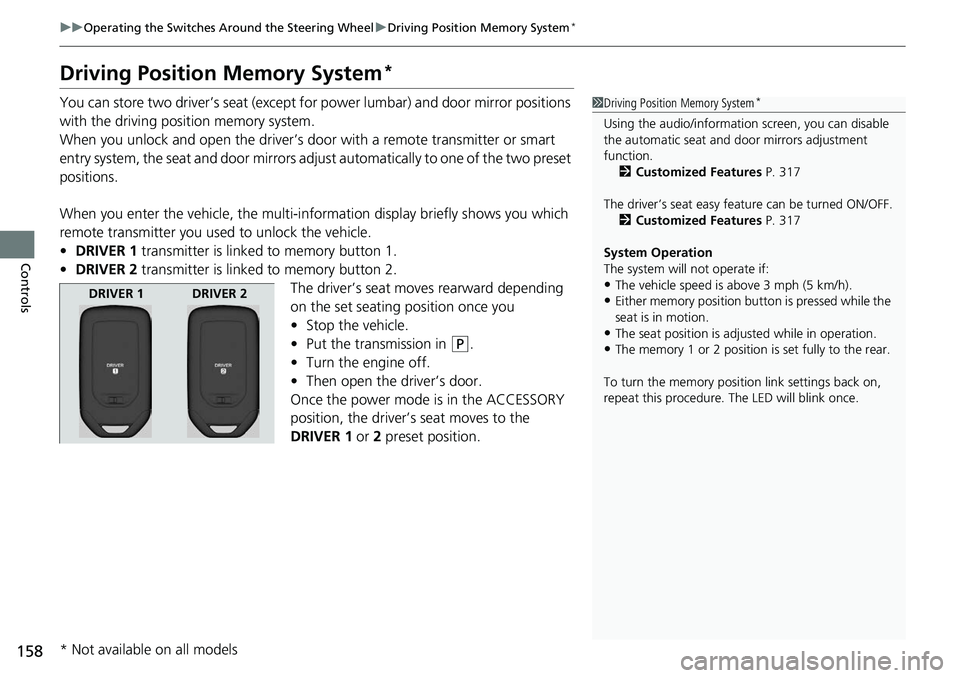
When you enter the vehicle, the multi-in formation display briefly shows you which
remote transmitter you used to unlock the vehicle.
• DRIVER 1 transmitter is linked to memory button 1.
• DRIVER 2 transmitter is linked to memory button 2.
The driver’s seat moves rearward depending
on the set seating position once you
•Stop the vehicle.
• Put the transmission in
(P.
• Turn the engine off.
• Then open the driver’s door.
Once the power mode is in the ACCESSORY
position, the driver’s seat moves to the
DRIVER 1 or 2 preset position.
1Driving Position Memory System*
Using the audio/informati on screen, you can disable
the automatic seat and d oor mirrors adjustment
function. 2 Customized Features P. 317
The driver’s seat easy feature can be turned ON/OFF. 2 Customized Features P. 317
System Operation
The system will not operate if:
•The vehicle speed is above 3 mph (5 km/h).
•Either memory position button is pressed while the
seat is in motion.
•The seat position is adju sted while in operation.
•The memory 1 or 2 position is set fully to the rear.
To turn the memory positi on link settings back on,
repeat this procedure. The LED will blink once.
DRIVER 1 DRIVER 2
* Not available on all models
Page 169 of 623
167
uuAdjusting the Seats uMaintain a Proper Sitting Position
Controls
Maintain a Proper Sitting Position
After all occupants have adjusted their s eats and head restraints, and put on their
seat belts, it is very important that they continue to sit upright, well back in their
seats, with their feet on the floor, until the vehicle is safe ly parked and the engine is
off.
Sitting improperly can increase the chance of injury during a crash. For example, if
an occupant slouches, lies down, turns sideways, sits forward, leans forward or
sideways, or puts one or both feet up, the chance of injury during a crash is greatly
increased.
In addition, an occupant who is out of posi tion in the front seat can be seriously or
fatally injured in a crash by striking interior parts of the vehicle or being struck by an
inflating front airbag.1 Maintain a Proper Sitting Position
3WARNING
Sitting improperly or out of position can
result in serious injury or death in a crash.
Always sit upright, well back in the seat,
with your feet on the floor.
Page 179 of 623
Continued177
uuInterior Lights/Convenience Items uInterior Convenience Items
Controls
The accessory power sockets can be used when the power mode is in ACCESSORY
or ON.
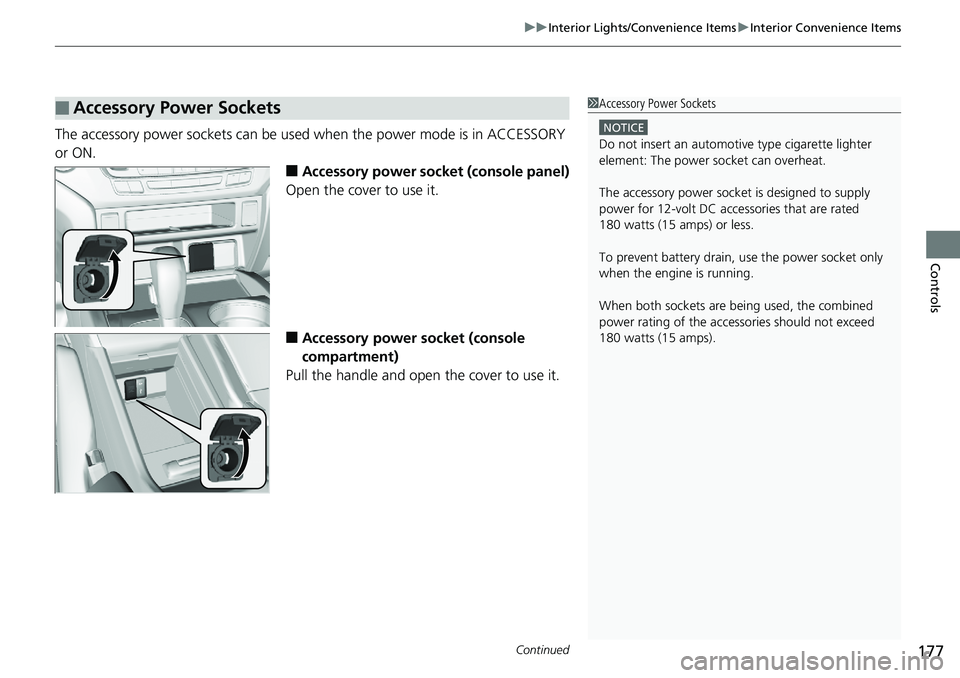
■Accessory power socket (console panel)
Open the cover to use it.
■Accessory power socket (console
compartment)
Pull the handle and open the cover to use it.
■Accessory Power Sockets1 Accessory Power Sockets
NOTICE
Do not insert an automotive type cigarette lighter
element: The power socket can overheat.
The accessory power socket is designed to supply
power for 12-volt DC accessories that are rated
180 watts (15 amps) or less.
To prevent battery drain, use the power socket only
when the engine is running.
When both sockets are being used, the combined
power rating of the accesso ries should not exceed
180 watts (15 amps).
Page 182 of 623
uuInterior Lights/Convenience Items uInterior Convenience Items
180
Controls
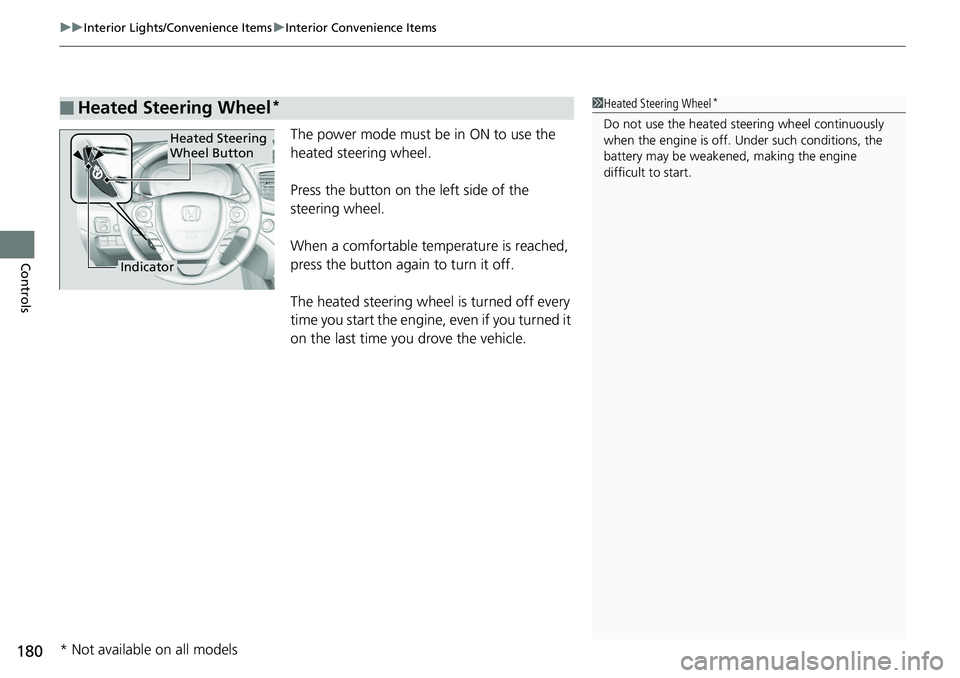
The power mode must be in ON to use the
heated steering wheel.
Press the button on the left side of the
steering wheel.
When a comfortable temperature is reached,
press the button again to turn it off.
The heated steering wheel is turned off every
time you start the engine, even if you turned it
on the last time you drove the vehicle.
■Heated Steering Wheel*1Heated Steering Wheel*
Do not use the heated steering wheel continuously
when the engine is off. Under such conditions, the
battery may be weaken ed, making the engine
difficult to start.
Indicator
Heated Steering
Wheel Button
* Not available on all models
Page 183 of 623
Continued181
uuInterior Lights/Convenience Items uInterior Convenience Items
Controls
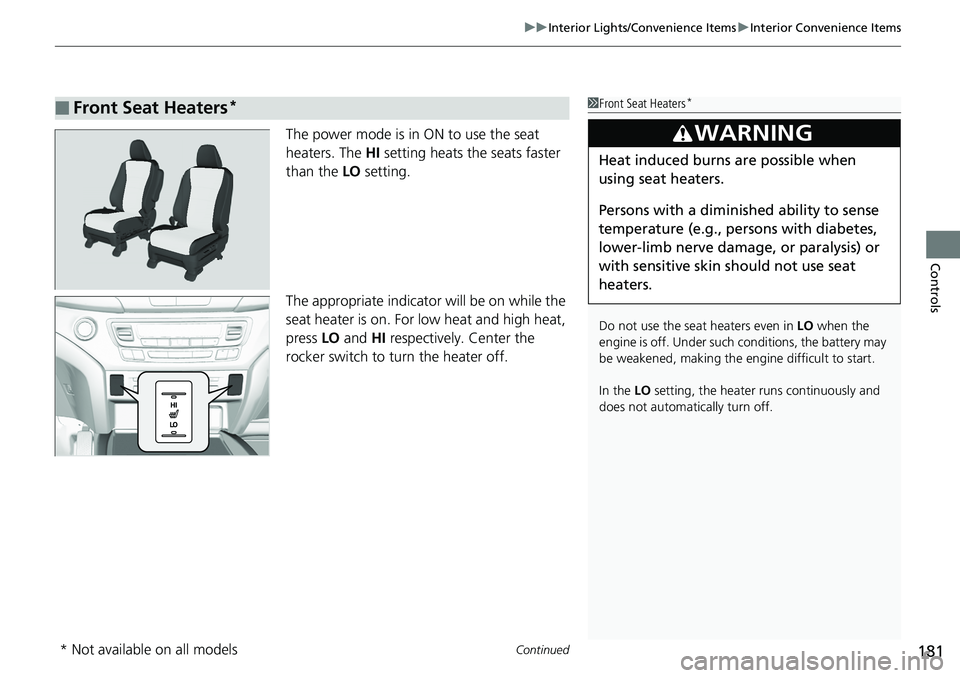
The power mode is in ON to use the seat
heaters. The HI setting heats the seats faster
than the LO setting.
The appropriate indicator will be on while the
seat heater is on. For low heat and high heat,
press LO and HI respectively. Center the
rocker switch to tu rn the heater off.
■Front Seat Heaters*1Front Seat Heaters*
Do not use the seat heaters even in LO when the
engine is off. Under such conditions, the battery may
be weakened, making the engine difficult to start.
In the LO setting, the heater runs continuously and
does not automatically turn off.
3WARNING
Heat induced burns are possible when
using seat heaters.
Persons with a diminished ability to sense
temperature (e.g., persons with diabetes,
lower-limb nerve damage, or paralysis) or
with sensitive skin should not use seat
heaters.
* Not available on all models
Page 184 of 623
uuInterior Lights/Convenience Items uInterior Convenience Items
182
Controls
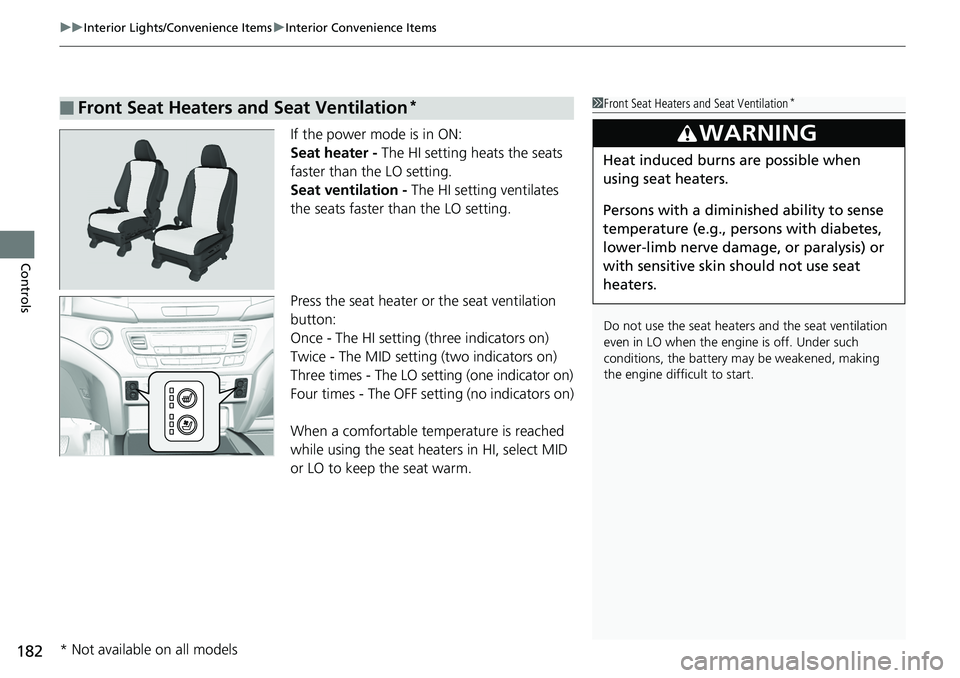
If the power mode is in ON:
Seat heater - The HI setting heats the seats
faster than the LO setting.
Seat ventilation - The HI setting ventilates
the seats faster than the LO setting.
Press the seat heater or the seat ventilation
button:
Once - The HI setting (three indicators on)
Twice - The MID setting (two indicators on)
Three times - The LO setting (one indicator on)
Four times - The OFF setting (no indicators on)
When a comfortable temperature is reached
while using the seat heaters in HI, select MID
or LO to keep the seat warm.
■Front Seat Heaters and Seat Ventilation*1 Front Seat Heaters and Seat Ventilation*
Do not use the seat heater s and the seat ventilation
even in LO when the engine is off. Under such
conditions, the battery ma y be weakened, making
the engine difficult to start.
3WARNING
Heat induced burns are possible when
using seat heaters.
Persons with a diminished ability to sense
temperature (e.g., persons with diabetes,
lower-limb nerve damage, or paralysis) or
with sensitive skin should not use seat
heaters.
* Not available on all models