open hood Hyundai Azera 2006 Owner's Manual
[x] Cancel search | Manufacturer: HYUNDAI, Model Year: 2006, Model line: Azera, Model: Hyundai Azera 2006Pages: 307, PDF Size: 12.62 MB
Page 25 of 307
1
FEATURES OF YOUR HYUNDAI
11
THEFT-ALARM SYSTEMB070A01A-AATThis system is designed to provide protec-
tion from unauthorized entry into the car.
This system is operated in three stages :
the first is the "Armed" stage, the second is
the "Alarm" stage and the third is the "Dis-
armed" stage. If triggered, the system pro-
vides an audible alarm with blinking of the
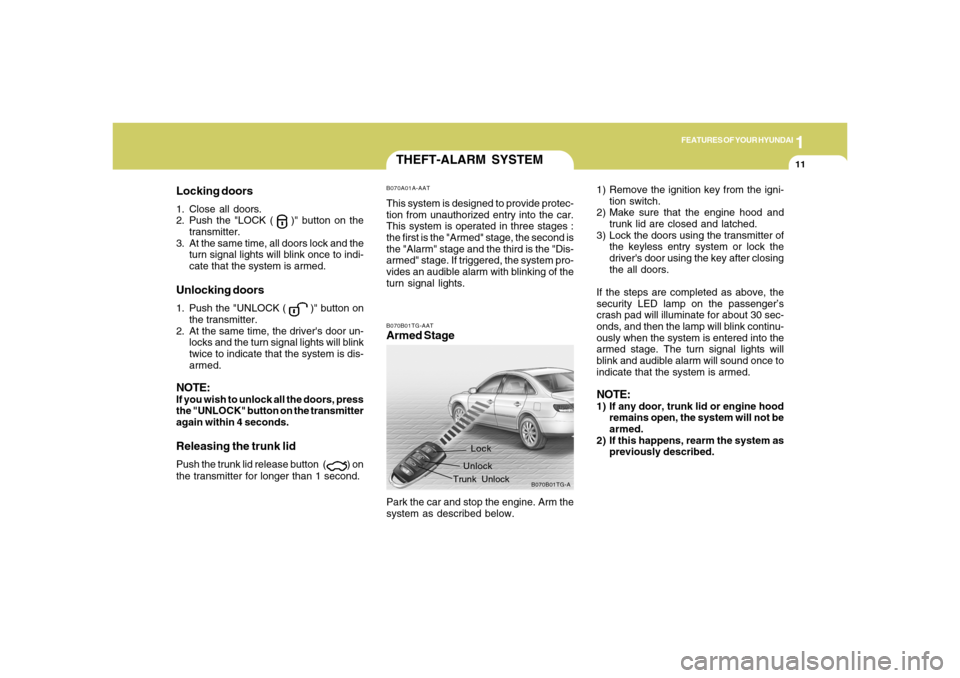
turn signal lights.B070B01TG-AATArmed Stage
B070B01TG-A
Lock
Unlock
Trunk Unlock
Park the car and stop the engine. Arm the
system as described below.
Locking doors1. Close all doors.
2. Push the "LOCK (
)" button on the
transmitter.
3. At the same time, all doors lock and the
turn signal lights will blink once to indi-
cate that the system is armed.
Unlocking doors1. Push the "UNLOCK (
)" button on
the transmitter.
2. At the same time, the driver's door un-
locks and the turn signal lights will blink
twice to indicate that the system is dis-
armed.
NOTE:If you wish to unlock all the doors, press
the "UNLOCK" button on the transmitter
again within 4 seconds.Releasing the trunk lidPush the trunk lid release button (
) on
the transmitter for longer than 1 second.1) Remove the ignition key from the igni-
tion switch.
2) Make sure that the engine hood and
trunk lid are closed and latched.
3) Lock the doors using the transmitter of
the keyless entry system or lock the
driver's door using the key after closing
the all doors.
If the steps are completed as above, the
security LED lamp on the passenger’s
crash pad will illuminate for about 30 sec-
onds, and then the lamp will blink continu-
ously when the system is entered into the
armed stage. The turn signal lights will
blink and audible alarm will sound once to
indicate that the system is armed.
NOTE:1) If any door, trunk lid or engine hood
remains open, the system will not be
armed.
2) If this happens, rearm the system as
previously described.
Page 26 of 307
1FEATURES OF YOUR HYUNDAI12
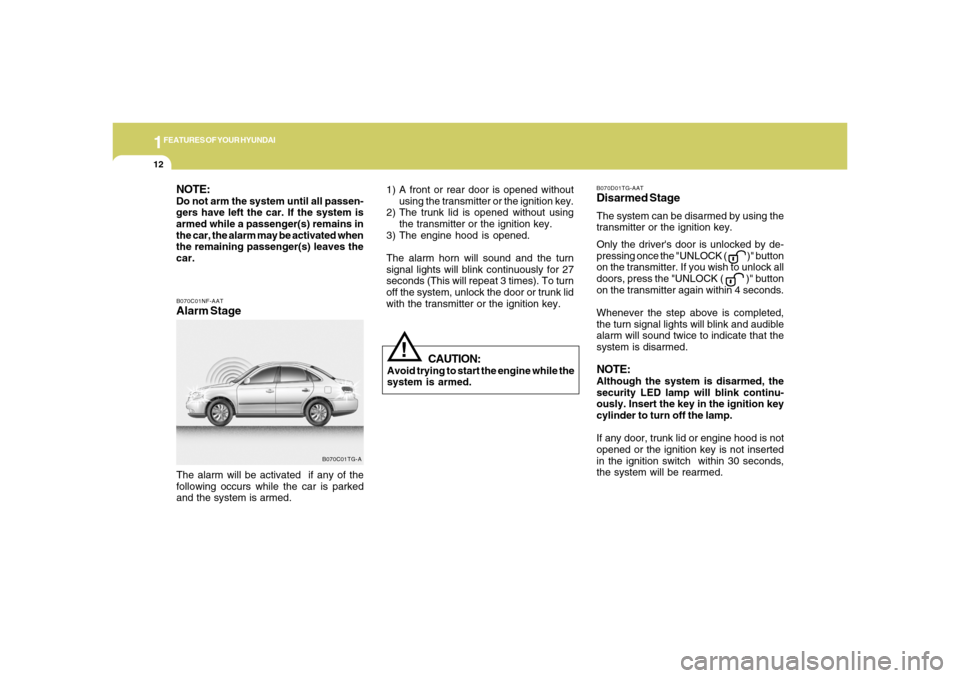
B070C01NF-AATAlarm StageThe alarm will be activated if any of the
following occurs while the car is parked
and the system is armed.
B070C01TG-A
CAUTION:
Avoid trying to start the engine while the
system is armed.
!
NOTE:Do not arm the system until all passen-
gers have left the car. If the system is
armed while a passenger(s) remains in
the car, the alarm may be activated when
the remaining passenger(s) leaves the
car.
B070D01TG-AATDisarmed StageThe system can be disarmed by using the
transmitter or the ignition key.
Only the driver's door is unlocked by de-
pressing once the "UNLOCK (
)" button
on the transmitter. If you wish to unlock all
doors, press the "UNLOCK ( )" button
on the transmitter again within 4 seconds.
Whenever the step above is completed,
the turn signal lights will blink and audible
alarm will sound twice to indicate that the
system is disarmed.
NOTE:Although the system is disarmed, the
security LED lamp will blink continu-
ously. Insert the key in the ignition key
cylinder to turn off the lamp.
If any door, trunk lid or engine hood is not
opened or the ignition key is not inserted
in the ignition switch within 30 seconds,
the system will be rearmed. 1) A front or rear door is opened without
using the transmitter or the ignition key.
2) The trunk lid is opened without using
the transmitter or the ignition key.
3) The engine hood is opened.
The alarm horn will sound and the turn
signal lights will blink continuously for 27
seconds (This will repeat 3 times). To turn
off the system, unlock the door or trunk lid
with the transmitter or the ignition key.
Page 89 of 307
1
FEATURES OF YOUR HYUNDAI
75
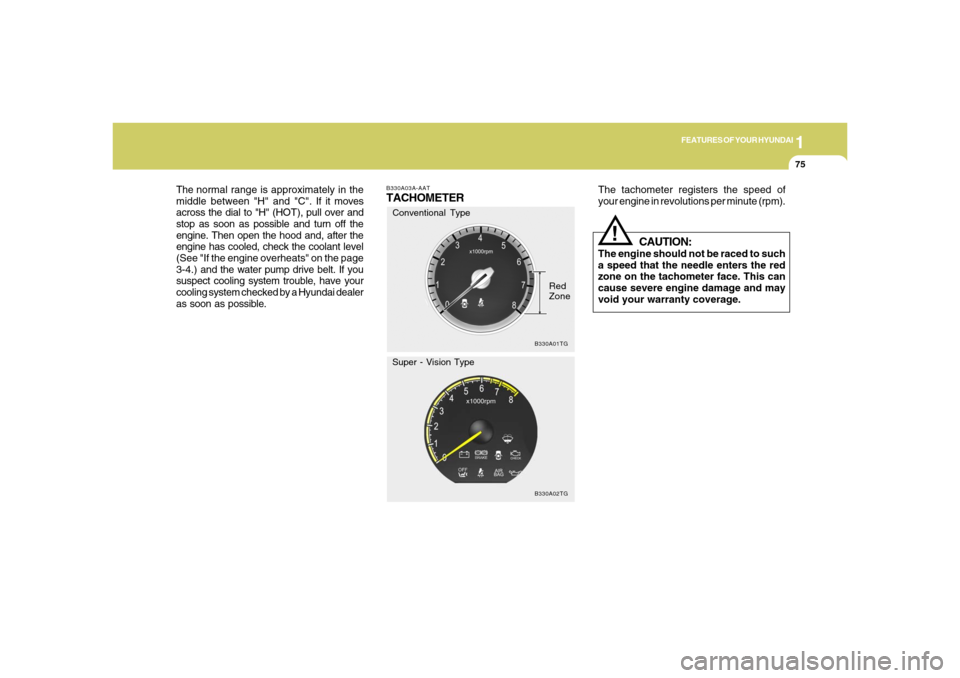
B330A03A-AATTACHOMETER
The tachometer registers the speed of
your engine in revolutions per minute (rpm).
CAUTION:
The engine should not be raced to such
a speed that the needle enters the red
zone on the tachometer face. This can
cause severe engine damage and may
void your warranty coverage.
!
B330A01TG
Red
Zone
B330A02TG
Conventional Type
Super - Vision Type
The normal range is approximately in the
middle between "H" and "C". If it moves
across the dial to "H" (HOT), pull over and
stop as soon as possible and turn off the
engine. Then open the hood and, after the
engine has cooled, check the coolant level
(See "If the engine overheats" on the page
3-4.) and the water pump drive belt. If you
suspect cooling system trouble, have your
cooling system checked by a Hyundai dealer
as soon as possible.
Page 127 of 307
1
FEATURES OF YOUR HYUNDAI
113
B560B01L-GATManual Fuel Filler Lid ReleaseIf the fuel filler lid cannot be opened using
the remote opener, a manual opener
handle is located inside the trunk on the left
side. Open the fuel filler lid by pulling on
this handle as shown in the illustration.
HNF2022
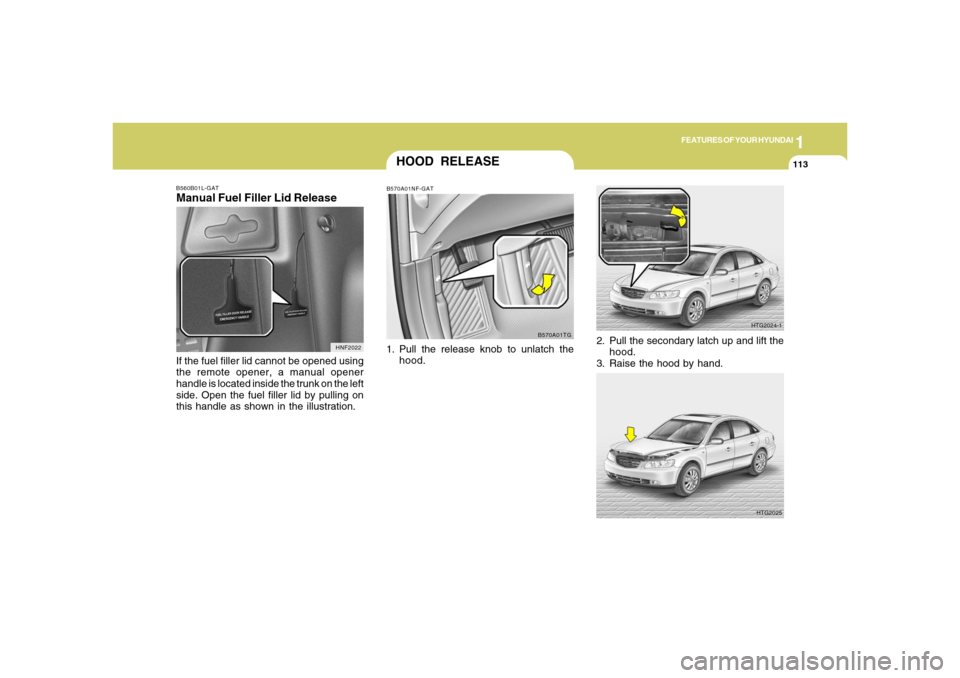
HOOD RELEASEB570A01NF-GAT1. Pull the release knob to unlatch the
hood.
B570A01TG
HTG2025
2. Pull the secondary latch up and lift the
hood.
3. Raise the hood by hand.
HTG2024-1
Page 128 of 307
1FEATURES OF YOUR HYUNDAI
114
!
WARNING:
Do not place the sun visor in such a
manner that it obscures visibility of the
roadway, traffic or other objects.
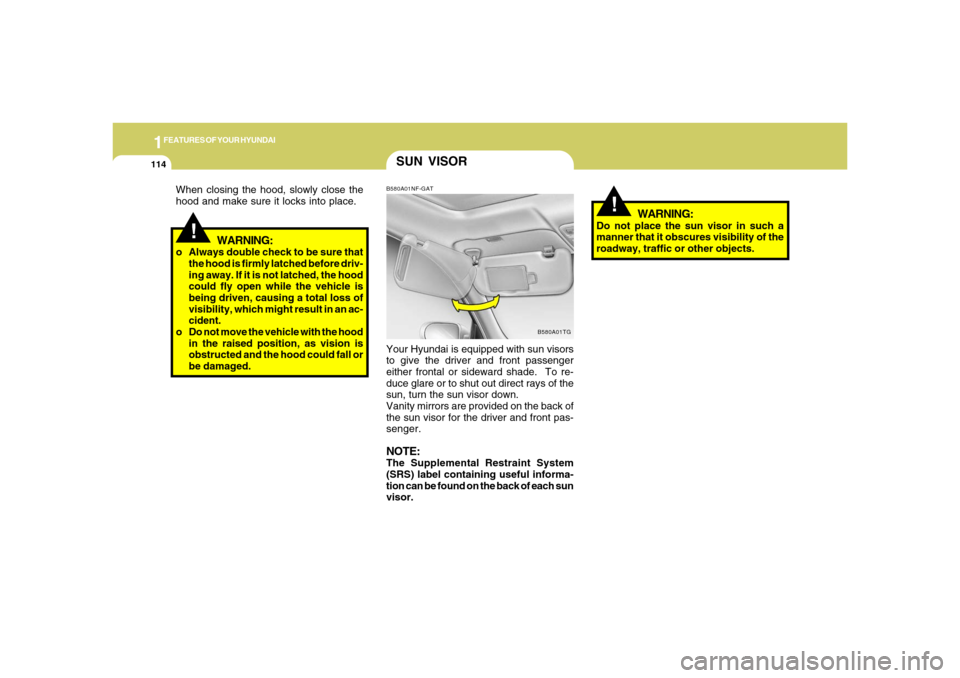
SUN VISORB580A01NF-GATYour Hyundai is equipped with sun visors
to give the driver and front passenger
either frontal or sideward shade. To re-
duce glare or to shut out direct rays of the
sun, turn the sun visor down.
Vanity mirrors are provided on the back of
the sun visor for the driver and front pas-
senger.NOTE:The Supplemental Restraint System
(SRS) label containing useful informa-
tion can be found on the back of each sun
visor.
B580A01TG
!
WARNING:
o Always double check to be sure that
the hood is firmly latched before driv-
ing away. If it is not latched, the hood
could fly open while the vehicle is
being driven, causing a total loss of
visibility, which might result in an ac-
cident.
o Do not move the vehicle with the hood
in the raised position, as vision is
obstructed and the hood could fall or
be damaged. When closing the hood, slowly close the
hood and make sure it locks into place.
Page 211 of 307
34WHAT TO DO IN AN EMERGENCY
IF THE ENGINE OVERHEATS
!!
!
WARNING:
While the engine is running, keep hair,
hands and clothing away from moving
parts such as the fan and drive belts to
prevent injury.
5. If the water pump drive belt is broken or
engine coolant is leaking out, stop the
engine immediately and call the near-
est Hyundai dealer for assistance.
WARNING:
Do not remove the radiator cap when the
engine is hot. This can allow coolant to be
blown out of the opening and cause se-
rious burns.6. If you cannot find the cause of the over-
heating, wait until the engine tempera-
ture has returned to normal. Then, if
coolant has been lost, carefully add
coolant to the reservoir (page 6-7) to
bring the fluid level in the reservoir up to
the halfway mark.
7. Proceed with caution, keeping alert for
further signs of overheating. If over-
heating happens again, call a Hyundai
dealer for assistance.
CAUTION:
Serious loss of coolant indicates there is
a leak in the cooling system and this
should be checked as soon as possible
by a Hyundai dealer.
D030A01TG-AATIf your temperature gauge indicates over-
heating, you experience a loss of power, or
hear loud pinging or knocking, the engine
is probably too hot. If this happens, you
should:
1. Pull off the road and stop as soon as it
is safe to do so.
2. Place the gear selector lever in "P" and
set the parking brake. If the air condi-
tioning is on, turn it off.
3. If engine coolant is running out under
the car or steam is coming out from the
hood, stop the engine. Do not open the
hood until the coolant has stopped
running or the steaming has stopped. If
there is no visible loss of engine coolant
and no steam, leave the engine running
and check to be sure the engine cooling
fan is operating. If the fan is not running,
turn the engine off.
4. Check to see if the water pump drive belt
is missing. If it is not missing, check to
see that it is tight. If the drive belt seems
to be satisfactory, check for coolant
leaking from the radiator, hoses or un-
der the car. (If the air conditioning had
been in use, it is normal for cold water
to be draining from it when you stop).
Page 251 of 307
6
DO-IT-YOURSELF MAINTENANCE
14
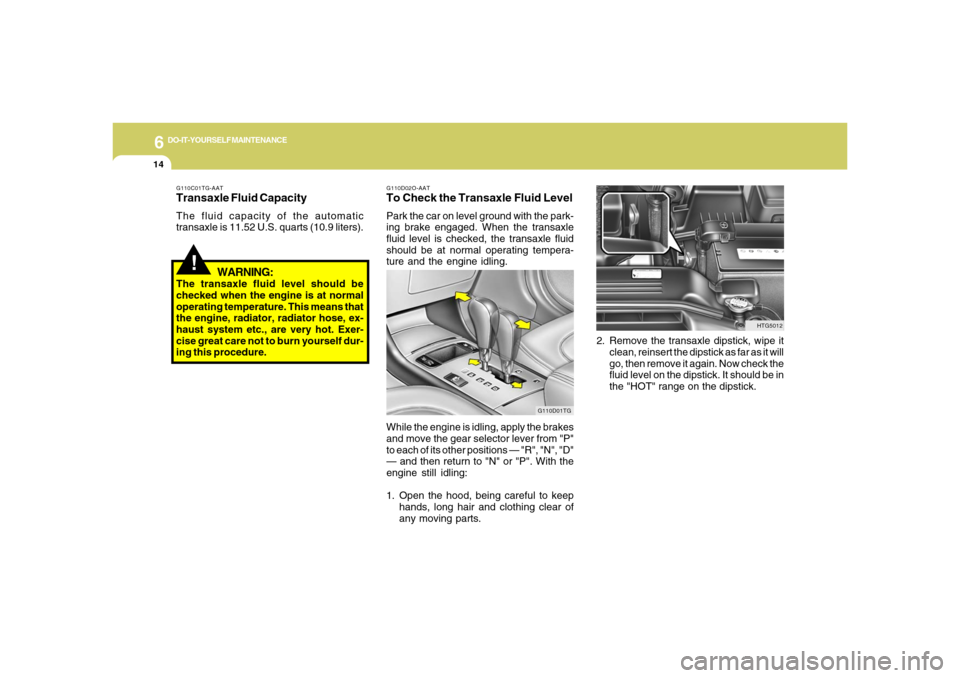
2. Remove the transaxle dipstick, wipe it
clean, reinsert the dipstick as far as it will
go, then remove it again. Now check the
fluid level on the dipstick. It should be in
the "HOT" range on the dipstick.
G110D02O-AATTo Check the Transaxle Fluid LevelPark the car on level ground with the park-
ing brake engaged. When the transaxle
fluid level is checked, the transaxle fluid
should be at normal operating tempera-
ture and the engine idling.
While the engine is idling, apply the brakes
and move the gear selector lever from "P"
to each of its other positions — "R", "N", "D"
— and then return to "N" or "P". With the
engine still idling:
1. Open the hood, being careful to keep
hands, long hair and clothing clear of
any moving parts.
!
G110C01TG-AATTransaxle Fluid CapacityThe fluid capacity of the automatic
transaxle is 11.52 U.S. quarts (10.9 liters).
WARNING:
The transaxle fluid level should be
checked when the engine is at normal
operating temperature. This means that
the engine, radiator, radiator hose, ex-
haust system etc., are very hot. Exer-
cise great care not to burn yourself dur-
ing this procedure.
HTG5012
G110D01TG
Page 262 of 307
6
DO-IT-YOURSELF MAINTENANCE
25
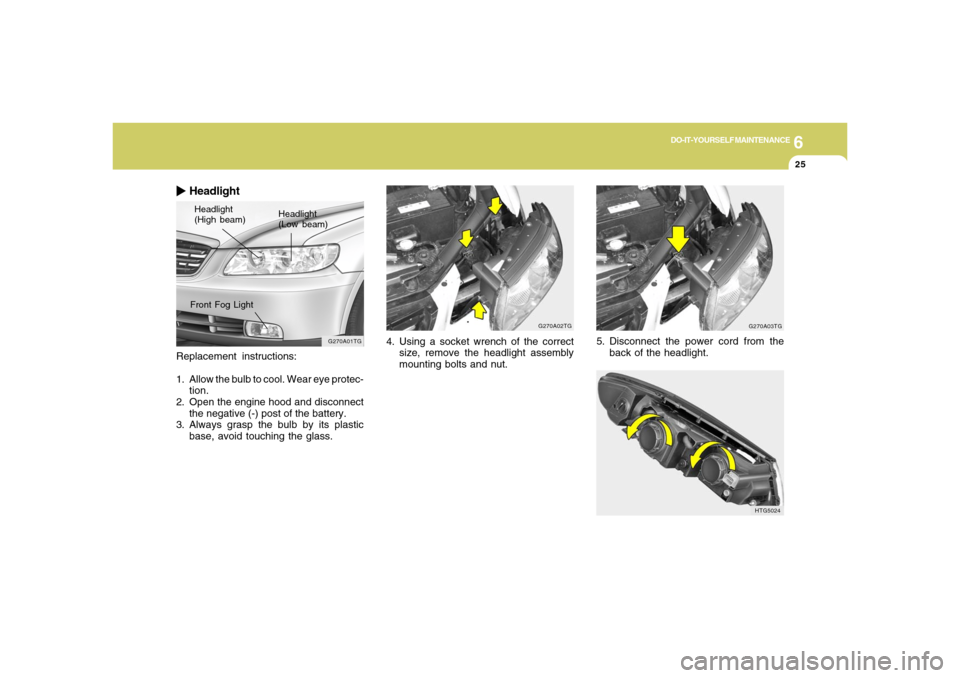
Replacement instructions:
1. Allow the bulb to cool. Wear eye protec-
tion.
2. Open the engine hood and disconnect
the negative (-) post of the battery.
3. Always grasp the bulb by its plastic
base, avoid touching the glass.
HeadlightHeadlight
(High beam)Headlight
(Low beam)
G270A01TG
Front Fog Light
G270A02TG
4. Using a socket wrench of the correct
size, remove the headlight assembly
mounting bolts and nut.
G270A03TG
5. Disconnect the power cord from the
back of the headlight.
HTG5024
Page 264 of 307

6
DO-IT-YOURSELF MAINTENANCE
27
G275A01TG-GATFRONT TURN SIGNAL LIGHT1. Open the engine hood and disconnect
the negative (-) post of the battery.
HTG5045
2. Turn the wheel inside until the wheel
housing is visible.
3. Remove the mounting screws of the
cover with a phillips screwdriver and
open the cover.4. Take out the bulb from the bulb holder
by turning it counterclockwise.
5. Install the new bulb.
HTG5046
Front Fog Light
NOTE:
It is recommended that the front fog light
bulb should be replaced by an autho-
rized Hyundai dealer.